
A vertical compost tumbler turns your narrow balcony into a fast, odor‑free compost system that slides against a wall, uses 360° aeration, and yields ready‑to‑use soil in 6‑8 weeks. Choose a compact, low‑profile unit with a sealed lid and easy‑turn lever, keep the mix 40‑60% moist, and balance greens to browns at roughly 1:2. Turn once or twice a week, add a rain cover, and harvest through the side hatch. Keep it insulated for winter, and you’ll discover more tips for maximizing space and yield.
Why a Vertical Tumbler Is Ideal for Small Balconies
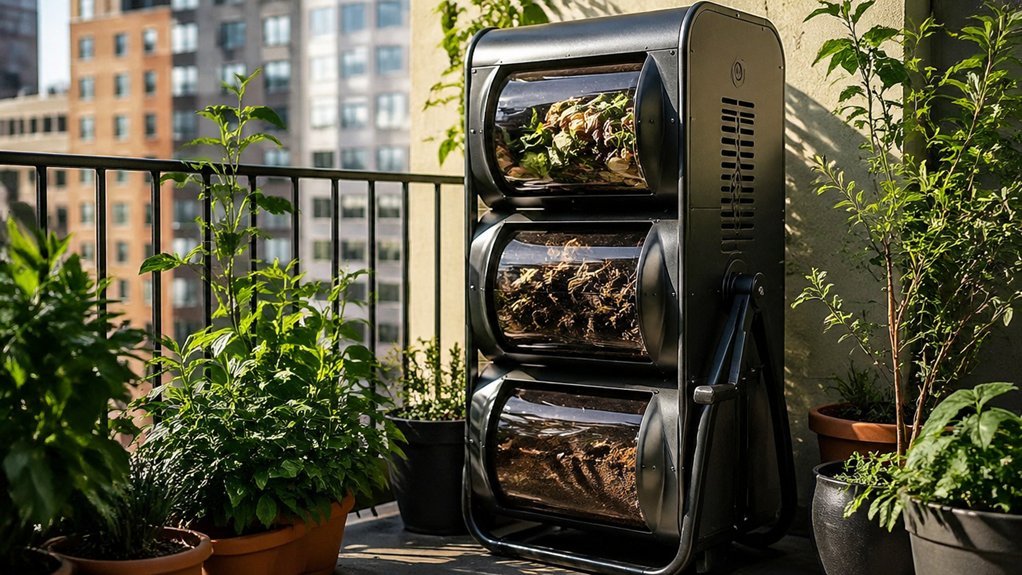
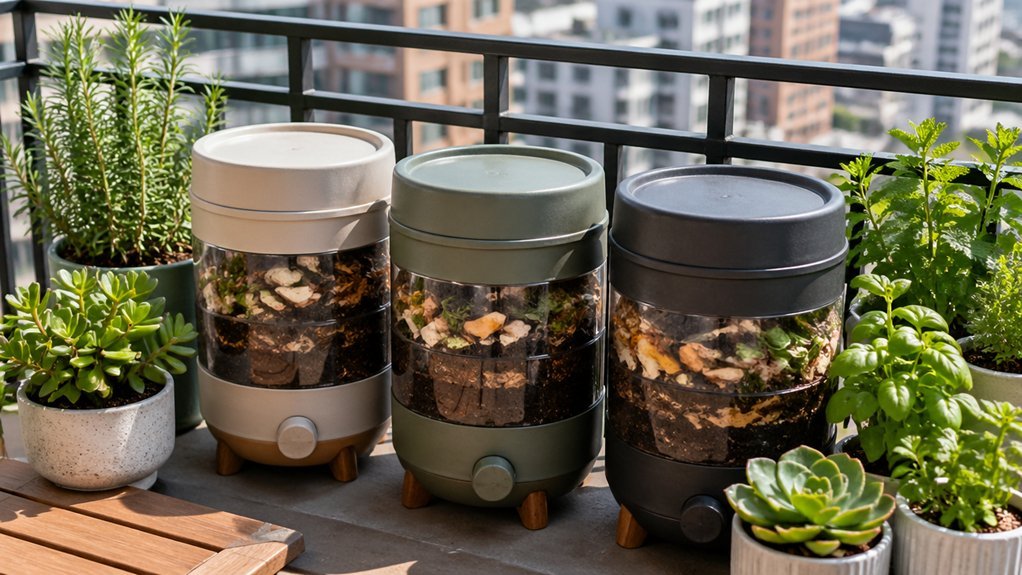
Ever wondered how to turn a cramped balcony into a thriving compost hub? You’ll find a vertical tumbler perfect for small spaces because it stacks the chamber upright, slashing the footprint you’d need on a patio. Its slim profile slides against a wall or railing without blocking traffic, letting you keep a tidy balcony composting station. When you rotate the unit, you get aeration benefits that speed decomposition while staying out of the way. The tall design lets you add scraps and harvest finished compost from a standing position, so you avoid painful bending. Built‑in lids and optional drainage handle rain and limited outdoor room, making the tumbler a smart, space‑saving solution. Vertical tumblers often employ a 360-degree aeration approach to maintain airflow and moisture balance for indoor or balcony setups airflow features that help odor control and faster processing.
How to Choose the Right Vertical Tumbler for a Small Balcony
Since a vertical tumbler already saves space on a cramped balcony, the next step is picking the model that fits your specific constraints. Look for a compact footprint and low external height; most balcony‑specific designs stay under 1 meter tall and occupy less than 30 cm². Prioritize easy turning—one‑handed levers or gear‑assisted spindles let you rotate the drum without straining in tight spaces. Choose a capacity that matches your waste output, typically 200–400 L, so the unit won’t overload the balcony’s weight limit. Check for a sealed lid to curb odors and a bottom drain for hassle‑free leachate removal. Finally, favor tool‑free assembly and lighter materials; modular components let you stack or relocate the vertical tumbler if you rearrange your balcony composting setup. The choice should also consider compatibility with multiple worm foods and compost inputs to keep your system balanced species compatibility and adaptable to different waste streams.
Set Up Your Tumbler for Maximum Space Efficiency
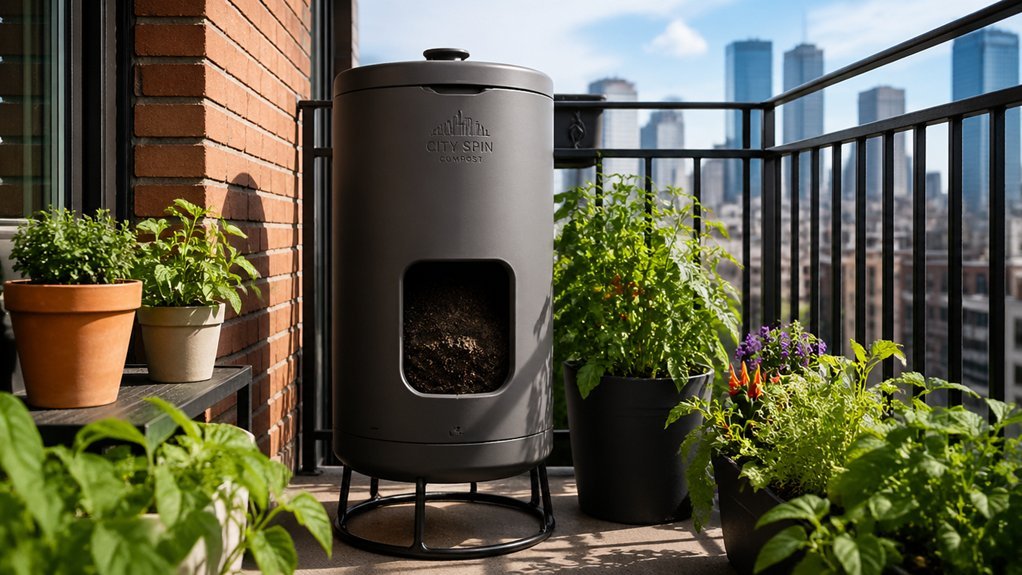
Your balcony’s limited floor space calls for a tumbler that sits on its side and rolls smoothly, so you can keep the unit compact while still getting ideal aeration. Pick a compact design that tilts slightly, then position it on a leveling base that’s stable and level. Keep at least 60 cm of clearance on all sides to allow full rotation without bumping plants or railings. Use a raised platform or a built‑in tilt to make emptying easy and reduce bending. Align the lid and access hatches so you can load and turn without constantly repositioning the unit. If space is tight, choose a tumbler with integrated drainage or leachate collection, eliminating extra trays and keeping the area tidy. This setup maximizes space efficiency while maintaining smooth operation. Space-saving design supports better airflow and easier maintenance in compact urban setups.
Select Fast‑Decomposing, Low‑Odor Greens and Browns
You’ll want a 1:3 green‑to‑brown ratio to keep the mix balanced and the smell down, so pair kitchen scraps and fresh clippings with shredded paper, dried leaves, or straw. Maintain a steady moisture level by aiming for a damp, crumbly texture and regularly checking the pile’s feel; a well-balanced balance of moisture supports faster breakdown while preventing odor buildup. P-4 security
Balanced Greens Ratio
A good rule of thumb is one‑third green material to two‑thirds brown, which keeps the compost aerobic and odor‑free.
Aim for a greens ratio of 1:2, balancing nitrogen‑rich scraps with carbon‑rich leaves, shredded paper, or straw.
Fast‑decomposing greens like kitchen peels and fresh grass clippings supply the nitrogen microbes need, while low‑odor browns absorb excess moisture and prevent anaerobic pockets.
Chop larger greens into bite‑size pieces, then layer them with generous amounts of carbon‑rich material to preserve airflow inside the vertical tumbler.
Regularly turn the mix to distribute the greens to browns evenly, keeping the temperature high enough for rapid breakdown without creating unpleasant smells.
This disciplined balance maximizes speed and maintains a tidy, odor‑controlled compost.
Incorporate a practical filter approach by using a layer of browns to help manage odors and moisture, aligning with odor control concepts from common ceramic compost crocks. odor-control
Moisture‑Control Tips
Keeping moisture between 40% and 60% is key to a healthy, odor‑free tumbler, and the easiest way to hit that range is by balancing shredded greens with plenty of dry browns. You’ll notice that a moist but not soggy mix keeps microbes thriving and prevents anaerobic pockets. Shred kitchen scraps, fresh clippings, and leaf litter before layering; the extra surface area boosts aeration and speeds decomposition. Add a handful of dried leaves or shredded newspaper each time you drop in greens to keep the pile fluffy and absorb excess liquid. Turn the tumbler a few times weekly to circulate air and even out moisture. Regular rotation also supports consistent moisture control in line with guidance on replacement frequency for filtration materials replacement frequency. Aim for a 1:2–1:3 greens‑to‑browns ratio. Chop all inputs into small pieces. Sprinkle browns after each greens addition. Turn regularly to maintain aeration.
Low‑Odor Materials
Ever wondered which scraps stay fresh without stinking up your balcony tumbler? Pick fast‑decomposing, low‑odor greens like coffee grounds, fruit and vegetable scraps, and tea bags. Pair them with browns such as shredded paper, cardboard, dry leaves, or paper towels. Aim for roughly one‑third greens to two‑thirds browns; this ratio keeps the pile from turning soggy and curbs odor while promoting aeration. Keep moisture at a damp‑sponge level—wet enough for microbes, but not dripping. Pre‑cut or shred both greens and browns to speed breakdown, prevent clumping, and improve airflow. By balancing these ingredients, you’ll maintain a clean, efficient vertical tumbler that smells fresh even in tight urban spaces. A practical option is to consider compost bag choices that are designed for kitchen or small-space use and feature plant-based materials with certified compostability to minimize plastic residue in your system plant-based materials.
Maintain Ideal Moisture Levels to Prevent Over‑Watering
Check your tumbler’s moisture each week and aim for a damp‑but‑not‑soggy feel, roughly 40‑60 % moisture. If it gets too wet, toss in dry browns like shredded paper or leaves and give it a quick turn to restore balance.
Cover the unit with a water‑resistant tarp or awning to keep rain from flooding the pile.
Moisture Balance Check
Wondering how to keep your tumbler compost from turning into a soggy mess? Check moisture daily and adjust before problems flare. A quick squeeze test—if a handful feels like a damp sponge, you’re in the sweet spot; if it drips, you need to dry it out. Turn the drum regularly to spread moisture and boost aeration, preventing pockets that cause odor. When it’s too wet, toss in dry browns to soak excess liquid; when it’s dry, add a handful of greens and a few extra browns to lock in needed.
- Feel the texture: should damp, not dripping.
- Turn often: improves aeration and distributes moisture.
- Add browns: absorbs excess water and restores balance.
- Monitor after rain: adjust with dry material if needed.
Water‑Resistant Cover Use
How can you keep your vertical tumbler from turning into a soggy mess when rain hits? Use a water‑resistant cover to shield the pile while still letting excess water escape. The cover maintains steady moisture, keeping it in the 40–60% aerobic range and preventing over‑watering from heavy downpours. Make sure drainage stays functional—install a drip pan or open a base hatch so leachate drains away and the compost doesn’t become waterlogged.
Watch for heat buildup in sunny urban spots; lift or vent the lid briefly if temperature spikes. When moisture drops too low under the cover, open it for a few minutes to boost aeration and restore microbial activity without exposing the pile to rain. This balance protects your compost and keeps it healthy.
Rotate the Drum Properly to Boost Aeration and Heat
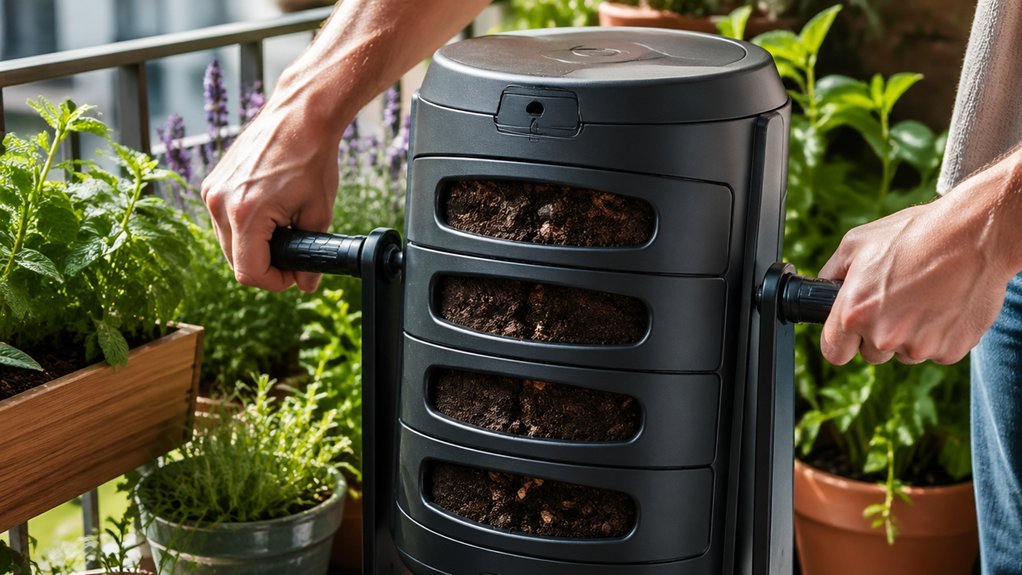
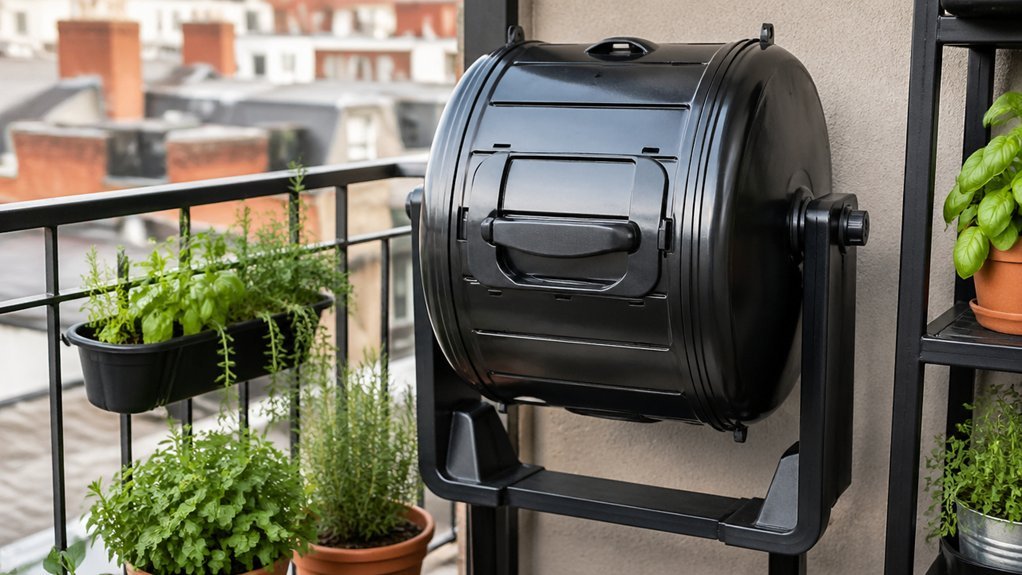
Rotate the drum several times a week to flood the mix with oxygen, which spikes microbial activity and raises the internal temperature. Proper drum rotation keeps the compost tumbler humming, ensuring even aeration and consistent heat that speeds breakdown. Avoid overfilling; stick to capacity guidelines so each turn moves air through every layer. The result is a faster, odor‑free compost that thrives in tight urban spaces.
- Turn the tumbler 3‑5 times weekly for optimal aeration.
- Aim for 30‑60 seconds per turn to mix greens and browns uniformly.
- Check the lid seal; a tight fit preserves heat and prevents moisture loss.
- Monitor temperature; a steady 130‑150 °F indicates healthy microbial activity.
Fix Bad Smell, Pests, and Slow Decomposition
Ever notice a sour whiff, wandering pests, or sluggish breakdown in your tumbler? First, lift the drum off the ground and add a drip pan to catch leachate that attracts rodents. Keep moisture between 40‑60 % and turn the tumbler several times a week; frequent turning boosts aeration, raises temperature, and speeds decomposition. Balance greens and browns at roughly 1:2–1:3 and always top new layers with dry, carbon‑rich material to improve odor control and deter flies. Avoid meat, dairy, or oily scraps—these invite pests and foul the mix. If smells linger, toss in coarse sticks or straw to improve airflow, and never overfill the unit. Maintaining these habits keeps your compost fresh, pest‑free, and fast‑acting.
Harvest Finished Compost Without Mess or Heavy Lifting
Ever wondered how to pull out finished compost without straining your back or making a mess? You can do it smoothly by exploiting the tumbler access hatch and side‑access design that let you tilt the bin and dump the crumbly material in one hand. A well‑engineered lid seals the leachate/drip pans, so drainage stays contained while you lift. Follow these steps for a clean, effortless harvest:
- Open the side‑access hatch and lock the lid in place.
- Position a bucket or tray beneath the leachate/drip pan.
- Tilt the tumbler gently; gravity does the heavy lifting.
- Pull the finished compost out with a scoop, keeping hands dry.
You’ll keep your kitchen garden tidy and your back happy.
Compare Urban‑Friendly Tumblers: Size, Price, Features
After mastering a mess‑free harvest, you’ll want a tumbler that fits your balcony or patio without hogging space. The HOTBIN offers a compact 200 L capacity, a built‑in carbon filter, and the highest test temperature, but its £255 price may stretch a tight budget. Green Johanna’s 330 L bin is larger, made from 100 % recycled plastic, and costs about £144.99, giving you more volume for a modest price.
Suttons Modular Wooden Bin lets you expand modules, stays under £200, and provides easy tool‑free access, though its footprint is larger than the plastic options. Blackwall’s 220 L converter is the budget‑friendly choice at £42.99, with a base plate accessory and long warranty, making it a truly compact, low‑price entry for urban composters. Each model balances capacity, price, and access to suit different balcony or patio constraints.
DIY Upgrades for Your Tumbler: Insulation, Rain Covers, Extra Hatches
Looking to squeeze the most out of a compact tumbler? Upgrade it with simple DIY tweaks that boost heat, keep moisture steady, and make harvesting painless.
First, wrap the drum with rigid foam or reflective insulation panels; the added insulation works with vented sides to hold higher temperatures, speeding decomposition.
Next, drape a waterproof tarp or custom‑fit rain cover over the unit, protecting the compost from heavy rain while preserving the 40‑60 % moisture range.
Finally, cut a second access opening near the base or enlarge the existing hatch—extra hatches let you pull out finished compost without disturbing the whole pile.
- Rigid foam or reflective insulation for vented sides
- Waterproof tarp or fitted rain cover
- Additional base‑level hatch for easy harvesting
- Reinforced base plate for stable placement on hard surfaces
Storing Your Tumbler for Winter or Off‑Season
Pick a dry, elevated spot for winter storage, like a garage shelf or patio under an overhang, to keep moisture off the frame.
Make sure the drum is partially open or vented and any leachate is emptied, so mold won’t develop and airflow stays clear.
Leave the latches loose enough for quick access, but tighten them enough to protect hinges and seals until you’re ready to compost again.
Winter Storage Location
Where should you keep your compost tumbler during winter? Choose a dry, sheltered spot that protects the unit from rain and freezing temperatures while still allowing airflow. Empty the tumbler, dry it, and then set it on a level, firm surface away from lawn grass. Elevate it a few inches to boost air circulation and keep moisture off the base. Secure lids and drainage parts to guard against corrosion. A simple tarp or awning works well for winter storage, and keeping the tumbler off the ground helps prevent rot on wooden models.
- Place under a tarp or awning
- Elevate on pallets or blocks for air circulation
- Store on a flat, non‑soil surface
- Tighten lids and drainage components
Moisture Control Measures
How can you keep your tumbler dry and mold‑free during the off‑season? First, move the unit to a sheltered, dry spot—preferably on a stable pallet or platform—to stop ground moisture wicking. Secure a breathable cover that blocks rain ingress while allowing slight airflow, preventing condensation inside. Before storage, drain any standing water from the base tank or drip tray; collect leachate in a container for later disposal. Check that lids seal tightly, then use a tarp or fitted cover if you must store outdoors. In humid climates, a vented tarp works best for moisture control. Regularly inspect for rust or wood rot, and keep the area well‑ventilated to maintain a balanced ambient moisture level.
Easy Access for Retrieval
Ever wondered how to pull out finished compost without wrestling a bulky lid? In urban gardening, a well‑designed tumbler gives you swift access when you need it most, especially during winter or off‑season storage. Choose a model with a wide, weather‑resistant hatch and reinforced hinges so rain stays out and the lid doesn’t sag. Elevate the unit on a hard surface to keep pests away and make indoor placement under a shed easy. Seal the container or cover it with a tarp to limit moisture and temperature swings, preserving microbial health for the next composting cycle.
- Wide access hatch for quick harvest
- Weather‑proof lid and sturdy hinges
- Elevated design to deter pests
- Built‑in drainage or leachate catchment for moisture control
Use Your Tumbler’s Compost in Small‑Space Gardens
Ready to turn your tumbler’s output into garden gold? In small‑space gardens you can spread finished compost directly onto container soil, mix it into raised‑bed mixes, or brew a nutrient‑rich compost tea for drip irrigation. Keep the material moist but not soggy, and apply a thin layer (1‑2 cm) to avoid crowding roots. Because the tumbler is space‑saving, you can store compost in a corner bin and pull it out when plants need a boost, ensuring continuous fertility without expanding your footprint.
| Application | How‑to | Benefit |
|---|---|---|
| Top‑dressing | Sprinkle 1 cm over pots | Improves soil structure |
| Soil mix | Blend 30 % compost into potting mix | Increases nutrient density |
| Compost tea | Dilute 1 : 10, water | Provides quick feed |
| Seed starter | Add 10 % compost to germination mix | Boosts seed vigor |
| Mulch substitute | Spread thin layer around seedlings | Retains moisture, suppresses weeds |
Plan Your First Compost Cycle: Timeline & Checklist
A successful first compost cycle in a vertical tumbler can be mapped out in just a few weeks to months, depending on whether you turn the pile or let it sit.
Start with a composting timeline that targets 6–8 weeks for a turned hot pile or 2–6 months for a passive run.
Assemble a starter mix of one‑third greens and two‑thirds browns, then monitor moisture management daily—keep it damp, not soggy.
Follow a turning schedule of once a week for active aeration, and check the bottom hatch for ready‑to‑harvest humus.
- Prepare the starter mix with proper green‑to‑brown ratio.
- Test and adjust moisture levels each day.
- Turn the tumbler according to your schedule.
- Harvest when the material looks dark, crumbly, and earthy.
Frequently Asked Questions
What Is the Disadvantage of a Compost Tumbler?
You’ll find that compost tumblers often hold less material, so you’ll empty and refill them more often, and they can get heavy to turn, risking strain, uneven heating, and frequent maintenance.
Should a Compost Tumbler Be in Sun or Shade?
Place your tumbler where it gets morning sun and afternoon shade; the light will boost microbial activity while the shade prevents overheating and drying, keeping moisture steady for consistent urban composting.
Do Potato Peelings in Compost Attract Rats?
You won’t usually attract rats if you keep potato peels thin, mix them with dry browns, and turn the tumbler regularly; excess moisture or large piles would be the real lure for rodents.
Do Tumbler Composters Really Work?
Yes, tumblers work; you’ll see faster decomposition because turning aerates the pile and raises temperature. Just keep moisture balanced, add diverse greens and browns, and turn regularly for optimal results.
In Summary
You’ve seen how a vertical tumbler fits snugly on a balcony, how to pick the right model, set it up, and keep it moist without over‑watering. With fast‑decomposing, low‑odor scraps and DIY upgrades like insulation and rain covers, you’ll get rich compost year‑round. Store it easily in the off‑season, then feed your small‑space garden. Follow the timeline and checklist, and watch your balcony bloom with sustainable, home‑grown goodness.
Leave a Reply