
Pick a compact dual‑chamber tumbler so you can load fresh greens in one side while the other finishes decomposing, giving you continuous compost without downtime. Choose a 60‑90‑gallon unit that fits your kitchen nook, and place it in light shade to keep steady heat without overheating. Start with a small soil‑based starter, add browns then greens in bite‑size pieces, and keep the mix as moist as a wrung‑out sponge. Turn each active chamber 2‑3 times a week, avoid over‑turning, and monitor temperature and texture for maturity before harvesting. Keep the finished compost in a small airtight container, and you’ll discover even more space‑saving tricks ahead.
Why a Compact Dual‑Chamber Tumbler Is Ideal for Apartments
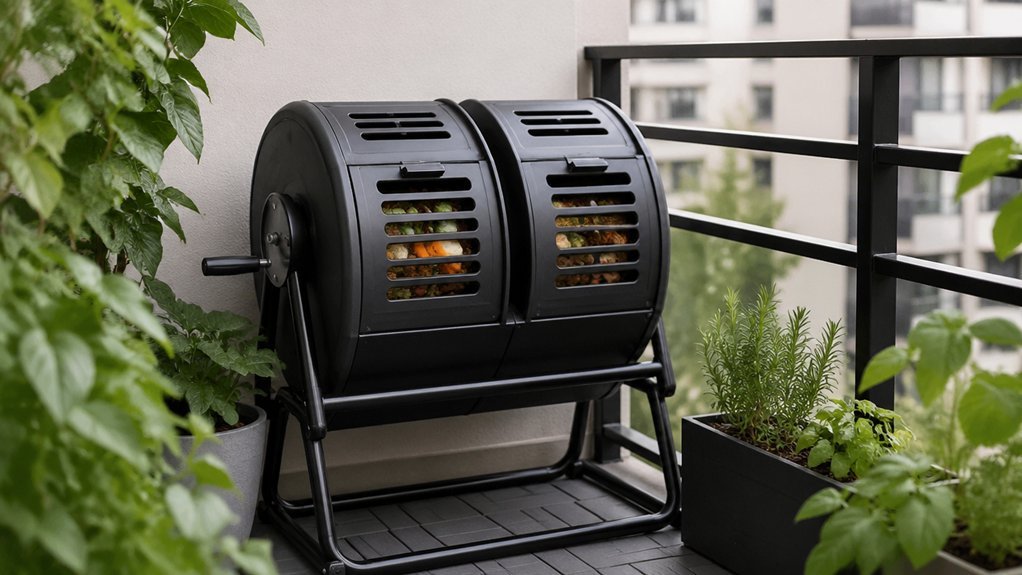
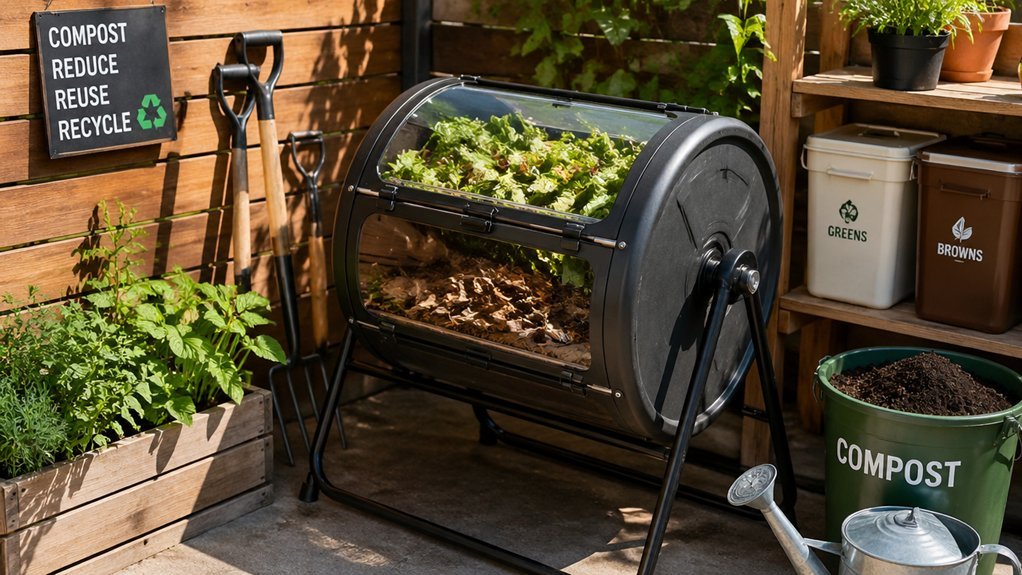
A compact dual‑chamber tumbler is perfect for apartments because it lets you start a new batch while the first one cures, keeping the composting process continuous in a tiny space. The integrated crawl-out and drainage features from BSF kit designs inspire how to manage moisture and pests in a small unit, ensuring a cleaner outdoor area with minimal odor. This approach also aligns with the idea of a space-conscious system that uses a dual‑chamber layout to maximize throughput without blooming into a messy setup, especially when paired with slide‑out lids for easy feeding and maintenance, and with rollers for easy movement on a balcony or patio. space-conscious systems
How Dual‑Chamber Design Enables Continuous Composting
You’ll load one chamber with fresh greens and browns while the other finishes decomposing, so you can harvest compost without stopping. This simultaneous batching lets you keep a steady flow of material and heat, eliminating any downtime. The result is a continuous harvest that fits even the smallest spaces. The dual-chamber design also helps manage odor by keeping active contents sealed away from the finished batch odor control.
Chamber, Simultaneous Batches
Ever wondered how you can keep compost flowing without a pause? With a dual‑chamber tumbler you run simultaneous batches, so while one drum finishes decomposing, you load fresh greens and browns into the other. Each chamber gets its own aeration cycle, keeping microbes active and heat steady. Manage the browns‑to greens balance separately, adjusting moisture and carbon sources for each batch. This independent control lets you harvest finished compost from one side while the second continues breaking down material, eliminating idle time. Rotate the drums independently, and you’ll maintain a constant flow of nutrient‑rich soil without ever stopping the process. This approach aligns with multi‑tray and continuous‑flow strategies described in the knowledge base, where modular designs and separate ventilation/odor controls enable scalable, ongoing compost production continuous‑flow design.
Continuous Harvest, No Downtime
Want nonstop compost while never stopping the cycle? With a dual-chamber tumbler you add fresh scraps to one drum while the other finishes turning, giving you a continuous harvest of ready‑to‑use compost.
This system often includes a durable inner mechanism and dual filters to maintain odor control during active cycles odor control and minimize maintenance needs.
Pick the Right Size for Your Household Waste
You can estimate your daily waste by tracking kitchen scraps and garden clippings for a week, then use that figure to pick a drum that fits both your volume and your space.
Aim for a tumbler whose capacity is about one‑third to one‑half of your weekly waste, and make sure its footprint works with your storage area.
If you’re tight on room, consider a roller‑on‑ground or frame‑mounted model to keep the footprint minimal space efficiency.
Able Estimate Daily Waste
How much waste do you actually produce each day? Start by tracking kitchen scraps and yard debris for a week, then divide the total by seven. This gives you a realistic daily waste figure you can compare against typical tumbler capacities. If you see 2–3 kg per day, a 32‑60 gallon (120‑230 L) tumbler will hold enough for 2–3 days in a single chamber or 4–7 days in a dual‑chamber setup. Keep an eye on your green‑brown balance; too much green (wet) material can cause odor and slow decomposition, so a larger or dual‑chamber model helps maintain airflow. Regular turning with the appropriate aeration tool can further improve decomposition efficiency and odor control aeration and airflow. Record kitchen scraps and yard waste for seven days. – Divide the weekly total by seven to get daily waste. – Match the daily amount to a 32‑60 gallon tumbler for 1‑4 people, or a 60‑90 gallon unit for larger households.
Match Drum Capacity to Space
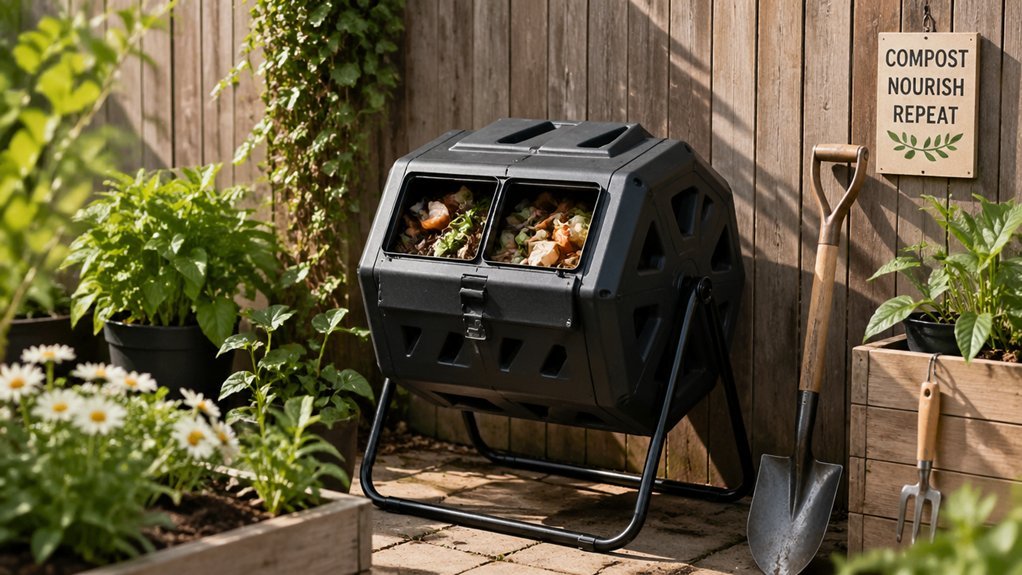
Now that you know your daily waste, you can match a drum size to the space you have. Choose a drum capacity that fits your weekly output: 30–60 gallons work for small households, while 90–120 gallons suit larger homes. If you’re a beginner, a dual‑chamber tumbler around 60–90 gallons gives continuous batching without overfilling. Measure the available outdoor area and plan tumbler placement; a frame‑mounted or rolling model can slip into tight spots. Light kitchen scraps and yard waste usually need 40–60 gallons, but heavier waste calls for 75–90 gallons. Think ahead—start with a compact size and upgrade only if your weekly input outgrows the current capacity. This approach maximizes efficiency while preserving precious space mesh size considerations and helps ensure you choose a system that supports durable, reusable components over multiple cycles.
Place the Tumbler in Light‑Shade for Consistent Heat
Where should you position your compost tumbler for optimal heat? You want light shade that lets dappled sun warm the drum without scorching it. This spot balances temperature management and moisture, keeping the plastic from warping while microbes stay active. Too much direct sun can overheat, slowing decomposition, and full shade can leave the mix too cold. Aim for a place where afternoon rays are filtered by a fence, shrub, or pergola. Adjust a temporary shade cloth if the sun gets too intense, and check the internal temperature daily to stay within the ideal range.
- Choose a dappled‑sun location under a tree or near a fence.
- Use a removable shade cloth during peak afternoon hours.
- Monitor temperature and adjust shade to keep heat consistent.
Start Your Compact Tumbler With a Small Soil‑Compost Starter Mix
Ever wondered how to jump‑start a compact tumbler? Begin with a small soil‑based starter mix: scoop a handful of garden soil or finished compost into the drum’s bottom. Add 1/4–1/2 of the volume as browns, then layer greens on top. Keep the mix moist like a wrung‑out sponge, not soggy, and give the tumbler a few rotations to spread microbes and improve aeration. This initial inoculation jump‑ microbial activity, prevents compaction, and sets a steady rhythm for future additions.
| Step | Action |
|---|---|
| 1 | Add soil or finished compost |
| 2 | Fill 1/4–1/2 with browns |
| 3 | Layer greens gently |
| 4 | Moisture check (sponge‑like) |
| 5 | Rotate tumbler 3–4 times |
Balance Browns and Greens in Your Compact Tumbler (3 : 1 Ratio)
Measure your browns each time you load the tumbler, then check the moisture to make sure it’s damp but not soggy. When you add greens, do it gradually and keep an eye on the balance so the 3 : 1 ratio stays steady. If the mix gets too wet, toss in more dry browns like shredded paper to bring the ratio and aeration back on track.
Measure Brown Materials
Wondering how to keep your compact tumbler humming? To nail the browns-to-greens ratio, start by measuring brown materials accurately. Weigh or volume‑measure shredded paper, cardboard, dry leaves, and wood chips before you toss them in. This keeps the carbon‑rich base steady, helps you maintain moisture balance, and simplifies compost mix tracking across batches.
- Use a kitchen scale or a graduated bucket for consistent measurements.
- Record each addition in a notebook or app to see the 3:1 ratio at a glance.
- Adjust on the fly: if the mix feels soggy, add more measured browns; if it’s dry, add greens and a splash of water.
Monitor Moisture Levels
After weighing your browns, check the moisture before you add more greens. A quick squeeze test tells you if the blend feels like a wrung‑out sponge; if it’s soggy, fold in extra dry browns until the texture lightens. Keep a compost thermometer handy—steady temperatures between 130°F and 150°F indicate the right balance of moisture and aerobic activity. When you add greens, do it gradually and give the tumbler a few turns to spread the wet material evenly. This prevents clumping and avoids anaerobic pockets that could slow down decomposition. By monitoring moisture and adjusting browns and greens on the fly, you’ll maintain a healthy, fast‑acting compost pile in your compact tumbler.
Adjust Green Additions
How do you keep your tumbler humming while preventing it from turning into a soggy mess? Aim for a 3 : 1 greens‑to‑browns ratio and watch the moisture level. Chop greens into bite‑size pieces, then sprinkle them in gradually. After each green layer, add a matching brown layer to keep the pile aerated and avoid clumping. If the mix feels soggy, toss in extra dry browns like shredded paper or cardboard until the ratio restores. Keep an eye on the interior temperature; a balanced mix of greens and browns fuels steady decomposition without foul odors.
- Chop greens small; they break down faster and stay airy.
- Layer browns after each green addition for proper aeration.
- Add dry browns when moisture spikes to maintain the 3 : 1 balance.
Chop Materials Into Bite‑Size Pieces to Speed Up Decomposition
Ever wondered why your tumbler seems sluggish? You’re probably feeding it large chunks that choke airflow. When you chop everything into 1‑2 inch bite‑size pieces, you boost the surface area that microbes can attack, so composting speeds up dramatically. Uniform bite-size pieces let air flow evenly, cutting anaerobic pockets that cause smells and slow breakdown. Pre‑cut greens like veggie scraps and fruit peels, and shred browns such as dry leaves or paper, so each tumbler feed lands as a consistent layer. This uniformity also steadies moisture, preventing soggy or dry spots that stall the process. Even tougher stems or corn stalks should be pre‑chopped before they hit the drum, shaving days off the time to finished compost.
Turn the Drum 2‑3 Times a Week – Avoid Over‑Turning
Wondering why your compost isn’t heating up? You need to Turn the drum just enough to keep Oxygen flowing without disrupting the heat. Aim for 2‑3 turns each week, spreading them out rather than cramming them together. This rhythm sustains the micro‑be community, lets brown materials break down, and preserves the moisture‑heat balance that fuels rapid decomposition. Over‑turning cools the pile, dries it out, and can create anaerobic pockets that stall progress.
- Turn twice a week, then wait a few days before the next spin.
- Rotate the active chamber only; let the other rest if you have a dual‑chamber tumbler.
- Keep a steady schedule to maintain a predictable, efficient composting pace.
Check Compost Maturity Before Harvest?
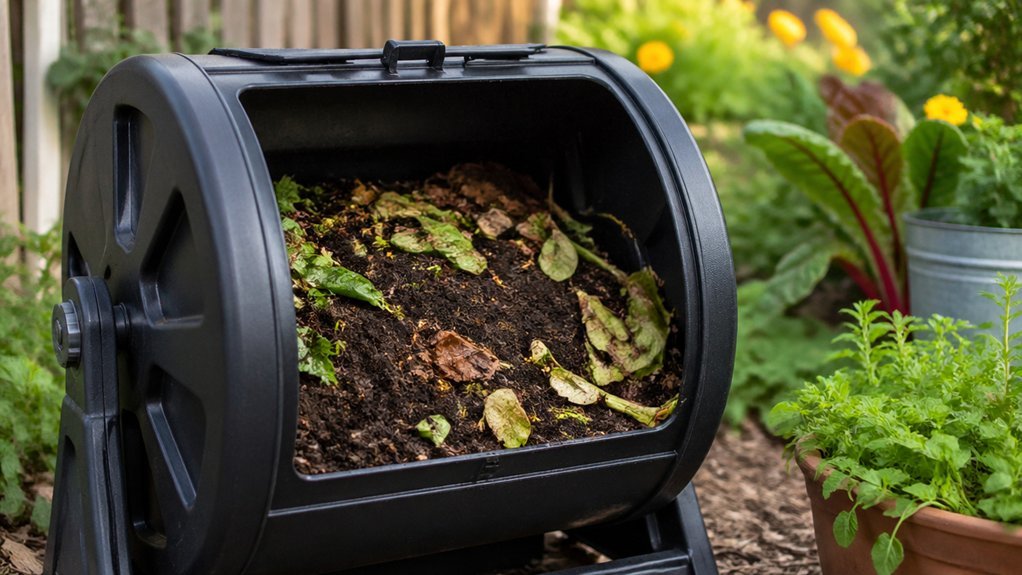
Ready to confirm your compost’s readiness before you harvest it? You’ll gauge maturity by texture, smell, temperature, and sieve results. Dark, crumbly, soil‑like material with an earthy aroma signals finished compost. Use a thermometer: a stable 120–160 °F (49–71 °C) range for several days shows active, mature compost, but avoid prolonged heat above 165 °F (74 °C) which kills microbes. Run a 2–3 mm sieve; if most particles pass through with few visible scraps, you’re close. The finished product feels cool, crumbles easily, and shows uniform color without large clumps. In a dual‑chamber tumbler, finish the first batch to this level before mixing newer material.
| Indicator | Desired Range | How to Test |
|---|---|---|
| Temperature | 120‑160 °F (49‑71 °C) | Thermometer |
| Texture | Dark, crumbly, soil‑like | Hand feel |
| Smell | Earthy, not sour | Nose |
| Sieve Pass | >90 % through 2‑3 mm | Sieve |
| Color | Uniform, no clumps | Visual |
Harvest Finished Compost and Store It in a Small Airtight Container
After the compost has fully cooled and cured for a couple of weeks, transfer it into a small airtight container. The finished compost will stay stable, odor‑free, and ready for seed‑starting or top‑dressing. Before you seal the storage container, give it a quick moisture check—press a handful; it should feel like a wrung‑out sponge, not soggy or crumbly. Label the lid with the completion date so you can track curing time and plan uses around peak nutrient availability.
- Keep the container in a cool, dry pantry to preserve quality.
- Use a tight‑fitting lid to maintain an airtight seal and prevent dust ingress.
- Rotate stock by date, using older compost first for peak freshness.
Frequently Asked Questions
What Do You Put in a Compost Tumbler First?
You start by adding a handful of soil or finished compost to seed the tumbler, then mix in chopped greens and browns—about a 1:3 ratio—adding water to keep it damp but not soggy.
What Three Items Should Not Be Placed in a Compost Pile?
You shouldn’t put meat, dairy, or fats in the pile; avoid pet waste and oily foods; and keep coal ash, lime, or any plastic, glass, metal, or treated wood out.
Should a Compost Tumbler Be in Sun or Shade?
You should place your compost tumbler in dappled sun or partial shade, letting it warm without overheating. Too much direct sun dries out moisture, warps plastic, while shade keeps microbial activity stable.
What Are Common Composting Mistakes?
You often forget the greens‑to‑browns balance, overfill the tumbler, skip regular turns, ignore moisture levels, and add meat or dairy—each mistake slows decay, creates odors, and attracts pests.
In Summary
Now you’ve got the perfect compact dual‑chamber tumbler, so keep it in a light‑shade spot, add a small starter mix, and chop your waste into bite‑size pieces. Turn the drum two to three times a week, and watch the continuous composting process. When the compost feels dark, crumbly, and smells earthy, harvest it and store it in a small airtight container. Enjoy fresh, nutrient‑rich soil without taking up much space.


Leave a Reply