
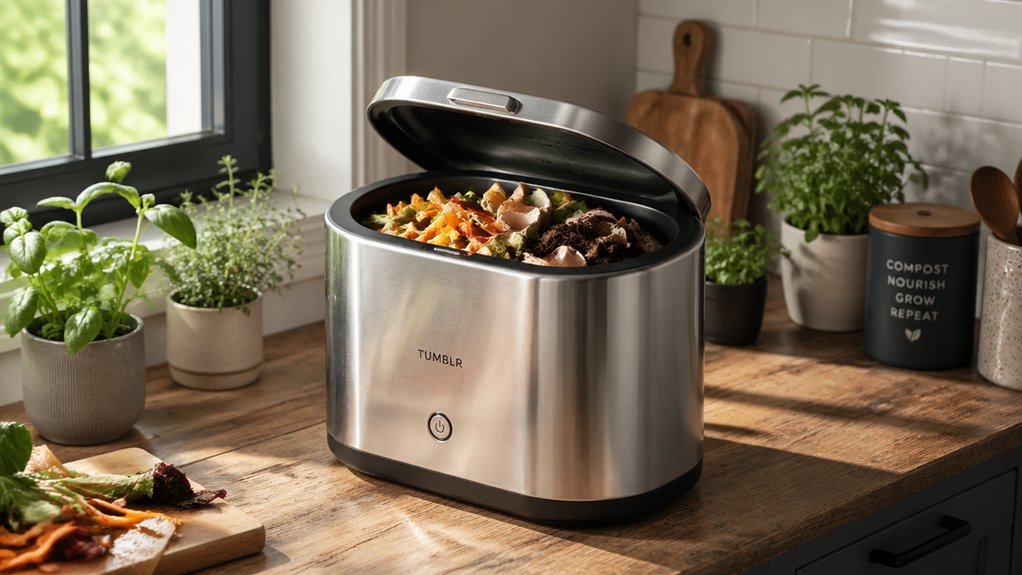
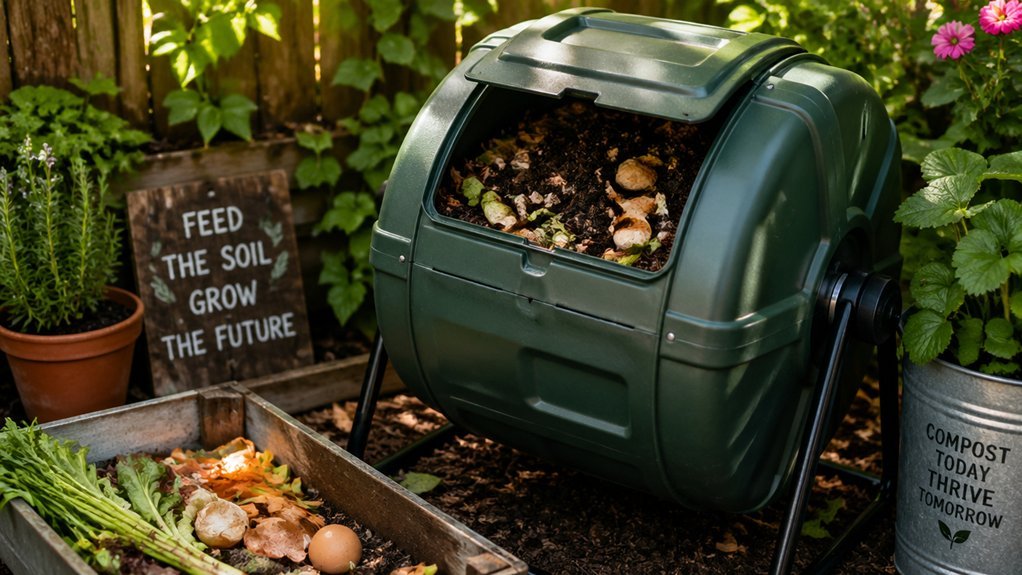
You’ll love how a compact, countertop tumbler fits right on your prep surface, keeping floor space free and letting you compost where you cook. Its rotating drum injects oxygen, speeds aerobic breakdown, and the built‑in carbon filter traps odors so your kitchen stays fresh. You can toss fruit peels, coffee grounds, eggshells and shredded paper, balance greens and browns, and choose from Grass, Express, Paper, or Cushioning modes for 2‑hour to 24‑hour cycles. The gentle hum and easy‑turn mechanism make it low‑maintenance, and the fast turnaround gives you usable compost for houseplants in just days—keep exploring to discover more details.
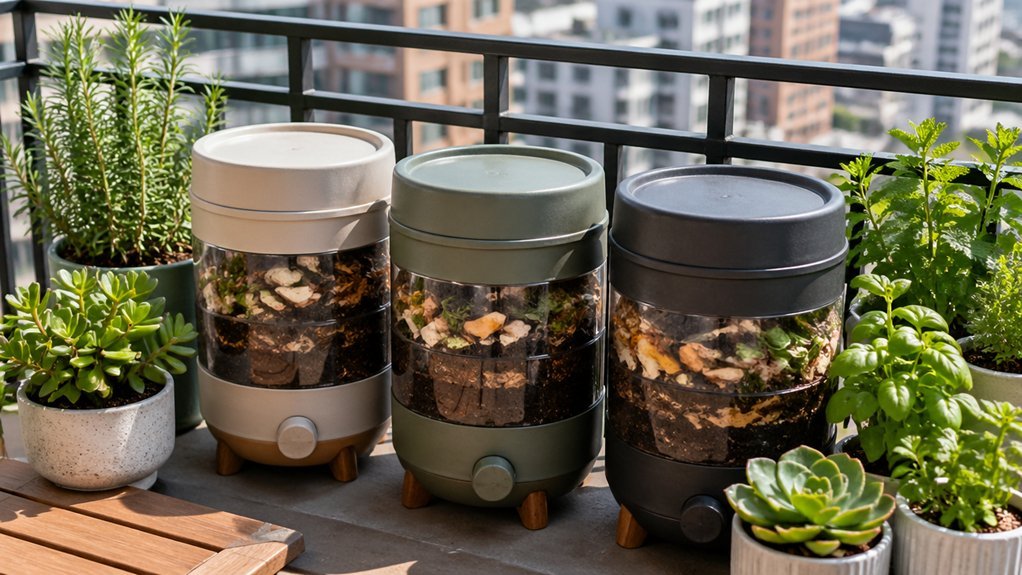
Why a Countertop Tumbling Composter Is Perfect for Small Kitchens
Ever wondered how you can turn kitchen scraps into garden gold without sacrificing precious counter space? You’ll love a countertop tumbler because it fits snugly on a small spaces, a countertop, or a narrow stand, leaving the floor clear for other gear. Its compact design lets you compost right where you prep meals, so you never have to lug bins to the garage. The built‑in turning mechanism speeds aeration, turning waste into usable material in under 24 hours on many cycles. You also get odor control: filters and sealed lids keep smells at bay, even if performance varies by model. Though the output is pre‑compost, you can still enrich plant pots after a short cure, making the system a perfect, low‑effort solution for tiny kitchens. Aeration features help maximize oxygenation and faster decomposition in compact units.
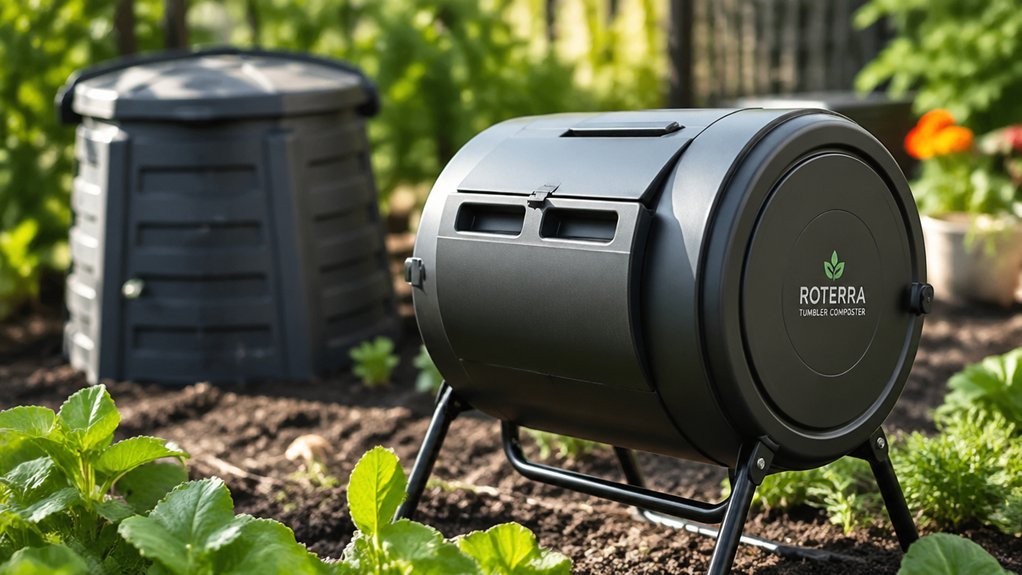
How the Rotating Drum Provides Aeration
You’ll notice the drum’s constant spin creates a steady stream of oxygen as it lifts and drops the waste, keeping microbes energized. Each turn breaks up clumps, opening pores so air can reach every bite of material. The result is a continuous flow of oxygen that speeds up aerobic breakdown without extra effort. Odor control remains a key consideration, as properly maintained airflow helps minimize smells and maintains a cleaner kitchen environment.
Drum Aeration Mechanics
How does a rotating drum keep your kitchen compost fresh and odor‑free? The drum aeration process starts the soon as the enclosed rotating drum begins its gentle spin. Each turn lifts and drops material, creating tiny air pockets that boost oxygen penetration throughout the pile. Smooth interior walls prevent snagging, so every bit of greens and browns gets mixed evenly without manual effort. Integrated vent holes let fresh air in while excess moisture escapes, maintaining the sweet spot for aerobic microbes. Because the drum stays sealed, odors stay locked out and the compost stays lively, turning kitchen scraps into dark, crumbly soil in a fraction of the time a static bin would need. The presence of a robust, airtight design helps sustain consistent aeration and odor control, even in outdoor-inspired kitchen setups. airflow design
Continuous Oxygen Flow
Why does a rotating drum keep oxygen flowing constantly? Because each turn lifts, drops, and tumbles the compost, breaking up clumps and exposing fresh material to the air.
The perforated walls or strategically placed holes let steady airflow seep in, so oxygen flow never stalls. As the drum spins, you create continuous aeration that pushes oxygen into every layer, preventing compacting and eliminating anaerobic pockets that cause odors.
Regular turning ensures the oxygen‑rich air reaches the core, while a well‑sealed tumbler holds that airflow for longer periods, accelerating decomposition.
The result is faster, cleaner compost that fits perfectly on a kitchen countertop without the stink of static bins.
Understanding the Four Vego Modes
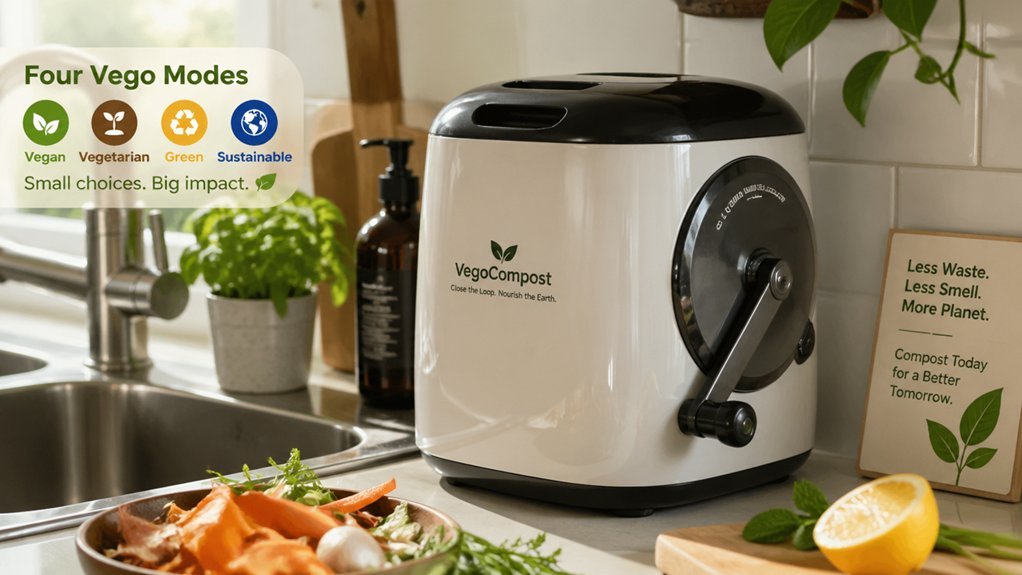
You’ll notice Grass Mode grinds your scraps quickly while preserving microbes, and Express Mode zaps moisture away in just a few hours. A third option uses crinkle-cut paper to cushion and separate waste, helping manage airflow and containment recyclable paper material, and both options keep the process under a day, so you can turn waste into usable material without waiting. Choose the one that fits your kitchen rhythm and waste‑reduction goals.
Grass Mode: Faster Grinding
Ever wondered how to speed up kitchen waste breakdown without sacrificing performance? Grass mode boosts grinding speed, letting you shred leafy scraps faster than the other settings. It runs 11–24 hours, sitting between Express and Vego, and targets green waste with a more aggressive mechanical action. By accelerating the particle size reduction, grass mode improves composting efficiency while keeping the machine’s standard cycle intact. You’ll notice quicker overall processing, which means less time waiting for the next batch to be ready. This mode is ideal when you have a lot of fresh herbs, vegetable peels, or garden clippings to handle, giving you a faster, smoother path to a tidy, odor‑free kitchen. App-controlled
Express Mode: Rapid Dehydration
Looking for a quick way to shrink kitchen waste without waiting for full composting? Express mode on your Vego kitchen composter tackles that need in just 2–8 hours. It applies heat to drive dehydration, turning soggy scraps into a dry, dust‑like material you can toss into garden soil. Because the cycle focuses on moisture removal, microbes aren’t the priority, but the resulting “express” by‑ still enriches soil. You’ll notice a dramatic volume drop, making storage a breeze compared with Grass or Fertilize modes. The rapid dehydration means you won’t have to wait weeks for a usable product—just set the timer, let the unit work, and enjoy compact, ready‑to‑use compost in a few hours. This efficiency makes Express mode a standout feature of modern kitchen composters. moisture management is a key benefit that aligns with how countertop tumblers handle moisture before final composting.
Which Kitchen Scraps Are Safe to Process?
- Fruit and vegetable peels, cores, and stems – soft, moist, and nutrient‑rich.
- Coffee grounds, tea bags (without staples), and crushed eggshells – add nitrogen and a bit of grit.
- Small amounts of bread, cooked rice, or grain leftovers – dry carbon that balances moisture.
Avoid meat, dairy, large bones, and oily foods; they can create foul smells and attract pests. Keep each load modest, and you’ll maintain a clean, efficient composting cycle.
Step‑by‑Step: Loading and Starting Your Countertop Tumbling Composter
Open the unit, toss in a balanced mix of greens and browns, then add your kitchen scraps while steering clear of fats and meat. Secure the lid and pick the appropriate mode—standard for everyday use or express for faster results—before pressing start. Finally, place the tumbler on a stable, level surface with enough clearance for the drum and vents, and keep an eye on moisture to maintain a sponge‑like feel. The liner design also matters for maintaining a leak‑free environment during the fermentation process and preventing residue buildup that could affect performance. leak‑free environment
Prep Prep Scraps
Ever wonder how to get your countertop tumbler humming from the first load? Start by gathering kitchen waste and sorting it on the counter. Separate greens from browns, then pre‑mix them in a roughly 1:2 ratio. Keep the daily input near 1.5 lb for optimal processing, and avoid fatty meats or bones that can clog a countertop komposters.
- Collect peelings, cores, and coffee grounds in a small bowl.
- Combine with shredded newspaper or cardboard strips.
- Load the balanced mix into the tumbler, then snap the lid shut.
This prep scraps routine balances moisture, reduces odor, and primes your compost for rapid, aerobic tumbling right from the start.
Select Mode & Start
Now that your scraps are pre‑mixed and ready, load the tumbler to about 90 % of its capacity, then snap the lid into place.
Next, check the input balance: aim for roughly equal parts greens and browns so the mixture stays airy and avoids clumping.
Turn the dial to the desired composting mode—most units offer a standard breakdown setting and an express option for faster drying.
If your model lists a daily input range, keep the load within that limit to prevent overloading.
Finally, follow the startup procedure: press the start button, ensure the lid clicks securely, and let the tumler begin its cycle.
Regular turning according to the manufacturer’s schedule will keep airflow optimal and odors at bay.
Odor Management Tips for a Countertop Tumbling Composter
Wondering how to keep your kitchen smelling fresh while composting? You can tame odor by turning the tumbler regularly, which boosts aeration and stops anaerobic smells. Pair that with a carbon filter and good ventilation to capture any lingering whiff, especially from meat‑heavy scraps. Keep a 1:3 green‑to‑brown ratio and moisture like a wrung‑out sponge, then drain excess liquid each cycle.
Turn the tumbler often, add a carbon filter, and ventilate to keep kitchen compost odor-free.
- Turn often – each rotation injects oxygen and pushes odor out.
- Add a carbon filter – it absorbs volatile compounds before they escape.
- Place in a ventilated nook – fresh air carries any scent away, keeping your kitchen crisp.
Energy Use and Cost of a Countertop Tumbling Composter Compared to Conventional Kitchen Bins
How much electricity does a countertop tumbling composters actually gobble up compared to a simple kitchen bin? You’ll find that a countertop composter can draw roughly 1 kWh per cycle, while a passive bin uses none. That electricity usage translates into a modest monthly energy cost—often $5–$10 if you run a few cycles a week. In contrast, the conventional bin stays free of utility bills. The table below highlights key differences:
| Feature | Countertop Compser | Conventional Bin |
|---|---|---|
| Power needed | 0.5–1 kWh per cycle | 0 kWh |
| Typical cycle time | 4–24 h | N/A |
| Noise level | Low‑moderate | Silent |
| Heat/aeration | Active | None |
| Ongoing cost | $5–$10 / month | $0 |
Using Compost on Houseplants vs. Outdoor Gardens?
Ever wondered whether the looser, pre‑compost from a countertop tumbler works as well for your indoor foliage as it does in a garden? The key is how you treat the material before it meets roots. For houseplants, you’ll want a short curing period to boost microbial activity, because the looser texture can leach nutrients quickly. Outdoor gardens tolerate the rawer mix; soil microbes already thrive in larger volumes, so composting efficiency stays high without extra steps.
- Cure 2‑3 weeks – lets microbes stabilize.
- Mix with existing soil – improves texture for pots.
- Apply thin layer – prevents over‑watering and odor.
Noise and Vibration of a Countertop Tumbling Composter
Usually, a countertop tumbling composter hums at a level comparable to a small kitchen appliance, but the exact noise and vibration depend on the model and speed setting you choose. You’ll hear a gentle whir in most geared, handle‑turn designs, yet some units emit audible grinding or motor sounds, especially on high‑speed or express cycles. Vibration is usually minimal, but it can become noticeable if the device sits on an uneven surface. Place the composter on a stable, level countertop and add an anti‑slip mat to keep movement to a whisper. Slower cycles produce barely perceptible noise, making them ideal for open‑plan kitchens, while rapid modes may be louder but still stay within typical household appliance levels.
Maintenance Checklist: Cleaning, Blade Care, and Filter Replacement
Even with its quiet operation, a countertop tumbler needs regular upkeep to stay efficient and odor‑free. After each composting cycle, wipe the interior and exterior with a mild, non‑abrasive cleaner, then dry the vents and filter before reassembly. Inspect the blades for dullness or damage; sharpen or replace them according to the manufacturer’s schedule to keep shredding swift. Swap out the carbon filter on your odor‑control system every few months, or when you notice a decline in freshness.
Wipe, dry, and inspect after each cycle; replace blades and carbon filter regularly for odor‑free performance.
- Clean the chamber and lid after every run.
- Check blade sharpness and replace if needed.
- Replace the carbon filter per the maintenance calendar.
Following this checklist guarantees reliable composting, minimal smells, and long‑term performance.
Real‑World Turnaround Times & Compost Quality
How quickly you’ll see usable compost depends on the tumbler’s capacity, feed mix, and whether it relies on heat‑assisted dehydration or active microbial digestion. In practice you’ll get a “ground material” amendment in 1–4 weeks for most countertop units, but Vego’s Express mode can finish in 2–8 hours, while Grass, Vego, and Fertilize modes stretch to 24 hours. Balancing carbon/nitrogen and steering clear of meat or fish inputs keeps odor low and improves compost quality. You may still need a curing step or worm bin integration to achieve a finer texture, but the rapid turnaround makes kitchen composting viable even in small spaces.
| Model | Turnaround Time | Typical Output |
|---|---|---|
| Standard Countertop | 1–4 weeks | Loose, rough amendment |
| Vego Express | 2–8 hours | Dehydrated granules |
| Vego Grass | up to 24 hours | Moist, crumbly |
| Vego Fertilize | up to 24 hours | Nutrient‑rich soil |
Frequently Asked Questions
Do Countertop Composters Really Work?
Yes, they work if you keep the mix balanced, turn it regularly, and maintain sponge‑like moisture; you’ll see usable compost in weeks, though capacity’s small and occasional odor control’s required.
What Is the Disadvantage of a Compost Tumbler?
You’ll find that compost tumblers have limited capacity, so you must empty them often; they’re pricey, can develop rust or wear, need regular turning, and often struggle to keep moisture and aeration balanced.
What Is the Best Compost Bin for Kitchen Countertops?
You’ll love the OXO Good Grips Easy‑Fill Compost Bin; it fits countertops, seals odors, and features a smooth, removable inner bucket that lets you empty waste quickly without mess or hassle.
Do Tumbler Composters Really Work?
Yes, they work if you keep the mix moist, balanced, and turn it regularly; you’ll see crumbly compost in weeks, but neglecting aeration or temperature can stall the process.
In Summary
You’ve seen why a countertop tumbler fits snugly in a small kitchen, how its rotating drum aerates waste, and which scraps you can safely toss in. By following the simple loading steps, keeping an eye on noise, and maintaining blades and filters, you’ll churn out nutrient‑rich compost in days—not weeks. Use it for houseplants or garden beds, and enjoy a cleaner, greener kitchen without the hassle.
Leave a Reply