
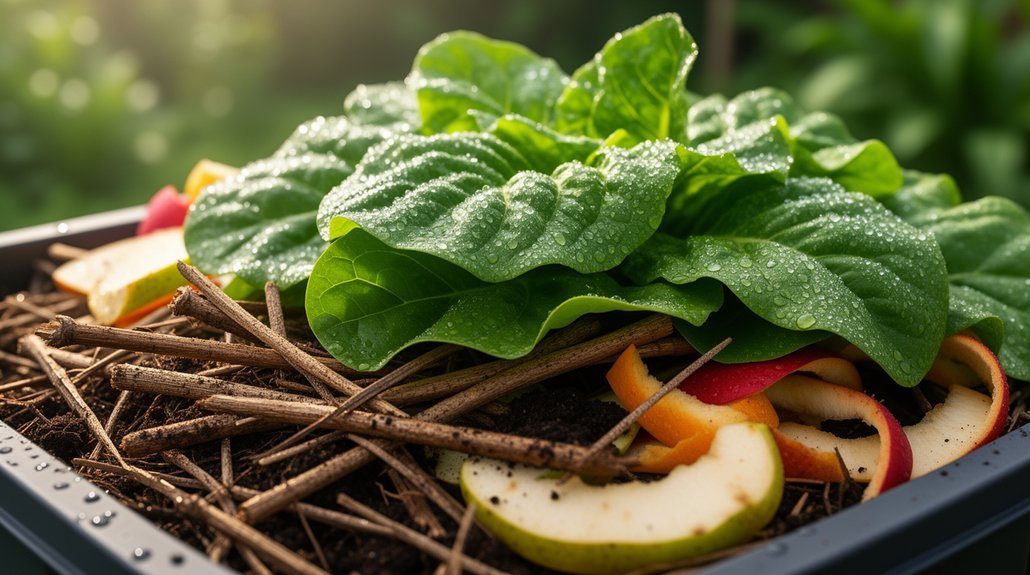
Balance moisture from the start by adding plenty of dry, carbon‑rich browns—shredded newspaper, cardboard, or dried leaves—after every handful of greens. Drain and shred kitchen scraps, then mix them thoroughly with the browns so the pile feels like a wrung‑out sponge, not a soggy mess. Build your bin on a porous base, add side vents or a smokestack, and turn the heap every few days to keep air flowing and prevent mats. Keep the lid tight, line the bin, and clean it regularly; if you follow these steps, you’ll discover even more tricks to stay mold‑free.
Why Moisture Controls Compost Mold (and How to Spot It)

Ever wonder why a soggy pile suddenly sprouts white fuzz? You’re seeing mold, and moisture is the culprit. Compost microbes need just enough water to stay active, but excess water chokes air, creating low‑oxygen zones where mold thrives. When you squeeze a wet spot and it drips continuously, that’s a sign you’ve crossed the line. Proper moisture should leave only a few beads or a slight sheen.
A matting, slimy texture, standing water, or a pile sitting in a low spot all point to too much water and insufficient airflow. White fuzz spreading across the surface tells you the balance is off. Electric composters can process waste in 2–4 hours with efficient heat management to prevent moisture buildup indoors.
Aim for a wrung‑out‑sponge feel, turn weekly, and keep drainage clear to keep mold at bay. Excess moisture can also attract pests that further disrupt the composting process.
Dry Browns That Absorb Excess Water
You can grab shredded newspaper, dried leaves, straw, or cardboard pieces to soak up excess moisture. Those dry browns pull water from wet spots, cut slime, and keep the pile airy. Just mix them in thoroughly and you’ll restore a balanced, crumbly texture. Add a layer of dry browns after each green addition to maintain proper moisture balance. For kitchen composting, consider using compostable trash bags to collect food scraps before adding them to your main pile, which helps control moisture and odors at the source.
Shredded Newspaper
Why let excess moisture turn your compost into a soggy, mold‑prone mess? Shredded newspaper acts as a dry brown that soaks up surplus water, keeping the pile from slipping into anaerobic, smelly conditions. Toss thin strips between fruit scraps and fresh greens; the paper fibers create tiny air pockets that improve airflow and speed decomposition. Aim for a carbon‑to‑nitrogen ratio around 25:1—each handful of newspaper adds the carbon needed to balance nitrogen‑rich kitchen waste. Use only non‑glossy, untreated newsprint; avoid glossy inserts and heavily coated pages. Lightly moisten the shredded paper before layering, then turn the pile regularly to prevent matting. For indoor composting systems or compact designs, 360° ventilation systems can further enhance moisture management alongside your shredded newspaper layer. Small, frequent additions work better than dumping a massive bundle at once. Shredded newspaper must be dry to avoid adding excess moisture.
Dried Leaves & Straw
How can you keep your compost from turning into a soggy, mold‑prone mess? Use dried leaves and straw as dry browns that soak up excess water and create air pockets. Shred the leaves, then alternate thin layers of leaves and straw with nitrogen‑rich greens. This keeps the pile at a damp‑but‑not‑soggy texture, prevents compaction, and fuels aerobic microbes. Turn the pile occasionally to refresh oxygen flow, and add water only when the mix feels dry to the touch. For indoor composting systems, turning every 3-4 days maintains aerobic conditions and prevents odor buildup during colder months. The result is a well‑aerated, low‑odor heap that turns into nutrient‑rich, crumbly compost while diverting yard waste. Both are carbon‑rich plant materials.
Cardboard & Paperboard Pieces
Any dry brown like cardboard or paperboard is a powerhouse for soaking up excess moisture in your compost. It balances nitrogen‑rich greens with a carbon ratio around 200:1, keeping the pile from turning slimy or stinky. Shred or tear the material so its corrugations and fibers stay open, creating air pockets that improve oxygen flow and curb anaerobic mold. Layer shredded pieces with food scraps, grass clippings, or leaves; the paper acts as a bulking agent and a “wrung‑out sponge” that regulates moisture. If the cardboard softens, turn it in or add more dry bits to maintain structure. Soak large sheets before tearing for easier mixing, and avoid thick, intact layers that can mat and trap water. This approach speeds decomposition, supports microbes, and prevents mold by maintaining the sealed anaerobic environments that suppress odor-causing processes. Plain paper can also be used, but it should be shredded to avoid clumping.
Airflow Tricks to Prevent Compost Mold
Ever wondered why your compost smells musty and develops fuzzy patches? Start with a porous base—layer sticks, twigs, or coarse wood under the bin so air can pool beneath the pile. Use a pallet or slatted sides to keep the whole bin breathable, and insert sticks, corn stalks, or perforated PVC tubes to create internal channels that push oxygen into dense zones. Turn or fluff the heap every few days; this breaks up mats, redistributes heat, and stops damp pockets from forming. Add side vents or a smokestack‑style opening so fresh air rushes in while excess heat escapes. By preventing compaction and keeping moisture evenly distributed, you give aerobic microbes the oxygen they need and keep mold at bay. For stubborn odors that persist despite good airflow, consider adding activated charcoal filters to capture remaining moisture and musty smells. Adding bulking material such as sawdust further improves airflow.
Prep Kitchen Scraps: Drain, Dry & Mix for Mold‑Free Compost

Why let soggy kitchen scraps turn your compost into a mold haven? Drain excess water in a colander or on paper towels, then chop or shred the pieces. Smaller bits dry faster and mix evenly with browns. For each handful of greens, toss two‑to‑three handfuls of dry leaves, shredded paper, or cardboard. This keeps the pile damp like a wrung‑out sponge, not dripping wet, and blocks anaerobic pockets where mold thrives. Pre‑drying juicy ends—tomato cores, citrus segments—on a tray before adding further cuts moisture. The dry carbon material creates aeration gaps, shades the greens, and curbs ammonia odors, giving you a clean, mold‑free compost. Adding citrus peels in moderation helps maintain a balanced pH while still providing nutrients. Maintaining proper moisture balance is especially important if you plan to use your finished compost for brewing compost tea, which requires high-quality microbial activity and organic matter.
Indoor Bin Maintenance: Empty, Clean & Dry on a Schedule
You should empty the indoor bin on a steady schedule so wet scraps don’t linger long enough to breed mold. After each dump, give it a quick rinse and let it dry completely before refilling to keep hygiene high and odors low. Consistently cleaning and drying the bin stops mold growth and keeps your compost fresh. Proper aeration is essential to prevent moisture buildup and mold formation. Models with charcoal filter technology help control odors while you maintain your regular cleaning routine.
Empty Regularly, Prevent Mold
How often you empty your indoor compost bin matters more than you think: a consistent schedule—typically every 2–4 days for countertop containers—keeps odors, fruit flies, and mold at bay. You’ll notice that small bins fill fast, especially when you toss high‑odor scraps like onion peels or citrus. Emptying before the pile gets wet or compacted stops anaerobic conditions that invite mold. If you have a larger bin, you can stretch to every other day or a week, but the rule of thumb is “don’t let food sit longer than a few days.” Pair each dump with a quick rinse to keep residue from feeding microbes. Using desktop-friendly configurations with multiple compartments can help you separate different compost materials and track emptying schedules more effectively.
- Empty every 2–4 days for countertop bins
- Adjust frequency for larger containers or lower volume
- Transfer scraps promptly to outdoor pile or municipal service
Odor‑free technology ensures that regular emptying also minimizes unpleasant smells.
Clean, Dry, Maintain Hygiene
Ever wondered why a clean, dry bin makes all the difference? You’ll notice fewer molds and odors when you keep the lid sealed, use a 55‑gallon or smaller container, and line it with a clear plastic or compostable bag. Wash the bin with hot, and soap on a regular schedule, and swap to a bleach‑water rinse after wet scraps or leaks. After each wash, let it air‑dry with the lid open; a paper liner will absorb any remaining moisture. Remove standing liquid before refilling, and always wrap soggy food in dry paper. Tight‑fitting lids trap smells and block fruit flies, while separate storage from trash prevents cross‑contamination. For enhanced odor control, consider bins with activated charcoal filters that neutralize smells while you maintain your cleaning routine. Consistent cleaning, thorough drying, and proper hygiene keep mold at bay. Collection day may differ on city holidays.
Bin Design Hacks: Lids, Filters & Drainage for Fresh Compost

Ever wondered why a simple lid, a few vent holes, and proper drainage can keep your compost from turning into a soggy mess? A tight‑fitting lid shields rain, snow, and pests while keeping moisture at the “squeezed‑out sponge” level. Add small drill holes in the lid and bottom, or side perforations, to feed oxygen and prevent anaerobic odors. Drainage holes at the base let excess liquid escape; catch it in a second container if you’re worried about spills. Choose a plastic tote or bucket, reinforce it with hardware cloth, and latch the lid for rodent protection. These design tweaks give you a dry, well‑aerated bin that stays fresh and mold‑free.
- Tight lid + vent holes for airflow and pest barrier
- Bottom drainage holes + catch tray for liquid control
- Wire mesh or hardware cloth to keep rodents out while allowing ventilation
using a 5‑gallon bucket as a compact bin option can also help maintain proper moisture levels.
Fix Early Mold: Spot, Stop, and Prevent
A well‑sealed bin with proper ventilation keeps the pile dry, but the moment moisture creeps in, mold can appear. Spot early signs: fluffy white growth is harmless, greenish or spongy patches hint at excess water, pink or odd colors suggest contamination, and dark, slimy, foul‑smelling mold signals anaerobic conditions. Stop it by turning the pile more often, adding carbon‑rich browns to soak up moisture, and cutting back watering. Bury fresh scraps deep, and avoid soggy inputs like wet food waste. Prevent moisture spikes by aiming for a wrung‑out‑sponge feel, covering during rain, shredding materials, and mixing greens with browns before adding. Choose only plant‑based, compost‑safe browns, exclude meat, dairy, oily foods, and soapy water. Turn weekly, watch for compacted zones, and keep the pile covered but not airtight. Green mold indicates the pile is too moist.
Frequently Asked Questions
Can I Use a Dehumidifier Near My Compost Bin?
Yes, you can place a dehumidifier nearby, but keep it out of direct airflow; it’ll lower room humidity, help prevent mold, and still let the compost stay moist and aerated.
How Often Should I Replace the Charcoal Filter?
You should replace the charcoal filter roughly every three to five months, but if you live in a hot, humid area or add lots of wet scraps, swap it out every two to three months to keep odors and mold at bay.
Will Adding Coffee Grounds Increase Mold Risk?
You’ll see a slight mold increase if you dump grounds straight in, but mixing them well with dry browns and keeping moisture balanced keeps it minimal and your compost healthy.
Is It Safe to Compost Meat and Dairy in Indoor Bins?
You shouldn’t compost meat or dairy in indoor bins; they won’t reach the high temperatures needed to kill pathogens, and they’ll cause odors, pests, and mold, turning your compost unsafe.
Can I Compost Pet Waste Without Mold Issues?
You can compost pet waste without mold if you keep it dry, balance carbon materials, turn it regularly, and use a sealed, high‑heat bin. Follow these steps and mold won’t become a problem.
In Summary
By keeping moisture in check, ensuring good airflow, and prepping your scraps before they hit the bin, you’ll stop mold before it starts. Regularly empty, clean, and dry your indoor bin, and choose a design with proper lids, filters, and drainage. Spot any early signs of mold, act fast, and maintain these habits—your compost will stay fresh, healthy, and ready to turn kitchen waste into rich soil.


Leave a Reply