

Keep your indoor compost at 40‑60 % moisture by adding a handful of dry browns—shredded paper, cardboard, straw, or untreated sawdust—before and after each batch of food scraps. Aim for a 2‑to‑3 volume ratio of browns to greens, and fluff the pile weekly to keep air flowing and odors out. Store your dry browns in a cool, dry spot, and cover the bin to limit evaporation. Adding the right amount of dry material will balance C:N and keep microbes active, and the next sections will show you how to fine‑tune these steps.
Why Moisture Control Matters in Indoor Compost
Because microbes drive indoor compost, keeping moisture in the right range is essential. You need water for their metabolism, but too much or too little throws the process off balance. Aim for 40‑60 % moisture by weight—about a wrung‑out sponge. If the pile feels soggy, oxygen gets displaced, anaerobic microbes produce ammonia, and the mix becomes dense and hard to turn. If it’s dry, microbes go dormant, fungal dominance rises, and decomposition stalls. Use the squeeze test: a proper handful should drip no more than a couple of drops. Cover the bin to limit evaporation, and water lightly when indoor air is warm or dry. Balancing moisture with aeration keeps the pile active and odor‑free. Moisture below 40 % leads to fungal dominance and incomplete decomposition.
Indoor Compost: Shred Paper & Cardboard for Faster Absorption
You’ll notice that shredding paper and cardboard into small strips dramatically boosts their surface area, letting microbes and worms reach cellulose faster. Those tiny pieces soak up liquid far quicker than whole sheets, keeping moisture evenly distributed throughout the bin. Shredded material also improves aeration, preventing compacted pockets that can slow decomposition. Turning your indoor compost every 3-5 days using a small pitchfork or trowel helps the mixture heat up and decompose effectively, working in tandem with the improved airflow that shredded materials provide.
Shred For Size
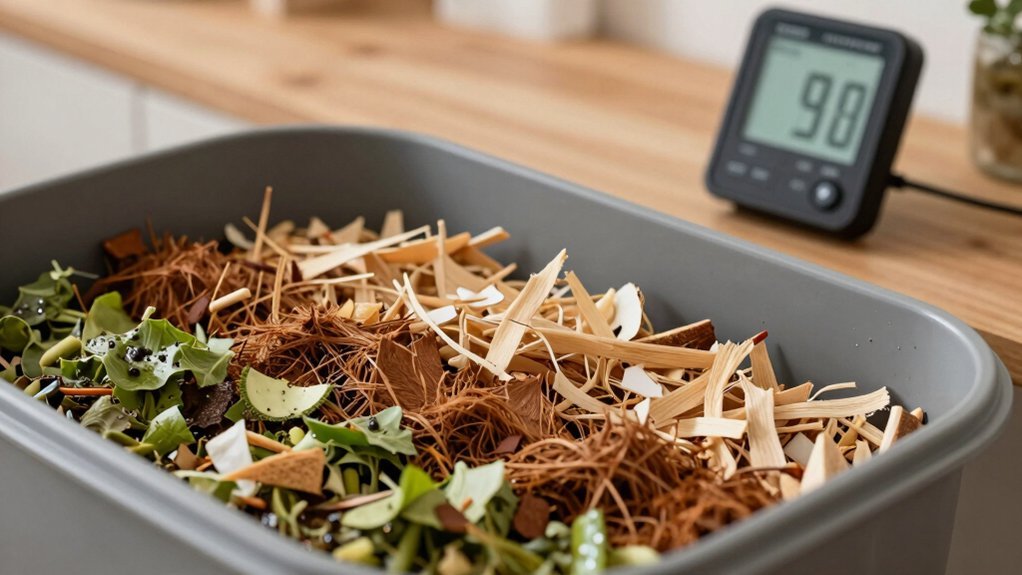
A few shredded strips of paper and cardboard can dramatically speed up indoor composting. You’ll want pieces that’re roughly one‑inch wide; this size gives microbes plenty of surface area while keeping airflow open. Flatten boxes first, then cut or shred them into uniform strips, confetti‑sized pieces, or torn fragments—consistency matters more than an exact measurement. Office shredders handle thin cardboard after you slice it, while electric or manual shredders work for larger batches. Remove tape, labels, and staples before shredding, and consider a light mist to soften stubborn corrugated layers. Uniform, fine pieces mix evenly with greens, layer smoothly in bins or worm trays, and prevent the mats that choke air and slow decomposition. For apartment dwellers using indoor compost bins, shredded cardboard serves as an ideal brown material that reduces odors while maintaining proper carbon-to-nitrogen balance. Air pockets in corrugated cardboard promote faster decomposition by improving aeration.
Cardboard Moisture Absorption
Uniform shredded strips already give the pile plenty of surface area; now the cardboard’s ability to soak up excess liquid becomes the next game‑changer. You’ll find that corrugated fibers act like tiny sponges, pulling moisture from soggy fruit scraps and coffee grounds while slowly releasing it as the bin dries. This balances the carbon‑to‑nitrogen ratio, keeps oxygen flowing, and curbs anaerobic odors. Spread shredded cardboard evenly, layer it with wet bits, and watch the pile stay fluffy and breathable. Shredded cardboard should be kept moist but not soggy to maintain microbial activity. Maintaining a balanced greens-to-browns ratio prevents excess moisture and odor buildup while supporting beneficial decomposition.
| Benefit | How it works | Ideal amount |
|---|---|---|
| Moisture absorber | Cellulose fibers soak up excess liquid | 10‑20 % of volume |
| Aeration aid | Corrugated pockets create air channels | Thin layers, not clumps |
| Odor reducer | Prevents anaerobic spots | Mix with nitrogen‑rich scraps |
Layer Dry Browns Before and After Every Food Scrap Drop

You should start each addition by spreading a thin layer of dry browns, then drop the food scraps, and finish with another brown layer to trap moisture and odor. This sandwich keeps the carbon‑to‑nitrogen ratio balanced and prevents the mix from getting soggy. Keep checking the moisture level and adjust the browns as needed to maintain a healthy, aerobic environment. Drill holes in the tub’s sides and bottom to ensure proper airflow. Consider using airtight storage containers to keep your dry brown materials fresh and organized before adding them to your compost bin.
Layer Browns First
Ever wonder why you should start every drop with a dry brown layer? You’re creating the carbon base that fuels aerobic decomposition and keeping the tub floor dry. A 1‑2‑inch foundation of shredded paper or sawdust stops food from touching the base, reduces compaction, and improves airflow.
When you add a handful of veggie scraps, immediately cover them with an equal volume of dry browns—shredded cardboard, dry leaves, or a pinch of finished compost works too. This blanket absorbs excess moisture, curbs odors, and blocks pests. Most quality electric composters achieve odor control through activated carbon filters and sealed housings, but manual composting relies on this layering method to contain gases naturally.
Maintaining a 2‑to‑3‑to‑brown‑to‑green ratio keeps the pile fluffy and aerobic. Remember to fluff the mix weekly and keep the lid loose for ventilation. Adding perlite can help speed up drying when the compost gets too wet.
Add Browns After
Why not cover every food‑scrap drop with a fresh layer of dry browns? Adding a thin, even coat of shredded paper, sawdust, or dry leaves right after you toss in kitchen waste locks in moisture, cuts odor, and keeps the bin aerobic. It also prevents compaction, letting air flow through the mix. Aim for roughly two‑to‑three times the volume of browns to greens, and keep each addition small so you can cover it promptly.
- Use non‑glossy shredded paper or brown bags as your go‑to carbon source.
- Sprinkle a handful of untreated sawdust or dry leaves for extra structure.
- Keep a bin of shredded cardboard nearby for quick, mess‑free covering.
These steps keep your indoor compost lively, odor‑free, and ready for weekly fluffing. Most ceramic crocks designed for kitchen composting rely on charcoal filters in lids to manage odor between emptying cycles. Using a mix of different dry browns can enhance microbial diversity and improve overall bin health.
Balance Moisture Regularly
Balanced moisture is the key to a thriving indoor compost, and the simplest way to keep it that way is by sandwiching each food‑scrap drop between dry browns. When you add a spoonful of veggie peels, first spread a thin layer of shredded paper or cardboard, then drop the scraps, and finish with another layer of dry leaves or straw. This creates a moisture buffer that keeps the pile feeling like a wrung‑out sponge rather than soggy. Aim for two‑to‑three times more browns than greens, and fluff the bin weekly to redistribute dampness. If you notice a wet spot, stir in extra dry material. Regularly checking texture and adjusting layers prevents anaerobic odors and speeds decomposition, while using bokashi bran accelerates the fermentation process for faster waste processing. Bokashi bucket can be used to pre‑process scraps before adding them to the bin.
Indoor Compost Ratio: Balance the 2‑to‑3 Volume Ratio
How can you keep indoor composting efficient without a science lab? Aim for a 2‑to‑3 volume ratio of browns to greens. A 2:1 mix is the minimum you can get away with, but 3:1 is the safest spot for stable decomposition. Too many greens raise nitrogen, moisture, and odor; too many browns can slow the process. Adjust by feel—your pile should feel like a wrung‑out sponge—and by smell—no sour or rotten odors. Add dry browns each time you toss in scraps, and keep the top layer covered.
Aim for a 2‑to‑3 browns‑to‑greens ratio; keep it moist, airy, and odor‑free with dry browns and regular turning.
- Shredded dry leaves or paper for bulk and moisture absorption.
- Straw or wood chips for extra structure and airflow.
- Mix and turn weekly to maintain oxygen and prevent compaction.
Target C:N ratio of roughly 20:1 to 30:1 guides this 2‑to‑3 volume balance. Store your dry materials like shredded paper and leaves in a cool, dry location away from moisture to maintain their quality for composting. Follow these cues, and your indoor bin stays active, odor‑free, and fast‑working.
Vermicompost Bedding: Ripped Newspaper vs. Cardboard
You’ll notice that ripped newspaper breaks down quickly, giving you fast‑turnover bedding, while cardboard holds its shape longer, providing a durable, airy structure for your worms.
The quick decomposition of newspaper can be great for new bins, but its light, flexible fibers may mat if they get too wet.
Cardboard’s sturdy flutes keep the bin loftier and help control moisture, making it a solid long‑term base. For apartment dwellers managing indoor composting systems, consider using shredded newspaper from a cross-cut shredder to create more uniform bedding material that decomposes consistently.
Newspaper also serves as an excellent moisture buffer because it absorbs excess liquid and releases it gradually, maintaining optimal humidity.
Ripped Newspaper: Quick Decomposition
When you rip newspaper into small strips, it soaks up moisture like a sponge, turning into a damp, breathable bedding that worms love. The fine pieces hold water, release it slowly, and cool the bin through evaporation. Because the surface area is huge, microbes and worms can colonize quickly, so the bedding breaks down in weeks rather than months. You’ll notice faster turnover, especially if you keep the mix moist and aerated. Use only black‑ink or unbleached paper, and strip away tape, glossy finishes, and inserts to avoid contaminants. For optimal results, consider using lightweight, well-balanced tools to help turn and mix your bedding materials.
- Quick moisture absorption keeps a stable, humid environment.
- Small fragments decompose faster, feeding worms sooner.
- Rapid breakdown lets you refresh bedding often, keeping the bin lively.
Add more shredded cardboard to increase bulk and retain moisture.
Cardboard: Long‑Lasting Structure
Ever tried using corrugated cardboard as vermicompost bedding? You’ll notice its wavy layers hold shape far longer than shredded newspaper, giving a bulkier texture that resists collapse. The permanent air channels keep the bin aerated, preventing soggy spots and supporting aerobic breakdown. Dry strips soak up excess water, while damp pieces retain moisture, acting as a buffer during feeding. Worms love the corrugations, colonizing the partially broken‑down material for shelter and feeding. Shred the cardboard, remove tape and glossy coatings, then moisten before adding. Mixing it with other dry bedding boosts manageability without sacrificing its long‑lasting structure. Colored cardboard is also acceptable as long as any glossy coating is removed.
| Feature | Cardboard Advantage |
|---|---|
| Structure | Holds bulk, slows collapse |
| Aeration | Permanent air channels |
| Moisture | Absorbs excess, retains needed water |
Add Sawdust, Wood Chips, or Straw to Stop Bins From Clogging
A handful of dry browns—sawdust, wood chips, or straw—keeps indoor compost bins from clogging by soaking up excess moisture and creating air pockets. You’ll notice fewer clumps and less odor when you balance every batch of wet scraps with a generous sprinkle of these carbon‑rich materials. They act like sponges and scaffolding, pulling liquid away from food waste while holding the pile loose enough for microbes to breathe.
Dry browns like sawdust, wood chips, or straw absorb moisture, create air pockets, and keep indoor compost odor‑free.
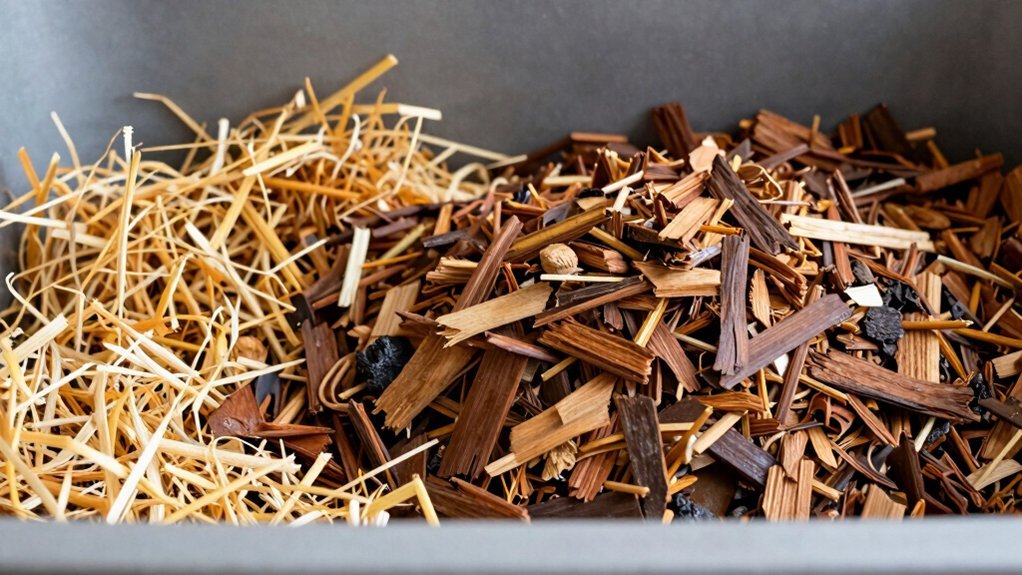
- Sawdust: fine particles fill gaps, absorb soggy bits, but stick to untreated wood to avoid toxins.
- Wood chips: coarse pieces keep layers from compacting, offering long‑term aeration in small indoor doses.
- Straw: chopped fibers separate wet layers, boost drainage, and whisk oxygen through the mix.
Cover each addition, stir occasionally, and keep the bin airy for fast, odor‑free decomposition. Adding a nylon mesh screen over the lid holes helps maintain airflow while keeping pests out.
Preparing Bokashi‑Fermented Waste for Your Indoor Compost Bin
How do you turn your fermented bokashi into a thriving indoor compost? First, wait until the bucket has sealed for about two weeks; the waste should be acidic, partially broken down, and still recognizable. Drain the bokashi tea every 1‑3 days using a spigot or tray, and set the liquid aside for later watering. Transfer the solids into a large indoor tub of soil, a covered planter, or an existing compost bin. Bury the material under a few inches of potting mix, then lightly press it down. Keep the container moist but not soggy, and let it sit for roughly two weeks before planting or adding more scraps. During this period microbes will rapidly colonize the pre‑fermented waste, turning it into nutrient‑rich matter for your indoor garden. The process relies on high acidity to suppress harmful microbes and promote beneficial fermentation.
Test Moisture Fast With the “Wrung‑Out Sponge” Method

Wondering if your indoor compost is too wet or too dry? Grab a handful from the bin’s core, squeeze it, and watch the reaction. If it forms a cohesive ball with a few drops, you’re in the sweet spot (≈50‑60% moisture). A crumbling clump means it’s too dry; add a splash of water or more wet feedstock. A steady stream from your hand signals excess moisture—mix in dry browns or turn the pile to aerate.
- Ball that stays together – ideal moisture range.
- Crumbles, no water – dry, needs moisture.
- Water drips out – too wet, risk of anaerobic pockets.
Repeat the test after each addition or mix to keep your indoor compost thriving.
Excess moisture fills pore spaces and creates anaerobic conditions.
Fix Odors by Adding the Right Amount of Dry Browns
When kitchen scraps get soggy or packed too tightly, the smell spikes, but adding the right amount of dry browns instantly tames the odor. You’ll want roughly two to three parts carbon‑rich browns for every part greens by volume, and a 4‑to‑8‑inch layer of shredded paper, newspaper, cardboard, dry leaves, or sawdust on top of the waste. This dry cover soaks up excess moisture, restores the green‑to‑brown balance, and creates airflow that keeps microbes working cleanly. If the pile starts to smell sour or looks wet, increase the brown layer before adding more scraps.
Keep the browns dry, avoid glossy or waxed paper, and mix them in regularly to keep the compost loose, earthy‑smelling, and odor‑free.
Seasonal Tweaks: Extra Browns for Winter or Summer
Ever notice how your indoor compost slows down in winter while sprinting in summer? In cold months you need more carbon to keep the pile airy and warm, so bulk up on dry browns. In summer you can lean a bit more on greens, but still sprinkle enough dry material to avoid soggy clumps and excess evaporation.
- Winter: Add shredded cardboard, dried leaves, or straw after each kitchen scrap to preserve structure and buffer moisture.
- Summer: Mix in a modest layer of shredded paper or fine wood chips to maintain aeration without over‑drying.
- Both: Keep a dedicated container of dry browns nearby for quick, consistent layering. This seasonal tweaking balances temperature, moisture, and airflow, keeping microbes active year‑round.
Materials to Exclude: Why Meat, Glossy Paper, and Treated Wood Spoil Moisture
If you toss meat, glossy paper, or treated wood into your indoor bin, you’ll quickly see moisture go out of control. Meat adds grease and nitrogen‑rich fluids that saturate the mix, creating soggy, low‑oxygen patches that smell and attract flies, rodents, and raccoons. Its proteins decompose slowly, so the bin stays wet and anaerobic, while pathogens like Salmonella and E. coli linger because the pile never reaches kill‑heat temperatures.
Glossy paper and coated cardboard lack absorbency; their polymer films and inks clump, preventing airflow and leaving liquid to pool at the bottom.
Treated wood leaches preservatives and chemicals, and it doesn’t soak up moisture predictably, so it contributes to a compact, contaminated mass rather than a dry, breathable buffer.
Stick to plain shredded paper, uncoated cardboard, and untreated wood shavings to keep moisture balanced and odor‑free.
C‑N Ratio Maintenance for Apartment Compost
Wondering how to keep your indoor compost from turning into a smelly, sluggish mess? Aim for a C:N ratio of 25:1–30:1. Start with a handful of high‑carbon bulking agents, then add kitchen greens in thin layers. Mix, shred, and monitor moisture—too wet means more browns, too dry means more greens.
Aim for a 25:1–30:1 C:N ratio, layer browns and greens, keep moisture balanced.
- Shredded cardboard or newspaper: easy to store, 175–560:1 C:N, absorbs excess moisture.
- Dry leaves or straw: 30–100:1 C:N, adds airflow and structure.
- Sawdust or wood chips: 100–500:1 C:N, use sparingly to avoid nitrogen lock‑out.
If you smell ammonia, toss in more dry material; if decomposition stalls, add fresh veg scraps or coffee grounds. Keep the pile fluffy, and it will stay active and odor‑free.
Frequently Asked Questions
Can I Compost Coffee Grounds Directly Without Adding Extra Browns?
No, you shouldn’t just dump grounds alone; mix them with dry browns. Aim for twenty‑to‑thirty percent grounds by volume, add shredded paper, leaves, or cardboard, and keep the pile aerated.
Do I Need to Sterilize Paper Before Using It as Bedding?
You don’t need to sterilize ordinary paper bedding unless you suspect pests or disease. Just shred, dampen, and mix it with browns and greens; sterilization’s only for contaminated or high‑risk batches.
How Often Should I Replace the Dry Material Layer in a Vermicompost Bin?
You should replace the dry material layer every one to two weeks, or whenever the squeeze test shows excess moisture. Add small batches frequently to keep the bin airy and prevent leachate buildup.
Is It Safe to Use Shredded Newspaper With Ink From Recycled Printing?
Yes, you can use shredded newspaper with recycled‑printing ink, as long as it’s plain black text on uncoated paper; avoid glossy, colored, or heavily coated pages, and balance it with nitrogen‑rich scraps.
Can I Mix Dry Leaves From Outdoor Lawns With Indoor Compost Materials?
Yes, you can mix dry outdoor leaves into your indoor compost as long as they’re pesticide‑free, shredded, and balanced with nitrogen‑rich greens. Keep layers thin, moisten, and turn regularly for quick breakdown.
In Summary
By mastering moisture control, you’ll keep indoor compost healthy and odor‑free. Shred paper and cardboard, layer dry browns before and after each food drop, and stick to a 2‑to‑3 volume ratio. Choose ripped newspaper or cardboard for vermicompost bedding, and adjust browns seasonally. Skip meat, glossy paper, and treated wood to protect the C‑N balance. With these habits, your apartment compost will thrive year‑round.


Leave a Reply