
You’re overloading the bin with watery scraps, dumping liquid too fast, or skipping the dry bedding that soaks up excess moisture. Clogged drainage holes or blocked air vents trap liquid, creating anaerobic pockets, while compacted material reduces pore space and slows drainage. High‑water‑content foods push the moisture past the safe field‑capacity level, and a bin placed on a non‑draining surface adds to the problem. Fix these issues and you’ll keep the worm habitat breathable and productive, and the next steps will show you how.
Quick Guide: Keep Your Worm Bin From Getting Too Wet

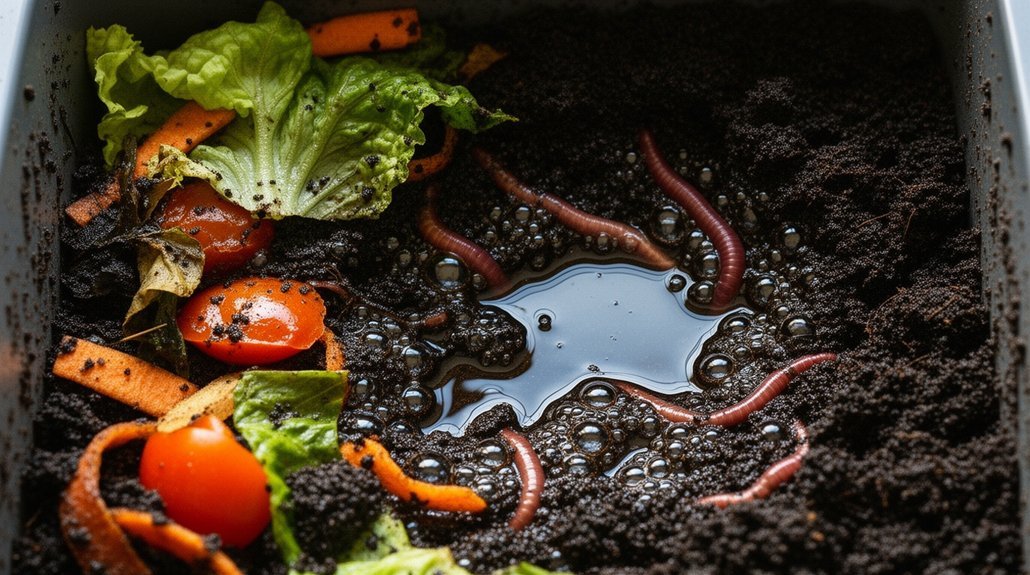
Ever wonder why your worm bin feels like a swamp? Add dry, absorbent bedding—shredded cardboard, newspaper, coconut coir—in thin layers and mix lightly. This creates air pockets, boosts oxygen flow, and buffers sudden moisture spikes from wet scraps. Keep drainage holes open and ensure a loosely fitted lid or air holes let excess liquid escape; blocked holes turn lower layers anaerobic and smell. Feed smaller, less‑wet portions of fruit and veg, balancing each feed with enough bedding to prevent leachate. Check moisture often: the bin should feel like a wrung‑out sponge. Bad odors, pooling liquid, or worms clustering on top signal trouble. Lightly fluff or relocate saturated zones, and dry old castings with extra bedding to maintain a healthy, aerated environment. For indoor kitchen scraps, consider using a charcoal filter system to manage odors while you troubleshoot moisture levels. Clogged drainage holes often cause excess moisture buildup.
Key Causes of Excess Moisture in a Wet Worm Bin
You’re probably adding too many watery scraps or dumping liquid too quickly, which floods the bin before the worms can process it. If you don’t balance those additions with enough dry bedding—like shredded cardboard or newspaper—the excess water has nowhere to go and turns the substrate soggy. The result is a sticky, low‑oxygen environment that stresses the worms and invites pests. High‑water‑content foods can push moisture levels above the safe threshold, leading to leachate formation. Consider using activated carbon filters to help manage excess moisture and odors in your vermicompost system.
Moisture Food Additions
Why do some feedings turn your worm bin into a swamp? You’re probably loading high‑moisture produce—watermelon, honeydew, cantaloupe, tomatoes—into the bin without enough dry bedding. Those scraps are 80‑90% water, and each bite adds a flood that the bedding can’t soak up if you overfeed.
When you dump large amounts of juicy fruit or vegetables faster than microbes and worms can process them, wet spots form, leachate pools, and odors appear. Monitoring moisture levels with temperature and moisture management helps identify when conditions become too saturated for proper decomposition.
Adding shredded newspaper, cardboard, or coconut coir at feeding time creates a carbon buffer that absorbs excess liquid. Without that dry layer, the bin stays soggy, fungi and mites thrive, and worms retreat.
Balance wet foods with ample dry bedding to keep the bin breathable and manageable. Add fresh dry bedding to reduce condensation and prevent worms from escaping onto the bin’s walls.
Rapid Water Application
How quickly you pour water into a worm bin can make all the difference between a thriving compost and a soggy mess. When you dump a large volume at once, the bedding can’t absorb it fast enough, so leachate pools and localized wet spots form before moisture redistributes. Clogged drainage holes or blocked air vents trap that liquid, preventing evaporation and forcing water to linger in the bottom layer. Adding high‑moisture scraps—melons, tomatoes, or shredded vegetables—creates sudden spikes because those foods release 80‑90 % water as they break down. Mist or small increments let the substrate soak gradually, while a top‑down pour compacts the material and pushes water into saturated pockets. Poor airflow compounds the problem, slowing drying and encouraging worms to congregate in the wet zones. During warmer months, keep moisture levels balanced to prevent excess water accumulation that can stress your worm population. Maintaining moisture near field capacity ensures worms stay hydrated without creating anaerobic conditions.
Inadequate Dry Bedding
If you let the bedding dry out too much, the bin loses its moisture buffer and excess water has nowhere to go. A thin, depleted layer can’t soak up the liquid from food scraps, so free water pools and the texture turns soggy. You’ll notice that as bedding breaks down, its fibers lose capacity to hold air and moisture, making the bin feel wetter and more anaerobic. Adding fresh, carbon‑rich material like shredded paper or cardboard restores the sponge effect, improves drainage, and keeps the worm habitat breathable. Quality coir products with exceptional water-holding capacity can absorb several times their weight in water, making them ideal for restoring moisture balance when bedding becomes depleted. Worms require moisture to breathe oxygen through their skin, and dry skin can cause suffocation.
| Issue | Effect | Fix |
|---|---|---|
| Low bedding volume | Free water accumulates | Top up with dry carbon bedding |
| Depleted fibers | Poor air flow, odor | Replace old bedding regularly |
| Compacted layer | Drainage blocked | Loosen or add coarse material |
| High‑water scraps | Moisture overload | Balance feed‑to‑bedding ratio |
| Shrinking bedding | Reduced buffer | Maintain generous depth |
Rapid Water Additions That Suffocate Your Bin
Rapid water additions can overwhelm your bin’s absorption capacity, turning a well‑balanced “wrung‑out sponge” into a soggy mess. When you pour a lot of liquid at once, the bedding can’t spread it evenly, so wet pockets form and air spaces shrink. Oxygen drops, anaerobic microbes thrive, and foul smells appear. Your worms scramble for air, often climbing out of the saturated zone, and the castings become muddy and hard to separate.
Leachate pools at the bottom, a clear sign you’ve exceeded the bin’s drainage limit. To keep things healthy, mist the top layer, mix, and test with the squeeze method before adding more. If liquid builds up, toss in shredded newspaper or leaves to restore balance. Adding dry browns helps re‑absorb excess moisture and restores proper aeration. Activated charcoal filters can also help neutralize odors that develop from overly wet conditions.
Wet Food Scraps That Disrupt Moisture Balance

Why do your worm bins turn soggy the moment you toss in a handful of juicy fruit? Those high‑moisture scraps flood the carbon‑to‑water balance, and if you don’t offset them, the bin becomes a liquid pool. The key is to pair wet feedstock with absorbent bedding right away.
- Add dry material – shredded cardboard or brown paper soaks up excess juice.
- Limit volume – keep juicy items to a small portion of each feeding.
- Mix immediately – blend scraps into bedding to avoid pockets of slime.
If you skip these steps, fermentation starts, slime spreads, and the vermicompost turns mushy instead of crumbly. Consider using leachate reservoirs to collect excess liquid and prevent waterlogging while maintaining proper airflow through the bin. Balance wet scraps with dry carbon, and your worms stay happy. Moisture should be loosely damp, like a wrung‑out sponge.
Drainage & Airflow Problems That Create Soggy Vermicompost
When drainage holes clog and airflow stalls, your vermicompost turns soggy fast. Blocked holes trap excess liquid, letting water pool and create anaerobic pockets, especially in the bottom layers where worms need oxygen. If the bin sits directly on a surface, there’s no escape path for that liquid; elevating the bin on bricks or a tray lets water drip away and prevents a soggy base.
Compacting the compost or overpacking bedding squeezes out pore space, slowing both drainage and air exchange. Poor design—missing side vents or a coarse drainage layer—exacerbates the problem, leaving moisture stuck and odors rising. Regularly inspect and clear the base, loosen compacted material, and keep a clear airflow channel to maintain a dry, healthy worm habitat. Installing 360-degree airflow design features helps reduce odors and moisture accumulation in indoor vermicomposting units. Tiny worm size limits daily feeding capacity, so excess scraps can quickly saturate the bin.
How Dry Bedding Saves a Wet Worm Bin From Getting Soggy

You can toss a handful of dry newspaper, cardboard, or coir onto the wet spots, and the bedding will soak up the excess moisture. By keeping the material fluffy and airy, you preserve the aeration worms need to breathe and move. This simple, repeated addition also prevents compacted clumps and the foul odors that come with anaerobic conditions. Shredded paper is especially effective for retaining moisture while staying lightweight. Materials like kraft paper can expand up to 200% when fluffed, creating additional airflow and cushioning within the bin.
Absorb Excess Moisture
Ever notice how a handful of shredded cardboard or newsprint instantly turns a soggy worm bin into a wrung‑out‑sponge texture? That’s dry bedding at work, pulling free water out of the mud and restoring the ideal moisture balance for vermicomposting. When you add carbon‑rich material, it acts like a sponge, buffering sudden wet influxes from melons, tomatoes, or cucumbers. The result is a dryer, more aerated bin that stays odor‑free.
How to absorb excess moisture:
- Toss a couple of handfuls of shredded cardboard or newsprint into the bin and mix thoroughly.
- Layer a thin sheet of dry leaves on top to wick moisture upward.
- If water still seeples when you squeeze a handful, repeat the process until the bedding feels like a wrung‑out sponge. Proper air circulation throughout the bin also helps evaporate trapped moisture more efficiently.
Add gradually, reassess, and keep the bin moist but not dripping.
Peat moss can also be added on top of kitchen scraps as a dry bedding option to further regulate moisture.
Maintain Aeration and Structure
Why does a soggy worm bin turn into a smelly, slow‑moving mess? Waterlogged bedding plugs pore spaces, starving worms and microbes of oxygen and pushing the pile toward anaerobic decay. The result is foul odors, sluggish processing, and stressed worms.
To keep aeration high, add dry bulking material—shredded newspaper, cardboard, peat moss, or coconut coir—whenever you feed watery scraps like watermelon or cantaloupe. Mix it evenly so you avoid wet clumps and dry islands. Fluff the bedding regularly; turning creates air channels and prevents the bin from compacting into mud. A dry top layer shields the surface from sealing, while the “damp sponge” texture you aim for stays breathable. This balance restores airflow, speeds casting, and keeps your worm population thriving. Carbon‑rich bedding also helps maintain a stable C:N ratio, supporting healthy worm digestion.
Warning Signs Your Worm Bin Is Too Wet (and Quick Fixes)
When excess moisture builds up in your worm bin, the first clues appear as soggy, compacted bedding and a faint, sour odor that signals anaerobic activity. You’ll also notice puddles at the bottom, leachate seeping out, and worms clustering on the surface. Quick fixes keep the system healthy:
Excess moisture yields soggy bedding, sour odor, puddles, and surface‑clustering worms—signs of anaerobic conditions.
- Add dry bedding – shredded newspaper, cardboard, or coconut coir absorbs water and restores a “wrung‑out sponge” texture.
- Improve airflow – loosen compacted material, clear blocked air holes, and ensure drainage holes are open.
- Adjust feeding – pause wet scraps, balance with dry carbon, and avoid over‑feeding.
Regularly squeeze a handful of bedding; if it drips, cut back on moisture. Keep the bin sheltered from rain, and monitor daily to prevent anaerobic conditions. Worms require a moist environment for respiration, so maintaining roughly 80% moisture is essential.
Frequently Asked Questions
How Often Should I Replace the Bedding in a Worm Bin?
You should replace the bedding roughly every six to nine months, or sooner if it collapses into dense, soggy castings; add fresh dry carbon material regularly to keep moisture balanced and aeration ideal.
Can I Use a Hygrometer to Monitor Vermicompost Moisture?
You can use a hygrometer, but it only tells you air humidity, not the bedding’s water content. Rely on squeeze tests or moisture probes for accurate vermicompost moisture monitoring.
Do Different Worm Species Tolerate Moisture Levels Differently?
You’ll find red wigglers, nightcrawlers and Indian blue worms each have distinct moisture tolerances, so you should match species to your bedding’s dampness, adjusting aeration and watering accordingly.
Is It Safe to Add Coffee Grounds to a Wet Bin?
Yes, you can add coffee grounds to a wet bin if you keep them dry, mix them with fluffy carbon, and limit them to under 25% of the total mass, ensuring good aeration.
What Temperature Range Affects Moisture Retention in Vermicompost?
You’ll find that 15‑25 °C (59‑77 °F) keeps moisture balanced; below 10 °C evaporation slows, making it soggy, while above 35 °C dries quickly unless ventilation’s poor, which can trap water.
In Summary
By managing moisture, you keep your worm bin healthy and productive. Add food and water gradually, balance wet scraps with dry bedding, and ensure proper drainage and airflow. Watch for soggy spots, foul smells, or sluggish worms—those are your cues to act fast. With these simple steps, you’ll prevent a swampy vermicompost, keep your worms thriving, and harvest rich, crumbly compost for your garden.


Leave a Reply