
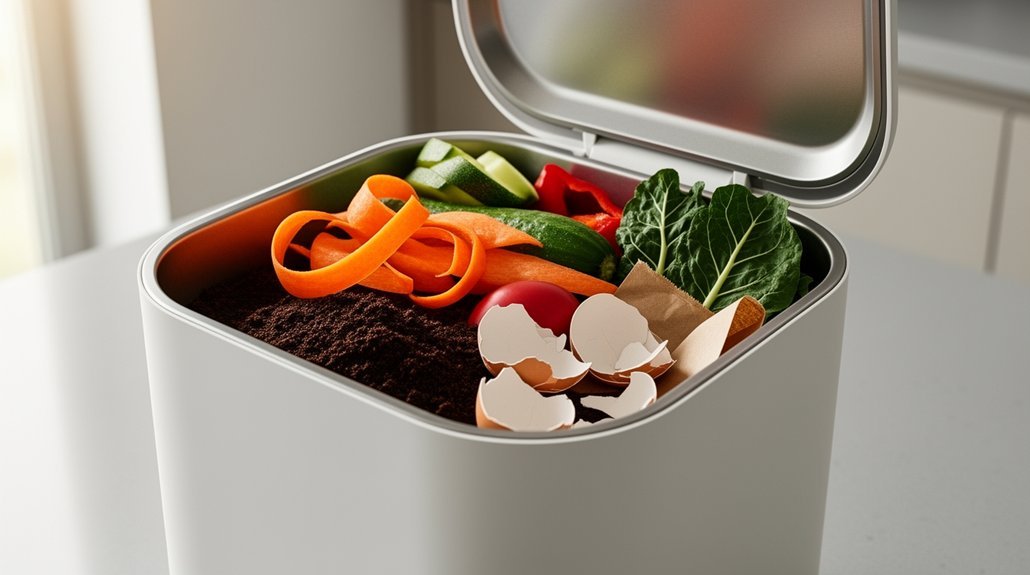
You’ll succeed with fruit and vegetable scraps, coffee grounds, eggshells, and bread as greens, balanced with dry leaves, shredded cardboard, and paper as browns in a 1:3 ratio. Avoid meat, dairy, oils, and cooked grains—they’ll attract pests and create foul odors. Layer your materials with four to eight inches of browns covering each food addition, maintain 50–60% moisture like a wrung-out sponge, and turn regularly for aeration. Follow local regulations before starting, and you’ll discover exactly which materials transform your kitchen waste into garden gold.
Balance Greens and Browns to Stop Odors
Because indoor composting bins rely on air circulation rather than outdoor ventilation, you’ll need to carefully balance nitrogen-rich “greens” (food scraps, grass clippings) with carbon-rich “browns” (leaves, cardboard, wood chips) to prevent odors.
Browns absorb excess moisture and create structure that lets air move through your pile. This airflow prevents anaerobic conditions—the primary cause of rotten smells. Aim for a 2:1 to 4:1 browns-to-greens ratio by volume, with many composters finding success at 3:1 or 4:1.
Cover each food scrap addition with a generous brown layer, keeping only brown material visible at the surface. If your bin becomes wet or smells bad, add more browns in small batches. For bins where traditional aeration isn’t possible, consider using bokashi fermentation as an alternative method that handles all kitchen waste including meat and dairy. Regular turning re-invigorates microbes and accelerates decomposition in indoor systems. Store dry materials nearby for quick adjustments when you add kitchen scraps.
Core Compost Materials: The Complete List
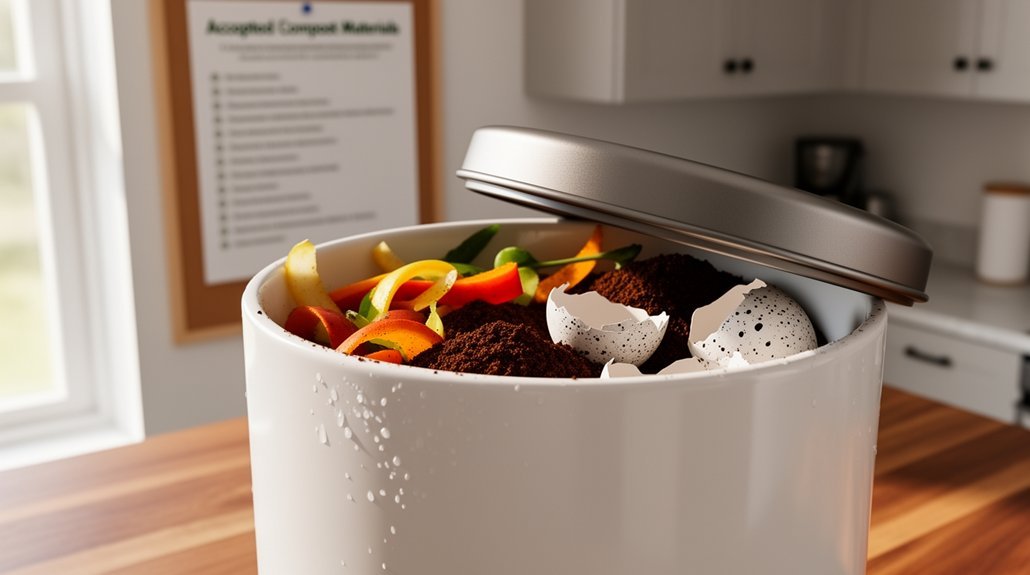
What materials actually belong in your indoor compost bin? You’ll want to build your pile with proven categories. Start with fruit and vegetable scraps—peels, cores, trimmings, and spoiled produce all work well. Add stale bread, grains, pasta, and rice from your pantry. Coffee grounds, loose leaf tea, and eggshells are indoor composting staples. For browns, use dry leaves, shredded cardboard, paper towels, and untreated wood chips. Garden trimmings and plant stalks contribute nicely when disease-free. You can also incorporate certain manures—cow, goat, and rabbit varieties are solid choices, though chicken manure requires careful temperature management. Animal bones appear on some lists too. Avoid meat, fish, and dairy in home systems unless you’re running a specialized setup. To prevent odors and fruit flies, empty your compost crock every 3-5 days or when you notice fullness or smell. When adding greens and browns, aim for a 50/50 ratio by volume to maintain proper nutrient balance and support effective decomposition.
What to Compost First (and Why)
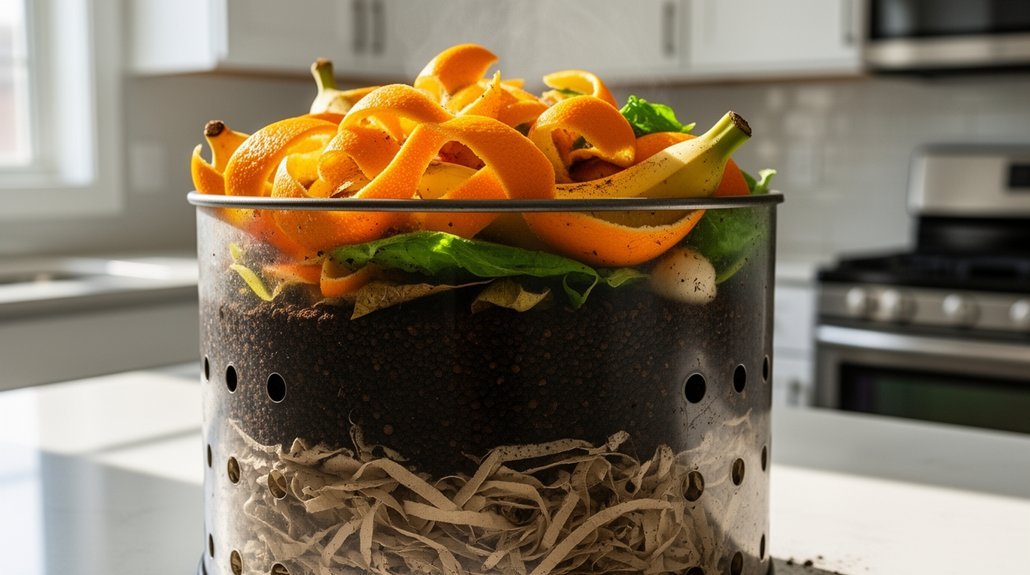
You’ll want to start your indoor compost with the easiest materials: kitchen scraps like fruit and vegetable peels paired with dry leaves or shredded cardboard. Layer your browns first, then add your greens, and always bury food scraps under 4 to 8 inches of dry material to prevent odors and pests. This straightforward approach establishes decomposition quickly while keeping your system balanced and manageable from day one. For herbs that have declined and show yellowing leaves or wilting, you can add them directly to your compost bin once they’re past their prime for harvesting. Maintaining a 1:3 green-to-brown ratio ensures bacteria, fungi, and insects can break down organic materials efficiently throughout your composting cycle.
Start With Easy Scraps
When you’re beginning indoor composting, why not start with materials that’ll decompose quickly and reliably?
Fruit and vegetable scraps are your best bet—banana peels, apple cores, citrus peels, carrot tops, and potato peels break down fast and manage odors well. Add coffee grounds and tea bags to your collection routine; they’re nitrogen-rich and require minimal effort to incorporate.
These soft, high-moisture kitchen scraps decompose predictably, making them ideal for beginners. You’ll see visible progress quickly, which keeps your motivation high. Eggshells work too, though they break down slower than soft materials. As your indoor system matures, worms will deposit their castings throughout the composting medium, further accelerating nutrient availability and soil enrichment.
Pair these food scraps with dry leaves or shredded cardboard to balance moisture and prevent odors. Spiral-head mixing tools can help incorporate dry materials evenly throughout your compost pile for optimal decomposition. This straightforward combination gives you everything you need to establish a successful indoor composting system immediately.
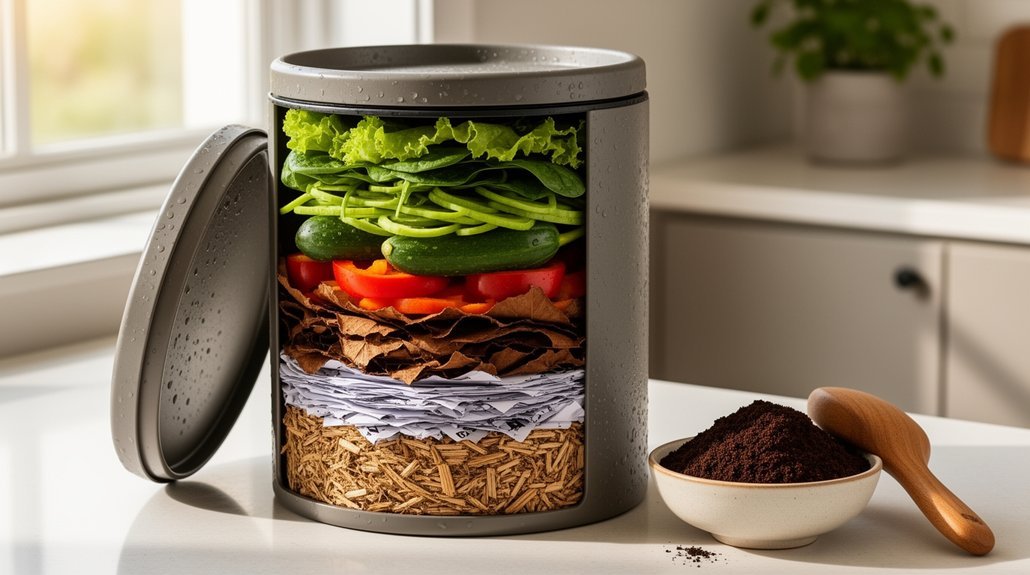
Layer Browns First Always
Because browns absorb moisture and create airflow pathways, they’re your composting foundation—literally. You’ll start by layering carbon-rich materials at the bin’s bottom to prevent compaction and support microbial activity.
| Material | Structure | Airflow |
|---|---|---|
| Shredded leaves | Excellent | Good |
| Cardboard strips | Good | Excellent |
| Straw | Excellent | Excellent |
This brown base acts as a buffer between wet food waste and your bin’s surfaces, reducing odor and slimy conditions. You’ll maintain a 2:1 to 4:1 browns-to-greens ratio by starting with this carbon layer. Cover each food addition with dried leaves or shredded paper, then finish feedings with another brown layer. This practice deters fruit flies, contains moisture, and keeps your indoor bin fresh. For accelerated decomposition, consider using compost starter cultures to introduce bacterial and fungal activity that enhances microbial breakdown. Brown materials feed soil-dwelling organisms and support the decomposition process from bottom to top. You’re not just adding material—you’re engineering proper decomposition from the start.
Paper, Cardboard, and Natural Fibers
How can paper and cardboard become valuable assets in your indoor composting system? You’ll find they’re excellent carbon-rich browns that balance nitrogen-heavy greens like food scraps.
Here’s what you can safely add:
- Unbleached newspaper, office paper, and cardboard boxes when shredded or torn
- Paper towels, napkins, and coffee filters free of chemicals or bodily fluids
- Corrugated cardboard layered with kitchen scraps to manage moisture and odor
- Natural fiber items like untreated wooden stirrers and unbleached tea bags
Avoid glossy magazines, waxed parchment, plastic-lined paper cups, and heavily coated products—they’ll slow decomposition. Brown cardboard works better than bleached varieties since it undergoes less processing. Shred everything into smaller pieces to accelerate breakdown and improve airflow in your indoor bin. Paper and cardboard account for 23% of household waste, making their composting a meaningful contribution to waste reduction efforts. Consider layering these materials with food-grade glass weights to help optimize moisture distribution and prevent material from floating to the surface during the fermentation process.
Materials That Will Ruin Indoor Compost

Certain materials can derail your indoor composting efforts by introducing toxins, triggering microbial imbalances, or leaving persistent contaminants in your finished compost. You’ll want to avoid large quantities of citrus peels, onion, and garlic scraps, as their natural compounds slow decomposition and intensify odors.
Cooked grains and starchy foods trigger rapid bacterial blooms that consume oxygen quickly, creating anaerobic pockets within hours.
Cooking oils and greasy residues form dense clumps resistant to breakdown, reduce airflow, and attract pests. Fats and oils are particularly difficult for bacteria to break down and can linger in your pile for extended periods. For superior compost quality, consider supplementing your finished product with organic fertilizer products to boost nutrient content.
Seeds and weed-risk materials can sprout in finished compost, especially in low-heat systems.
Finally, you must exclude produce stickers, plastic wrappers, foil, treated charcoal, and synthetic fibers—these non-organic contaminants won’t break down and compromise your compost quality.
Why Meat, Dairy, and Oils Don’t Work
When you add meat, dairy, or oils to your indoor composter, you’re inviting pests like rats, flies, and rodents while simultaneously creating the foul odors that’ll make your space unbearable.
These materials decompose through putrefaction rather than clean aerobic breakdown, shifting your pile toward anaerobic conditions that slow the entire process and degrade your final compost. Decomposing meat can harbor dangerous pathogens including listeria, E. coli, and salmonella. Using compostable bags can help contain odors during the process, but won’t prevent the fundamental decomposition issues these materials create.
The grease and fat form barriers that block airflow and water movement, starving the microbes that actually drive decomposition and leaving you with a slimy, slow-rotting mess.
Attraction Of Unwanted Pests
Why do meat, dairy, and oils create so much trouble in indoor composting systems? You’re inviting pests into your home. These materials emit strong odors that travel beyond your bin, attracting rodents, raccoons, flies, and insects. Here’s why they’re problematic:
- Animal-based scraps remain recognizable longer than plant matter, making them easier for pests to locate and target
- High-fat and high-protein foods resemble concentrated food sources that scavengers actively seek out
- Dairy products spread through your pile, increasing odor exposure and fly attraction. Excess moisture from dairy can create the soggy conditions that particularly accelerate pest colonization.
- Oils cling to bin surfaces, creating persistent scent trails that signal food availability
Even small amounts can trigger pest activity in poorly managed systems. Your indoor environment lacks the controls needed to safely break down these attractants before wildlife arrives, unlike commercial composting facilities that maintain temperature and microbial conditions to neutralize odors rapidly.
Decomposition And Odor Problems
Beyond attracting pests, meat, dairy, and oils cause another serious problem in indoor composting systems: they generate foul odors that linger in your home. Animal proteins and fats break down into volatile compounds that produce putrid smells, while dairy sours quickly in sealed bins. Fats decompose slowly, leaving offensive residues that coat materials and trap moisture.
In enclosed indoor spaces, excess moisture promotes anaerobic decomposition, creating hydrogen sulfide—that rotten egg smell. Your sealed bin traps these gases, intensifying odors indoors. Proper 360° ventilation systems can help mitigate these issues in indoor composting setups. This is why regular turning and aeration are impossible in completely sealed systems without active mechanical intervention.
Standard home compost systems lack the heat, volume, and active aeration needed to manage these inputs effectively. Keep meat, dairy, oils, and sauces out of your indoor bin. Instead, stick with plant-based materials balanced with carbon-rich browns for successful, odor-free composting.
Aerobic System Breakdown Risk
How does your indoor compost system maintain the aerobic conditions it needs to function properly? When you add meat, dairy, and oils, you risk destabilizing that delicate balance. These materials create specific problems:
- Dense, wet pockets that block oxygen flow and shift decomposition toward putrefaction
- Hydrophobic coatings from fats that prevent even moisture and microbial contact
- Microbial imbalances where excess nitrogen overwhelms carbon ratios and slows breakdown
- Pathogen survival in inconsistent temperature zones, requiring sustained heat for safe elimination
Even controlled indoor systems struggle with these additions. Excessive oils inhibit microbial growth, while meat and dairy demand reliable temperature maintenance your composter may not consistently achieve. Meat decomposition can involve dangerous bacteria such as E. coli, listeria, or salmonella that may transfer to surrounding plants if the compost pile becomes contaminated. You’re better served sticking with approved food scraps and plant-based materials to keep your aerobic system functioning predictably.
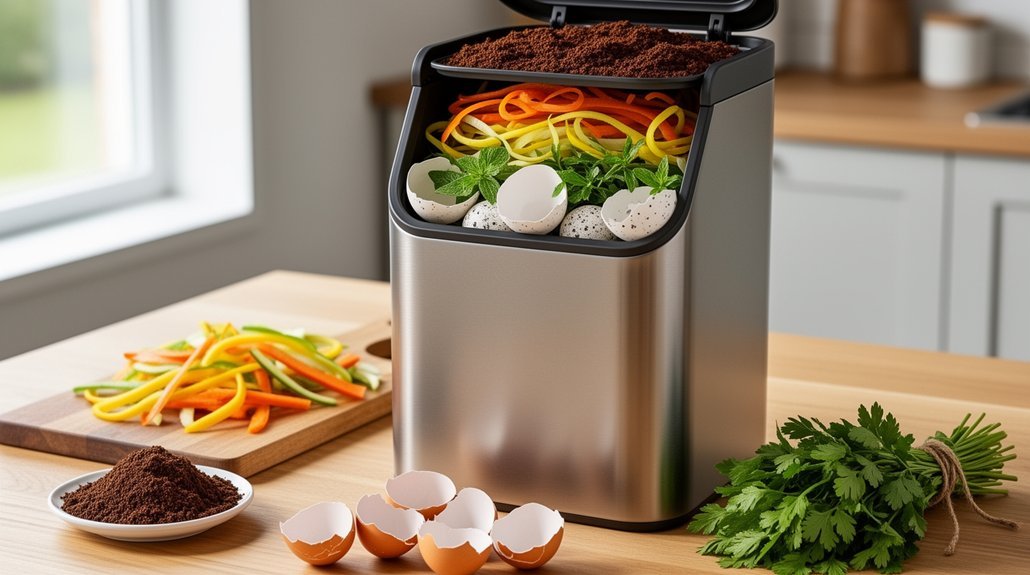
Chop, Layer, and Cover: Setup Essentials
Once you’ve gathered your materials, the way you prepare and arrange them in your bin dramatically affects decomposition speed and odor control. Start by chopping scraps into 1- to 2-inch pieces—increased surface area accelerates microbial breakdown. Begin with a 4- to 6-inch layer of browns like shredded newspaper or cardboard to absorb excess moisture and establish airflow.
Layer greens and browns in a 1:2 or 1:3 ratio, alternating thin layers rather than dumping large amounts at once. This balanced approach maintains steady decomposition.
After each addition, cover fresh food scraps with 4 to 8 inches of dry leaves or torn cardboard. This critical step reduces odor, prevents fruit fly attraction, and keeps your bin manageable. Consistent covering supports even decomposition throughout your system. Consider using charcoal filters in your bin design to help neutralize odors while allowing proper ventilation.
Moisture and Airflow: Make or Break Your Bin
Your bin’s setup is only half the battle—what happens inside determines success. You’ll need to balance moisture and airflow carefully to keep your compost thriving.
Aim for 50–60% moisture, like a wrung-out sponge. Too much water creates anaerobic conditions and odors; too little stalls microbial activity. Indoor systems require closer monitoring since airflow is typically limited.
Establish these critical practices:
- Install drainage trays or bottom vents to prevent leachate buildup
- Add air holes spaced every 4–6 inches along bin sides
- Monitor moisture frequently and drain excess liquid promptly
- Turn or fluff material regularly to restore oxygen pockets
Without proper ventilation, material compacts, heat distributes unevenly, and smells intensify. Aerobic conditions are essential for the most efficient bacteria in your pile, so regular maintenance keeps decomposition efficient and your indoor space odor-free.
Boost Your Pile: Hair, Leaves, and Yard Scraps
Why do most indoor composters struggle to balance their piles? You’re likely missing key materials that create equilibrium between nitrogen and carbon.
Hair is your secret weapon. It contains about 15% nitrogen and breaks down slowly, feeding microorganisms over time. Disperse strands throughout your pile rather than clumping them—small, separated pieces decompose faster. Mix hair with dry leaves, which serve as your carbon base and help balance nitrogen-heavy inputs like food scraps.
You’ll want to follow the EPA’s guidance: add two to three times more browns than greens by volume. Layer hair with leaves and yard scraps like grass clippings, plant stalks, and small twigs. These combinations create air spaces, improve structure, and support steady decomposition while reducing odors in your enclosed bin. Aim for a damp sponge-like consistency to ensure your microbes remain active and your compost progresses efficiently.
Before You Start: Know Your Local Rules
Before you set up your indoor compost system, you’ll need to understand what your local government requires. SB 1383 mandates organic waste collection programs across California, but rules vary remarkably by jurisdiction. Here’s what you should verify:
Before setting up indoor composting, verify your local government’s SB 1383 requirements, as rules vary significantly by jurisdiction.
- Contact your local waste management program to confirm participation requirements for your housing type
- Determine whether curbside collection, self-haul to approved facilities, or indoor composting satisfies local ordinances
- Identify which organic materials your jurisdiction accepts in collection services
- Check for any exemptions or waivers that might apply to your situation
Your local program’s specific rules determine how you’ll separate organics and where you can dispose of them. Some jurisdictions allow self-haul to composting facilities, while others require curbside participation. Jurisdictions must provide organic waste collection to all residents and businesses as part of their mandated programs. Don’t assume indoor composting alone meets your obligations.
Frequently Asked Questions
Can I Compost Tea Bags With Staples, or Must I Remove Them First?
You can compost tea bags with staples left on, though you’ll want to remove them if you’re hand-sifting or turning your pile often. The bigger concern is whether your tea bag’s material—not the staple—actually decomposes.
Do Compostable Bags and Foodservice Containers Break Down in Home Compost Bins?
You shouldn’t rely on compostable bags breaking down in your home bin. They often don’t fully degrade under typical backyard conditions. Skip them and compost loose organic waste instead for better results.
Why Should I Avoid Onions and Garlic in Indoor Composting Systems?
You should avoid onions and garlic because they release strong sulfur compounds that intensify indoor odors, stress worms, create anaerobic pockets, decompose slowly, and attract pests in confined spaces.
How Often Should I Check Moisture Levels and Adjust My Indoor Bin?
You should check your indoor bin’s moisture weekly as a standard practice. Check more frequently when you’re adding watery scraps or after adjusting coverage and airflow. Monitor regularly—indoor systems dry out or saturate quickly.
What’s the Difference Between Home Composting and Municipal Composting Acceptance Standards?
You can compost meat and dairy in municipal facilities because they’re temperature-controlled, but you shouldn’t add them to home bins. Municipal systems accept certified compostable packaging; home systems don’t reliably process it.
In Summary
You’re now ready to start your indoor composting journey. You’ll create rich, nutrient-dense compost by balancing greens and browns, maintaining proper moisture and airflow, and avoiding problematic materials. You’ll transform your kitchen scraps into gardening gold while reducing waste. Remember to check your local regulations first, then layer, monitor, and adjust your bin as needed. You’ve got everything you need to succeed.


Leave a Reply