

You’ll transform kitchen scraps and yard waste into rich compost by balancing carbon-rich browns with nitrogen-packed greens at a 3:1 ratio. Start with coarse materials for airflow, layer alternately, and maintain 50–70% moisture while turning regularly. Keep temperatures between 131–150°F for optimal decomposition. Avoid meat, dairy, and treated materials. Monitor odor, texture, and heat to catch problems early. Get the fundamentals right, and you’ll reveal the secrets to faster, odor-free results.
Our Recommended Product on Amazon

As an Amazon Associate we earn from qualifying purchases.
Building Your First Compost Bin or Pile
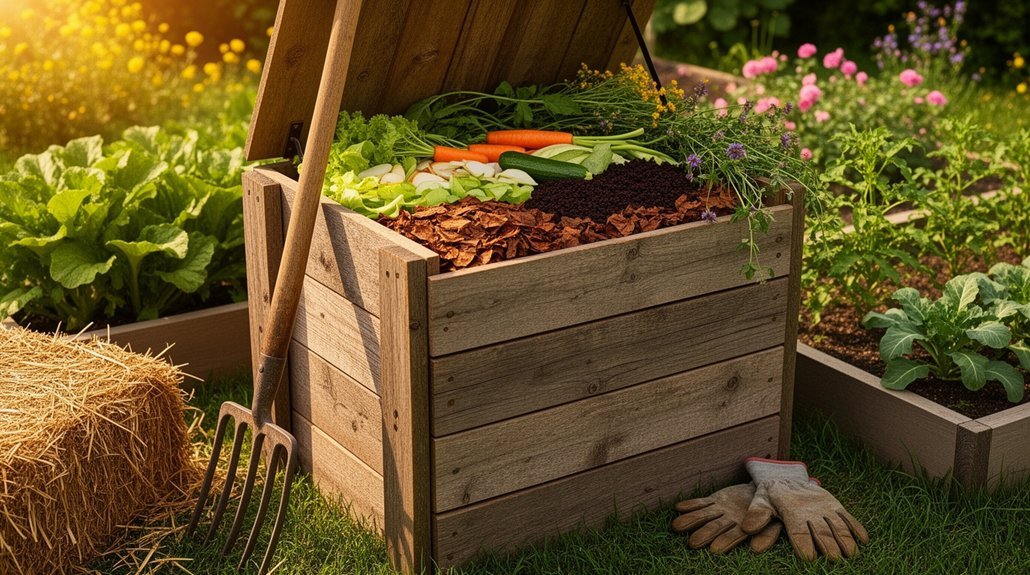
Before you start layering materials, you’ll need to pick the right spot for your compost. Choose a location near your kitchen or garden for convenient access, but far enough from living areas to minimize odor and flies. Select level ground that won’t shift or settle unevenly. Ensure you have room to turn, water, and harvest your finished compost, with a hose nearby for moisture adjustments. Protect your pile from direct sun, wind, and rain by positioning it in a location with natural shelter from trees or shrubs, which will help maintain consistent moisture and temperature.
Next, establish a proper foundation. Aim for at least 1 cubic yard—roughly 3 feet by 3 feet by 3 feet—to help the pile heat effectively. Start with a 4- to 6-inch base layer of coarse material like brush trimmings or sticks to improve drainage and airflow. Build your bin using lumber, pallets, or wire for containment while maintaining air circulation. For kitchens looking to pre-process food scraps before adding them to your outdoor pile, countertop food cyclers can reduce waste volume and accelerate decomposition.
Why Home Composting Works: The Carbon-to-Nitrogen Balance
You’ll need to understand how browns and greens work together to create the ideal carbon-to-nitrogen ratio that drives successful composting.
The science points to a sweet spot around 30:1 by weight—or roughly 3 parts browns to 1 part greens by volume—where microbes get enough carbon for energy and nitrogen for growth. As decomposition progresses, two-thirds of the carbon is released as carbon dioxide while the remaining third becomes incorporated into microbial cells. Proper odor control and ventilation during this process helps manage moisture and prevent ammonia buildup in your compost pile.
Get this balance right, and you’ll watch your pile heat up and break down quickly; miss it, and you’re either stuck with a slow, cold pile or battling ammonia odors.
Browns and Greens Explained
The magic of home composting relies on balancing two material types: browns and greens.
Browns are carbon-rich materials like leaves, straw, and cardboard that supply energy for microbes. Greens are nitrogen-rich materials like grass clippings and kitchen scraps that fuel rapid decomposition. You need both because:
- Carbon provides energy while nitrogen supports microbial growth and protein formation
- Browns improve airflow and absorb excess moisture; greens add nutrients and heat
- Imbalanced piles decompose slowly, fail to heat, or develop odors
Too many browns starve your pile of nitrogen. Too many greens create wet, dense, smelly conditions. When you mix them properly, you’ll achieve steady decomposition and stable compost. For faster results, many gardeners introduce compost starter bacteria to accelerate the microbial breakdown process. Remember: fresh grass clippings are green, but dried grass becomes brown. Material function depends on condition, not just appearance. Note that color alone is not a reliable indicator of whether a material will function as a brown or green in your compost pile.
The Ideal Ratio Formula
How do you know if your pile’s working? You’re balancing carbon and nitrogen correctly. Microbes need carbon for energy and nitrogen for protein synthesis—when you nail this balance, they multiply rapidly and generate heat.
Aim for a 30:1 carbon-to-nitrogen ratio by weight, though you’ll find success anywhere from 25:1 to 30:1. Stay within the practical range of 20:1 to 40:1. Below 20:1, you’ll risk ammonia odors and nitrogen loss. Above 35:1, decomposition stalls because microbes can’t reproduce fast enough.
A balanced pile reaches 131°F to 150°F, accelerating breakdown and suppressing pathogens. Your rough guide: three parts browns to one part greens by volume. Remember, identical volumes don’t guarantee identical ratios—material composition varies widely. Turning indoor compost every 3-5 days using a small pitchfork or trowel helps the mixture heat up and decompose effectively. Moisture content should remain between 50-70% throughout the composting process to maintain optimal microbial activity.
Balancing for Decomposition Success
Getting that 30:1 ratio right matters because it directly fuels the microscopic workforce that makes composting happen. When you balance carbon and nitrogen properly, you’re feeding microbes both energy and protein-building nutrients simultaneously. This sparks rapid microbial multiplication and faster decomposition.
Here’s what happens when you nail the balance:
- Your pile heats up actively as mesophilic microbes initially colonize the pile, raising temperatures to 20–45°C before thermophilic microbes take over at higher temperatures to accelerate the process further
- Decomposition accelerates significantly compared to carbon-heavy or nitrogen-heavy extremes
- Organic matter stabilizes more completely into finished compost
Without balance, you’re working against yourself. Too much nitrogen loses 20–35% as ammonia gas and creates odors. Too much carbon starves microbes of nitrogen, slowing everything down. For indoor composting systems like bokashi fermenters or worm composting bins, tight-sealing lids and proper material layering help maintain this critical balance while containing odors. Your finished compost reflects this: its much lower C:N ratio shows microbes have consumed carbon and converted nitrogen into plant-available forms.
Choosing Browns and Greens for Your Compost
You’ll want to use browns—like dry leaves, straw, and shredded paper—to create airflow and structure in your pile, while greens such as food scraps, grass clippings, and coffee grounds supply the nitrogen that fuels decomposition. The key to success is balancing these materials at roughly a 3:1 browns-to-greens ratio, though you can adjust based on how your pile looks and feels. Layer your browns and greens lasagna-style, always covering greens with browns to minimize odor and keep pests away. To further reduce odors, consider using activated charcoal filters designed for compost bins to absorb unwanted smells from your pile. An improper mix may cause your pile to not heat up or emit unpleasant odors, so monitor your compost and adjust the ratio as needed.
Brown Materials for Aeration
Why do composters emphasize browns so heavily? Browns create the foundation for successful decomposition by providing carbon energy and maintaining essential airflow.
You’ll find several excellent brown materials that maximize aeration:
- Dry leaves and straw – These free or inexpensive materials create air pockets naturally while breaking down slowly enough to sustain pile structure.
- Wood chips and shredded wood – They add long-lasting structural support, keeping your pile open and preventing compaction.
- Twigs and small wood pieces – When broken into fragments, these decompose faster while maintaining porosity.
Chop your brown materials before adding them to speed decomposition. Build your pile with a dry brown base layer first, then mix browns throughout rather than layering them only on top. This approach ensures consistent oxygen availability for your decomposers. For those with limited outdoor space, bokashi bran systems offer an alternative method to process kitchen scraps before incorporating them into traditional compost piles. Pine needles are carbon-rich and useful as brown material that aids balance with nitrogen-rich greens.
Green Materials for Nitrogen
While browns provide the structural backbone of your compost pile, greens supply the nitrogen that fuels microbial activity and accelerates decomposition. You’ll find greens in your kitchen and yard—vegetable scraps, fruit waste, coffee grounds, grass clippings, and fresh plant trimmings all work well. These nitrogen-rich materials are wet, soft, and decompose quickly.
For faster results, consider adding manure from chickens, horses, cows, or rabbits. Chicken manure is particularly nitrogen-dense and speeds pile heating.
Balance is essential. Layer greens with browns to prevent compaction, odor problems, and the slimy texture that thick grass clippings can develop. Treated lawn clippings require caution—verify they’re safe before composting. In cooler systems, weed seeds may survive, so ensure your pile reaches approximately 140°F for effective seed elimination. Kitchen compost crocks can help you collect and store green materials conveniently before adding them to your outdoor compost pile.
Balancing Ratio and Layering
How do you know if your compost pile’s got the right balance of browns and greens? Watch for these warning signs:
- Stinky, rotten odors signal too many greens or poor aeration
- Soggy, slimy texture indicates excess moisture or nitrogen overload
- Pile not heating up suggests insufficient nitrogen content
Aim for a 2:1 to 4:1 browns-to-greens ratio by volume. Layer your materials strategically—add three or four buckets of leaves for every bucket of kitchen scraps. This distribution helps carbon-rich materials surround nitrogen sources, improving airflow and moisture control. Layering increases oxygen flow through the pile by alternating greens and browns rather than mixing them deeply. Consider using enzyme-based accelerators to speed up decomposition of organic matter and enhance microbial activity in your compost system.
What Kitchen and Garden Scraps to Add
Successful composting starts with knowing which kitchen and garden scraps break down efficiently and contribute valuable nutrients to your pile. You can add fruit and vegetable peels, cores, and trimmings without worry. Coffee grounds and crushed eggshells boost nitrogen and calcium respectively. Plain cooked grains, stale bread, and tea leaves work well too. From your garden, grass clippings and fresh plant trimmings pair perfectly with kitchen waste. Chop larger pieces into smaller sections to speed decomposition. Avoid greasy or heavily dressed foods, as they break down unpredictably. Combine your kitchen scraps with dry leaves or shredded paper to maintain proper carbon-to-nitrogen balance. This diverse mix creates nutrient-rich compost faster. For kitchen scraps specifically, a countertop compost bin can store materials conveniently before transferring them to your outdoor composting system. Additionally, you can include nutshells from walnuts, almonds, or pistachios as long as they haven’t been treated or painted, expanding your range of suitable composting materials.
What Never Belongs in Your Compost Bin
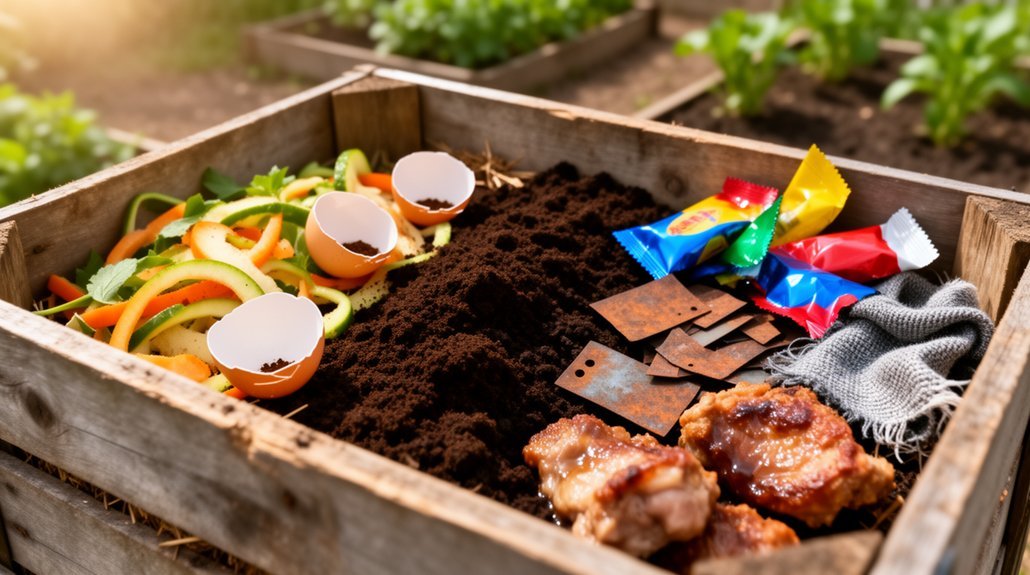
Now that you know what to add to your compost bin, it’s equally important to recognize what absolutely doesn’t belong.
Never add these three categories to your home compost:
- Animal and cooked foods – Meat, fish, dairy, and cooked leftovers attract pests like rats and raccoons while creating foul odors. Baked goods and excess oils similarly invite rodents and slow decomposition. Eggshells are the exception—they can be rinsed, dried, and crushed to contribute calcium to your finished compost.
- Pet and human waste – Dog and cat feces contain disease-causing organisms unsuitable for backyard systems. Cat litter poses contamination risks regardless of labeling.
- Treated materials and synthetics – Pressure-treated wood, pesticide-coated plants, plastics, and bioplastics don’t break down properly and contaminate finished compost with toxic residues or fragments.
Diseased or pest-infested plants also don’t belong since home systems rarely reach temperatures high enough to destroy pathogens. Keep contamination out to ensure quality compost.
Keeping Your Compost Pile Moist, Airy, and Active
Why does your compost pile seem to stall or smell bad? Moisture and oxygen imbalances are likely culprits. You’ll want to maintain a “damp, wrung-out sponge” texture—roughly 50% moisture by weight. Water during turning to reach multiple layers, and use a spray nozzle for controlled application. Mix in wet greens like kitchen scraps or fresh grass clippings to raise moisture naturally.
Equally important is airflow. Turn active piles one to two times weekly to replenish oxygen and prevent compaction. Coarser materials like shredded branches help maintain air spaces throughout your pile. The microorganisms driving decomposition require this balanced interaction between moisture and oxygen to thrive.
Monitor conditions with a squeeze test: material should hold together without dripping. If your pile’s too wet, add dry browns and turn it. If it’s too dry, add water and greens, then mix thoroughly.
Fixing Compost Problems Before They Spread
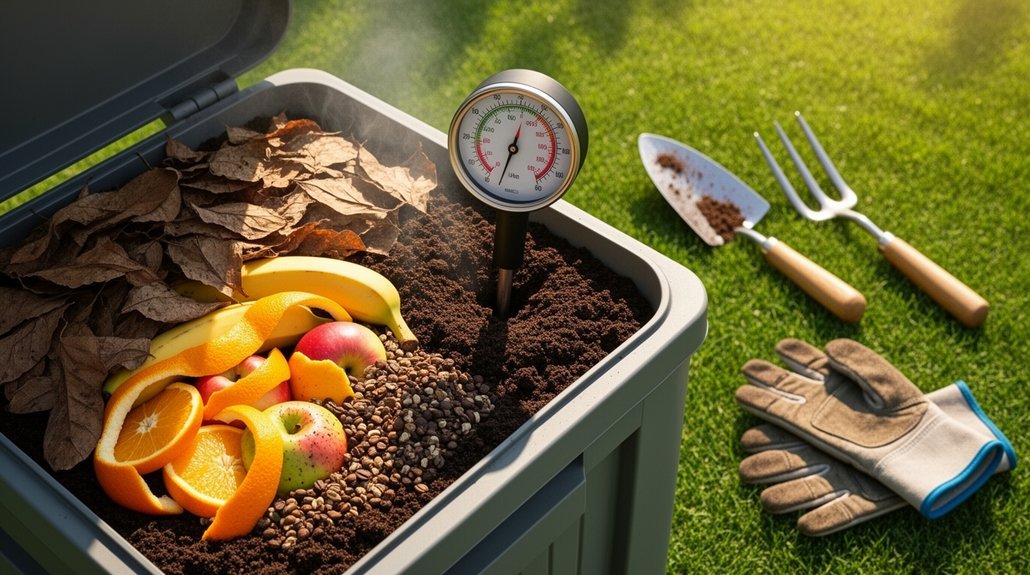
Even with proper moisture and aeration, problems can still emerge in your compost pile. The key is catching them early before they spiral out of control.
You’ll want to address specific issues promptly:
- Odor problems – Turn your pile to restore airflow if rotten-egg smells indicate oxygen loss, or mix in carbon-rich browns to reduce ammonia odors.
- Moisture imbalance – Add dry materials like shredded prunings or cardboard to absorb excess water, then rebuild the pile to improve drainage.
- Pest attraction – Remove meat, dairy, and grease immediately, and bury food scraps under brown material to limit smell and flies.
Quick intervention prevents minor issues from becoming major headaches, keeping your composting process on track. Regular turning also distributes oxygen evenly and prevents matted materials that hinder airflow.
Frequently Asked Questions
How Long Does It Typically Take for Finished Compost to Be Ready for Use?
You’ll typically wait three to twelve months for finished compost in home systems. Well-managed hot composting finishes faster—around three to six months—while cold composting takes six to twelve months or longer.
Can I Compost in an Apartment or Small Urban Space Without Odor Issues?
Yes, you can compost in an apartment without odor if you’re using electric composters, Bokashi fermentation, or vermicomposting. You’ll keep things odor-free by maintaining proper moisture, airflow, and a balanced greens-to-browns ratio.
What Is the Best Season or Time of Year to Start Composting?
You’ll find spring the easiest season to start composting. Warmer temperatures speed decomposition, longer daylight accelerates organic breakdown, and seasonal yard work supplies steady materials. Your pile matures by late summer or fall.
How Do I Know When My Compost Is Fully Finished and Ready to Harvest?
You’ll know your compost’s finished when it’s dark brown, crumbly, cool to touch, and smells earthy. Original materials should be unrecognizable, and it shouldn’t generate heat anymore.
Can I Use Finished Compost Directly in Vegetable Gardens or Does It Need Aging?
You can use finished compost directly in your vegetable garden without aging. Once it’s dark, crumbly, and earthy-smelling, you’re ready to incorporate it into soil or apply it as mulch immediately.
In Summary
You’ve now got everything you need to start composting at home. You’ll build your bin, balance those browns and greens, and watch your kitchen scraps transform into rich, dark gold. It won’t take long before you’re spreading that nutrient-packed compost across your garden. You’re reducing waste, cutting landfill contributions, and creating natural fertilizer—all in your own backyard. Start composting today and you’ll never look back.



