
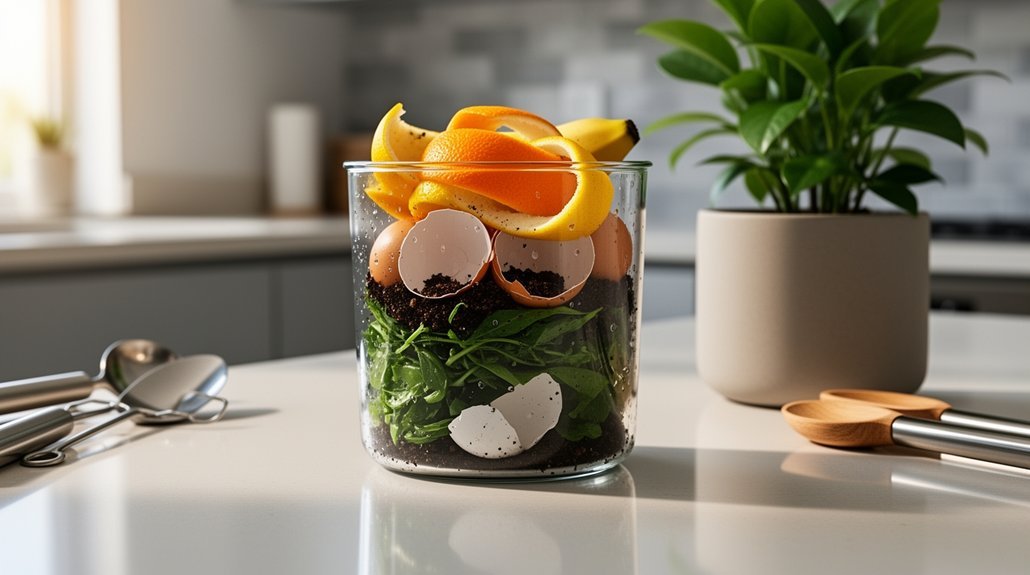
You’ll want to add kitchen scraps like fruit peels, vegetable trimmings, and coffee grounds to start your system. Layer these greens with dry browns—shredded leaves or paper—maintaining a 3:1 brown-to-green ratio. Chop everything into quarter-inch pieces to speed decomposition. Crush eggshells for added minerals. Avoid meat, dairy, oils, and heavily seasoned foods entirely. Cover fresh scraps immediately with dry materials to prevent odors and pests. Follow this approach, and you’re building a foundation that’ll transform your waste efficiently.
Choose Your System: Vermicomposting or Bokashi

How do you decide between vermicomposting and bokashi for your apartment? Your choice hinges on waste types and desired output.
Bokashi accepts all kitchen biowaste—meat, dairy, and citrus included—making it ideal if you generate diverse scraps. Vermicomposting excludes animal products, limiting you to plant-based waste. However, vermicomposting produces finished compost ready to use, while bokashi creates pre-compost requiring further decomposition in soil or another composter.
Bokashi handles all kitchen waste including meat and dairy, while vermicomposting requires plant-based scraps only but yields finished compost.
Both systems fit small spaces and work indoors. Bokashi needs minimal maintenance once sealed; you simply sprinkle inoculated bran during additions. Vermicomposting demands more monitoring of moisture and temperature but runs more autonomously once established. Bokashi’s anaerobic fermentation process generates microbial activity that can later accelerate decomposition when the material is exposed to aerobic conditions.
If you prioritize convenience and waste diversion, bokashi wins. For finished compost quality, vermicomposting excels. Consider your waste profile and end goals.
Start With Kitchen Scraps: Your Green Foundation
Because your kitchen generates waste daily, you’ve already got the raw materials for successful apartment composting—you just need to know what works. Start by collecting fruit and vegetable scraps like peels, cores, and trimmings. Coffee grounds, tea leaves, and crushed eggshells add essential nutrients. You can also compost leftover grains, rice, and plain bread in moderate amounts.
Chop larger pieces before adding them to your bin—this increases surface area for microbes and speeds decomposition. Store scraps in a sealed countertop container and empty it regularly to prevent odor buildup. Maintaining the right balance of materials helps minimize odors and keeps your compost system functioning efficiently. With bokashi systems, you’ll also produce bokashi tea for plants as a nutrient-rich byproduct during fermentation.
Avoid meat, fish, dairy, oils, and heavily seasoned foods, which attract pests and slow the process. Your kitchen scraps provide the nitrogen-rich “greens” that fuel your compost system.
Layer in Dry Browns to Balance Moisture

You’ll find that dry leaves are your best bet for balancing moisture in apartment bins because they’re highly absorbent and easy to store. Getting your moisture control right matters just as much as what you compost—too wet invites odors and pests, while too dry slows decomposition. Start by layering dry browns over each food scrap addition to keep your pile at that perfect wrung-out-sponge consistency. Aim for three to four buckets of browns for every bucket of greens to maintain the ideal ratio and prevent your apartment compost from becoming soggy and slimy. For your apartment bin setup, consider using compostable trash bags as liners to make disposal cleaner and more convenient once your compost reaches maturity.
Dry Leaves Work Best
Why should dry leaves become your go-to brown material for apartment composting? They’re lightweight, compact easily when shredded, and store conveniently in small spaces. Dry leaves provide the carbon balance you need to offset wet kitchen scraps, preventing soggy, odorous piles.
Shredded leaves decompose faster than whole leaves because smaller pieces expose more surface area to microorganisms. You’ll achieve optimal results by layering leaves with nitrogen-rich materials like food scraps or grass clippings in roughly equal volumes.
This balanced approach supports faster breakdown while keeping your compost well-aerated and less moisture-heavy. The finished leaf compost improves soil structure, water retention, and aeration—especially valuable for your container plants and balcony gardens. Dry leaves are high in fiber, which enhances drainage and creates a more cohesive finished compost product. For convenient disposal of finished compost or food scraps before composting, consider using certified compostable bin liners to maintain your apartment’s cleanliness. You’re also diverting organic waste from landfills, reducing methane emissions.
Moisture Control Techniques Matter
How does moisture spiraling out of control wreck your apartment compost? Excess water creates anaerobic conditions that produce foul odors and attract pests—two problems you’ll want to avoid in tight quarters.
You’ll maintain better moisture balance by layering dry browns with each food scrap addition. Shredded cardboard, torn newspaper, and small twiggy materials act like sponges, soaking up liquid from greens while creating air pockets for oxygen flow. This combination keeps your bin from becoming waterlogged and compacted.
If your compost starts smelling or looking mushy, add more dry browns immediately and mix the contents. Storing browns in a nearby container makes this corrective step quick and convenient. Regular layering prevents soggy buildup before it becomes problematic, keeping your apartment compost system functioning smoothly. Brown materials also help prevent unpleasant odors in the pile by maintaining proper carbon balance and supporting aerobic decomposition. For apartment dwellers, choosing a kitchen compost bin with odor control features can provide additional protection against moisture-related smell issues.
Cut Food Waste Small to Speed Decomposition
You’ll speed up decomposition considerably when you cut your food waste into smaller pieces before adding it to your compost bin. Smaller scraps expose more surface area to microbes, which means faster breakdown and less time waiting for finished compost. The size of your waste matters because one- to two-inch pieces decompose noticeably quicker than whole scraps or large chunks. Shredding yard waste and kitchen scraps is particularly effective because easier-to-decompose materials like grass clippings and vegetable scraps break down much faster than denser materials like wood. Introducing beneficial microbes to your compost accelerates this process by establishing microbial colonies that actively colonize and break down organic matter throughout your bin.
Smaller Pieces Break Down Faster
When you cut food scraps into smaller pieces, you’re fundamentally giving microbes a head start on decomposition. Increased surface area lets bacteria and fungi colonize your waste faster, accelerating the breakdown process significantly.
Here’s what smaller pieces accomplish in your apartment composter:
- Speed up microbial colonization by exposing more material for enzymes to work on simultaneously
- Improve heat distribution through better mixing, supporting the thermophilic stage that breaks down organic matter rapidly
- Enhance oxygen flow by reducing clumping and creating pathways for aerobic microbes to thrive
- Prevent odor problems by eliminating dense wet pockets where anaerobic decomposition occurs
Soft scraps like fruit and vegetable waste can break down within 1–3 weeks when cut small. Even tougher items decompose noticeably faster with reduced particle size, making chopped waste the practical advantage your apartment system needs. BSF larvae systems also excel at processing smaller food particles rapidly, consuming 1–2 times their body weight daily when waste is appropriately sized. Balancing your chopped scraps with brown materials like shredded newspaper supports optimal decomposition rates while maintaining proper moisture and aeration.
Chopping Reduces Decomposition Time
Why does chopping your food scraps matter in apartment composting? When you cut food waste into smaller pieces, you expose more surface area to decomposer microbes. This expanded access lets bacteria and fungi attack organic matter faster, markedly reducing decomposition time.
Tough scraps like citrus peels, corn cobs, and broccoli stalks benefit most from chopping. Whole pieces break down slowly, but cutting them into quarters or smaller chunks accelerates the process substantially. Chopping is not strictly essential for decomposition, as whole pieces will eventually break down on their own. Store finished compost in airtight containers to maintain quality and prevent moisture loss.
Smaller pieces also generate heat faster, which supports more active microbial decomposition. This quicker heat buildup speeds overall processing of your kitchen waste.
For apartment composting, chopping offers another advantage: finer finished compost with fewer recognizable food fragments. You’ll achieve consistent results without needing specialized equipment.
Size Matters For Efficiency
How small should you cut your food scraps? You’ll want pieces small enough to maximize microbial access while maintaining proper airflow. Medium-sized particles outperform both large chunks and overly fine material, striking the ideal balance for efficient decomposition.
Consider these sizing guidelines:
- Chop larger kitchen scraps into quarter-inch pieces to speed breakdown
- Cut thick rinds, cores, and stems into smaller sections for faster processing
- Keep peels and soft produce thin to reduce visible waste buildup
- Aim for uniform sizing to create consistent decomposition rates
Smaller pieces break down more evenly, reducing lingering odors and uneven decay. They’ll also lower your compost’s bulk volume, making storage easier in tight apartment spaces. For apartment composters, maintaining anaerobic fermentation conditions in sealed containers helps preserve your prepared scraps between collection cycles. Properly sized material helps your microbial community digest waste more efficiently and convert it into finished compost faster. Do not include materials thicker than a finger for faster decomposition.
Coffee Grounds and Eggshells: Mineral Boosters for Faster Decomposition
Coffee grounds are nitrogen-rich “greens” that balance carbon-heavy materials like paper and cardboard. They’re soft, small particles that integrate easily into compact bins while supporting microbial activity. Mix them thinly with dry browns to prevent matting and maintain airflow.
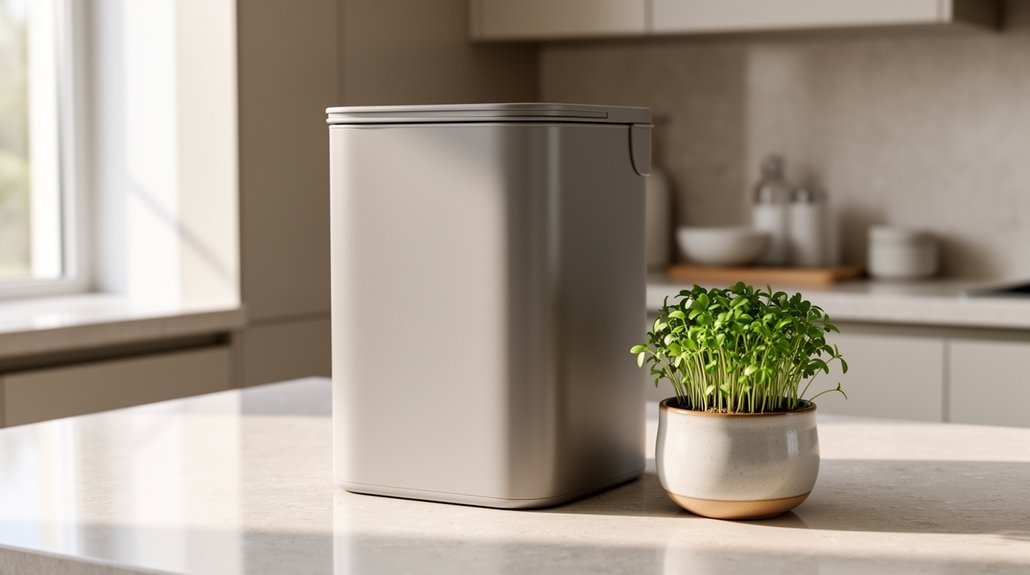
Eggshells contribute calcium and phosphorus, though they decompose slowly. Crushing or powdering them dramatically speeds mineral release and improves soil structure. Rinse shells first to reduce odor and pest attraction. Over time, the gradual breakdown of these materials feeds soil microbes that enhance nutrient cycling in your finished compost. For apartment dwellers using countertop compost bins, these mineral-rich additions work particularly well in smaller capacities since they break down gradually without creating excessive volume.
Both materials work best in moderation, mixed rather than layered. The finished compost boosts nutrient availability for container plants and herbs, making these humble kitchen scraps ideal for small-space gardeners.
Skip These Materials Entirely

While coffee grounds and eggshells boost your compost’s nutritional value, certain materials will actively sabotage your bin and create serious problems in your apartment.
You’ll want to skip these entirely:
- Meat, fish, and dairy – These protein-rich scraps break down slowly, create foul odors, and attract pests like flies and rodents in shared spaces.
- Fats and oils – Greasy foods coat organic matter, reduce airflow, and produce slimy, odorous compost that invites pest infestations.
- Diseased or moldy plants – Contaminated plant waste spreads pathogens into your finished compost and can compromise soil health later.
- Pet waste and hygiene products – Cat litter, diapers, and sanitary items introduce dangerous pathogens and chemicals unsuitable for home systems.
Additionally, avoid all plastics, treated wood, colored paper, and inorganic materials like glass and metal—these never decompose and contaminate your compost permanently. For worm bins specifically, maintaining low salt content and avoiding dairy or poultry items will prevent harm to your worm population and prevent the odor problems that neighbors may detect. In apartment settings with worm bins specifically, dairy or poultry items can harm your worm population and intensify odor problems that neighbors may detect.
Choose Paper Products Rated for Apartment Bins
Paper products can make excellent carbon-rich additions to your apartment compost bin, but you’ll need to choose carefully since not all paper breaks down equally. You’ll want to prioritize uncoated, uncolored materials that decompose quickly in confined spaces. Paper serves as the brown component that balances the nitrogen-rich food scraps in your composting system, creating the proper carbon-to-nitrogen ratio needed for efficient decomposition.
| Best Choices | Require Inspection |
|---|---|
| Brown paper bags, coffee filters, plain napkins | Cardboard, tissue paper, toilet paper |
| Paper towels (food residue only), shredded paper | Corrugated boxes, cereal boxes |
Avoid glossy or wax-coated papers entirely. Before composting, you should remove staples, tape, and plastic linings. Tear larger items into smaller pieces to accelerate breakdown. Check that paper’s been used only with food—never with chemicals or cleaning products. When you follow these guidelines, paper becomes a reliable “brown” material that balances nitrogen-rich food scraps in your apartment system.
Get Your Greens-and-Browns Balance Right

Why does your apartment compost smell like ammonia or sit there doing nothing? You’ve probably got an imbalance between greens and browns.
Aim for a 2:1 to 3:1 ratio of browns to greens. This balance keeps your pile from becoming wet and smelly or dry and stagnant. Here’s what to watch for:
- Too many greens: Your compost gets slimy, produces foul odors, and attracts flies. Add more browns and increase aeration.
- Too many browns: Decomposition slows, and the pile stays cool. Mix in more greens to boost microbial activity.
- Fine mixing matters: Blend browns with greens rather than layering them. This helps browns absorb excess moisture and maintain airflow. Nitrogen facilitates rapid decomposition by feeding the microbes that break down your materials.
- Don’t measure precisely: Approximate balancing works well in apartment systems.
Eliminate Odor by Covering Fresh Scraps
Once you’ve nailed your greens-and-browns ratio, you’ll want to tackle the most common apartment composting complaint: odor. The solution is straightforward: cover your fresh scraps immediately with dry materials like shredded paper, cardboard, or paper towels. This simple step traps smells inside the bin and discourages fruit flies by hiding exposed food particles. Keep a small container of browns beside your bin for quick access after each meal. Bury new scraps under your cover layer rather than leaving them exposed on the surface—this limits air exposure and slows odor release. When combined with a tightly sealed lid, consistent covering becomes your first line of defense against unwanted smells, making indoor composting genuinely manageable. Empty the bin weekly to prevent buildup of decomposing scraps that accelerate odor development over time.
Frequently Asked Questions
Can I Add Cooked Foods to My Apartment Compost Bin?
You can add small amounts of cooked food to your apartment compost bin, but you’ll want to bury it deep, balance it with dry materials, and avoid foods with oil, sauce, or heavy seasoning to prevent odors and pests.
How Often Should I Add New Materials to My Compost?
You should add new materials every 2 to 3 weeks, but check that your previous layer’s broken down first. Wait longer if decomposition’s slow. Let visible progress guide your timing, not a calendar.
What Temperature Is Best for Apartment Composting Systems?
You’ll want to keep your apartment compost between 90°F and 140°F for active decomposition, though worm bins perform better at 59°F to 77°F. Monitor temperatures closely to prevent overheating or slowdowns.
Can I Use Glossy or Printed Paper in My Bin?
You can use plain printed paper, but avoid glossy or heavily coated varieties. Shred uncoated paper and mix it with food scraps. When you’re uncertain, recycle instead—it’s the safer option for your bin.
How Long Does Apartment Compost Take to Become Usable?
You’ll typically need 3 to 6 months for usable apartment compost with regular management. Hot composting finishes faster—2 to 3 weeks—while passive methods take 6 to 12 months depending on conditions.
In Summary
You’ll create successful apartment compost by balancing your greens and browns consistently. You’ve got to cut your food scraps small, add coffee grounds and eggshells for minerals, and cover everything with dry materials to eliminate odors. You’ll avoid problematic items like meat and dairy. Whether you’re vermicomposting or using bokashi, you’re reducing waste while creating nutrient-rich soil for your plants. You’re making a real environmental impact right from your kitchen.
Leave a Reply