
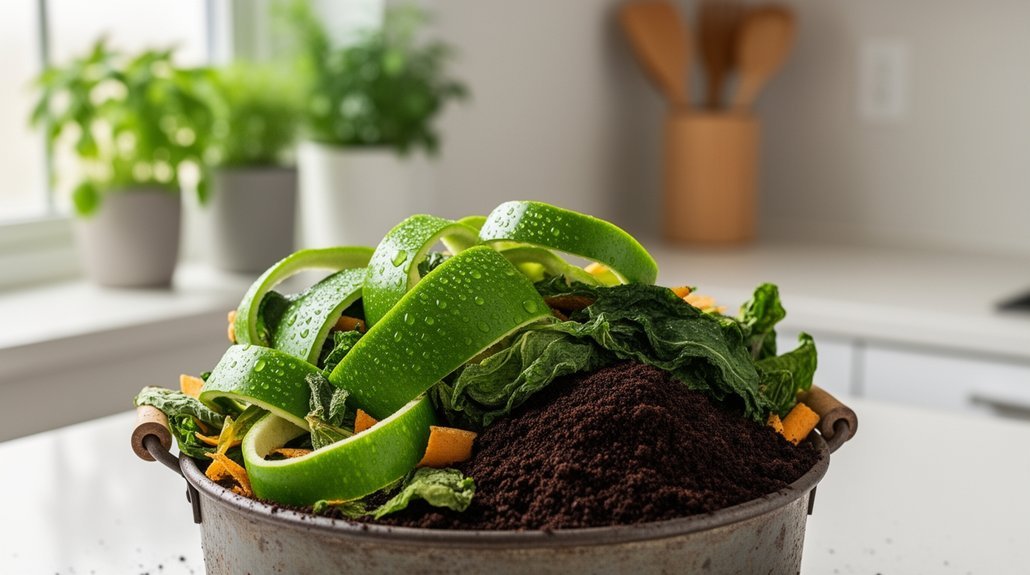
Use fruit and veggie peels, coffee grounds, tea leaves, and herb trimmings as your high‑nitrogen scraps—they’re the fuel that speeds up compost in a tiny bin. Chop them into bite‑size pieces and layer each addition under 2–4 cups of dry browns like shredded cardboard, paper, or leaves to keep the mix airy and odor‑free. Add a thin sprinkle of bio‑char or charcoal to balance excess nitrogen and turn the pile weekly for oxygen. Follow these steps and you’ll discover how to keep your small‑space compost thriving.
Small‑Space Composting: High‑Nitrogen Scraps That Power Your Bin

Ever wondered how a handful of kitchen scraps can keep a tiny compost bin humming? You’ll find that fruit and vegetable peels, coffee grounds, and tea leaves are the core nitrogen sources that fire up microbes in a compact system. Keep a countertop bin with a charcoal filter, lid, and ventilation to store these moist greens short‑term and avoid odors. Chop scraps into bite‑size pieces, crush eggshells, and bury them under a layer of dry bulking material—like shredded newspaper—to keep the bin from getting soggy. Add fresh herb trimmings and disease‑free plant clippings regularly; the steady, small inputs feed the decomposers and maintain active heat. For best results, use food-grade glass weights or similar containment methods in enclosed fermentation systems to keep materials submerged and prevent contamination. This routine fits apartments, balconies, or indoor worm bins, delivering powerful nitrogen without attracting pests. Remember to maintain a 4:1 browns‑to‑greens ratio for optimal speed.
Why a Carbon‑Dominant Mix Beats a Nitrogen‑Heavy One
You’ll notice that a carbon‑dominant mix fuels microbes faster, keeps odors down, and wicks away excess moisture.
By layering dry browns over your greens, you create the airflow microbes need and prevent the soggy, smelly conditions that a nitrogen‑heavy pile invites. Quality compost starters with diverse microbial consortia can further accelerate breakdown while maintaining odor control through natural enzymes.
The result is a cleaner, quicker composting process that fits perfectly in small spaces. Maintaining a 1:2 greens‑to‑browns ratio helps avoid mold buildup.
Faster Microbial Activity
Why does a carbon‑dominant mix outpace a nitrogen‑heavy one? You’ll see microbes thrive when carbon supplies steady energy and nitrogen provides just enough protein building blocks.
A balanced C:N of 25:1–30:1 gives microbes the fuel to multiply without hitting the ammonia‑loss ceiling that nitrogen‑heavy piles create.
Excess nitrogen pushes the system toward anaerobic pockets, slowing aerobic microbes and wasting nitrogen as ammonia.
In a carbon‑rich blend—straw, cardboard, leaves—fuel releases slowly, keeping microbes active longer and fostering a smooth succession of bacteria and fungi.
This steady energy flow translates into faster, more complete breakdown of kitchen scraps, especially in cramped bins where imbalance would otherwise stall the process.
Carbon sources provide structure and aeration, helping prevent the odor associated with overly nitrogen‑rich piles.
Reduced Odor and Moisture
What makes a compost bin smell less and stay drier? You keep the mix carbon‑dominant. Dry browns—leaves, straw, shredded paper, cardboard—absorb excess moisture and provide the pores that let oxygen flow. When you layer a handful of kitchen scraps with 2–3 × the volume of these browns, you prevent the ammonia‑rich, sulfurous smells that signal nitrogen overload. The coarse, bulky carbon also breaks up compacted pockets, keeping the pile aerobic and odor‑free. In small‑space bins, covering each green addition with a 4‑8 inch blanket of dry material is essential; it soaks up soggy bits, stops clumping, and lets you compost without a stench. Maintaining adequate aeration ensures that the microbial activity stays aerobic, further reducing odor. For countertop setups, consider using a kitchen compost bin with odor control features to temporarily store scraps before transferring them to your outdoor system.
| Material | Typical Use |
|---|---|
| Dry leaves | Bulk absorber, odor neutralizer |
| Straw | Coarse structure, airflow |
| Shredded paper | Fine carbon, moisture mop |
| Cardboard | Bulky, long‑lasting carbon |
| Wood chips | Aeration, bulk filler |
How to Achieve a 30:1 C:N Ratio in a Tiny Compost Bin
How can you hit the classic 30:1 carbon‑to‑nitrogen ratio in a tiny compost bin?
Start by adding a thin layer of greens—fruit scraps, coffee grounds, or tea leaves—then cover each addition with several inches of dry browns.
Keep the browns‑to‑greens volume around 4:1, which translates to roughly 2–3 parts browns for every part greens by weight.
Add scraps frequently in small batches, and never let the pile stay wet or smelly; if it does, toss more dry material on top.
Turning the bin once a week restores oxygen and helps microbes maintain the right balance. Microbial inoculants can accelerate decomposition and ensure consistent microbial action throughout your composting process.
- Use pre‑shredded leaves or newspaper as your brown source.
- Store greens in a countertop bin with a charcoal filter until you have enough browns.
- Add a handful of coffee grounds each time you drop in vegetable scraps for extra nitrogen.
Soil enrichment improves moisture retention and supports microbial activity.
The Best Browns for Small‑Space Compost Systems
Balancing the 30:1 C:N ratio is only half the battle; you also need the right browns to keep a tiny bin airy and odor‑free. In cramped composters, shredded cardboard tops the list—easy to tear, lightweight, and it adds structure that prevents slime. Plain brown paper bags and shredded newspaper work similarly, offering dry carbon that you can store flat and toss in as needed. Dry leaves, collected in a small tote, keep the mix loose and soak up excess moisture. Small twigs and coarse woodchips create air pockets, while corrugated cardboard and egg cartons, torn into bits, boost porosity without compacting. Coffee filters, tea bags (metal‑free), and grease‑free paper towels add extra carbon in urban apartments. Store all browns dry, shred them into bite‑size pieces, and add regularly to maintain airflow and odor control. Like coconut coir’s spongy fiber composition, fine, shredded browns expand into a light, airy structure that prevents compaction and ensures proper drainage. Adding more carbon helps prevent slimy, anaerobic conditions.
How Much Brown Material per Cup of Greens?

Ever wondered how many cups of brown material you need for each cup of greens? In a small‑space compost bin, you’ll usually aim for 2–4 cups of browns per cup of high‑nitrogen kitchen scraps. Start with a 2:1 ratio for mildly wet scraps, bump up to 3:1 for typical mixes, and reach for 4:1 when the pile feels soggy or smells. The extra carbon bulk absorbs excess moisture, prevents compaction, and keeps ammonia at bay. If you notice a sour odor, simply add more dry browns and give the pile a quick turn. An analog dial thermometer can help you monitor pile temperatures to ensure active decomposition is occurring. Maintaining this balance ensures steady, odor‑free decomposition even in tight countertop containers.
Aim for 2‑4 cups browns per cup greens; adjust to 2:1, 3:1, or 4:1 based on moisture and odor.
- 2 cups browns per cup greens for mildly wet scraps
- 3 cups browns per cup greens for typical kitchen mixes
- 4 cups browns per cup greens for very wet or odor‑prone scraps
Browns provide bulk and allow air to filter through the pile.
Cut Scraps Into <2 Cm Pieces for Faster Decomposition
Why not slice your kitchen scraps into pieces under 2 cm? You’ll boost surface area, giving microbes more contact points and speeding decomposition. Aim for uniform chunks no larger than 1 inch, but under 2 cm is ideal, especially for tough stalks, corn cobs, and potato peels. Chop with a knife, scissors, or a small shredder before you toss anything into a worm bin, tumbler, or in‑vessel system. The finer pieces break down evenly, reduce the need for frequent turning, and keep airflow steady when mixed with browns. Warm, moist conditions accelerate the process further, while small fragments help you avoid odor spikes. In small‑space setups, this simple step makes your high‑nitrogen greens turn into compost faster and more efficiently. For even faster results in bokashi systems, combine chopped scraps with EM-1 cultures to initiate rapid fermentation and minimize putrefaction odors. Smaller piece size accelerates composting.
Store Kitchen Waste Smell‑Free Until It Hits the Bin
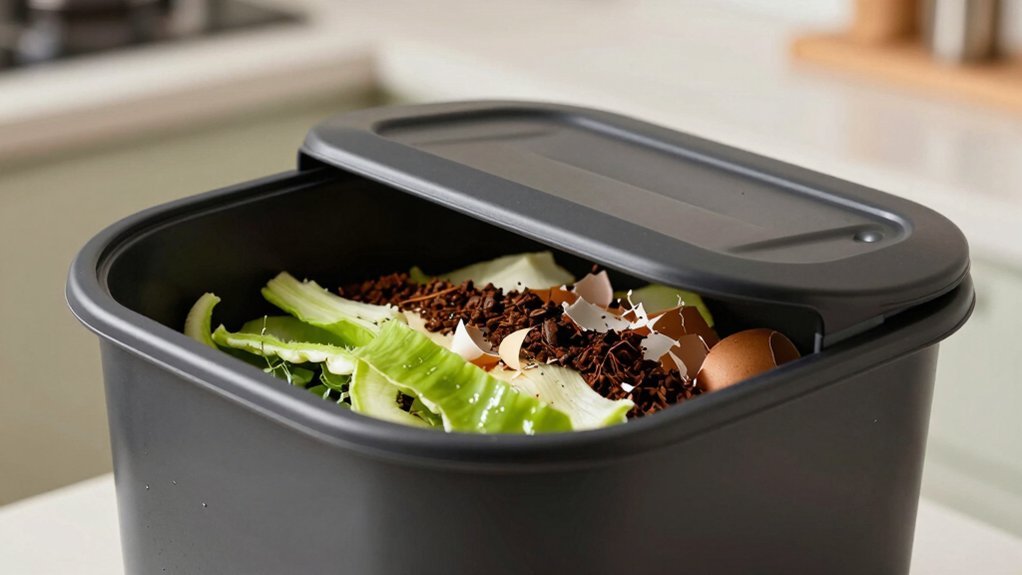
Ever wonder how to keep kitchen waste from stinking up your apartment before it reaches the compost bin? You can freeze the scraps, use a lidded bin with an odor‑blocking lid, or store them in a cool, shaded spot. Freezing halts microbial activity, so even fish skins and meat stay odor‑free until you’re ready to compost. A countertop bin with an activated‑charcoal filter traps smells and keeps fruit flies away, while a cool under‑sink cabinet slows decomposition and pest attraction. Most ceramic crocks use standardized charcoal filters that require replacement every 4–6 months to maintain peak odor control. Keep lids tight, rinse containers regularly, and dry them thoroughly to prevent moisture‑driven odors.
- Freeze high‑nitrogen scraps in a reusable bag or container.
- Choose a lidded bin with a carbon filter and compostable liner.
- Store in a shaded, cooler area (under‑sink, closet) when freezing isn’t possible.
Regular stirring helps maintain aeration and prevents odor buildup.
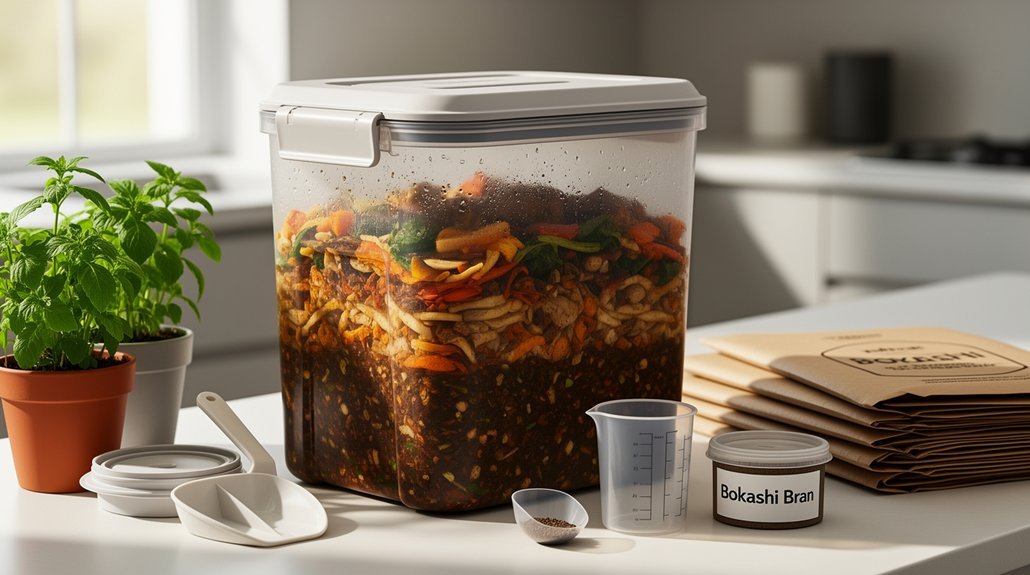
Bokashi vs. Vermicomposting: Which Gives Better Nitrogen Balance for Apartments?
You’ll find that bokashi keeps up to 95 % of the nitrogen in your scraps, while vermicomposting relies on careful moisture control to prevent losses. The bokashi bucket fits neatly on a countertop and stays odor‑free, whereas worm bins need space for bedding and ventilation. With proper bran addition and maintenance, bokashi systems produce bokashi tea as a liquid fertilizer that concentrates nitrogen benefits for your plants. Considering space, odor, and nitrogen preservation, which method aligns best with your apartment routine? The system’s overall nitrogen retention is significantly higher in bokashi compared to traditional composting.
Bokashi Nitrogen Retention
How much nitrogen actually stays in your kitchen scraps when you compost in an apartment? With bokashi, you lock the material in a sealed, anaerobic bucket, so ammonia can’t escape and heat never builds up. The fermentation preserves most of the nitrogen that would otherwise volatilize in a hot pile, and you can toss in meat, dairy, and oily foods without penalty. After about two weeks the pre‑compost is ready for soil or a worm bin, keeping the nutrient load high and the odor low—perfect for small spaces.
- Sealed, low‑oxygen environment cuts nitrogen loss dramatically.
- No heat means volatile nutrients stay in the mix.
- Accepts a wide range of nitrogen‑rich scraps, including animal products.
- The process maintains a high C:N ratio that further reduces nitrogen volatilization.
Vermicomposting Moisture Management
Bokashi locks nitrogen in a sealed bucket, but once you move that moist pre‑compost into a worm bin, the real challenge becomes keeping the bedding at the right wetness. Aim for a “wrung‑out sponge” feel—about 70‑90 % moisture. Too wet and oxygen drops, sparking anaerobic pockets and ammonia; too dry and worms slow, leaving nitrogen‑rich scraps untouched. Mix high‑nitrogen waste with absorbent bedding like shredded cardboard or coir to buffer excess liquid. Regularly squeeze a handful of bedding; if it drips, add dry material, if it feels dry, mist lightly. Maintaining this balance lets worms convert nitrogen into stable castings rather than leaching it away. The nitrogen‑rich pre‑compost also supplies microbes that boost the worm bin’s overall activity.
| Condition | Moisture Level | Effect on Nitrogen |
|---|---|---|
| Too wet | >90 % | Anaerobic, ammonia loss |
| Ideal | 70‑90 % | Aerobic, nitrogen retention |
| Too dry | <70 % | Reduced worm activity, nitrogen loss |
Space‑Efficiency and Odor Control
Ever wondered which method fits tighter into a studio while keeping the air fresh? Bokashi wins on footprint; a single airtight bucket slides under a sink or into a pantry, while vermicomposting bins need a larger floor area and often a multi‑tray setup. The sealed lid of bokash also locks in odor, making it virtually smell‑free during fermentation. Worm bins can stay low‑odor if you don’t overfeed, but exposed scraps or poor maintenance quickly produce a noticeable stench. For apartments where space and scent matter, bokashi offers the most compact, odor‑controlled solution, and it preserves nitrogen‑rich scraps for later soil use.
- Compact bucket fits under sinks
- Airtight lid blocks smells and pests
- Worm bins need more floor space and careful feeding
Bokashi fermentation preserves nitrogen by keeping the organic material anaerobic, which reduces nitrogen loss compared to aerobic composting.
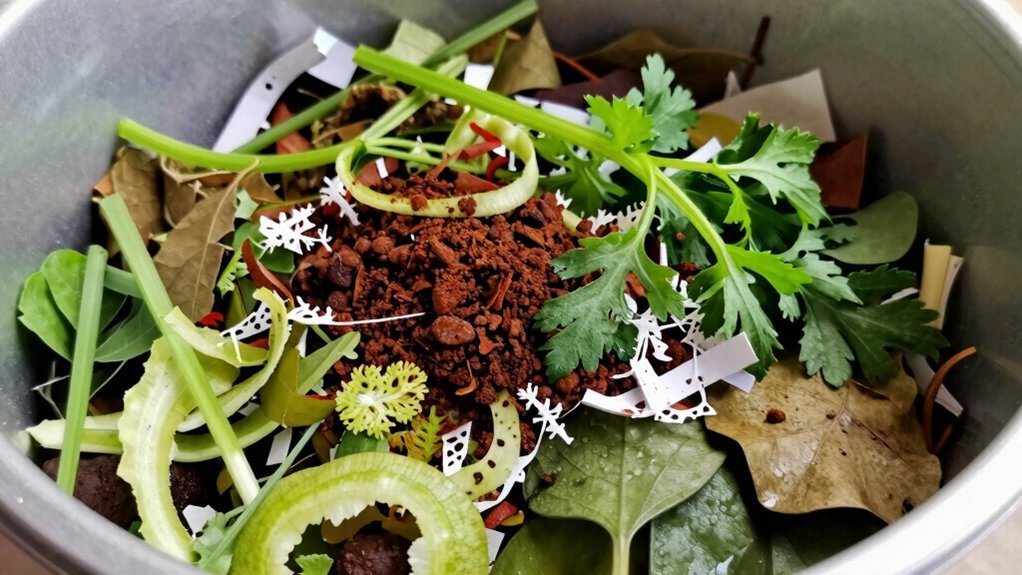
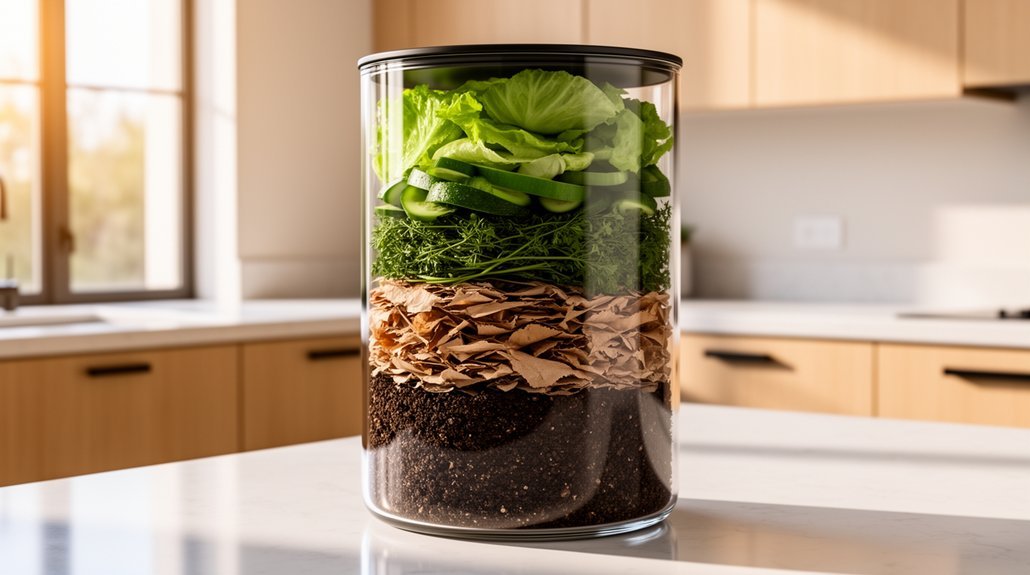
Layering Strategy: Greens, Browns, and Air Gaps for Odor Control
A good layering strategy starts with a thin green layer—about two to three inches of kitchen scraps—followed immediately by a thicker brown layer that soaks up excess moisture and masks odors. Then add a coarse base of sticks or straw to create air gaps and improve drainage. Alternate 2‑inch green slices with 3‑inch brown layers, keeping the ratio roughly 1 part greens to 3 parts browns by volume. Each green layer should be covered promptly to prevent compaction and slime. Top the bin with a final brown blanket to deter pests and keep smells down. Chop scraps small, keep the pile damp like a wrung‑out sponge, and maintain voids throughout so aerobic microbes stay active and odor stays controlled. Ensure the bin is at least 3 feet wide and deep to retain heat and support proper aeration.
Add Charcoal or Bio‑Char to Fine‑Tune Nitrogen Balance
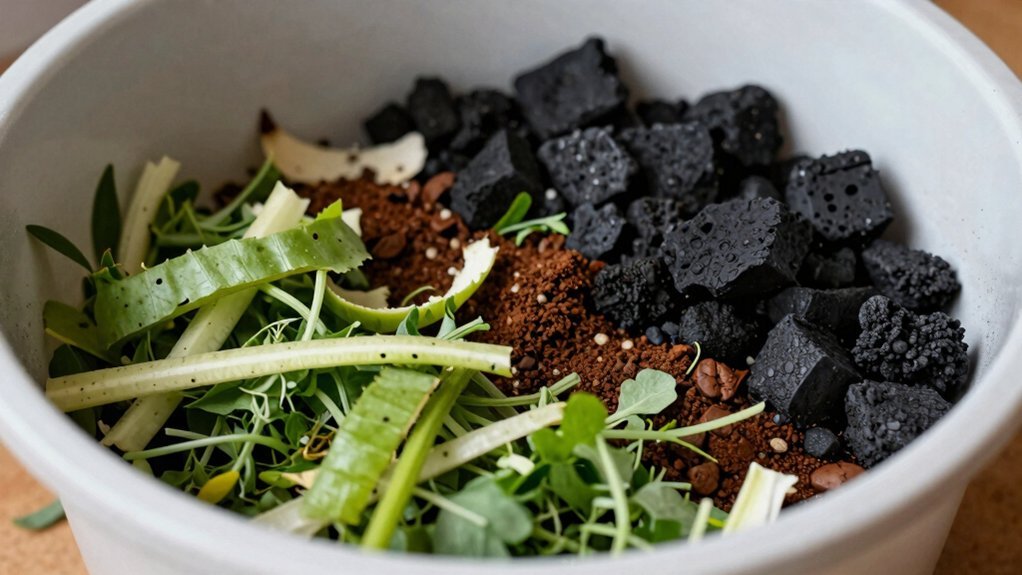
Wondering how to keep your kitchen‑scrap pile from turning into a smelly, nitrogen‑rich mess? Adding a thin layer of charcoal or bio‑char can buffer excess nitrogen, curb odor, and improve airflow in a cramped bin. The material’s porous surface adsorbs ammonium, lowering ammonia volatilization, while its light texture prevents compaction. Use it sparingly—about 5‑10 % of the dry volume—so you fine‑tune nitrogen balance without diluting the final nutrient content. Remember, bio‑char isn’t a nutrient source; it’s a physical amendment that supports aerobic conditions and reduces wet, sticky zones.
- Sprinkle bio‑char between green layers for odor control.
- Mix a small amount into the bulk to boost aeration.
- Adjust the ratio if the pile stays too damp or smells strong.
Adding bio‑char can also reduce VOC emissions, helping the pile stay fresher longer.
When and How to Turn or Mix Your Countertop Bin
After adding bio‑char to balance nitrogen, you’ll need to keep the bin from getting soggy and smelly. Empty the countertop collector every 2–4 days, or sooner if you notice strong odors, fruit flies, or a full bin. In warm weather, shorten the interval to a couple of days. Lightly stir the scraps before you transfer them—this prevents compaction and spreads moisture evenly. Use a spoon or small spatula; you don’t need a pitchfork. If you store scraps in a bucket for a few days, give it a gentle shake every 2–3 days. Reserve deep turning for the outdoor pile where you add browns and larger volumes. The goal is a dry, airy batch ready for the next compost stage.
Troubleshooting Wet or Smelly Compost in Small Spaces
You’re probably seeing a soggy, stinky mix because the carbon‑to‑nitrogen balance is off and airflow is limited.
Adding dry browns, adjusting the C:N ratio, and loosening the pile will pull excess moisture and improve ventilation.
A simple charcoal filter or a quick turn can further cut odors while you rebalance the bin.
Moisture Management Techniques
Ever noticed your small‑space compost turning soggy and stinky? When moisture spikes above the 50‑60 % “well‑wrung sponge” range, oxygen pockets fill, odor erupts, and decomposition stalls. First, check for pooling water or leachate at the base; if you see it, tilt the bin or add a drainage layer of coarse material. Second, adjust your watering rhythm: drip or slow‑pour from the bottom, then turn the pile to redistribute damp spots and restore airflow. Third, shield the compost during rain with a tarp or straw cover, and remove excess liquid from indoor bins daily. These quick fixes keep your pile aerobic, fragrant, and fast‑acting.
- Add a coarse drainage layer (e.g., small branches) at the bottom.
- Use drip irrigation or a slow pour from the bottom, then turn the pile.
- Cover with a tarp or straw during rain and drain excess liquid regularly.
Carbon-to-Nitrogen Ratio Adjustments
When your small‑space bin turns soggy and smells like ammonia, the culprit is usually an excess of nitrogen‑rich kitchen scraps outweighing the carbon “browns” you’ve added.
Aim for roughly a 4:1 volume of browns to greens, or about a 30:1 C:N weight ratio, to keep microbes happy.
First, layer 4–8 inches of dry leaves over fresh scraps; they soak up moisture and supply carbon.
If leaves run low, toss shredded newspaper, cardboard, straw, or dried grass.
Keep a reserve of these browns so you can add a handful each time you drop fruit peels, coffee grounds, or herb trimmings.
Adjusting the ratio by volume, not lab precision, restores balance, reduces slime, and eliminates the ammonia odor.
Ventilation and Odor Mitigation
Why does your compost bin suddenly smell like rotten eggs or sour milk? Low oxygen and excess moisture trigger those sour notes. Keep oxygen above 13 % by opening vents, turning the pile, and using a small fan if needed. Turn the mix every few days to break up clumps and let air flow through every feeding. Add dry carbon like shredded newspaper or cardboard when the mix feels soggy, and drain any leachate that pools at the bottom. A tight‑fitting lid with screened side vents and a bottom drain cuts odor while keeping pests out. If smells persist, layer a 4‑inch biofilter of unscreened compost on top and mist it lightly to keep the media moist.
- Open vents and turn frequently to maintain >13 % oxygen.
- Add dry absorbents and drain leachate to control moisture.
- Cover with a biofilter layer and keep it moist for odor polishing.
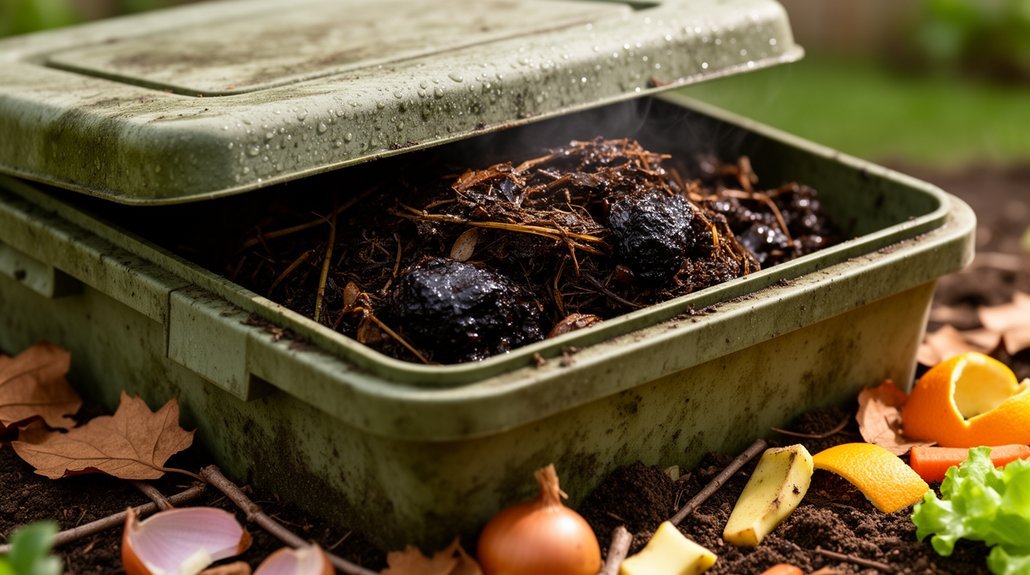
Harvesting Rich Compost for Apartment Plants and Balconies
Where can you find the richest compost for your balcony herbs and apartment pots? Harvest it once it turns dark, crumbly, and soil‑like. Mix a handful into potting mix for a nutrient boost, or spread it as a top‑dressing to retain moisture and suppress weeds. Rotate batches: add fresh greens, cover with browns, and pull the finished compost every 4‑6 weeks. The result is stronger growth, fewer synthetic fertilizers, and happier plants.
| Item | Role |
|---|---|
| Coffee grounds | Quick nitrogen source |
| Crushed eggshells | Calcium and slow‑release nutrients |
| Shredded cardboard | Carbon balance and odor control |
| Fresh herb trimmings | Immediate nitrogen for rapid decomposition |
Frequently Asked Questions
Can I Compost Citrus Peels Without Causing Odor?
Yes, you can compost citrus peels odor‑free if you chop them small, mix them thoroughly with dry browns, keep the pile moist but not soggy, and turn it regularly for good airflow.
Do Coffee Grounds Need to Be Dried Before Adding to a Small Bin?
You don’t need to dry coffee grounds before tossing them into a small bin; just mix them in, keep them balanced with browns, and turn regularly to avoid compaction and excess moisture.
How Often Should I Add Fresh Browns to Prevent Soggy Compost?
You should add fresh browns right after every batch of scraps, covering the food layer completely. Aim for a 2‑3‑to‑1 brown‑to‑green ratio each time, and keep the surface dry and airy.
Is It Safe to Include Small Amounts of Cooked Pasta?
Yes, you can add small amounts of plain cooked pasta. Just chop it, mix it thoroughly with dry browns, keep the pile aerated and moist, and avoid sauces or excessive salt to prevent pests.
Can I Reuse the Same Charcoal Filter Multiple Times?
You can reuse the filter a few times, but only until it feels saturated. Wash it gently, dry it fully, and replace it every three to five months for reliable odor control.
In Summary
By balancing high‑nitrogen scraps with the right amount of brown material, you’ll keep your tiny bin healthy and odor‑free. Stick to the 30:1 C:N rule, add a pinch of charcoal if needed, and give it a quick turn each week. Soon you’ll harvest dark, crumbly compost that fuels your apartment plants and balcony garden—proving that even the smallest spaces can turn waste into garden gold.
Leave a Reply