

You can vermicompost indoors in NYC without a permit, but you must follow DSNY organics‑separation rules: use only fruit, vegetable scraps, coffee grounds, tea bags, and shredded paper; keep the bin sealed with a double‑seal lid and mesh vent; place it in a well‑ventilated, moisture‑controlled spot like under a counter; avoid meat, dairy, oily foods, pet waste, and plastics; and ensure the bin is labeled and contained to prevent odors and pests. If you keep these steps, you’ll stay compliant and avoid fines.
NYC Indoor Vermicomposting: City Requirements
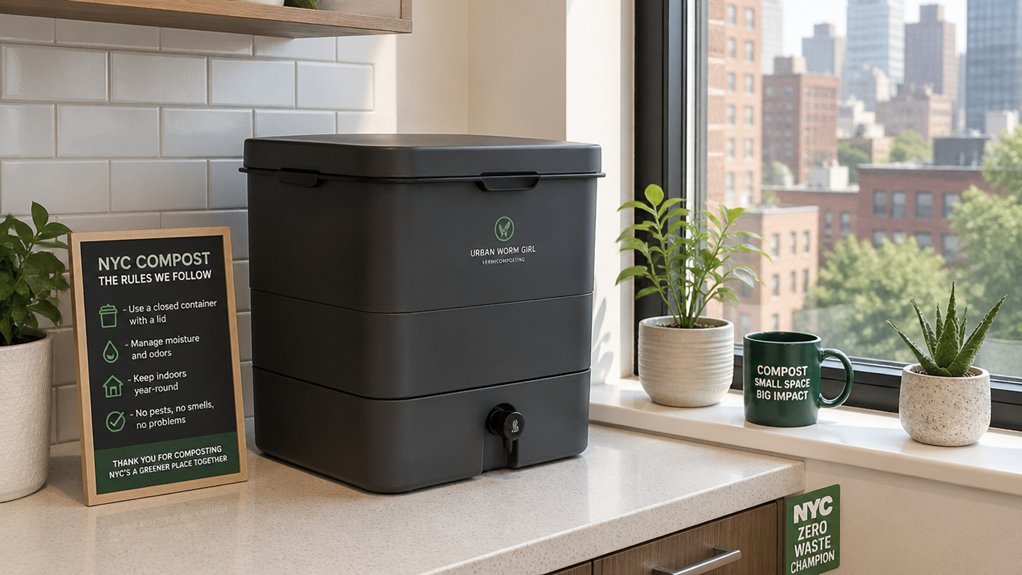
Ever wonder what the city actually expects when you keep a worm bin at home? Indoor vermicomposting falls under NYC’s general home composting guidance and the DSNY regulations that govern organics separation. In multi‑family buildings, DSNY mandates labeled organic waste bins and strict adherence to separation rules, so your worm bin must align with those standards to avoid contamination. Keep only fruit, vegetable scraps, coffee grounds, and shredded paper—no meat, dairy, or oily foods—to prevent pests and odors that could trigger enforcement. Store scraps securely, label the bin clearly, and dispose of any excess material according to your building’s organics program. By following these steps, you satisfy DSNY regulations and protect your building from contamination penalties. Building-specific rules may also influence container labeling and placement within your hallway or common areas.
Apartment‑Friendly Worm Bins That Meet DSNY Standards
Now that you’ve got the basics of NYC’s indoor compost rules down, let’s look at the worm bins that actually fit in an apartment while staying DSNY‑compliant. Choose a compact, plastic or fabric apartment bin with a secure lid that seals in moisture and blocks pests. Aim for a capacity of 2–3 gallons, which fits under a kitchen counter or inside a closet. Line the bin with damp newspaper or coconut coir, add a handful of red wigglers, and feed only fruit, vegetable scraps, coffee grounds, and tea bags. Freeze larger scraps before tossing them in to boost odor control. Avoid meat, dairy, oily foods, and pet waste to meet DSNY standards. Regularly monitor temperature and moisture, and empty the castings every few weeks to keep the system tidy and compliant. Keeping a consistent rotation schedule helps maintain the bin’s airflow and odor control continuous composting.
Set Up a Sealed, Odor‑Controlled Worm Bin in a Small Space
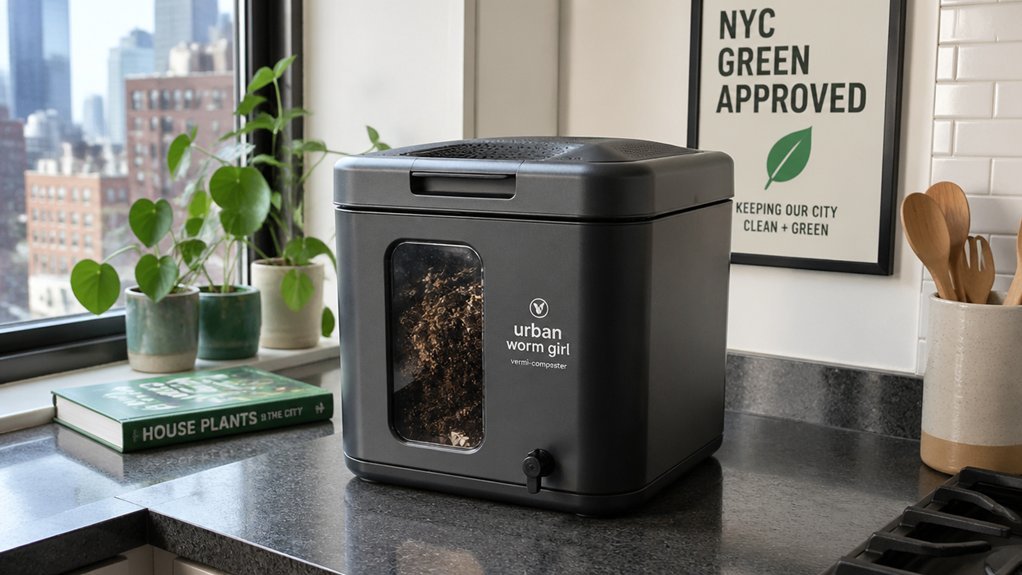
A sealed, odor‑controlled worm bin can be tucked into a compact apartment without compromising cleanliness.
Begin with a small, sturdy container—ideally a clear plastic tote with a snug‑fitting lid. Drill several small ventilation holes, then cover them with fine mesh to deter pests while permitting airflow. Add damp shredded newspaper as bedding, then introduce red wigglers and a modest amount of kitchen scraps. Keep the bin on a shelf away from direct sunlight, and check moisture daily; a damp, not soggy, environment helps control odors. Adhere to residential guidance from DSNY: feed only fruit, vegetable peelings, and coffee grounds, and harvest castings every few weeks for successful indoor composting. A compact, 5‑gallon “Bokashi Kit” style approach to odor control can be helpful to manage fermentation byproducts in even smaller spaces odor‑control.
Start with a clear tote, drill mesh‑covered vents, add damp newspaper bedding, introduce wigglers, and feed fruit, veg scraps.
- Choose a bin no larger than 20 liters for space efficiency.
- Use a double‑seal lid with mesh to block smells.
- Maintain bedding moisture at a wrung‑out sponge level.
- Feed small, frequent portions to prevent excess ammonia.
- Empty leachate into a sink with a strainer to avoid buildup.
What You Can Compost in an Indoor NYC Worm Bin
What can you actually toss into a NYC indoor worm bin? You can feed your red wigglers most kitchen leftovers, provided they’re plant‑based and not oily. Fruit peels, vegetable trimmings, coffee grounds, tea bags, and crushed eggshells all break down quickly, keeping the worm bin healthy and odor‑free. Follow NYC guidelines by chopping large pieces and burying them in the bedding, which speeds decomposition and reduces pests. Avoid meat, dairy, and greasy foods—these attract flies and upset the balance. A simple table shows the safest categories:
| Category | Examples | Reason |
|---|---|---|
| Fruit | Apple cores, banana peels | Easy to digest |
| Veggies | Carrot tops, lettuce leaves | Low odor |
| Coffee/Tea | Grounds, tea bags | Nitrogen source |
| Eggshells | Crushed shells | Calcium |
| Bread/Grains | Stale toast, rice | In moderation |
Stick to these items, and your indoor vermicomposting will thrive. Filter considerations can help maintain odor control and align with the use of indoor composting systems.
Materials You Must NOT Add to NYC Indoor Vermicomposting
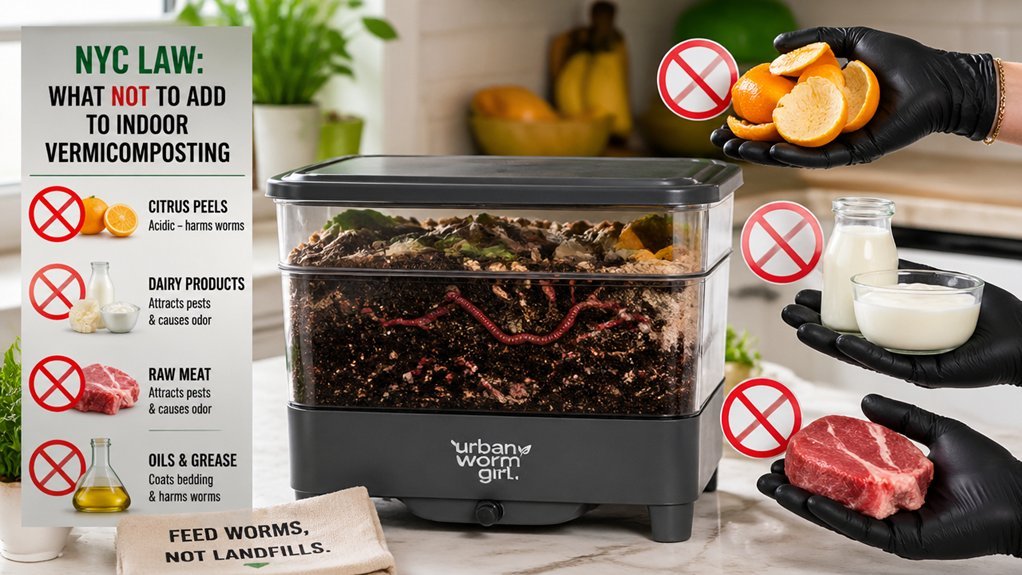
You should keep meat, fish, bones, dairy, and greasy foods out of your indoor bin because they attract pests and cause odors.
Pet waste, cat litter, and dog feces are also prohibited, as they can introduce harmful pathogens.
Finally, avoid any plastic‑lined, coated, or non‑compostable packaging that could trap moisture and damage the worms.
A recommended practice is to choose compact, sealed designs to minimize odor leakage in small indoor spaces airtight lid and to regularly empty and clean the bin to maintain a healthy vermicomposting environment.
Avoided Materials
Ever wondered which scraps belong in your NYC indoor worm bin? When you practice vermicomposting indoors, you must steer clear of specific avoided materials that threaten worm health and violate city guidelines. Meat and dairy, especially oily fish and bones, draw pests and emit foul smells. Greasy liquids coat the bin, fostering rot and odor. Non‑compostable items such as plastics and metals linger forever, harming worms and contaminating the compost. Even coated paper or glass fragments can shred the bin’s structure.
- Meat, dairy, fish, and bones
- Oily or greasy foods and liquids
- Plastics, metals, and glass
- Coated paper products
- Any non‑organic, non‑decomposable waste
No Pet Waste
Wondering why pet waste can’t go into your indoor worm bin? NYC guidelines list pet waste as disallowed materials for indoor vermicomposting because it introduces pathogens and odors that can harm both worms and your home environment. You must keep litter and feces from cats, dogs, or other pets out of the bin; even small amounts can upset the compost balance and attract pests. The city’s rules are clear: only kitchen scraps, coffee grounds, and paper go in. If you accidentally add pet waste, remove it immediately and sanitize the area to avoid contamination. Staying compliant protects your vermicomposting setup, your health, and the community’s standards for indoor waste reduction. Pet-waste restrictions are designed to minimize pathogen risk and odor concerns while maintaining safe, compliant composting practices.
No Plastic Items
Plastic must stay out of your indoor worm bin, because NYC’s vermicomposting rules forbid any non‑biodegradable material. When you keep your setup plastic‑free, the worms thrive, the bedding material stays breathable, and the organic waste decomposes efficiently. Even a tiny fragment can choke the system, breach indoor guidelines, and force you to start over. Stick to natural scraps and avoid anything that won’t break down.
- Plastic bags and wrap
- Styrofoam containers
- Plastic utensils and straws
- Disposable coffee cups with plastic liners
- Any non‑compostable packaging
Control Moisture and Airflow to Stop Leaks and Smells
You’ll keep the bin damp like a wrung‑out sponge, not soggy, to curb odors and leaks.
Turn the bedding often and use a breathable, perforated container so air circulates and anaerobic spots don’t form.
If you notice smells or drips, add dry browns, boost aeration, and check for compaction or overfeeding.
Be mindful of moisture control to prevent runaway moisture levels that can invite odors and leaks, especially in enclosed NYC spaces. Moisture control
1 Moisture Balance Tips
How can you keep your indoor worm bin from smelling or leaking? Keep the moisture balance like a wrung‑out sponge: damp enough for worms, but not soggy. Too much liquid creates anaerobic zones and foul odors; too little stalls activity. Use bedding—shredded paper, cardboard, or coconut coir—to soak excess water and improve aeration. Check leachate; if a pool forms, cut back moisture and mix the bin to boost airflow. Secure the lid and keep drainage pores clear so leachate exits without splashing.
- Add dry bedding after each food addition.
- Squeeze out excess liquid from wet scraps.
- Stir the worm bin gently every few days.
- Monitor drainage trays for standing water.
- Adjust feeding frequency based on moisture levels.
2 Airflow Optimization Strategies
Balancing moisture is only half the battle; keeping air moving through the bin stops the smells and leaks that spoil indoor vermicomposting. First, equip your worm bin with a breathable lid or a few filtered vent holes; this creates a steady stream of airflow and prevents anaerobic pockets.
Second, position the bin on a tray that catches leachate, then empty the tray daily to avoid soggy bedding that blocks ventilation. Turn the bedding gently every few days to break up compacted zones and let oxygen circulate.
Keep the bin in a well‑ventilated room away from direct heat, and use a secondary container for leachate management if needed. These two airflow optimization strategies keep your vermicomposting system fresh, odor‑free, and compliant with NYC guidelines.
3 Leak Prevention Techniques
Ever wondered why a single drip can ruin an indoor worm bin? By mastering moisture control you stop leaks, odors, and costly clean‑ups. First, keep your indoor bins on a drainage tray that catches any excess liquid. Second, balance greens and browns so the mix stays damp, not soggy. Third, check daily and add dry bedding or remove surplus liquid before it pools. These steps give you reliable leaks prevention while meeting NYC vermicomposting rules.
- Use a sturdy drainage tray under each bin.
- Layer kitchen scraps with dry paper or leaves.
- Squeeze out moisture from food before adding.
- Add dry bedding whenever the mix feels wet.
- Seal the bin tightly and wipe any drips promptly.
Daily Maintenance Checklist for NYC Indoor Worm Bins
A solid daily routine keeps your NYC indoor worm bin healthy, odor‑free, and productive. First, open the lid briefly and glance at worm activity; bustling worms mean the environment is right.
Next, add a handful of kitchen scraps—fruit peels, veggie trimmings, coffee grounds—while avoiding meat, dairy, and oily foods.
Then, check moisture: the bedding should feel like a wrung‑out sponge, not soggy. If it’s too wet, sprinkle dry shredded newspaper or cardboard to restore balance.
Lightly stir the bedding to keep it aerated and prevent compaction.
Finally, close the lid securely and place the bin in a stable‑temperature spot, ensuring good odor management.
Repeat this daily maintenance checklist to keep your vermicomposting system thriving.
Pest‑Free Indoor Vermicomposting: Safe Practices for NYC Apartments
Keeping your indoor vermicomposting pest‑free in a New York City apartment hinges on sealing the bin, controlling airflow, and feeding only approved scraps. You’ll follow NYC guidelines by using a sealed bin, storing food waste cold until you add it, and burying scraps under bedding. Red wiggler worms thrive in a stable, low‑light spot, but you must keep the bin closed to block fruit flies and rodents. Regularly check moisture, avoid meat, dairy, oily or processed foods, and never introduce plastics. By treating your vermicomposting system like a mini‑garden, you protect your apartment from pests while staying compliant.
Seal the bin, refrigerate scraps, bury under bedding, and monitor moisture for a pest‑free NYC vermicompost.
- Freeze or refrigerate scraps before feeding.
- Bury food under several inches of bedding.
- Keep the sealed bin on a stable, elevated surface.
- Monitor moisture; aim for a soil‑like texture.
- Seal the lid tightly after each addition.
Harvesting and Using Worm Castings in a Multi‑Unit Building
Where do you start once the worms have turned kitchen scraps into dark, crumbly castings? First, gently sift the bedding to separate the worm castings from unfinished material. Use a shallow tray or sieve, shaking the bin over it until the fine, nutrient‑rich castings fall through. Store the castings in a sealed container to keep odors low and preserve moisture. In a multi‑unit building, spread a thin layer on houseplant pots or mix it into potting soil; a quarter‑inch is enough to boost fertility without attracting pests. If you have a balcony garden, blend the castings with compost or soil for a richer mix. Remember to keep the bin clean, avoid meat, dairy, and oily scraps, and monitor humidity to maintain a pleasant indoor composting environment.
Documenting Compliance: Reporting to DSNY Made Easy
You can submit your vermicomposting reports online through the DSNY portal, which lets you attach photos and notes instantly. The system flags upcoming inspection dates so you stay ahead of any required follow‑ups. By keeping a simple spreadsheet of submissions and inspection reminders, you’ll have a clear audit trail for building management.
Reporting Submissions Online
Typically, you’ll submit your vermicomposting compliance through the NYC Department of Sanitation’s online portal, where a quick form lets you upload photos of your bin, list the worm species, and confirm you’re following the moisture and feeding guidelines. The system validates your entry against NYC guidelines and DSNY rules, then issues a confirmation number you can reference later. Keep the file size under 5 MB, use JPEG or PNG formats, and double‑check that the worm species is listed as red wigglers. Accurate online reporting streamlines composting compliance and reduces the chance of follow‑up inquiries.
- Upload clear bin photos showing bedding and moisture level
- Specify red wigglers as the worm species
- List only approved food scraps (no meat, dairy, oily items)
- Include a brief note on odor control measures
- Save the DSNY confirmation receipt for records
Track Inspection Dates
After uploading your bin photos and confirming red wigglers, the next step is to log any DSNY inspection dates you receive. Use a simple spreadsheet or the DSNY portal to note the date, inspector name, and any comments about your indoor worm bin. Record each vermicomposting inspection promptly so you can match it against NYC guidelines and show that you’re meeting compliance scheduling requirements. If DSNY enforcement follows up, you’ll already have the evidence handy, reducing back‑and‑forth emails. Set reminders for follow‑up visits and keep the file organized by year. This habit turns sporadic checks into a clear audit trail, making it easier to demonstrate ongoing compliance and avoid potential penalties.
Common Violations and NYC Fines for Indoor Vermicomposting
Ever wondered why a smelly, pest‑infested kitchen can land you a fine in New York City? When you neglect proper indoor containment for vermicomposting, odors and pests become an immediate health concern, and the Department of Sanitation can issue NYC fines. Violations range from using disallowed meat or dairy to leaving bins unsealed, overflowing, or placed in living spaces. Repeated noncompliance in multi‑unit buildings triggers higher penalties, and neighbors can report you via 311. The city’s goal is corrective, but the financial hit can be steep if you ignore the rules.
- Unsealed or overflowing bins that emit odors
- Inclusion of meat, dairy, or other prohibited waste
- Lack of proper airflow causing pest infestations
- Free‑standing piles in kitchens or common areas
- Failure to maintain sealed, contained systems in multi‑unit dwellings
Local NYC Resources That Support Indoor Vermicomposting
Looking for help getting your indoor worm bin up and running? The city’s DSNY resources break down vermicomposting basics—greens, browns, moisture, and airflow—so you can follow NYC guidelines without a permit. Check the DSNY website for downloadable slides and step‑by‑step PDFs that cover containment, odor control, and castings use. Educational programs from GrowNYC and community groups like Big Reuse offer workshops, videos, and Q&A sessions, both online and in‑person. The CCE Broome County series and EPA indoor worm bin guidance also appear on local portals, giving you practical tips on red wiggler care and bin maintenance. Tap these free resources to stay compliant, reduce waste, and turn kitchen scraps into nutrient‑rich soil for your indoor garden.
Frequently Asked Questions
Can Vermicomposting Be Done Indoors?
Yes, you can vermicompost indoors; just set up a worm bin with bedding, red wigglers, and kitchen scraps, keep it moist, aerated, and avoid meat or dairy to prevent odors and pests.
What Are the Composting Rules in New York City?
You must keep your indoor bin under 30 gallons, use only fruit/vegetable scraps, avoid meat or dairy, maintain moisture, seal it to prevent pests, and follow any building‑code fire‑safety rules.
What Is the Fatal Temperature for Worms in Vermicomposting?
The fatal temperature for your vermicomposting worms is about 95 °F (35 °C) or higher; exposure that long will kill them, so keep the bin well below that heat threshold.
Can You Vermicompost in an Apartment?
Yes, you can vermicompost in an apartment. Set up a small bin, add red wigglers, feed them kitchen scraps—skip meat and dairy—and keep it moist, ventilated, and away from direct sunlight.
In Summary
By following DSNY’s rules—using a sealed, odor‑controlled bin, sticking to approved kitchen scraps, and keeping records—you can compost indoors without breaking NYC law. Your worm bin stays clean, your neighbors stay happy, and you turn waste into valuable fertilizer for your plants. Stay compliant, keep the bin tidy, and enjoy the benefits of sustainable, indoor vermicomposting in any city apartment.



