
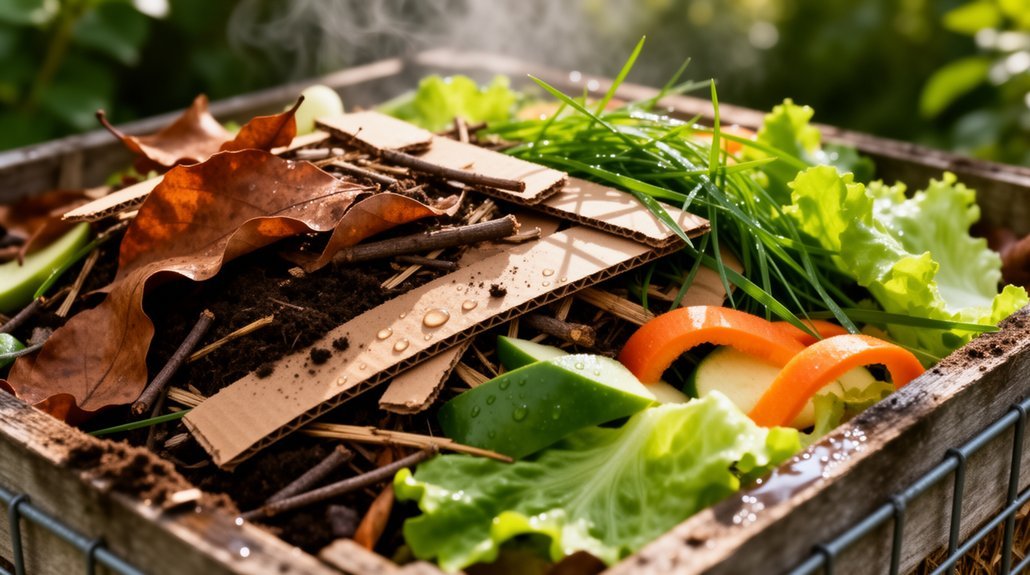
You’ll transform your compost pile by maintaining a 2:1 or 3:1 browns-to-greens ratio. Browns like leaves and cardboard supply carbon, while greens like kitchen scraps and grass clippings provide nitrogen for microbial growth. Layer them alternately, keep your pile as moist as a wrung-out sponge, and turn it weekly. This balance generates heat, accelerates decomposition, and controls odors. Master these fundamentals, and you’ll discover how to troubleshoot common problems and recognize when your compost is ready to harvest.
Why Browns and Greens Matter for Composting

Why does your compost pile sometimes turn into a smelly, waterlogged mess or stubbornly refuse to break down? The answer lies in balancing browns and greens.
Greens supply nitrogen that fuels microbial growth and generates heat, while browns provide carbon as an energy source. You need both working together—microbes can’t efficiently break down organic matter without this combination.
Greens fuel microbial growth with nitrogen while browns provide carbon energy. Both are essential—microbes need this partnership to efficiently break down organic matter.
A proper ratio, typically 2:1 or 3:1 browns to greens, supports active decomposition. Too many greens create excessive moisture and slow breakdown. Too many browns leave your pile cool and dry, equally problematic. Regular turning of your compost pile optimizes microbial activity and speeds up the entire decomposition process. Like fermentation tools that require proper maintenance for longevity, compost piles benefit from consistent care and proper storage conditions to prevent degradation.
When you maintain balance, your compost heats up, accelerates decomposition, controls odors, and prevents compaction. The browns-greens system offers a straightforward method to manage inputs without measuring exact chemistry, making composting accessible and reliable.
What Makes Browns Essential to Your Pile
Browns aren’t just filler in your compost pile—they’re the backbone that keeps everything working. They supply the carbon that feeds your decomposer microbes, giving them the energy they need to break down organic waste efficiently. Without adequate browns, your microbes go hungry, and decomposition slows dramatically.
Browns also create the physical structure your pile needs. Their woody texture keeps spaces open for oxygen flow, which supports aerobic decomposition and eliminates foul odors. They absorb excess moisture from greens, preventing that slimy, anaerobic mess that attracts pests and smells terrible. Common browns like leaves, wood chips, straw, and shredded paper are readily available materials that work effectively in most home composting systems. For those using indoor bokashi systems, tight-fitting lids on your bin also play a crucial role in odor prevention alongside proper brown management.
Most importantly, browns maintain the carbon-to-nitrogen balance that makes composting stable. Experts recommend a 3:1 browns-to-greens ratio for prime results. Too many greens without enough browns creates overheating, slime, and ammonia odors. You need browns to succeed.
How Greens Speed Up Decomposition

While browns provide structure and carbon, greens fire up decomposition by supplying the nitrogen your microbial workforce needs to thrive. Nitrogen fuels microbial protein synthesis, accelerating growth and reproduction of decomposer organisms that break down organic matter rapidly.
You’ll notice green-rich piles generate significant heat—often reaching 140°F within days—which eliminates pathogens and weed seeds while speeding breakdown. Fresh greens like grass clippings and fruit scraps also contribute moisture, keeping your pile at optimal dampness for aerobic decomposition. Placing your compost bin in full sun will further amplify this heat generation, maximizing microbial activity throughout the decomposition process.
However, balance matters. Aim for roughly one part green to two or three parts brown by volume. Too much green creates excess nitrogen, potentially causing odors or slowdowns. Chopping greens into smaller pieces and layering them with browns maximizes surface area and airflow, accelerating decomposition further. For dedicated composters managing worms, supplementing your pile with specialized worm food can further optimize microbial and worm activity in your system.
Brown Materials You Probably Already Have
You’ve likely got brown composting materials scattered around your home and yard already—dried leaves from fall cleanup and everyday paper products like coffee filters, paper bags, and cardboard tubes all work as excellent carbon sources. Gathering leaves in autumn and storing them dry gives you a year-round supply to balance your compost pile, while household paper items provide convenient browns when kitchen scraps threaten to make your pile too wet. These accessible materials mean you don’t need to search far to maintain the proper carbon-to-nitrogen ratio that keeps decomposition moving forward. For vegetable gardens and other plants that benefit from finished compost, understanding how nitrogen-heavy materials affect your pile becomes essential. Proper browns help prevent unpleasant odors and methane production that can develop when your pile becomes too nitrogen-heavy.
Yard Waste and Leaves
Every autumn, your yard provides one of the most valuable—and often overlooked—composting materials: fallen leaves. You’re sitting on a goldmine of carbon-rich browns that’ll balance your nitrogen-heavy greens perfectly.
Here’s why you shouldn’t let them disappear:
- Shred them first – Shredded leaves decompose faster and integrate better into your pile than whole leaves, accelerating your compost timeline.
- They’re nutrient-dense – Leaves contain phosphorus, potassium, and trace minerals that return to your soil in slow-release form, boosting fertility naturally. As leaves break down through decomposition, these minerals enrich the surrounding soil with essential nutrients your plants need.
- Layer strategically – Mix shredded leaves with kitchen scraps or grass clippings to achieve ideal carbon-to-nitrogen balance for efficient decomposition. Consider using compostable food scrap bags to collect and contain kitchen scraps before layering them with your leaves.
You can also use leaves as mulch around garden beds or collect bagged curbside leaves (ensuring they’re contaminant-free). This simple practice diverts waste from landfills while creating premium compost for your garden.
Household Paper Products
Beyond your yard’s seasonal bounty, your home already contains plenty of brown materials perfect for composting—and most people don’t realize they’re throwing them away. You can shred office paper, newspaper, and plain printer paper directly into your pile. Uncoated paper bags and cardboard egg cartons break down quickly when torn into smaller pieces. Toilet paper rolls, paper towel rolls, and coffee filters decompose rapidly, making them excellent additions. Kraft paper from gift wrap or packaging is another sustainable option for your compost bin. These paper materials work especially well when combined with charcoal filters or other odor-control components to maintain a balanced composting environment.
Avoid glossy magazines, wax paper, and cereal boxes—their coatings resist breakdown. Skip paper cups and used toilet tissue entirely. Remove staples and tape before composting cardboard.
Tear everything into strips to accelerate decomposition. These paper browns balance nitrogen-rich kitchen scraps, reduce odors, and improve airflow while keeping waste from landfills.
Green Materials for Your Compost Bin
You’ll want to focus on three primary sources of green materials: kitchen scraps and produce waste from your daily meals, grass clippings and garden trimmings from your yard work, and nitrogen-rich additions like manure and coffee grounds. These greens provide the fast-acting nitrogen that fuels microbial decomposition and balances out your browns. Additional green inputs such as seaweed and hair clippings can enhance your compost pile with extra nutrients and minerals while contributing to the nitrogen content needed for efficient breakdown. For apartment dwellers with limited space, black soldier fly larvae offer an alternative high-protein composting method that processes organic waste efficiently without the traditional green material requirements.
Kitchen Scraps and Produce
What’s sitting in your kitchen right now that can become compost gold?
You’ve got a treasure trove of green materials ready to transform your compost pile. Fruit and vegetable scraps form the foundation—apple cores, banana peels, carrot tops, and potato skins all break down efficiently when you chop them into smaller pieces. Coffee grounds and loose tea leaves add vital nitrogen to your mix. These materials release essential nutrients like nitrogen, phosphorus, and potassium slowly to nourish plants as decomposition occurs.
Focus on these high-impact additions:
- Soft produce scraps that decompose quickly and build nitrogen content
- Coffee grounds paired with dry browns for balanced decomposition
- Crushed eggshells rinsed to reduce odor and pest problems
The key’s maintaining proper balance: aim for roughly three parts browns to one part greens by volume. Layer your kitchen scraps with dry leaves to control moisture and odor while supporting the microorganisms that break down organic matter into finished compost. Using a countertop compost bin helps you collect and organize your kitchen scraps before transferring them to your outdoor pile. Beneficial microorganisms from fermented vegetables and coffee grounds accelerate the decomposition process and improve the final compost quality.
Grass Clippings and Garden Trimmings
Your kitchen scraps represent just one piece of the composting puzzle—the real nitrogen powerhouse comes from your yard. Fresh grass clippings contain around 4% nitrogen, making them invaluable green material that can supply up to 25% of your lawn’s fertilizer needs when returned directly.
| Material | Nitrogen Content | Decomposition Speed |
|---|---|---|
| Grass clippings | ~4% | Fast |
| Garden trimmings | Moderate | Fast |
| Woody stems | Low | Slow |
However, don’t pile clippings alone—they’ll mat densely and create odors. Mix them with browns like dry leaves or wood chips in a 1:1 ratio. This balance maintains airflow, controls moisture, and accelerates decomposition while preventing compaction that harms microbial activity. Maintaining a well-balanced carbon-to-nitrogen ratio ensures your compost pile sustains robust microbial activity and produces high-quality finished compost. When clippings are treated with herbicides, wait two or three mowings after application before adding them to your compost pile to allow residues to break down.
Manure and Coffee Grounds
Why do seasoned composters consistently reach for manure and coffee grounds? These nitrogen-rich materials transform your bin’s decomposition process while offering distinct advantages.
Manure supplies essential nutrients—nitrogen, phosphorus, potassium, and micronutrients—that accelerate decomposition. You’ll benefit from composting raw manure first since heat kills pathogens like E. coli and reduces odor and weed seeds. The finished product becomes a slow-release fertilizer that improves soil structure and drainage. Proper composting reduces pathogen presence compared to fresh manure, making safety a key consideration when selecting your manure source. Selecting an airtight compost container with reliable sealing will further minimize odor escape during the decomposition process.
Coffee grounds contribute similarly as nitrogen-rich inputs that break down into valuable organic matter. However, you’ll need to balance them strategically:
- Mix grounds with high-carbon browns to prevent matting and airflow restriction
- Layer or combine materials to reduce excess moisture and odor
- Create diverse compost inputs for more stable, nutrient-rich finished compost
Together, these greens support efficient, sustainable composting.
Get Your Brown-to-Green Ratio Right

If your pile turns wet, slimy, or smells like ammonia, you’ve added too many greens. Simply incorporate more browns to restore balance.
Conversely, a dry, slow-decomposing pile signals excess browns. Adding greens boosts nitrogen and restarts active breakdown.
You don’t need exact measurements. Treat the ratio as a rule of thumb, adjusting based on how your compost looks and smells. Kitchen scraps and grass clippings typically require more browns as counterweight. Layering helps balance nutrients and structure by alternating materials throughout your pile.
Monitor your pile’s condition and recalibrate accordingly.
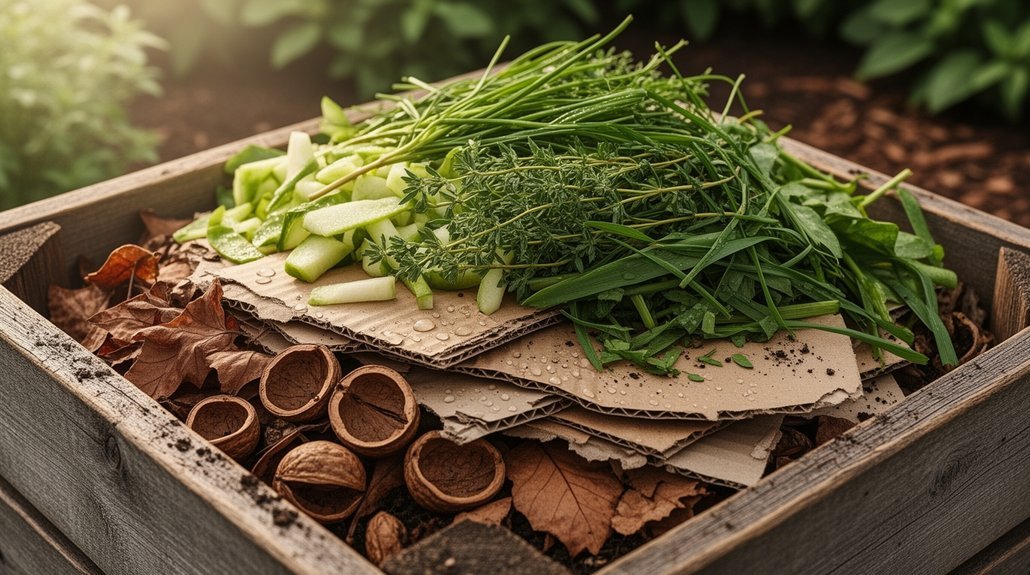
How to Layer Browns and Greens
The foundation of your compost pile matters just as much as the materials you add. Start with a 6-inch layer of coarse browns like branches and straw to create air pockets and prevent compaction. Then build your pile in alternating layers, sandwiching greens between brown coverings.
Here’s your layering strategy:
- Place 2-4 inches of greens in the center of your brown base, keeping them away from exposed edges to minimize pest attraction
- Cover each green layer completely with 3-4 inches of browns like dry leaves or shredded paper to hide food scraps and filter odors
- Repeat this pattern until you reach approximately 1 cubic yard, maintaining a loose structure for proper airflow
This lasagna-style approach distributes materials evenly while reducing the need for constant mixing. Alternating layers help distribute organic material more evenly and support a balance of beneficial microorganisms for a loamy soil microbiome.
Keep Your Pile Moist and Airy

Your compost pile’s success hinges on striking the right balance between moisture and oxygen—two factors that directly influence microbial activity and decomposition speed.
| Condition | Problem | Solution |
|---|---|---|
| Too Dry | Microbial activity stops | Add water, greens, or damp bedding |
| Too Wet | Oxygen depletes, odors develop | Spread on tarp, fluff, add browns |
| Compacted | Air pockets disappear | Turn with pitchfork or aerator |
| Balanced | Optimal decomposition | Moist, crumbly texture maintained |
Aim for 50% moisture—like a wrung-out sponge. Water slowly during evening to prevent runoff and evaporation. Turn your pile weekly to distribute moisture evenly and increase oxygen penetration. Monitor after turning since aeration accelerates drying. Cover your pile with tarps or mulch during hot weather to retain moisture. A simple hand test confirms readiness: material should clump without dripping water. The bacteria and fungi that drive decomposition rely on this consistent moisture balance to remain active and break down organic matter efficiently.
What Not to Add to Your Compost
You’ll want to keep diseased plants, weed seeds, and invasive material out of your pile since they can survive decomposition and reintroduce problems to your garden. Invasive plants like wandering willie and bindweed are particularly problematic because their roots and seeds can regrow when the finished compost is spread across your garden beds.
Treated wood and glossy paper contain chemicals and coatings that don’t break down properly and can contaminate your finished compost.
Avoid adding meat, dairy, and oils—they’ll attract pests, create foul odors, and disrupt the microbial activity your compost needs to thrive.
Diseased Plants And Seeds
While it might seem wasteful to exclude diseased plant material from your compost pile, doing so is crucial for protecting your garden’s health. Home compost piles rarely reach temperatures high enough to eliminate plant pathogens like fungi, bacteria, and viruses.
When you reintroduce infected compost into your garden, you’re fundamentally spreading disease to healthy plants. This risk increases markedly with certain crops:
- Tomato and potato plants, including fruits and tubers
- Material with persistent fungal or bacterial infections
- Weeds carrying disease or producing seeds
Instead, bag diseased debris securely and dispose of it at your local landfill. For particularly problematic material, double-bagging prevents spore spread during handling. Municipal composting facilities operate at higher temperatures capable of destroying these pathogens safely. If diseased plants were accidentally added to your compost pile, you should remove them promptly to prevent further contamination of your finished compost.
Treated Wood And Paper
Because treated lumber contains chemical preservatives like arsenic, chromium, and copper, it doesn’t belong in your compost pile. Composting moisture and organic acids leach these chemicals into your finished compost and surrounding soil, creating contamination risks. Sawdust and scraps from treated wood are especially problematic—fine particles spread preservatives more easily than intact boards.
Skip coated, waxed, or laminated paper too. Heavy inks, dyes, and chemical coatings introduce unwanted contaminants. Treated paper products often contain non-compostable additives that won’t break down cleanly.
Instead, use untreated wood chips, plain shredded cardboard, and uncoated paper as your brown materials. If you’re building a wooden compost bin, choose untreated cedar or hemlock. These alternatives support healthy decomposition without contamination concerns.
Meat, Dairy, And Oils
Just as treated materials introduce unwanted chemicals into your pile, animal-based foods and cooking fats create different but equally problematic issues.
You’ll want to exclude meat, fish, dairy, and oils from your home compost system. Here’s why:
- Pest attraction: Raw and cooked meat, fish, and dairy products emit strong odors that lure rodents, raccoons, and flies to your pile, creating sanitation problems.
- Decomposition problems: These materials rot rather than break down aerobically, ferment slowly, and can form clumps that reduce aeration and moisture flow throughout your pile.
- Airflow obstruction: Fats and oils coat compost materials, creating water-resistant barriers that suffocate microbes and halt decomposition.
Instead, dispose of grease in sealed containers, route meat and dairy to municipal organics programs, or explore bokashi pre-treatment options for these materials.
Fix Slimy, Smelly, or Slow Compost
What’s gone wrong with your compost pile? Slimy, smelly compost signals anaerobic conditions where oxygen depletion has stalled decomposition. Excess moisture combined with poor aeration typically causes the problem.
Here’s your fix: Stop adding fresh greens immediately. Mix in dry browns—shredded paper, cardboard, or leaves—until your pile feels like a wrung-out sponge. Turn the pile every few days with a pitchfork to reintroduce oxygen and break up compacted layers. This aeration speeds microbial recovery and eliminates odors fast.
Aim for roughly 50% moisture; anything above 70% pushes out oxygen entirely. During rain, cover your pile; uncover it during dry periods. Chop oversized scraps before adding them, since large particles slow breakdown. These adjustments restore balance and get decomposition back on track.
When Your Compost Is Ready to Use
Once you’ve restored your pile’s balance and the slimy, smelly phase has passed, you’ll eventually reach the rewarding moment when your compost is truly finished and ready to use.
Your finished compost should display these key indicators:
- Visual and sensory markers: Dark brown or black color, crumbly texture, and an earthy forest-floor aroma confirm maturity. Avoid sour or ammonia-like odors.
- Temperature verification: Cool compost near ambient temperature suggests active decomposition has completed. Use a thermometer to confirm readiness.
- Germination testing: Plant radish seeds in your compost sample. Healthy green seedlings within days indicate it’s ready for garden beds, mulching, or potting mix amendments.
You can sift out remaining large pieces before using your nutrient-rich compost.
Frequently Asked Questions
Can I Compost Dryer Lint and Cotton Fabric, or Will They Contaminate My Pile?
You can compost 100% natural-fiber lint and cotton fabric without contamination. Avoid synthetic blends and dryer sheets, which introduce microplastics. Cut fabric small, add thin layers, and mix thoroughly into active piles.
How Should I Prepare Large Branches and Cardboard Before Adding Them to Compost?
You should cut large branches into 1–2 inch sections using pruners or loppers. Tear cardboard into strips, remove tape and plastic, wet it thoroughly, and flatten sheets before layering everything with nitrogen-rich greens.
Is It Safe to Use Manure From All Animals in Home Compost Piles?
No, you shouldn’t use manure from all animals. You’ll want to avoid cat, dog, and pig manure in your garden because they’re more likely to contain human parasites. Stick with herbivore manures instead.
How Often Should I Turn or Mix My Compost Pile for Faster Decomposition?
You’ll achieve faster decomposition by turning your pile every 3 to 4 days during the active heat phase. Use a compost thermometer to guide you—turn when temperature drops below 104°F to maintain ideal microbial activity.
Can I Add Coated Paper Products Like Glossy Magazines to My Compost Bin?
You shouldn’t add glossy magazines to your compost bin. Their plastic or synthetic coatings slow decomposition and won’t break down properly. Instead, you’ll want to recycle them through your municipal program for better results.
In Summary
You’ve now got everything you need to build a thriving compost pile. By balancing your browns and greens, keeping things moist and airy, and avoiding problem materials, you’ll transform your kitchen scraps and yard waste into rich, dark compost. You’ll notice when it’s ready—it’ll look crumbly and earthy. Soon you’ll be enriching your garden with nutrient-packed compost you’ve made yourself.


Leave a Reply