
You can ferment kitchen scraps in your apartment using a bokashi bin—an airtight bucket that fits under your sink or on a balcony. Simply layer food scraps with bokashi bran, seal the lid, and you’ll have nutrient-rich pre-compost in 7-14 days without odor or pests. Drain the liquid regularly to feed plants, then finish the material in potted soil. The process works because anaerobic microbes break down everything—meat, dairy, cooked meals—that traditional composting can’t handle. There’s much more to mastering each step ahead.
Why Bokashi Works in Apartments
Why does bokashi succeed where traditional composting fails in apartments? You don’t need a yard or outdoor space. Bokashi’s airtight fermentation system fits neatly into your kitchen, closet, or balcony, making it ideal for compact living. The sealed container controls odors by fermenting scraps rather than letting them rot, so neighbors won’t complain about smells. You’ll also avoid attracting flies, rats, and other pests that plague open compost bins. The process moves fast—typically 7 to 14 days—so you’re not storing stinky waste for months. Once fermented, you can bury the material in houseplant soil, planter boxes, or community gardens. The anaerobic fermentation process breaks down all food scraps, including meat and cheese, which traditional composting cannot accommodate. With proper odor control from the airtight lid, your bokashi system remains neighbor-friendly even in close quarters. Bokashi transforms apartment composting from impossible to practical and manageable.
What You Get in a Bokashi Kit and Why Each Part Matters
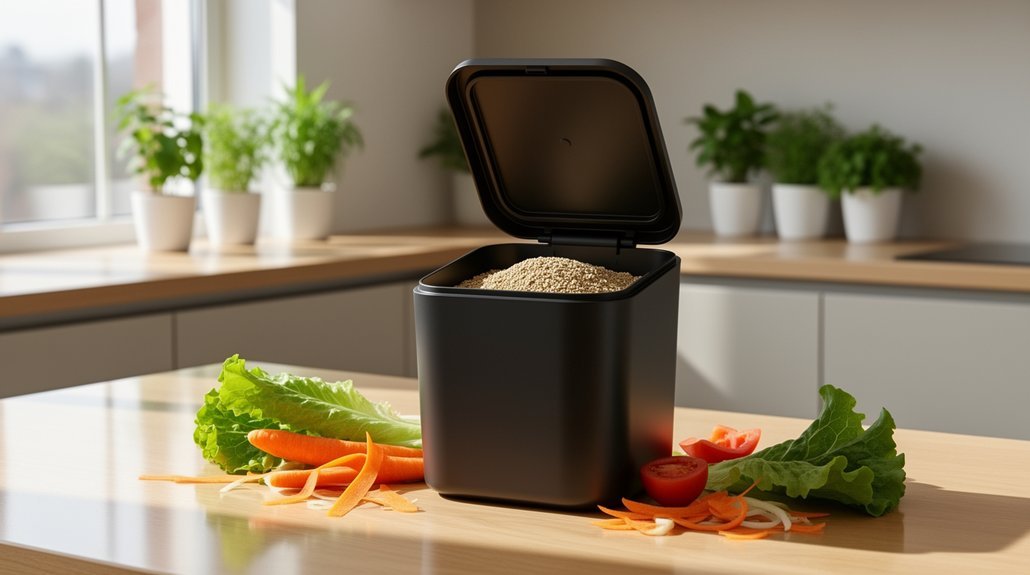
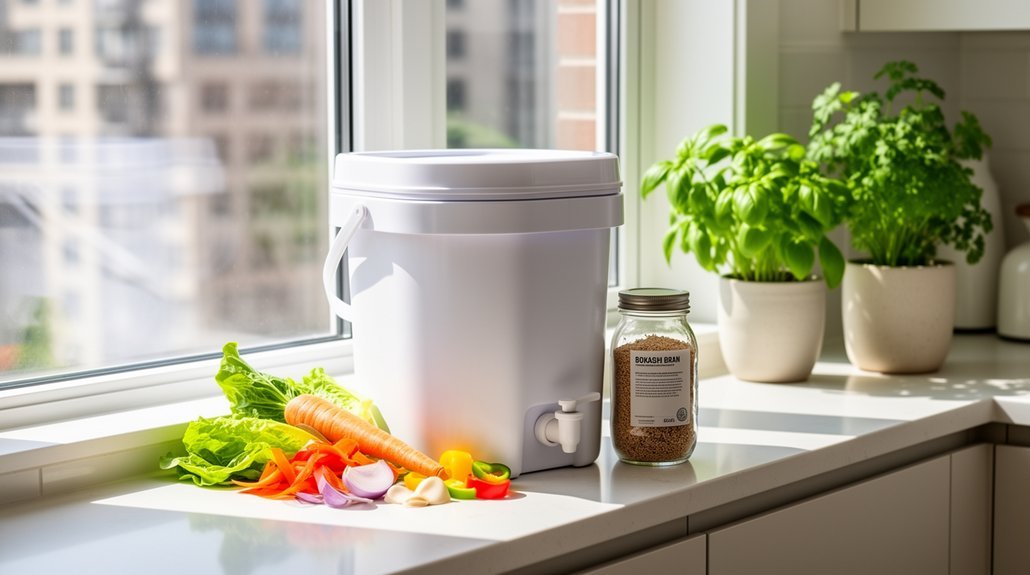
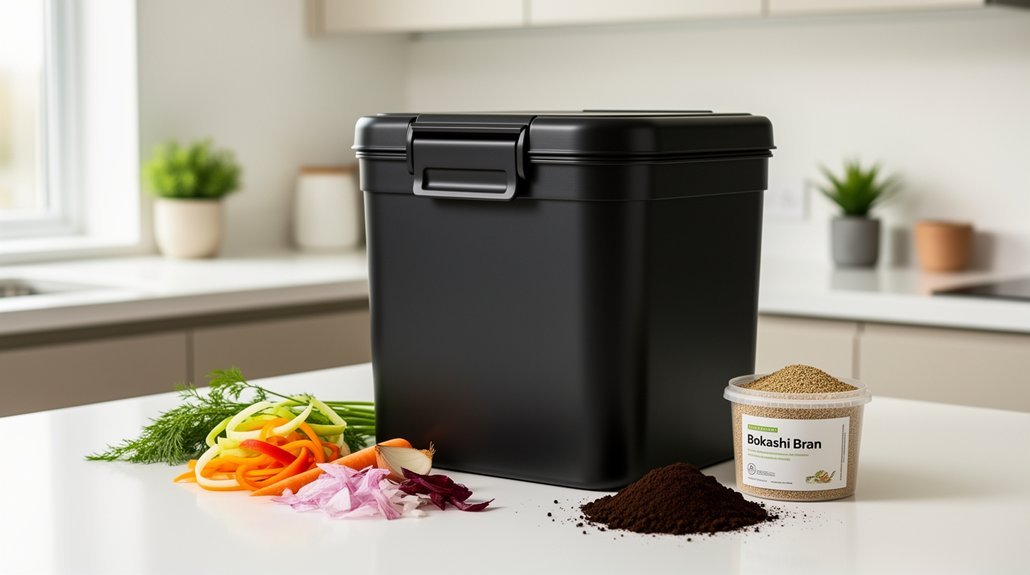
What’s actually inside a bokashi starter kit? You’ll get a 4–5 gallon airtight bucket with a secure lid that maintains the anaerobic environment essential for fermentation. A strainer plate keeps food scraps elevated above the drainage system, while a bottom spigot lets you collect nutrient-rich bokashi liquid.
The kit includes bokashi bran—the microbial inoculant that drives fermentation—typically 1–2 lbs per bag. You’ll also receive a compactor to press down scraps and remove air pockets, plus a dosage container for measuring bran layers. Many kits add a small collection pail for gathering kitchen waste before transfer. Each 2.2 lb bag of bran can ferment up to 5 full kitchen composters, making the bran supply efficient for long-term use. The bran is a premium blend of rice bran, EM-1, and molasses that accelerates food waste breakdown without producing unpleasant odors.
Dual-bin kits let one batch ferment while you actively use the second. These components work together to support compact layering, odor control, and consistent fermentation in your apartment.
Set Up Your Bokashi Bin: Step-by-Step
You’ll start by selecting the right container—whether you’re buying a dedicated bokashi bin or adapting a 5-gallon bucket with a tight-fitting lid and spigot—then assemble its essential components like the internal drainer plate and verify everything seals properly.
Next, you’ll prepare your bin for its first batch by setting the spigot to closed, positioning the drainer plate level at the bottom, and confirming the lid forms an airtight seal without leaks. An airtight condition is essential because it enhances the anaerobic fermentation process that bokashi relies on. Consider using compostable bin liners to line the interior for easier cleanup and material transfer once fermentation is complete.
With your setup complete, you’re ready to begin layering bran and food scraps to kick off the fermentation process.
Choosing Your Container Setup
How you configure your bokashi bin makes all the difference in apartment composting success. You’ll want to contemplate several setup options that fit your space and lifestyle:
- Single 5-gallon bucket – Simple, compact, and ideal if you’re willing to pause collection during fermentation
- Two-bucket rotation – Lets you continuously collect scraps while one bin ferments undisturbed
- Nested buckets – An inner perforated bucket sits inside an outer collection bucket, catching liquid drainage
- Dual sealed system – Both buckets fully sealed with airtight lids for maximum odor control
Choose based on your available space and collection volume. Screw-on lids outperform snap-on alternatives for durability. Two-bucket setups work best for consistent daily use, eliminating downtime between fermentation cycles. The two-bin arrangement requires minimal space while allowing you to maintain continuous composting without interruption, making it particularly suited for apartment dwellers with limited room to spare. For indoor bokashi systems, stainless steel handles and secure lids help maintain practicality in tight quarters where ease of transport between collection and fermentation spaces is essential.
Assembling Essential Components
Successfully assembling your bokashi bin requires attention to several key components that work together to create an effective fermentation environment. Start by placing the strainer plate level at the bottom of your bucket to separate solids from liquid. Install the spigot and confirm it’s in the closed position before use. Fit the airtight lid securely—this seal is essential for anaerobic fermentation and odor control. Ensure all pieces align so liquid can drain properly below your waste layer. You’ll use this sealed vessel differently than traditional compost bins; it’s designed to process meat, dairy, cooked foods, and bones without generating odors. Keep the lid closed between additions to maintain your anaerobic environment and support low-odor indoor operation. Many bokashi kits include presser, shovel, and measuring cup to help you compact waste layers and manage the fermentation process efficiently. Consider installing a tap or tray at the bottom to easily collect and manage drainage from your fermentation process.
Preparing For First Use
Before you add any food scraps, take a few minutes to verify that your bokashi bin’s components are properly assembled and functioning. Check these essential elements:
- Confirm the spigot is in the closed position
- Ensure the drainer plate sits level at the bottom
- Test that the airtight lid seals completely
- Verify the outer bucket can catch any drainage
Position your bin in a stable, easily accessible location—your kitchen counter works perfectly for apartment living. Choose a spot you’ll visit daily to add scraps consistently. Check that your setup prevents liquid leaks, maintaining indoor sanitation. The airtight seal is critical for creating the anaerobic environment necessary for the bokashi microbes to ferment your food waste effectively. Regular maintenance of your spigot through cleaning every 2-3 weeks will help prevent clogs and keep drainage flowing smoothly. Once you’ve verified everything functions properly, you’re ready to load your first layer of bokashi bran before introducing food waste.
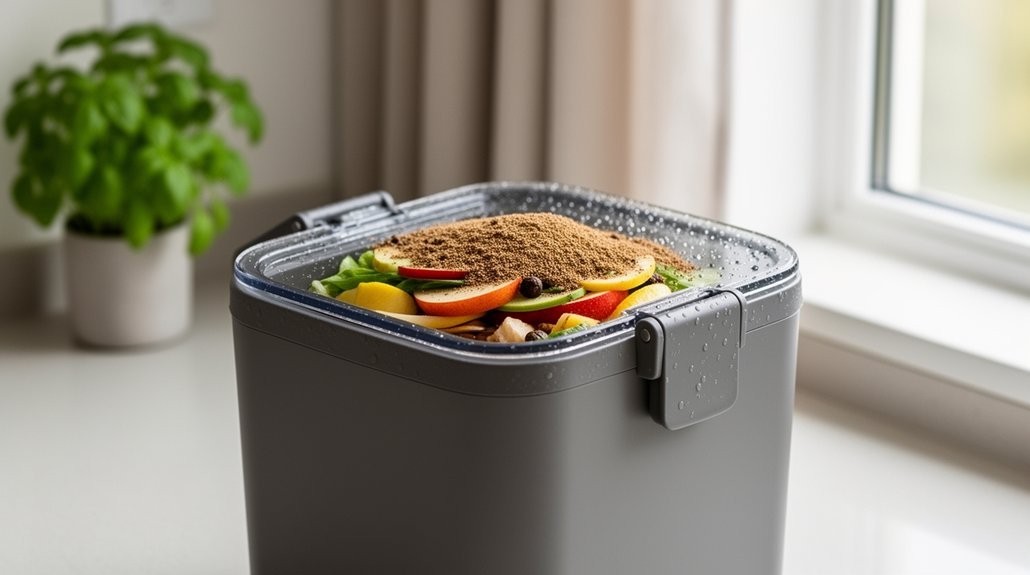
What Foods Go in Your Bokashi Bin (and What Doesn’t)?
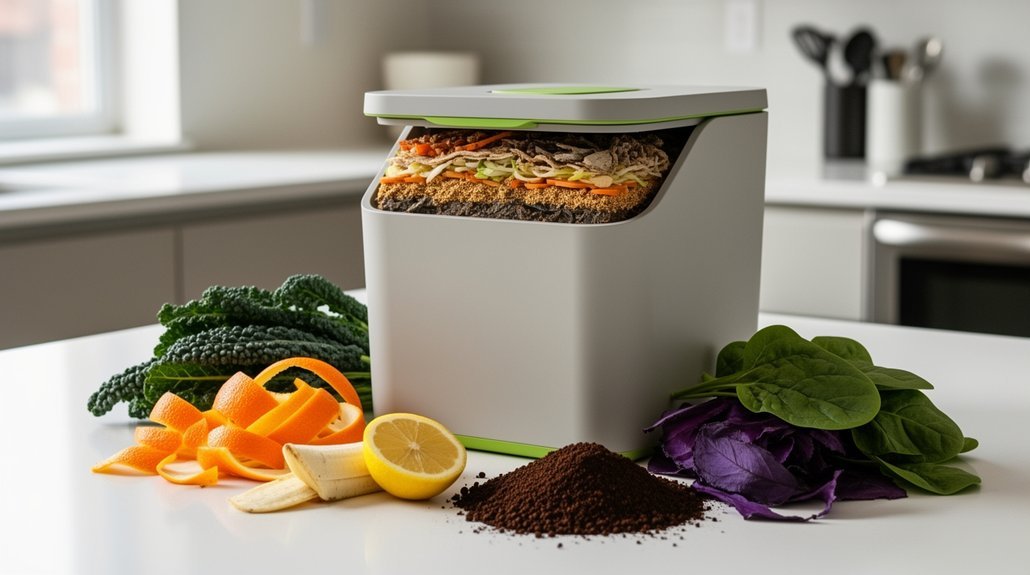
You’ll want to load your bokashi bin with fruit and vegetable scraps, cooked foods, and even meat and dairy—options that’d ruin traditional compost but thrive in fermentation.
At the same time, you’ll need to sidestep excess liquids, heavily oiled foods, and large bones, which can derail the fermentation process and create odor problems in your apartment. Small amounts of liquid are acceptable, but avoid pouring large quantities at once to prevent overflow into the bokashi tea reservoir.
Mastering moisture control through proper layering with bokashi bran and strategic drainage keeps your system running smoothly while maximizing what you can recycle from your kitchen. The bokashi bran absorbs excess liquid and minimizes odors, making it essential for maintaining anaerobic conditions in your bin.
Food Scraps You Can Add
One of bokashi composting’s greatest strengths is its versatility with food waste. You can add virtually any kitchen scrap to your bokashi bin, making it ideal for apartment dwellers with limited space.
You’ll want to include:
- Kitchen scraps – fruit and vegetable peelings, cores, and trimmings
- Cooked meals – leftover grains, rice, pasta, sauces, and mixed dishes
- Protein-rich foods – meat scraps, fish, and bones
- Dairy and baked goods – cheese, eggs, bread, and pastries
For optimal fermentation, chop larger pieces into smaller portions. This reduces air gaps and speeds the fermentation process. You can also add coffee grounds, tea leaves, and small amounts of organic paper. Most bokashi systems utilize charcoal filters to manage odors during the fermentation process, similar to kitchen compost crocks. However, limit excess liquid, as too much moisture interferes with fermentation performance. Avoid overloading your bin with incompatible materials to maintain process efficiency and ensure consistent fermentation results.
Items To Always Avoid
While bokashi bins accept most kitchen waste, several categories of items can undermine fermentation and should stay out.
| Category | Why to Avoid |
|---|---|
| Liquids & Excess Moisture | Prevent microorganism growth, causing decay instead of fermentation |
| Oils & Grease | Destabilize fermentation and create excess moisture |
| Heavily Moldy Food | Overload bins with undesirable microbes, risking failure |
| Large Bones & Meat | Take too long to break down in the system |
You’ll also want to exclude animal feces due to pathogen risks, ashes with unknown chemical content, and non-food items like paper or pencil shavings. When you’re uncertain about adding something, skip it. Bokashi systems are designed specifically for food fermentation, and sticking to appropriate materials ensures reliable results in your apartment setup. To maintain optimal fermentation conditions, regularly check your airtight lid for proper sealing to prevent contamination. Unlike traditional composting, bokashi relies on anaerobic fermentation to process diverse food scraps without oxygen, making it critical to maintain an airtight environment by avoiding items that introduce excess moisture or disrupt the microbial process.
Handling Moisture And Liquids
Why does moisture matter so much in a bokashi bin? Excess liquid suppresses the microorganisms you need for fermentation, replacing it with rot instead. You’ll want to drain or strain liquid-rich scraps before adding them to your bin.
To manage moisture effectively, follow these strategies:
- Drain food waste, especially leftovers with sauces or cooking liquids
- Let wet scraps sit in a strainer so free liquid separates first
- Add bokashi bran generously over wetter layers to support fermentation
- Alternate wet scraps with drier items like bread or coffee grounds
Avoid soups, broths, juices, and milk entirely—they’ll quickly destabilize your bin. You can add small amounts of wet leftovers if you mix them thoroughly with dry waste and bran. When you collect excess bokashi tea from wetter items like watermelon, drain it regularly to prevent bin failure. Seal your lid tightly after each use to prevent moisture buildup between additions. Maintaining the optimal moisture level described as wet as a wrung-out sponge helps preserve fermentation conditions and prevent bin failure.
Keep Your Bokashi Bin Fresh and Odor-Free Daily
How can you maintain a bokashi bin that stays fresh and odor-free? You’ll need to focus on three daily practices. First, keep your bin dry by blotting damp scraps before adding them and laying absorbent material on the top layer to capture surface moisture. Second, ensure your lid seals tightly—air leaks allow decomposition odors to develop, so avoid lifting it unnecessarily. Third, apply bokashi bran consistently with each food layer; uneven coverage leaves scraps under-fermented and smelly. Additionally, remove excess liquid buildup regularly and clean your bin thoroughly between cycles using only mild soap and water, never bleach. Store your bin in cool, shaded conditions to prevent odor problems from overheating. If your bin is equipped with a tap, drain the bokashi juice that accumulates naturally from the moisture in your food scraps to maintain optimal dryness.
Drain Bokashi Tea and Feed Your Plants
Once your bokashi bin is actively fermenting, you’ll start accumulating nutrient-rich liquid—bokashi tea—that deserves prompt attention. This potent liquid contains valuable microbes and nutrients from your food scraps, but it’ll develop a foul odor if left sitting.
Bokashi tea is nutrient-rich liquid that requires prompt draining—use within 8 hours before it develops an unpleasant odor.
Here’s how to maximize your bokashi tea:
- Drain your spigot every couple of days, using the tea within 8 hours for best results
- Dilute heavily before applying—start at 1:100 ratio, or weaker for sensitive plants
- Add diluted tea to your watering can during regular plant feedings as a nutrient boost
- Pour unused tea down drains to reduce sludge and grease buildup. Over-wet conditions may cause your bokashi bucket to fail, so regular draining helps prevent excess moisture from accumulating in the reservoir at the bottom.
Finish Your Bokashi in Pots and Containers

Your bokashi bin’s fermentation cycle completes when you’ve filled it and let the microbes work their magic, but the real transformation happens when you transfer that pre-compost to containers where it’ll finish breaking down into planting-ready soil.
Start by filling your container one-third full with living soil—worms and bugs accelerate decomposition.
Add bokashi pre-compost as the next layer, filling to roughly two-thirds capacity. Mix thoroughly, breaking up lumps so material contacts soil evenly. Cover your container with a lid or plastic bag to protect from excess moisture. Ensure good drainage in the bottom of your container to prevent waterlogging and moisture-related problems during the breakdown process.
Wait 2-4 weeks for finishing. White mold may appear—that’s normal bokashi activity. Once lumps disappear and material resembles finished compost, you’re ready to plant directly into your nutrient-rich container soil.
Fix Bokashi Problems Fast
Even when you’ve followed the bokashi method carefully, things can still go wrong—but most common issues stem from a handful of preventable mistakes.
Even careful bokashi practitioners encounter problems—but most stem from a handful of preventable mistakes.
You can identify failure by smell and appearance. A pleasant, pickled aroma signals success, while foul odors or green, blue, or black mold indicate problems. White mold is normal.
Fix issues quickly by addressing these culprits:
- Insufficient bran—add more to every 30–40 mm layer, especially for protein-rich scraps
- Poor sealing—ensure your lid closes tightly after each addition
- Excess moisture—drain high-moisture scraps before loading
- Infrequent drainage—empty your tap regularly to prevent blockages
If your batch has rotted beyond recovery, bury it deeply with extra bran and soil, then restart fresh. Remember that bokashi microbes thrive anaerobically, so compress contents thoroughly after each addition to expel trapped air pockets that can slow fermentation or cause offensive smells.
Frequently Asked Questions
How Long Does the Entire Bokashi Composting Process Take From Start to Finished Compost?
You’ll typically need four to six weeks after your bucket’s full for the entire process. That includes two weeks of sealed fermentation, then another two to four weeks of breakdown in soil or compost. Add initial fill time beforehand.
Can I Use Bokashi Compost for Indoor Houseplants in My Apartment?
Yes, you can use bokashi compost for indoor houseplants. You’ll mix the fermented material into potting soil during repotting or bury it in soil pockets. Dilute the bokashi tea 1:100 before watering plants indoors.
What’s the Difference Between Bokashi Bran From Different Manufacturers or Brands?
You’ll find differences in carrier grain (rice versus wheat bran), microbial blends, packaging format (bran, liquid, or spray), and inoculant strength. Most variations reflect cost, availability, and application method rather than fundamental bokashi performance.
Do I Need to Buy a Specific Bokashi Kit or Can I DIY One?
You can DIY a bokashi system if you’ve got a food-safe bucket, but you’ll need bokashi bran, a drain method, and a masher. Starter kits offer convenience and guaranteed compatibility for less hassle.
How Much Space Does a Two-Bin Bokashi Setup Actually Require in Small Apartments?
You’ll need about as much floor space as two standard household waste bins side by side. Your setup fits easily in a kitchen corner, under-sink area, or pantry. You’ll mainly need access to the lid and spigot for daily use.
In Summary
You’ve got everything you need to start composting in your apartment with bokashi. By following these steps, you’ll transform your food scraps into nutrient-rich compost without the mess or smell of traditional methods. You’ll reduce waste, feed your plants, and maintain an eco-friendly lifestyle in your small space. Start your bokashi journey today and watch your gardening efforts flourish.


Leave a Reply