
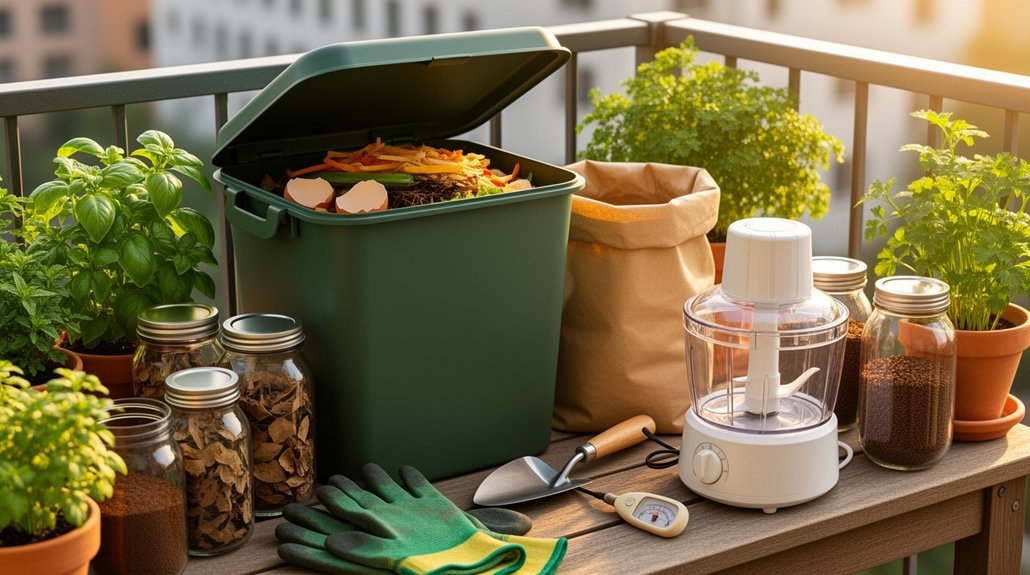
You’ll need a compact 75-liter ventilated bin with drainage holes and charcoal filters to control odors. Add a countertop scrap bucket, hand-crank mulcher, and manual aerator to process materials efficiently. Use a compost thermometer to monitor decomposition, and keep a small watering can for precise moisture control. Include a snug, weighted lid, lightweight sifter for finished compost, and reusable transport bucket. These ten tools transform your balcony into a productive composting system that fits tight spaces while managing smell and pests effectively—and there’s much more to optimize your setup.
Choose a Compact, Ventilated Compost Bin
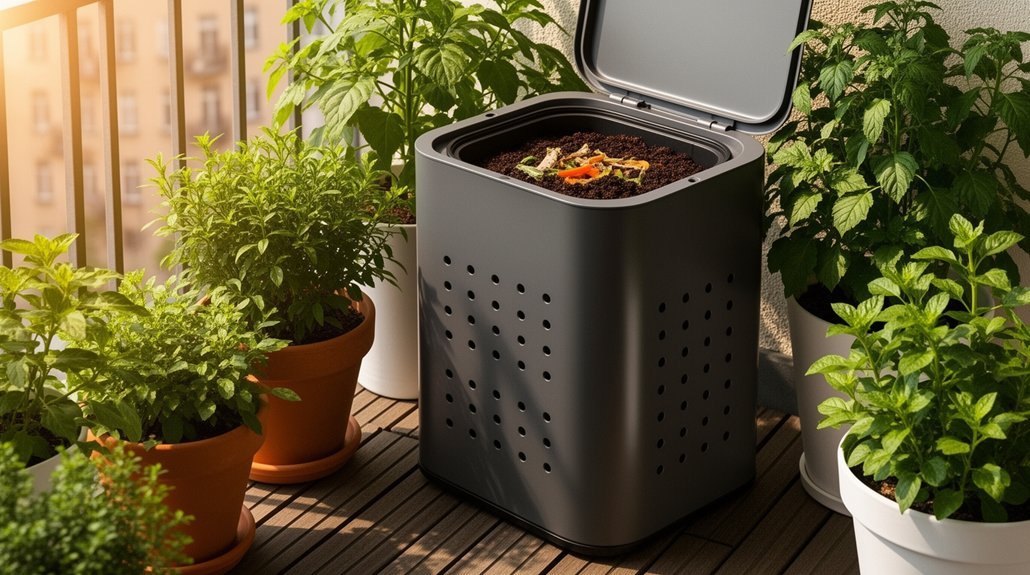
A compact, ventilated compost bin is the cornerstone of successful balcony composting. You’ll want a 75‑liter‑plus unit or a 17‑35‑gallon patio‑sized model that fits your balcony’s narrow footprint. Tall, narrow shapes use space efficiently and keep decomposition stable. Choose plastic, not metal, for corrosion resistance and a lifespan of up to five years. Ensure side and bottom holes are spaced about 5 cm apart, and add mosquito netting to keep insects out.
Passive aeration works best, so pack coarse branches loosely for airflow. Install drainage holes and a tray or built‑in reservoir to catch leachate, preventing moisture buildup and odors. For indoor balcony bins, charcoal filters provide effective odor control alongside passive ventilation. A secure lid—weighted if needed—shields against rain, wind, and pests while keeping the process aerobic and fast. Include a trivet underneath to catch any liquid drainage.
Set Up a Countertop or Under‑Sink Scrap Bucket for Daily Collection
You’ll want a compact, leak‑proof bucket with a tight‑fit, odor‑seal lid so scraps stay fresh and mess‑free. Label one side for greens and the other for browns, then place it on the countertop or under the sink for easy daily collection. This simple setup keeps your kitchen tidy while streamlining the two‑step balcony compost workflow. Using a sealed lid helps prevent odors and bugs. Once your collection bucket fills, transfer the contents to your bokashi system with drainage on the balcony to begin the fermentation process.
Compact, Leak‑Proof Bucket
Where to place a compact, leak‑proof bucket determines how smoothly your kitchen‑to‑balcony compost flow works. Choose a 0.68‑gallon or 1‑gallon container if you prep daily and want quick access; a 2.4‑gallon bin suits family‑level scraps before a balcony drop‑off. Opt for a rigid bucket with a snug lid and removable insert—this keeps wet waste from seeping onto countertops or under‑sink cabinets. Stainless steel or hard‑sided plastic offers durability and a smooth interior that rinses easily; dishwasher‑safe models cut cleanup time. Look for sturdy handles that let you lift and carry the bucket without drips. A sturdy handle is essential for transporting between counter and compost bin, so prioritize stainless steel designs that resist rust and heat. Match the size to your emptying schedule so you never overfill, which minimizes odor and mess. Using a plastic‑free option like a terra‑cotta pot can further reduce waste.
Tight‑Fit, Odor‑Seal Lid
Wondering how to keep kitchen odors at bay while collecting scraps? Choose a tight‑fit, odor‑seal lid that snaps or screws securely onto a 1‑gal lon bucket. Silicone gaskets or rubber seals block airflow, keeping fruit flies out and smells in. Pair the lid with an activated‑charcoal filter for extra absorption, and line the bucket with a compostable liner or newspaper to soak up moisture. Place the lidded container on the counter or under the sink for easy daily drops, then empty it before odor builds. Look for a lid that closes without excessive force, and verify that replacement seals or filters are available. A dishwasher‑safe lid and removable filter make routine cleaning quick and hassle‑free. Use a tight‑fitting lid to minimize odor escape.
Label and Separate Greens/Browns
How can you keep your balcony compost system running smoothly from day one?
Set up a dedicated countertop or under‑sink bucket for daily scraps and label two sections: “Greens” and “Browns.” Use a wide‑mouth container—like a small mixing bowl, a 5‑gallon bucket, or a stainless‑steel bin—so you can scrape fruit, veg, coffee grounds straight from the board into the greens side. Keep a thin layer of shredded cardboard or a paper towel at the bottom to prevent sticking. Store a handful of dry browns (shredded paper, cardboard, paper towels) nearby; when you transfer scraps, layer greens over browns immediately. Sealable lids or charcoal filters curb odor, and a removable collector makes daily transfers to your balcony compost quick and mess‑free. For optimal odor management, periodic changing or washing of charcoal filters ensures your collection bucket remains fresh throughout the week.
Add a Hand‑Crank Mulcher to Shred Kitchen Scraps Fast
When you’re composting on a balcony, every inch of space matters—and a hand-crank mulcher can transform your kitchen scraps into smaller, faster-decomposing pieces without taking up much room.
Hand-crank shredders work by manually feeding scraps through a cutting mechanism, breaking them into manageable pieces. This process increases surface area, allowing microbes to decompose material faster. You’ll find these countertop models ideal for:
- Fruit and vegetable peels, trimmings, and soft kitchen waste
- Pieces sized between 0.5 to 1.5 inches for optimal composting
- Wet green waste in modest amounts
The shredded scraps you create can be buried in soil, added to compost bins, or fed to worm systems. Since these units operate manually, they’re perfect for balconies where noise and electricity access are concerns. A hand-crank attachment welded to the rotating axis enables consistent manual operation for shredding without requiring any motor or external power source. For bokashi systems specifically, chopping waste to one-inch pieces accelerates the fermentation and composting process significantly.
Pick a Long‑Handled Compost Fork for Balcony Compost Turning

Once you’ve shredded your kitchen scraps into smaller pieces, you’ll need a reliable tool to turn and aerate your balcony compost regularly. A long-handled compost fork reduces strain by minimizing how much you bend over during turning sessions. Choose a shaft around 90 cm for larger frames or 660 mm or less for petite builds. Look for forks with four to five oval tines—they balance easy penetration with strong material hold. Tines extending 23 to 45 cm help you reach deeper into piles without excessive bending. Opt for a D-grip handle, which provides excellent control when lifting and shaking compacted material. For optimal odor control during frequent turning, consider pairing your compost fork with charcoal filter systems commonly used in countertop compost bins to manage any airborne odors. Store your fork in a dry place to prevent rust and deterioration that could compromise its performance over time. This combination of reach, tine design, and handle style ensures you’ll efficiently break down compost in tight balcony spaces.
Use a Manual Aerator to Improve Airflow in Balcony Compost
Why does your balcony compost pile compact so quickly? Limited space and frequent additions create dense zones where oxygen can’t reach. A manual aerator solves this problem efficiently without requiring heavy turning.
Manual aerators come in two main styles:
- Corkscrew models twist into the pile, creating air channels as you insert and withdraw
- Folding-wing designs insert closed, then open while lifting to mix material
- Both types reduce compacted zones where anaerobic conditions develop
Insert your aerator across different points in the bin rather than one spot. For best results, make multiple passes and wiggle the tool during withdrawal to break up dense material. This approach improves oxygen access and accelerates decomposition while keeping your balcony setup manageable. Consider pairing your manual aerator with strategically placed air vents to maximize ventilation performance in your compact space. Aeration frequency matters—aerating every 2-4 days during active composting extends the hot phase and maximizes decomposition speed.
Keep a Small Watering Can for Precise Moisture Control
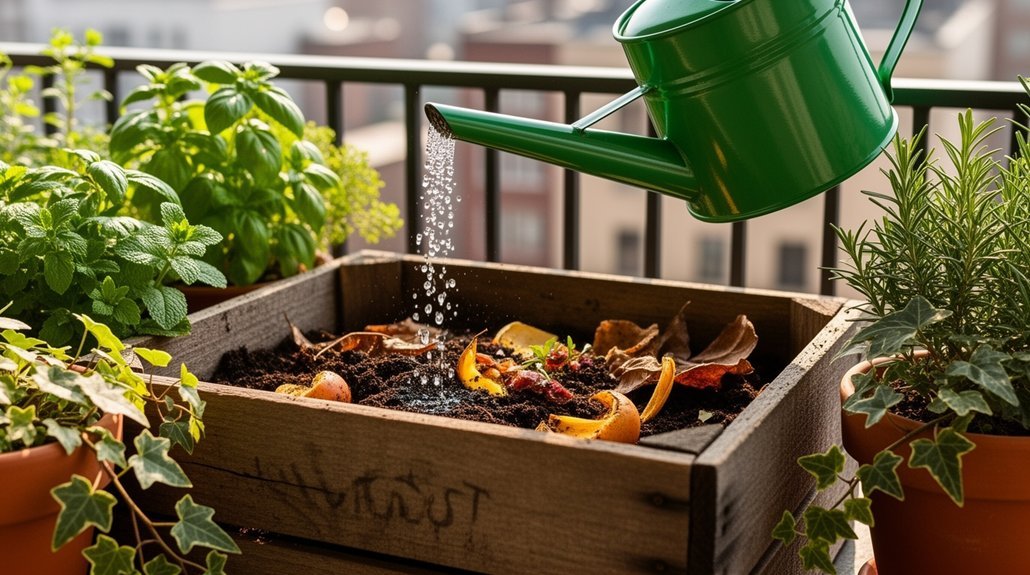
A small watering can—typically 0.3–1 L—gives you precise control over moisture in your compact balcony composter, where oversaturation quickly leads to anaerobic conditions and foul odors. Choose one with a long, narrow spout to direct water exactly where it’s needed without wetting bin walls or surrounding areas.
Apply water in thin layers, using short bursts to judge absorption before adding more. This approach lets you maintain the ideal 40–60% moisture range that keeps microbes and worms active. Proper moisture balance works synergistically with regular aeration via stirring to ensure your compost breaks down efficiently and produces quality finished compost.
On hot or windy days, target only the drying top layer rather than wetting the entire bin. A leak-proof, rust-resistant design ensures durability, while lightweight construction makes frequent monitoring practical on any balcony size. Consider adding organic materials like worm castings to your compost to accelerate decomposition and enhance nutrient content.
Select a Compost Thermometer to Track Pile Temperature and Activity
Monitoring temperature complements your moisture management, since you’ll need to know whether your compact balcony pile is actively decomposing or struggling. A quality compost thermometer gives you reliable insights into microbial activity and heat generation.
Choose a thermometer with these essential features:
- 20-inch probe length to reach your pile’s active core, ensuring accurate readings rather than just cool outer layers
- Stainless steel construction with a thick stem to resist rust from moisture exposure on your balcony
- Large 2-inch dial with color-coded zones for quick interpretation of warm, active, and hot temperatures
These specifications support faster troubleshooting when decomposition slows. You’ll spot heat spikes and cooling trends easily, helping you adjust your balcony composting approach for consistent results. Most quality models feature hermetically sealed dials to prevent fogging and maintain readability in humid balcony environments. For balcony setups where space is limited, consider the Rukars 20-inch stem option, which offers a good mid-range value without the heavy-duty pricing of professional-grade models while still providing the reach necessary for accurate core temperature readings.
Cover the Bin With a Snug Lid or Rain Guard to Keep It Dry
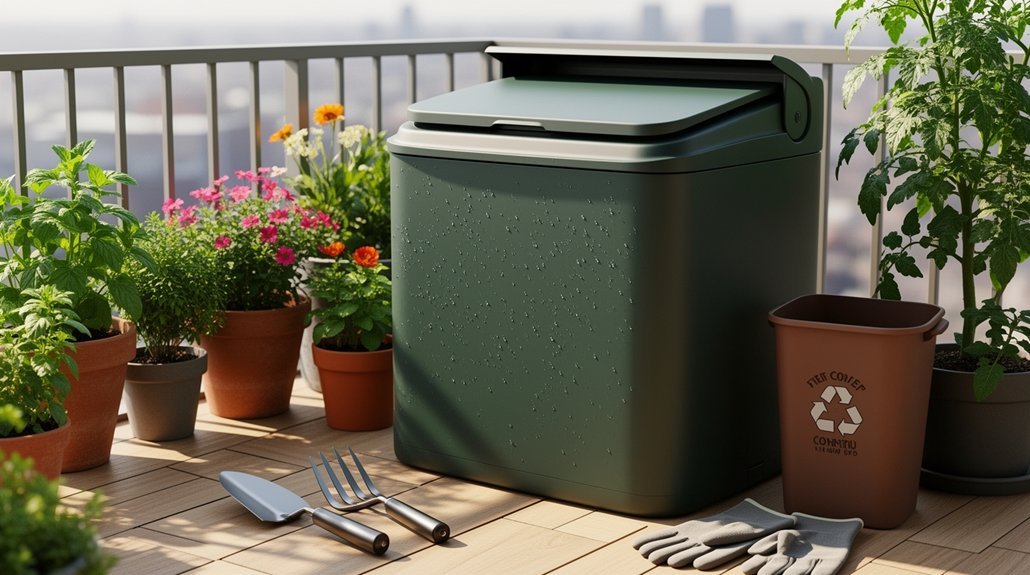
You’ll want a snug-fitting lid to seal out rain and prevent odors from escaping your balcony compost bin. A rain guard adds an extra layer of protection during heavy storms, keeping excess moisture from waterlogging your scraps and triggering anaerobic breakdown.
Strategic ventilation holes—typically around 1/8 inch—let air circulate through the pile while blocking the worst of wind-driven rain that’s common in compact outdoor spaces. Any container can serve as a compost bin for your balcony as long as mixing or turning the contents is possible to maintain proper decomposition. For optimal results, consider bins with airtight lids that provide superior odor control while maintaining the aerobic conditions necessary for faster material breakdown.
Secure Lid Prevents Odors
Why does a secure lid matter for balcony composting? A tight-fitting lid is your first defense against odors that escape during decomposition. When you seal your bin after each addition, you trap volatile compounds and prevent kitchen scrap smells from drifting across your balcony.
Here’s what a secure lid accomplishes:
- Contains organic waste odors that attract flies, rodents, and raccoons to your composting station
- Limits the escape of decomposition gases while maintaining necessary airflow through small vent holes
- Keeps your balcony cleaner and prevents complaints in shared housing situations
A snug lid doesn’t just manage smells—it makes your composting routine more manageable. You’ll handle spills less frequently, and you’ll maintain better control over your compact composting system with consistent, reliable closure. Products like the Bin Doctor Lid Latch are specifically designed to keep waste in place and secure your lid with auto-release and retention characteristics that prevent wind and tipping even in year-round outdoor conditions. Airtight lids also minimize gas exchange and odor escape, which is especially important in close quarters with neighbors.
Rain Guard Stops Moisture
How does excess moisture damage a balcony compost bin? Heavy rain can waterlog your contents, creating a soggy, unmanageable mess that disrupts decomposition. Since balcony setups lack ground drainage, you’re especially vulnerable to moisture buildup.
A snug-fitting rain guard is your best defense. You’ll want a cover that extends beyond the bin’s edges so water runs off outside rather than pooling. Choose one sized properly for your system—Daily Dump offers small (49″W x 28″H) and large (60″W x 34″H) options. Velcro fasteners keep guards secure during storms.
Select water-resistant materials like 18 oz. vinyl or UV-resistant HDPE tarps that withstand seasonal weather. Use your cover during heavy rains, then remove and dry it afterward. Handwash the cover with organic soapy solution and store it in a dry place to extend its lifespan. This approach prevents moisture buildup while maintaining the balance your compost needs.
Ventilation Maintains Aerobic Conditions
Because aerobic decomposition requires consistent oxygen flow, ventilation holes are essential to balcony composting success. You’ll want to drill multiple holes in your bin’s sides, lid, and bottom to maximize airflow and drainage. Tight, packed material blocks oxygen movement and creates lumpy, smelly compost, so loose layering with chunky browns maintains the air cavities you need.
Combine ventilation with a snug-fitting lid that protects contents without sealing airtight:
- Keeps rain, birds, and pests away from your pile
- Limits odors and reduces fly attraction
- Allows balanced air exchange when paired with side holes
Regular stirring distributes oxygen throughout the pile, preventing wet clumps and unpleasant odors. Well-aerated compost smells earthy, steams slightly, and breaks down efficiently—the hallmark of healthy balcony composting. Optimal temperatures around 25–30°C accelerate decomposition and improve the quality of your finished compost.
Select a Lightweight Sifter or Screen for Separating Finished Compost

A good sifter or screen is essential for removing debris and creating uniform compost that’s ready for your balcony garden. You’ll want a lightweight frame—typically 2″x2″ cedar lumber with hardware cloth—that you can easily shake and handle. Consider a bucket-compatible design that fits standard 5-gallon containers, reducing bending and simplifying your workflow in tight spaces.
Choose your mesh size based on your needs: 1/2″ mesh screens faster for general garden use, while 1/4″ mesh produces finer compost for potting mixes. Modular sifters with interchangeable mesh sizes give you flexibility across different projects. Fine mesh screens separate clumps and rocks while aerating your finished compost for optimal plant growth.
A quality screen removes rocks, root balls, and clumps while improving drainage and texture consistency. You’ll build a durable, portable tool in about 15 minutes with basic materials, creating finished compost that’s uniform and garden-ready.
Transport Finished Compost With a Small, Reusable Tote or Bucket
You’ll want a lightweight, durable tote made from materials like reusable nylon that can withstand repeated use and moisture without degrading.
Choose a carrier with secure closures—drawstring or button-and-cord designs work well—to keep fine compost contained and prevent spills during movement through tight spaces.
A collapsible tote that folds flat for storage or rolls up compactly saves valuable balcony real estate when you’re not actively transporting compost.
Light Durable Tote Materials
Transporting finished compost from your balcony system doesn’t require heavy equipment—lightweight, durable totes and buckets make the job manageable and sustainable. You’ll find several practical options that balance durability with portability.
Woven polypropylene totes offer high tensile strength and moisture resistance while keeping weight minimal, making them ideal for repeated lifting. Nylon designs fold compact for storage and withstand frequent washing, serving multiple household transport roles.
Consider these key advantages:
- Fabric construction supports repeated use without the seam failure risk of thin single-use bags
- Low tare weight reduces carrying effort when moving finished compost by hand
- Washable materials simplify cleanup after contact with moist residue
Choose lightweight fabric containers when you handle modest finished compost loads regularly and prioritize ease of transport and storage.
Secure Tight‑Free Transfer
How do you move finished compost from your balcony without spilling it across shared hallways or stairwells? You’ll want a small, reusable tote or bucket with secure handles and a tight-fitting lid. These containers keep finished compost level and contained during transport through doorways and elevators.
Choose rigid-sided buckets with firm rims that preserve their shape when lifted, especially with heavier, damp material. Wide openings make scooping easier, while smooth interior surfaces simplify emptying. Lidded designs contain dust and fine particles, critical for shared spaces.
Match your container size to load weight—finished compost is denser than fresh scraps, so manageable volumes prevent tipping. After each trip, rinse and air-dry your container to eliminate residue and odor. Keeping transfer tools dedicated to compost use prevents cross-contamination with household items.
Collapsible, Space‑Saving Design
When space is at a premium on your balcony, collapsible containers and nested designs become essential tools for managing finished compost. You’ll appreciate how these systems maximize your limited footprint while keeping operations efficient.
Collapsible handling works best when your composting unit includes a removable inner chamber. You can separate nested containers during harvesting, allowing one to rest while the other stays in service. Store compact transfer vessels under benches, on rolling carts, or inside larger garden totes.
Key advantages you’ll experience:
- Lightweight plastic containers move easily through narrow doorways and elevator trips
- Empty units nest together, occupying minimal floor space when not in use
- Modular pieces simplify transferring finished compost to potting soil or garden containers
This design approach transforms balcony composting into a manageable, space-conscious practice.
Frequently Asked Questions
How Often Should I Turn My Balcony Compost to Maintain Active Decomposition?
You’ll maintain active decomposition by turning your balcony compost every 2 to 3 days in hot conditions, or weekly for balanced speed. Turn when temperature drops below 104°F to keep the thermophilic phase active.
What Types of Kitchen Scraps Shouldn’t Go in My Balcony Compost Bin?
You shouldn’t add meat, fish, bones, dairy, oils, citrus peels, onions, or garlic to your balcony bin. Avoid plastics, treated materials, and pet waste. These items attract pests, create odors, and slow decomposition in small spaces.
Can I Use Balcony Compost for Indoor Houseplants or Container Gardens?
You can use finished balcony compost for indoor houseplants, but you’ll want to mix it at 10–20% into potting soil rather than using it straight. Raw compost risks pests, pathogens, and root rot indoors.
How Long Does It Typically Take to Produce Finished Compost on a Balcony?
You’ll typically produce finished balcony compost in two to six months with active management. Faster systems achieve results in thirty to sixty days when conditions are optimized, while passive composting takes three to four months.
What Should I Do if My Balcony Compost Starts Smelling Bad or Attracts Pests?
You’ll fix bad smells by adding brown materials, turning your compost, and keeping moisture balanced. You’ll prevent pests by burying scraps under browns and using a covered bin that limits access.
In Summary
You’ve got everything you need to transform your balcony into a composting powerhouse. With these ten essential tools, you’ll efficiently collect scraps, speed up decomposition, and monitor your pile’s progress. You’ll turn kitchen waste into nutrient-rich compost without the mess or odor. Start small, stay consistent, and you’ll soon harvest finished compost for your plants. Your balcony gardening dreams are within reach.


Leave a Reply