
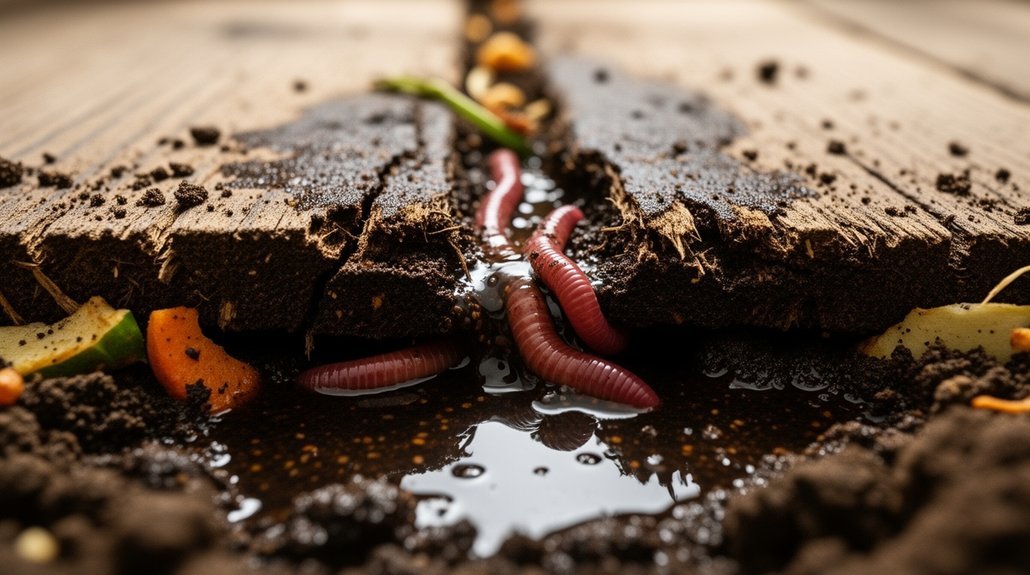
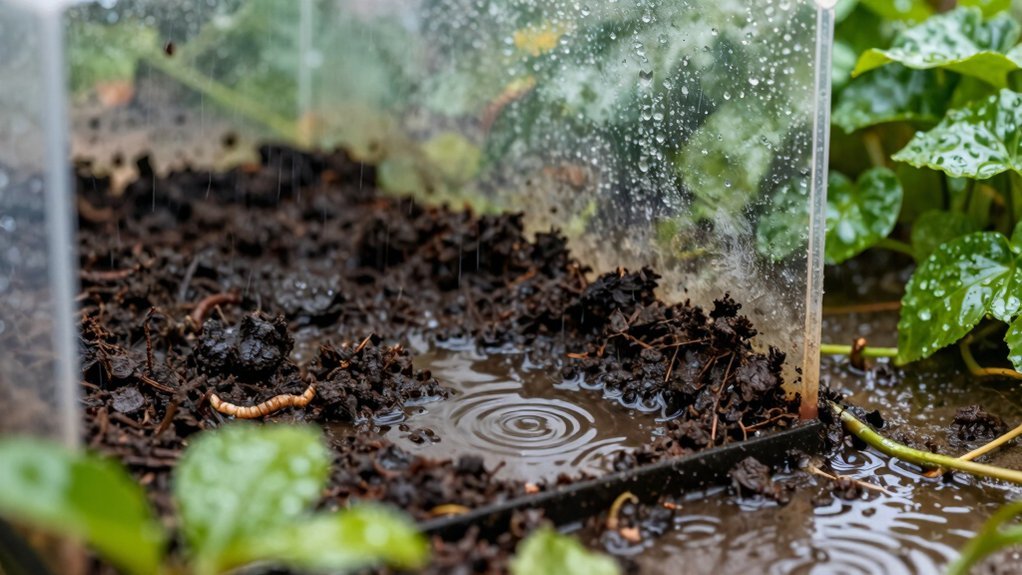
Your worm bin leaks when the liquid from juicy scraps overwhelms the bedding’s absorbency, blocked drainage holes trap that moisture, and poor aeration creates anaerobic pockets that stop evaporation. Wet, soggy bedding becomes heavy, worms cluster on walls or escape, and a sour or rotten‑egg smell appears. The excess leachate pools at the bottom, seeping through seams or the lid. Fixing feed balance, adding dry carbon bedding, clearing holes, and boosting airflow will stop the drip, and the next steps will show you how.
Identifying a Leaking Worm Bin: Symptom Checklist
By watching the bin’s bottom, you can spot a leak before it spirals out of control. Look for drips, puddles, or standing liquid under the bin—signs that wet scraps like melon or banana are overwhelming the bedding. If the bedding feels soggy, heavy, or slimy, it’s likely saturated beyond a “wrung‑out sponge.” A foul, sour smell tells you the environment has turned anaerobic, while a healthy bin stays earthy.
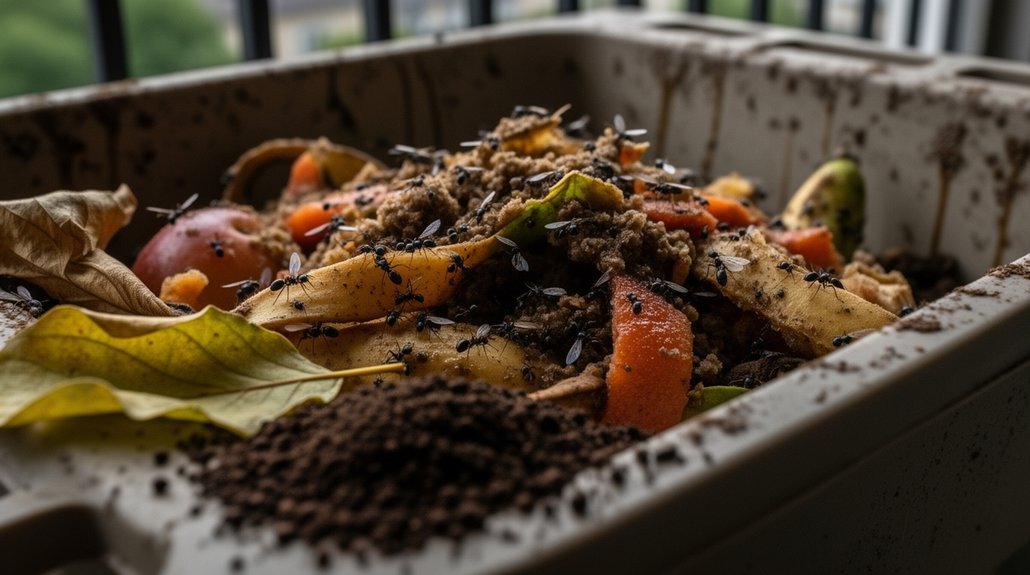
Notice worms clustering on walls or lid, avoiding the wet zone, or escaping entirely; they’re reacting to low oxygen and excess moisture. Finally, watch for spikes in mites, pot worms, or fruit flies, which thrive when drainage is blocked and the bin is too wet. Many worm bins feature air ventilation holes designed to prevent this exact moisture buildup and maintain proper airflow. These symptoms together confirm a leaking, out‑of‑balance worm bin. Mites thrive when moisture is excessive.
Core Moisture Problem Behind a Leaking Worm Bin
The symptoms you just listed all point back to one underlying issue: too much moisture inside the bin. Excess water from high‑water‑content scraps or sudden splash additions overwhelms the bedding’s holding capacity, forcing liquid down to the drainage points. When you dump a batch of juicy veggie peels or pour water faster than the substrate can absorb it, pockets of saturation form, and leachate seeps out the bottom. Blocked holes or compacted bedding further trap that moisture, turning the lower layers muddy, anaerobic, and foul‑smelling. Poor aeration and rain intrusion compound the problem, as trapped air reduces evaporation and external water adds to the overload. Keep feedings balanced, mix thoroughly, and ensure clear drainage to stop the leak. Adding dry bedding after wet feedings helps absorb excess liquid and prevents leachate formation.
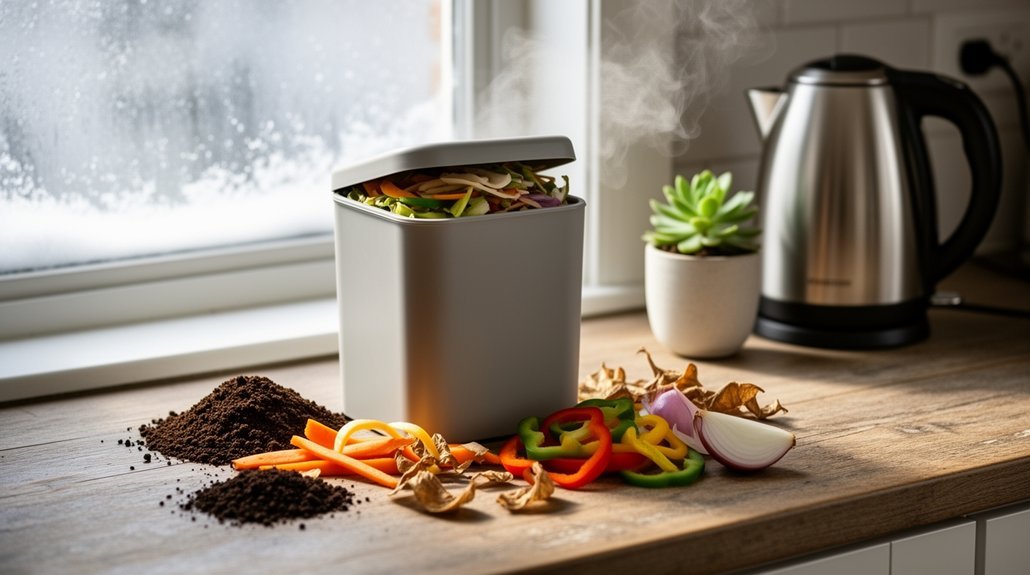
High‑Water‑Content Scraps That Overwhelm Bedding
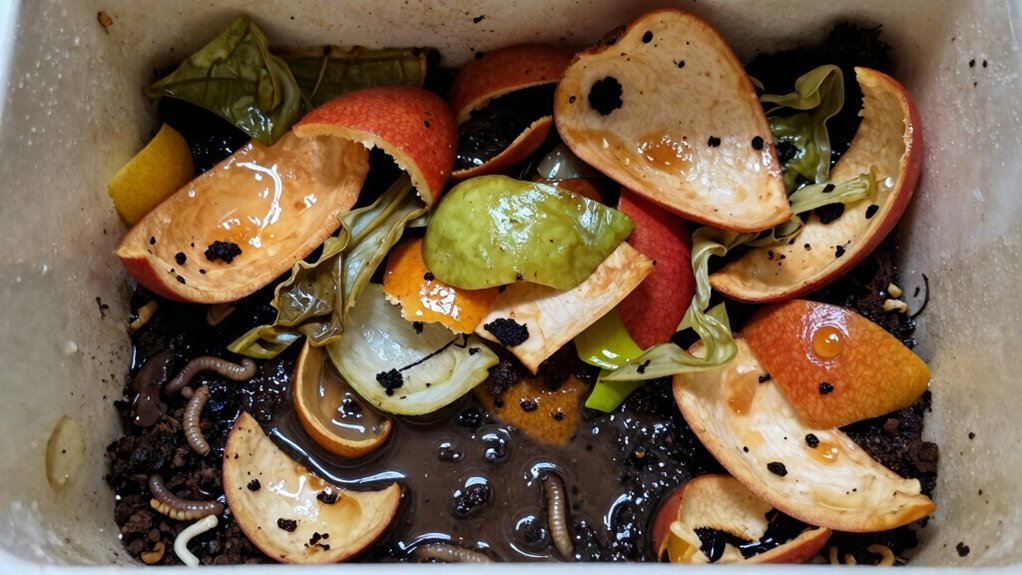
Ever notice how a handful of juicy carrot peels or a bowl of sliced tomatoes can turn your worm bin into a soggy mess? Those high‑water‑content scraps dump 80‑90 % water straight into the system, flooding the bedding faster than it can wick. When you toss a big batch at once, liquid rushes through, pools at the bottom, and compresses the substrate, choking oxygen and inviting anaerobic smells. Fermenting wet bits release even more fluid, turning a modest leak into a steady drip. Balance each feeding with dry carbon material and add scraps gradually to keep the bin breathable and dry. Adding dry bedding such as shredded paper can absorb excess moisture and restore proper moisture levels. To prevent pest infiltration and odor issues, avoid adding meat, dairy, and oils which attract unwanted organisms and create strong smells that compound moisture problems.
| Food | Typical Water % |
|---|---|
| Tomatoes | 94 |
| Cucumber | 95 |
| Melon | 90 |
| Leafy greens | 85 |
| Frozen produce (thawed) | 80 |
Why Dry Carbon Materials Are Your Bin’s Best Moisture Sponge
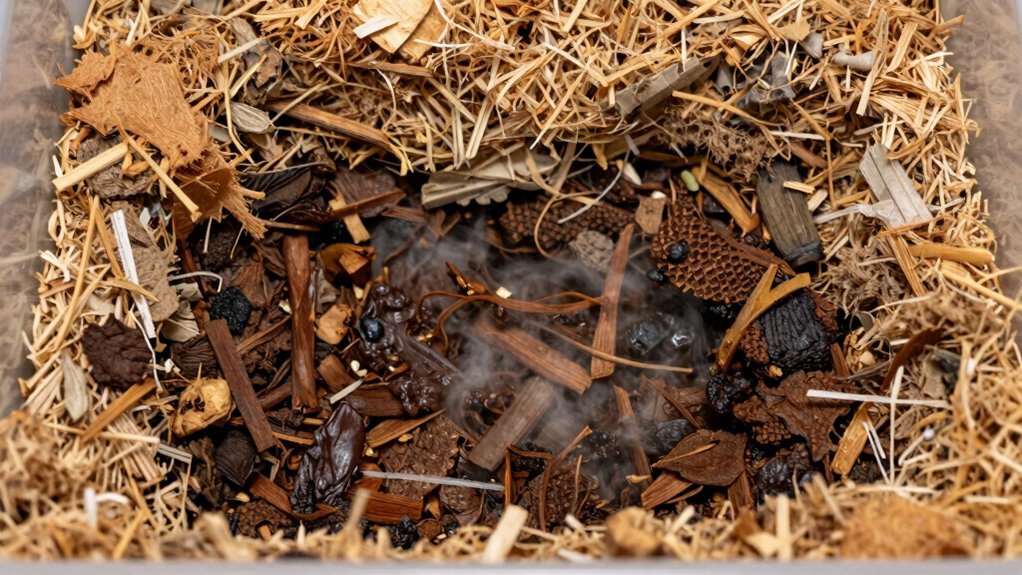
Wonder how a handful of shredded cardboard can turn a soggy worm bin into a breathable, sponge‑like habitat? Dry carbon—cardboard, newspaper, straw, hay, dry leaves—soaks excess water, keeping moisture at a “wrung‑out sponge” level. When you add shredded corrugated cardboard, its porous structure absorbs liquid, adds bulk, and prevents compaction, so air can flow and worms can breathe through their skin.
High‑porosity straw and hay improve drainage, while newspaper grabs moisture quickly and dries fast, giving you flexible control. Mix these carbons when bedding feels soggy; they pull liquid into their fibers, reducing leachate and anaerobic pockets. For additional moisture control, consider using compostable food storage bags as liners to catch excess leachate while allowing air circulation through the bin’s drainage layer.
Aim for 60‑85 % moisture; if water drips when you squeeze bedding, add more dry carbon until the bin feels moist but not dripping. This balance stabilizes texture, maintains oxygen, and stops leaks before they start. Field capacity is the optimal moisture level for worm health.
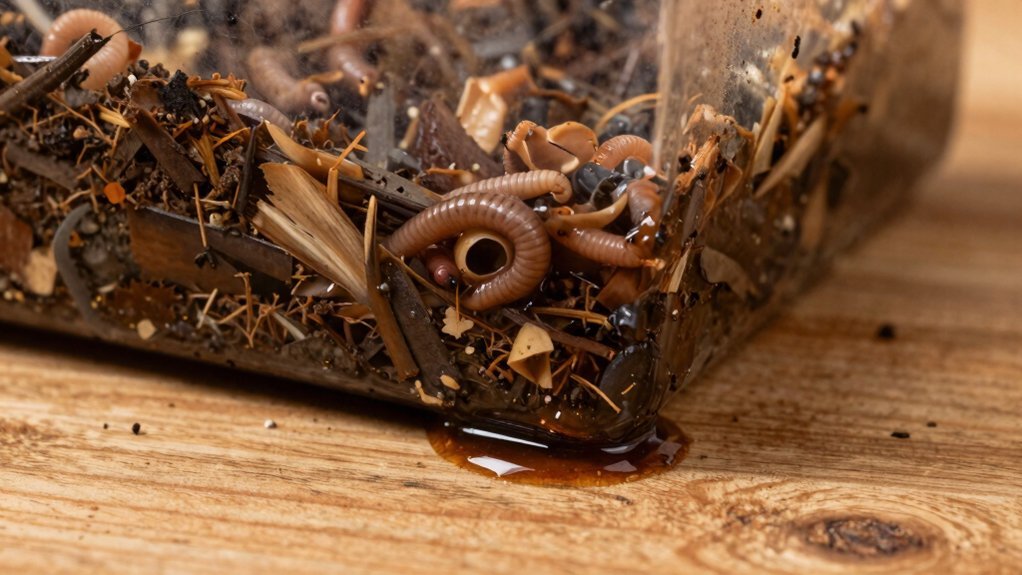
Clogged Drain Holes That Cause Leaking Worm Bin Leachate
Why do your worm bin’s leaks often start at the bottom? Clogged drain holes block the leachate’s exit, so liquid pools and forces its way out through seams, lid gaps, or warped plastic. Small openings get sealed by castings, food sludge, shredded bedding, and worm bodies that settle in the drain zone. When moisture is high, fine particles compact into a dense plug, and excess water backs up, raising pressure at the lowest point. This pressure pushes leachate through any weak spot, making the bin appear leaky. Regularly inspect and flush the holes, use a mesh screen, and keep the drainage area clear. If blockage persists, consider enlarging the holes or redesigning the drain to restore proper flow. Like removable inner pail designs that separate full buckets for easier dumping, a well-designed drainage system prevents pressure buildup and leakage. Side holes are recommended for beginners because they allow easy drainage without a tray.
Poor Ventilation That Traps Moisture Inside the Bin
You’ll notice that insufficient airflow lets moisture linger, turning your bin into a swampy mess.
When ventilation pathways get clogged, the excess water can’t escape and starts pooling at the bottom.
This trapped dampness fuels leachate and creates the foul odors you’re trying to avoid. Worms breathe through their skin, so adequate air exchange is essential. Consider using airtight storage containers for your worm bedding materials to maintain proper moisture balance before adding them to the bin.
Insufficient Air Flow
How does a leaky bottom reveal a ventilation problem? If air can’t circulate, moisture stays trapped and evaporates slowly, so water pools at the base and the bin leaks. You’ll notice worms climbing upward, searching for oxygen, and the lower layers staying soggy after each feeding. Compacted bedding loses pore space, holding water tighter and preventing airflow from flushing humid air out. That stagnant, humid air condenses on walls and lids, drips back into the bedding, and keeps the bottom wet. Carbon dioxide builds up, heat rises, and anaerobic microbes flourish, causing sour, swampy odors. To stop the leak, increase airflow: add more holes, avoid over‑stacking, and keep the bedding fluffy so air can move freely. Maintaining a moisture level of 70–80 % is essential for proper oxygen absorption.
Clogged Ventilation Pathways
Ever notice the bin’s bottom staying soggy despite regular feeding? That’s usually a sign your ventilation pathways are clogged, trapping moisture inside. When bedding, food scraps, or slime press against air holes, evaporation drops and humidity builds up. Small vents get blocked by fine particles, and compacted substrate seals off airflow, so wet air can’t escape and drifts down to the base. Poor vent design—too few holes or badly placed ones—creates dead zones where water lingers, especially in stackable trays. The result is anaerobic conditions, foul odors, and leachate that seeps out. Keep vents clear, fluff the bedding, and check lid and side openings regularly. Open pathways let humid air exit, drying the bin and stopping the leak. Clogged drainage holes can also prevent excess water from escaping, worsening the soggy bottom. Consider using bags with 2-ply wet-strength construction to line your bin if you’re experiencing persistent moisture issues, as reinforced materials can help contain excess liquid more effectively.
Rain and Condensation as External Water Sources
You’ll notice rain slipping through loose lids or ventilation holes, quickly raising the bin’s water level.
At the same time, warm, moist air condenses on cooler surfaces, adding hidden moisture even when it’s not raining.
Both sources can saturate bedding, choke airflow, and push worms toward drier spots. Condensation can be normal but excessive worm escape indicates a potential issue. Proper odor control technology like dual-layer carbon filtration in composting systems demonstrates how moisture management is essential for maintaining healthy decomposition environments.
Rain‑Induced Water Ingress
Why does rain suddenly turn your worm bin into a leaky mess? When rainwater finds its way through lid gaps, vents, or an uncovered top, it can soak the bedding faster than it can absorb, creating pooling and leachate. Outdoor bins left under open sky collect splashback and runoff from saturated ground, while wind‑driven rain sneaks in through oversized air gaps. If drainage holes are clogged or undersized, the excess water has nowhere to go, so it seeps out the bottom. The combination of heavy rain, compact bedding, and poor drainage overwhelms the bin’s capacity, leading to the wet, muddy conditions that trigger bottom leakage. Consider relocating bins to a covered area during harsh winters to prevent material degradation from extreme weather exposure. Worms need a moist environment to breathe, but excess moisture can be fatal. 1. Seal lids and close vents tightly.
2. Relocate bins to a covered area or elevate them.
3. Keep drain holes clear and appropriately sized.
4. Use porous, fluffy bedding to improve water flow.
Condensation‑Driven Moisture Buildup
How does condensation turn a seemingly dry worm bin into a leaky mess? When you pile high‑water‑content scraps in a sealed bin, the vapor rises, hits the cool lid or walls, and drops back as droplets. Those droplets cling to the lid, then slide down, pooling at the bottom. Warm, humid weather and temperature swings amplify this cycle, especially if your lid is tightly sealed and airflow is limited. Even a few extra drops signal that the bedding can’t absorb the excess moisture fast enough.
Over time the liquid seeps through the floor, creating leachate and a soggy base. If you notice worms crawling out, a swampy texture, or a sour odor, the condensation‑driven moisture buildup is already compromising your bin’s health. To prevent this issue, avoid storing meat and dairy in your worm bin, as these materials decompose slowly and can contribute to excess moisture and odor problems in your system.
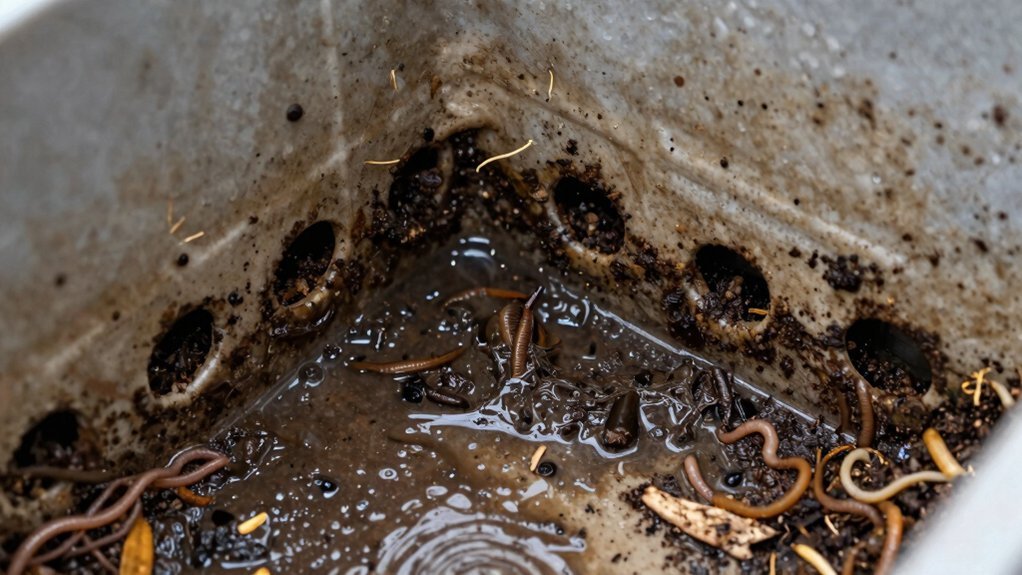
Anaerobic Zones Identified by Smell and Worm Behavior
Ever notice a sour, egg‑like smell drifting from a corner of your worm bin? That whiff usually means hydrogen sulfide is building up in an oxygen‑free pocket. You’ll also catch sour, vinegar‑like aromas or a sharp ammonia sting when low‑oxygen zones ferment organic acids or nitrogen‑rich scraps. Worms give you early clues: they cluster away from the smelly, soggy spot, surface‑gather on wet bedding, or crawl toward the lid and walls. Reduced feeding and sluggish movement signal the same problem.
1⃣ Rotten‑egg odor → hydrogen sulfide, anaerobic decay
2⃣ Worms avoid the area → stress, low oxygen
3⃣ Slimy, blackened material → severe anaerobic pockets
4⃣ Excess liquid leachate → waterlogged, oxygen‑poor zone
Spotting these signs lets you act before the bin leaks or fails. Like charcoal filters in kitchen compost pails that trap odors, proper worm bin ventilation prevents the buildup of foul-smelling gases in anaerobic zones.
Adding more airflow through extra holes or occasional lid removal helps prevent oxygen‑free pockets.
How Adding Dry Bedding Stops Anaerobic Smells?
You’ll notice that dry bedding soaks up the extra liquid, keeping the bin from turning into a soggy mess. Those fluffy air pockets let oxygen flow, which stops the anaerobic zones that produce foul smells. Adding proper aeration ensures that the bin remains well‑ventilated, further preventing anaerobic conditions.
Absorb Excess Moisture
A few handfuls of dry bedding can instantly soak up the excess liquid that turns your worm bin into a leaky, sour‑smelling mess. When you sprinkle shredded newspaper, cardboard, coconut coir, or dried leaves over wet spots, the material acts like a sponge, pulling free water away from the bottom and breaking up compacted clumps. The added carbon restores a wrung‑out sponge feel, keeps drainage pathways clear, and prevents anaerobic pockets where foul bacteria thrive. By topping each feeding with dry bedding and fluffing it lightly, you keep moisture balanced, odors down, and leaks at bay.
- Add several handfuls of dry carbon bedding on top of wet zones.
- Lightly mix or fluff to distribute moisture without overhandling worms.
- Bury fresh food under the dry layer to avoid exposed wet patches.
- Repeat after each moist feeding to maintain a balanced bin.
Aim for a higher proportion of carbon to nitrogen, around a 2:1 ratio.
Create Air Pockets
Absorbing excess moisture with dry bedding not only stops leaks, it also creates a network of tiny air pockets that keep the bin oxygen‑rich.
When you sprinkle shredded newspaper, cardboard, coconut coir, or dried leaves into the mix, you break up mats and prevent compaction.
Those loose fibers form voids and channels that let air circulate through the whole mass, not just the surface.
Worms thrive in oxygen‑rich zones, and the pockets keep microbes from turning wet clumps into smelly hotspots.
Fluff the bedding regularly with a fork or comb to keep the voids open, and add fresh dry material every two to three weeks.
This simple step maintains airflow, stops anaerobic odors, and keeps the bin from turning into a soggy, compacted mess.
Drainage holes should be cleared regularly to prevent water buildup.
Neutralize Anaerobic By‑products
When you add dry bedding to a soggy worm bin, you immediately pull excess moisture out of the mix, reopening the tiny air pockets that aerobic microbes need to thrive. The dry carbon—shredded paper, cardboard, coco coir, or dry leaves—soaks up free liquid, restoring the “damp sponge” balance and preventing water from sealing off oxygen. This shift stops anaerobic bacteria from producing ammonia, alcohols, methane, and acidic gases that smell sour or sewer‑like. By giving worms a drier, carbon‑rich environment, you also protect them from toxic by‑products and reduce leaky‑bottom pooling. Adding adequate carbon helps rebalance the nitrogen‑to‑carbon ratio, further discouraging anaerobic conditions. 1. Sprinkle a generous layer of shredded newspaper.
2. Add coconut coir or dry leaves to boost carbon.
3. Bury fresh, wet scraps under the new bedding.
4. Pause feeding briefly if the bin stays heavily anaerobic.
Simple Bin Adjustments to Restore Airflow
Ever notice how a leaky bottom often signals blocked airflow rather than just excess moisture? You can boost ventilation by adding bulky carbon bedding—shredded cardboard, paper, coconut coir, or wood chips—to create pore spaces that keep oxygen flowing. Drill extra side holes or enlarge existing ones, covering them with mesh to keep pests out while letting fresh air in and stale air out. Confirm drainage holes stay clear and consider raising the bin so excess liquid drains away, preventing saturation that clogs air pathways. Regularly sprinkle fresh, coarse bedding to maintain structure and avoid compaction.
| Action | Effect |
|---|---|
| Add bulky bedding | Increases porosity |
| Drill/ enlarge side holes | Improves air exchange |
| Keep drainage clear | Reduces water pooling |
| Raise bin | Enhances liquid exit |
| Refresh coarse bedding | Prevents compaction |
When Moisture Is Too High, How to Safely Relocate Worms?
If the bedding feels more like sludge than a damp sponge, it’s time to move your worms before the moisture kills their oxygen supply. First, spot the warning signs: pooling, strong odor, and worms clustering at the surface mean the bin is waterlogged.
Then, set up a temporary holding bin with plenty of ventilation holes but no drainage, and line it with a thick, damp bedding layer. Keep the bedding just moist—squeeze a handful and only a few drops should fall.
When you transfer, scoop the whole contents together in low light, avoiding vibration and compacting the material.
Finally, add a dry top layer or a small ice pack if it’s too wet, and monitor the new bin for odor or escape behavior.
- Identify excess moisture
- Prepare ventilated holding bin
- Transfer gently, preserving clusters
- Balance moisture during relocation
Smart Placement & Seasonal Tweaks to Prevent a Leaking Worm Bin
After moving soggy worms to a fresh bin, the next step is to keep the bin from leaking in the first place. Place it in a shaded, temperature‑stable spot and avoid direct rain; a stand or slatted platform lets air circulate and keeps drainage holes clear. Keep the base off cold concrete or damp ground, and tilt only if the design requires it. Use dry carbon bedding—shredded cardboard, newspaper, or leaves—to absorb excess moisture, and fluff it regularly so it stays sponge‑like.
Cover kitchen scraps with dry bedding, freeze‑thaw watery leftovers, and never add extra water unless the bedding is bone dry.
In summer, boost airflow and shade; in winter, watch for condensation and check lids and drains after rain. These tweaks stop water from pooling at the bottom.
Frequently Asked Questions
Can I Use a Plastic Liner to Catch Leachate Without Harming Worms?
You shouldn’t use a plastic liner; it traps moisture, blocks airflow, and can kill worms. Instead, add dry bedding, improve drainage holes, and use a removable tray or grate to collect leachate safely.
Do Different Worm Species Tolerate Higher Moisture Levels?
You’ll find that European nightcrawlers and Indian blue worms tolerate higher moisture better than red wigglers, but all still need aerated bedding; too much water will still cause leaks and stress.
How Often Should I Replace the Bedding to Prevent Water Buildup?
You should replace the bedding whenever it’s no longer fluffy or feels soggy—usually every few weeks, but check daily; spot‑replace damp spots and do a full reset when moisture won’t recede.
Is It Safe to Add a Layer of Sand for Extra Drainage?
You can add a thin sand layer, but keep it minimal. It won’t stop leaks; proper drainage holes and balanced bedding matter more. Too much sand compacts, reduces airflow, and hinders worm health.
Can I Recycle the Collected Leachate as a Fertilizer?
You can reuse leachate if the bin’s mature, well‑aerated, and odor‑free; dilute it (about 1:5–1:10), apply it to soil, not foliage, and avoid edible crops.
In Summary
By managing moisture, using dry carbon bedding, and keeping drainage clear, you’ll stop leaks and keep your worm bin healthy. Adjust feeding, add newspaper or shredded cardboard, and ensure good airflow. If the bin’s still soggy, relocate the worms to a drier spot and tweak placement seasonally. With these simple steps, your bin stays dry, odor‑free, and productive.
Leave a Reply