
You’ll boost ventilation in compact composting by maintaining a 2:1 to 3:1 browns-to-greens ratio, which creates air pockets that prevent odor-causing anaerobic conditions. Drill strategic holes around your bin’s sides and bottom for cross-ventilation, then layer coarse materials like straw and twigs to build a breathable scaffold. Keep moisture like a wrung-out sponge, monitor seasonal changes, and turn regularly. Master these core strategies, and you’ll unlock the specific techniques that transform sluggish piles into thriving systems.
Why Oxygen Matters in Compact Composting
Why does oxygen matter so much in compact composting? You’re working with limited space, which means oxygen can’t naturally reach your pile’s center. Without it, anaerobic conditions develop quickly, slowing decomposition and creating problems you’ll want to avoid.
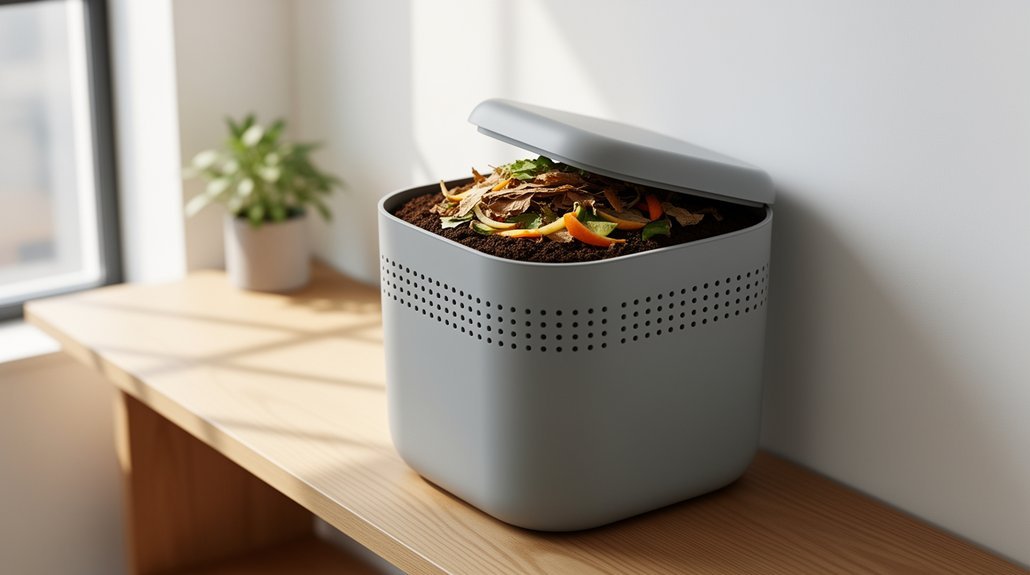
When oxygen levels drop below 10%, your compost shifts toward anaerobic breakdown. This produces methane and hydrogen sulfide—that rotten-egg smell that’ll upset your neighbors fast. Anaerobic decomposition also reduces overall efficiency and produces inferior compost. Compost organisms can survive with as little as 5 percent oxygen, but maintaining levels above 10 percent prevents the formation of those foul-smelling compounds. For indoor composters, airtight lids with charcoal filters help contain odors while you manage ventilation through active aeration methods.
In compact systems, you can’t rely on pile size alone. You need active air management. Turning your pile boosts oxygen temporarily, while forced aeration systems supply it consistently. Even small improvements in ventilation dramatically improve your results and eliminate odor complaints.
The Browns-to-Greens Ratio That Stops Odors Before They Start
You’ll want to layer your greens with browns strategically because browns create the air pockets that keep your compact pile breathing.
When you alternate nitrogen-rich materials like kitchen scraps with carbon-heavy dry leaves or shredded paper, you’re physically building channels for oxygen to flow through rather than trapping moisture in dense, airless clumps.
This layering approach—combined with hitting that 2:1 to 3:1 browns-to-greens ratio—prevents the slimy, anaerobic conditions that trigger odors in tight spaces. For optimal results, aim for a carbon-to-nitrogen ratio closer to 25–30:1 to balance breakdown speed and odor control. Aerobic organisms outcompete the anaerobic fungi that cause root rot and foul smells, so maintaining consistent airflow between your material layers is your best defense against decomposition gone wrong.
Why Browns Create Air Pockets
Have you ever noticed how a pile of wet greens collapses into a dense, airless clump? Browns prevent that disaster by creating structural integrity. Bulky browns like straw, twigs, and wood chips resist settling, maintaining open spaces where oxygen flows freely.
| Brown Material | Structure Value | Air Pocket Creation |
|---|---|---|
| Straw/hay | High | Excellent channels |
| Dry leaves | Moderate | Good support |
| Wood chips | High | Durable pockets |
Aerobic microbes thrive in these air pockets, breaking down compost efficiently. Fine browns like sawdust add carbon but contribute minimal structure. When you layer coarse browns throughout your pile, you’re essentially building a scaffold that keeps everything loose and breathable. This structural support is essential for fast, odor-free decomposition in compact spaces where airflow matters most. Mesh size considerations in sifting finished compost can help you separate finer materials from larger undecomposed pieces, ensuring your final product has optimal texture for your garden. Shredding or chopping increases surface area and speeds decomposition while improving aeration across all brown materials.
Layering Greens With Dry Materials
When should you add browns to your compost pile? Immediately after adding greens. You’ll want to follow the 3:1 browns-to-greens ratio by volume—or go up to 4:1 if you’re in a tight space where odors quickly become noticeable.
Cover each layer of kitchen scraps with 4 to 8 inches of dry leaves, shredded paper, or cardboard. This barrier blocks putrid smells and deters flies before they settle in. Under-cabinet bins benefit from this layering method since odor control is vital for installations with limited space.
The key is consistency. Don’t dump all your greens at once; instead, add them in thin layers and cap each one immediately. This approach keeps your pile moist like a wrung-out sponge—not soggy—and maintains the airflow you’ve worked to create with your brown materials. Brown materials absorb excess moisture while allowing decomposition to proceed at an optimal rate.
Tumblers vs. Static Bins: Which Works Best in Small Spaces?
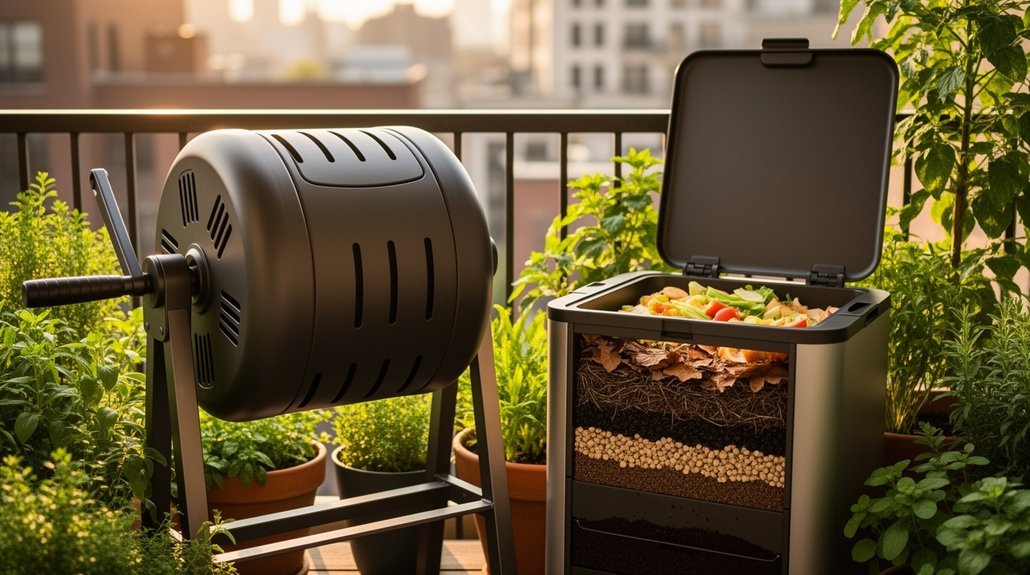
Static bins offer higher capacity—about 2–3 times more volume per footprint than tumblers. However, tumblers fit neatly on patios or balconies, with some models holding just 18.5 gallons for light composting needs.
Static bins offer 2–3 times more volume per footprint, while tumblers fit neatly on patios with compact 18.5-gallon options.
The tradeoff matters: tumblers require surrounding clearance for rotation, so their space advantage isn’t absolute. If you need higher capacity without frequent emptying, continuous composting systems and static bins serve small spaces better. Dual chamber tumblers allow continued use while one finishes, providing workflow flexibility for compact properties.
Consider your priorities. Choose tumblers for sealed, pest-resistant composting and faster cycles (6–8 weeks). Select static bins if you want lower costs, better drainage, and maximum compost volume. For ongoing digestive health of your composting system, shelf-stable probiotics and natural prebiotics can support the microbial activity that accelerates decomposition in static bins. Your space constraints and composting goals determine the best fit.
Build Your Own Ventilated Bin: A DIY Drilling Guide
You’ll start by selecting a container that suits your space—a trash can, barrel, or sealed bucket all work well—then drill strategically placed holes to create the airflow your compost needs.
Your drilling pattern matters: aim for side holes spaced 6 to 8 inches apart around the upper portion, with additional bottom drainage holes if you’re worried about excess moisture.
Once you’ve drilled, you’ll layer greens and browns intentionally, using dry materials to maintain the oxygen pockets that keep decomposition active and odors at bay. Consider using stackable storage containers with similar airtight principles to organize your brown materials separately for easier layering. Mesh screening added to the holes prevents worms from escaping through the ventilation openings while still allowing proper airflow circulation.
Choosing The Right Container
Why does container selection matter so much for compact composting? Your container choice directly impacts ventilation, moisture balance, and decomposition speed in limited spaces.
You’ll want a durable plastic bin—ideally 30 gallons—that balances manageable size with adequate capacity. Dark or opaque containers retain heat better, supporting faster breakdown. Look for rigid plastic that resists moisture and handling stress; thin bags or soft-sided totes won’t maintain their shape when packed with wet material. A tight-fitting lid helps keep soil moist while keeping critters out. Consider adding coconut coir as a bedding material to enhance moisture retention and aeration within your chosen container.
Prioritize smooth-sided designs for easy cleaning and maintenance. Your bin should be sturdy enough to withstand frequent moving and rotating. Select a container with a secure lid to control pests and odors while allowing airflow. This foundation sets you up for successful DIY modifications that’ll optimize ventilation without sacrificing moisture retention.
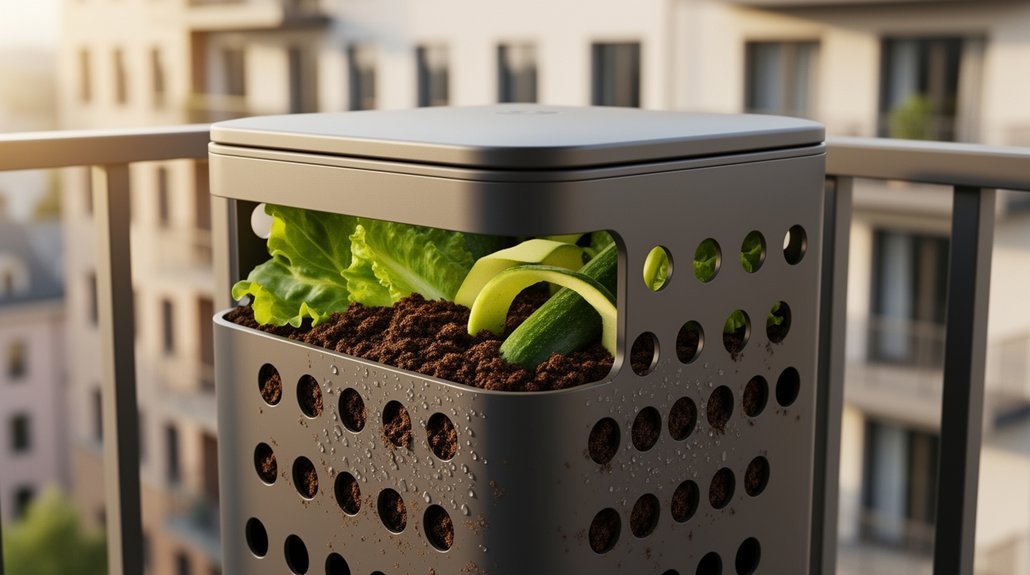
Drilling Holes For Airflow
Once you’ve selected the right container, drilling strategic holes transforms it into an efficient ventilation system. You’ll want to distribute openings around all sides to create cross-ventilation that prevents stagnant air pockets and reduces odor.
| Bin Size | Holes Per Side | Hole Diameter |
|---|---|---|
| Small | 2–3 | ¼–½ inch |
| Medium (3×3 ft) | 6–8 | ½–¾ inch |
| Large | 10+ | ¾–1 inch |
Space holes evenly to ensure uniform airflow throughout your compost mass. Drill bottom holes for drainage, preventing excess moisture buildup. Size openings large enough to resist blockage but small enough to contain material. You can insert small bamboo canes to keep ports clear. Bin material affects hole size and spacing, so consider whether you’re working with plastic, wood, or metal when planning your drilling strategy. Most ceramic crocks and containers benefit from charcoal filter systems when used indoors to manage odors alongside mechanical ventilation. Add top lid holes for additional ventilation control, then pair your drilling work with occasional turning to maximize aeration.
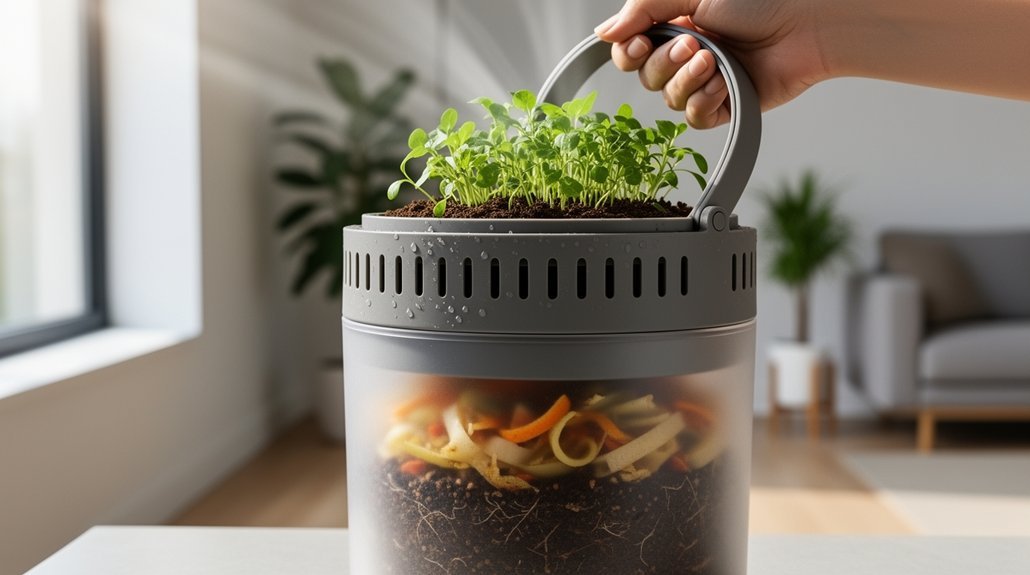
Layering Materials Effectively
Strategic layering transforms your drilled bin into a high-functioning composting system that maximizes airflow while maintaining the right moisture and microbial balance. Start with a 3–4 inch base layer of twigs, branches, or chopped corn stalks arranged criss-cross to prevent compaction and create air pockets. Alternate nitrogen-rich greens—kitchen scraps, grass clippings—with carbon-rich browns like leaves and cardboard, keeping each layer lightly moist. Top everything with a 4–6 inch carbon cover layer of straw or wood chips to regulate moisture and reduce odors. In rainy seasons, increase your cover to 6–8 inches for waterlogging protection. Winter composting calls for thicker insulating layers around 10 inches to retain heat and support microbial activity, ensuring your compact bin stays productive year-round. For small kitchen waste streams, consider supplementing with compostable kitchen waste bags to streamline your material collection before adding to the bin. Aim for a target C:N ratio of 25-30:1 to optimize decomposition while minimizing odor issues in your confined space.
Layer Smart: Building Air Pockets Into Compact Piles
How you layer materials in a compact compost bin determines whether you’ll build thriving aerobic decomposition or sluggish, smelly anaerobic zones. Start with an 8–10 inch base of criss-crossed sticks or coarse woody material to create large voids for oxygen access. Then alternate thin nitrogen-rich greens with thicker carbon-rich browns like leaves, straw, or shredded paper. This prevents wet materials from matting together and blocking airflow. Add long, coarse materials near the bin’s edges and base to maximize internal void space. Build in 4-inch batches for even distribution. Maintain moisture like a wrung sponge by watering each layer during assembly. The equal volume balance of nitrogen and carbon materials ensures your compost pile develops the oxygen distribution needed for faster decomposition. This strategic layering supplies oxygen and water while minimizing odor and maintenance. For households managing compost in shared or compact kitchens, consider pairing this layering technique with airtight lid designs that control odors while you build your pile.
Turn and Twizzle: Active Aeration for Small-Space Compost
Building air pockets into your pile creates the foundation for aerobic decomposition, but you’ll need active aeration to keep oxygen flowing as materials settle and compact over time.
| Method | Best For |
|---|---|
| Manual turning with pitchfork | Small volumes, limited space |
| Aeration rods or rebar | Spot oxygenation without emptying |
| Drum tumblers | Enclosed mixing when space allows |
| Forced-air blowers | Compact piles, timer-controlled cycles |
Turning directly incorporates oxygen and breaks up matted material restricting airflow. You’ll reduce anaerobic odors while improving microbial contact with fresh feedstocks. For passive alternatives, probe multiple locations with aeration tools to create air channels. In enclosed setups, forced-aeration systems with timers or temperature sensors deliver oxygen efficiently. Add a biofiltration layer of finished compost above discharge points to minimize odor escape during active cycles. Without adequate forced aeration, temperature rise and oxygen resupply become inhibited, causing anaerobic pathways that generate odors and slow decomposition.
Let Passive Methods Work: Temperature and Air Pressure
Why wrestle with equipment when heat and pressure naturally drive airflow through your compost? Your pile generates warmth as microbes break down organic matter, creating a temperature differential that fuels passive ventilation. Heated air inside aeration ducts becomes less dense and rises, drawing fresh oxygen upward through the mass—just like a chimney.
You’ll maintain stabilizing temperatures around 55°C (131–171°F) without active fans. Monitor your pile’s temperature as a practical indicator of whether passive airflow sustains aerobic activity. Design matters, though. Keep ducts sized appropriately and friction losses low; excess resistance undermines natural draft. For passive flow velocities below 0.1 mm/s, pressure losses remain minimal with typical compost porosity between 0.5–0.7. When you optimize duct layout and pile geometry for buoyancy forces, passive systems deliver oxygen efficiently while cutting energy costs—ideal for compact setups where space and power are limited.
Getting Moisture Right: The Hidden Ventilation Variable

Moisture sits at the intersection of microbial activity and airflow—get it wrong, and you’ll throttle your compost’s ability to breathe. You’ll want to target 50-60% moisture, where material feels like a wrung-out sponge. Below 30%, microbial activity crashes and heat generation drops, killing the convection currents that drive natural aeration. Above 65%, you risk anaerobic pockets and compaction that blocks oxygen movement entirely.
In compact systems, monitor moisture closely since smaller piles dry faster or become unevenly saturated. Add water during turning when things get dry, or incorporate carbon-rich browns if excess moisture appears. Consider covers to reduce evaporation. Drip irrigation systems can deliver water slowly over longer durations to maximize absorption in tight spaces. Balanced moisture maintains the thin liquid films where decomposition thrives while preserving the pore space your compost needs to stay ventilated.
Placement and Sun: Optimizing Airflow
Where you place your compost bin matters as much as how you build it. You’ll want to find a sheltered spot that receives partial shade rather than full sun, which can dry out your pile and slow decomposition. Dappled light works well if you can’t avoid sunny areas entirely.
Prioritize open surroundings where air circulates freely around your bin. Avoid tucking it against walls or in enclosed corners, as stagnant air reduces oxygen flow and increases odor problems. If your bin has side slats or vents, keep them unobstructed for maximum ventilation. Using larger pieces of brown materials can create air pockets that further improve airflow within compact spaces.
Finally, ensure easy access for regular maintenance and turning. Choose well-drained soil or use an elevated platform to prevent waterlogging. This balance between shade, airflow, and accessibility transforms even tight spaces into functional composting zones.
When Compost Goes Anaerobic: Fixes That Work
You’ll recognize anaerobic decomposition by its sour, sewage-like odor, slimy texture, and dark discolored patches—telltale signs that oxygen’s been depleted from your pile.
The fastest fix is to fork through your compacted material to break up clumps and restore airflow, which shifts the microbial balance back toward healthy aerobic decomposers.
Pairing this aeration with moisture reduction and carbon-rich bulking agents like dry leaves or wood chips prevents the problem from recurring in your tight living space. Most compost systems will need about one month to fully transition back to aerobic conditions once you’ve introduced these corrections.
Recognizing Anaerobic Decomposition Signs
How can you tell if your compact compost pile’s turned anaerobic? Start by trusting your nose. Sour, rotten, or sewage-like odors signal oxygen depletion, while rotten-egg smells indicate hydrogen sulfide production. Earthy, forest-floor aromas mean you’re still aerobic.
Next, check your pile’s structure. Slimy, matted, or compacted material suggests poor airflow. Look for distinct odor layers or a foul-smelling center with less offensive outer material—telltale signs of an anaerobic core.
Monitor moisture levels too. Waterlogged compost reduces air spaces and triggers anaerobic conditions. Dense, wet material often decomposes unevenly.
Finally, examine temperature. A cooler-than-expected core indicates reduced microbial activity. Uneven temperatures across your pile point to stratification and poor internal oxygen distribution. Recognizing these signs helps you intervene before decomposition stalls completely.
Quick Aeration Recovery Methods
Once you’ve spotted the telltale signs of anaerobic decomposition—the foul odors, slimy texture, and waterlogged zones—it’s time to act. Fork or rake your pile immediately to reintroduce oxygen and activate aerobic microbes, which decompose material faster than their anaerobic counterparts. Break up compacted zones where low-oxygen pockets thrive. Mix in dry, bulky browns like straw or chipped leaves to restore pore space and absorb excess moisture. If full turning isn’t practical, use a compost aerator or rod to probe temporary air pathways. For confined bins, consider installing a perforated pipe or aeration floor that cycles air through the pile—even 30 seconds on, 30 minutes off delivers measurable results. These interventions restore oxygen circulation quickly and restart active decomposition.
Seasonal Adjustments: Maintaining Ventilation Year-Round
Why does your compost pile behave so differently across seasons? Temperature and humidity shifts directly affect microbial activity and moisture retention, requiring you to adjust your ventilation strategy accordingly.
| Season | Challenge | Solution |
|---|---|---|
| Summer | Excessive evaporation dries pile | Cover with leaves or cardboard; reduce turning frequency |
| Winter | Reduced microbial activity slows decomposition | Use aerated static pile systems; consider indoor placement |
| Spring/Fall | Variable moisture and temperature | Monitor regularly; balance turning with cover management |
In warm weather, you’ll want to prioritize moisture retention by covering your pile and moderating aeration. Cold conditions demand you maintain core heat through passive airflow or forced aeration systems. Year-round success depends on regular monitoring, strategic cover replacement after turning, and harvesting mature compost to sustain healthy ventilation balance throughout changing seasons.
Frequently Asked Questions
Can I Compost Meat, Dairy, and Oils in a Ventilated Compact Bin Safely?
No, you shouldn’t compost meat, dairy, and oils in compact bins—even ventilated ones. They’ll create odors, attract pests, and form water-resistant barriers that disrupt airflow. You’ll achieve better results with municipal composting programs instead.
How Often Should I Check Moisture Levels in a Small-Space Compost System?
You should check your small-space compost moisture weekly as a practical baseline. Hot, dry conditions may require more frequent checks. Use the squeeze test—your compost should feel like a wrung-out sponge.
What’s the Fastest Way to Finish Compost in a Limited-Space Tumbler?
You’ll finish compost fastest by chopping all inputs into 1–2 inch pieces, balancing greens and browns, rotating 2–3 times weekly, maintaining damp moisture, and batch-loading without continuous additions.
Are Worm Bins Better Than Aerobic Bins for Apartment Composting?
Worm bins suit your apartment better if you’ve got limited space and want odor-free composting. They’re quieter and need less floor room than aerobic tumblers, though they’ll process fewer scraps.
How Do I Prevent Compost From Freezing in Winter Outdoor Balcony Systems?
You’ll prevent freezing by insulating your bin with straw, leaves, or wood chips, positioning it against a south-facing wall, covering it with a tarp, and adding a base layer to block ground cold transfer.
In Summary
You’ve now got the tools to master compact composting in your limited space. By balancing browns and greens, managing moisture, and ensuring proper airflow, you’ll eliminate odors and speed up decomposition. Whether you’re using a tumbler, static bin, or DIY setup, remember that ventilation is your secret weapon. Stay consistent with seasonal adjustments, and you’ll transform kitchen scraps into garden gold without the mess or smell.


Leave a Reply