
Tighten the lid so it snaps evenly, and wipe the rim before each seal to keep air out. Slice scraps into half‑inch pieces and sprinkle a thin layer of bokashi bran every 2‑3 cm, pressing down with a plate to squeeze out oxygen. Cover each layer with a plastic bag, cardboard, or a light plate and add dry newspaper if it gets soggy. Use a compact bottom‑drain bucket under a countertop collection bin, and check the rim daily for cracks or gaps. If you keep these steps in mind, you’ll discover even more tricks to stay odor‑free and insect‑proof.
Tighten the Lid to Keep Your Bokashi Bin Airtight
Why does a tight lid matter? Because bokashi relies on an anaerobic environment; any stray air disrupts the microbes, creates odors, and invites flies.
A tight lid maintains anaerobic conditions, preventing odors, microbes disruption, and fly infestations.
When you close the lid firmly after each addition, you keep oxygen out and the fermentation on track.
A light, even seal works better than forcing the lid down—just press around the rim so it sits evenly.
Check for warping, debris, or misalignment before you walk away; a crooked edge lets air slip in.
If you notice a sour smell or gnats, the seal is failing.
Fix it by cleaning the rim, pressing the lid uniformly, or swapping a damaged lid.
In small spaces, use a dedicated counter bin and load scraps in batches to reduce opening frequency, preserving that airtight seal. Smaller pieces promote faster microbial activity and reduce the risk of foul odors. Stainless steel bodies offer superior durability compared to plastic alternatives, which can warp over time and compromise your seal.
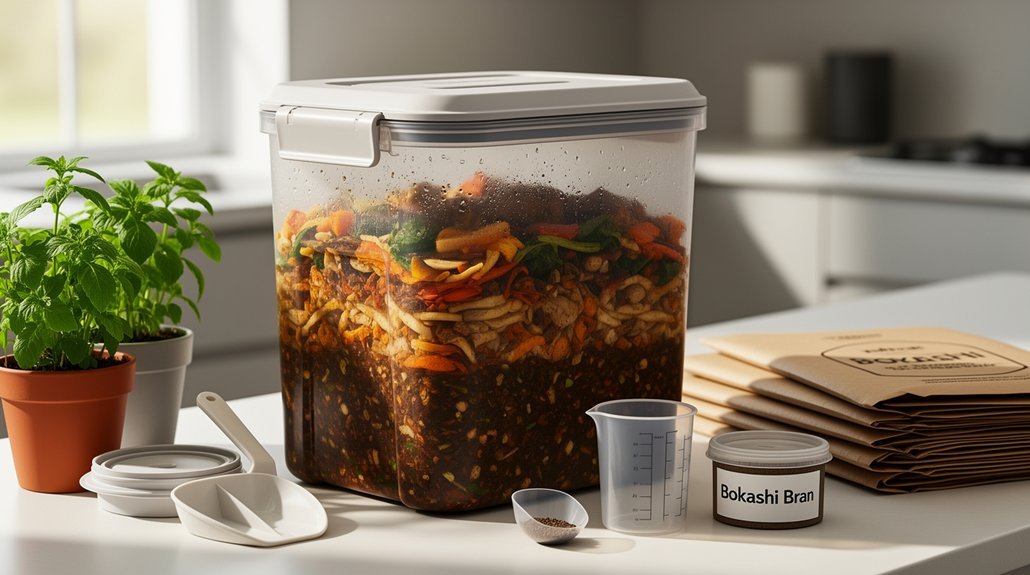
Cut Food Scraps Into ½‑Inch Pieces for Faster Fermentation
Chopping your food scraps into roughly half‑inch pieces speeds up bokashi fermentation by giving the microbes more surface area to work on. In a small bin, each layer is thin, so the extra surface lets the inoculated bran coat everything evenly. Grab citrus peels, banana skins, broccoli stalks, or eggshells and give them a quick rough chop—no need for fine mincing. Aim for uniform ½‑inch chunks; this size balances kitchen effort with microbial access. When you add the bran afterward, it spreads through the pieces, reaching the interior of dense items that would otherwise linger. Consistently chopping before each load keeps the bin smelling fresh, prevents slow pockets, and lets the fermented “pickled” state appear faster, even in cramped countertop or apartment setups. For optimal results, sprinkle 1-2 tablespoons of bran per inch of waste to ensure proper fermentation. Bokashi works best when the waste is evenly layered to ensure consistent fermentation.
Balance Moisture in the Bokashi Bin – Watch for Dripping Lid
Ever notice a steady drip from the lid? That drip tells you the bin is too wet. Spotting condensation, a fuzzy white bloom, or a sour odor means you need to act. First, cut back on soggy scraps and drain the bokashi tea daily. Press the layers firmly, then add a dry absorbent like shredded newspaper or 1/4 cup of bokashi chaff. Keep the lid sealed and check the gasket. If moisture persists, swap out the paper layer and add more bran. Proper compression helps expel excess air and keep the fermentation anaerobic. For best results, store your bokashi bin in a cool, dry place to minimize condensation buildup from temperature fluctuations.
| What to watch | Quick fix |
|---|---|
| Dripping lid | Drain tea, press down |
| White fuzz | Add dry newspaper |
| Green mold | Tighten seal, compress |
| Putrid smell | Increase dry absorbents, improve airflow |
Add Bokashi Bran Every 2‑3 cm of Waste While Layering
Wondering how to keep your bokashi bin humming in a tight kitchen? Add a thin layer of bran every 2‑3 cm of waste. Sprinkle roughly one tablespoon (about 10–15 g) of bran for each inch of scraps, or a handful for every 3–4 cm. This keeps microbes in close contact with fresh material, eliminates air pockets, and promotes even fermentation. After each sprinkle, press the waste down with a small plate or trowel to squeeze out trapped oxygen; a firm, flat layer lets the bokashi culture work efficiently. Consistent, light sprinkling across the whole surface prevents under‑fermented spots and controls odor. In cramped spaces, frequent thin additions let you seal the lid often, maintaining low‑oxygen conditions and steady composting. Adding effective microorganisms ensures the fermentation proceeds quickly and safely. Like worm composting systems that require odor control ventilation, bokashi bins benefit from proper layering to minimize unwanted smells in confined kitchens.
Cover Each Layer With a Plastic Bag, Cardboard, or Plate
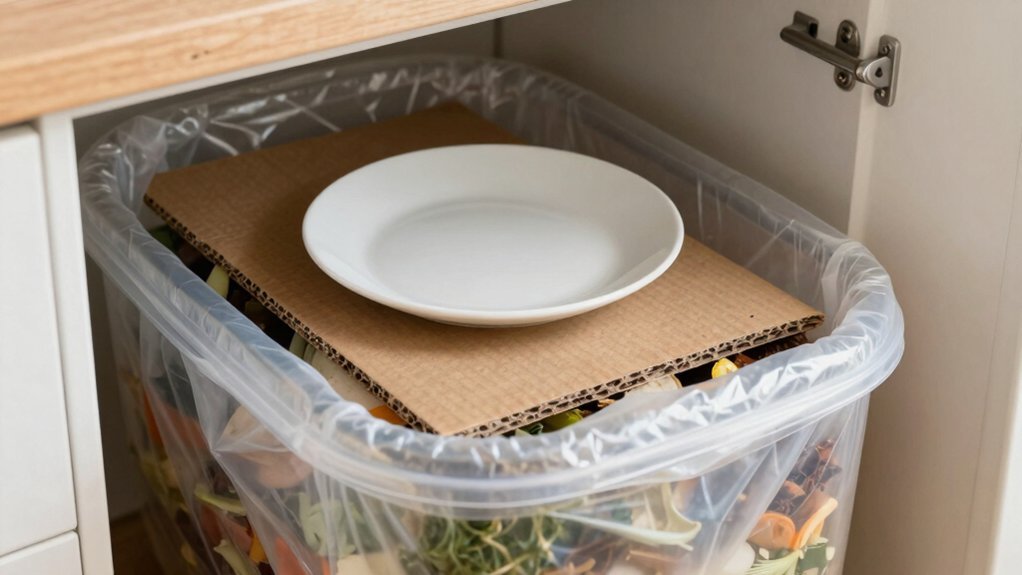
How do you keep oxygen out while still letting you add scraps quickly? Slip a clean plastic bag over the fresh waste, tuck it around the bucket sides, and press it flat before closing the lid. The bag acts as an oxygen barrier, keeps odors down, and works well in cramped kitchens. If you prefer a reusable option, cut cardboard to fit the bin’s shape, place it snugly on top, and optionally add a thin plastic sheet for extra sealing. For added pressure, set a lightweight plate or rigid cover over the layer; it presses the scraps down, limits air pockets, and stays easy to lift during each addition. Choose the cover that matches your bin’s dimensions, stays clean, and lets you remove it quickly without mess. Consider pairing your bokashi system with airtight storage containers for organizing finished compost or dry ingredients used in your kitchen garden. Use a thick bio‑bag to prevent tearing and maintain durability when layering waste.
Press Each Layer Firmly to Remove Trapped Air and Odor
Because bokashi thrives in an oxygen‑limited environment, you need to press each layer firmly to squeeze out trapped air and keep odors at bay. Add thin scraps, then use a potato masher or tapping tool to compress before the next layer. The pressure pushes air from irregular surfaces, densifies the mass, and forces bokashi bran to contact more waste. A firm final press before sealing reduces oxygen, steering microbes toward sour‑sweet fermentation instead of rotting smells. In small bins, compact layers maximize capacity, lower headspace, and guide moisture downward, making stacking easier and odor control reliable. Proper carbon-to-nitrogen ratios and moisture balance further enhance the fermentation process in confined apartment spaces. Anaerobic fermentation works best when the waste is tightly packed, minimizing the chance of aerobic breakdown and foul smells.
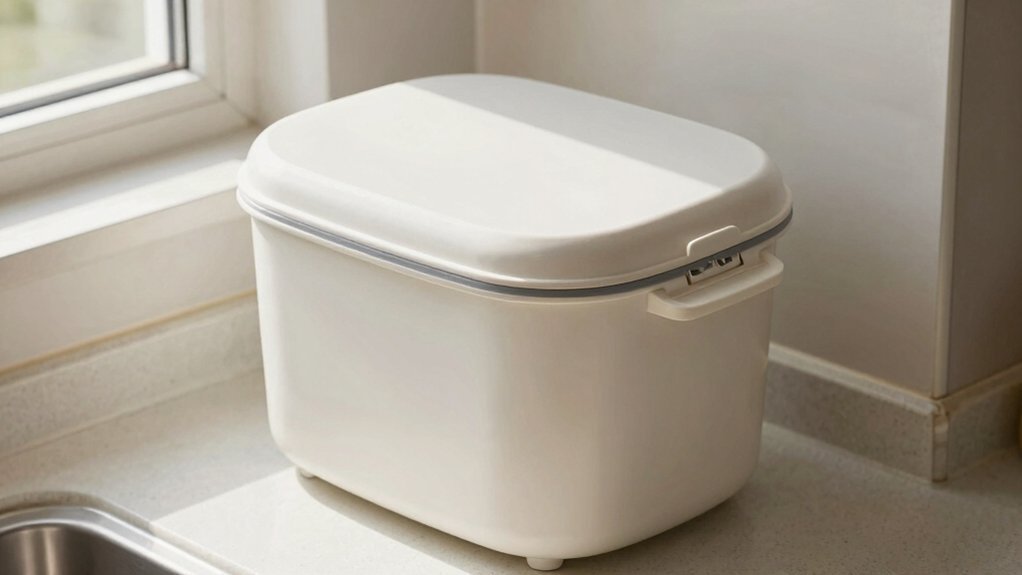
Create a Compact Bottom‑Drain Bokashi Bin for Small Spaces
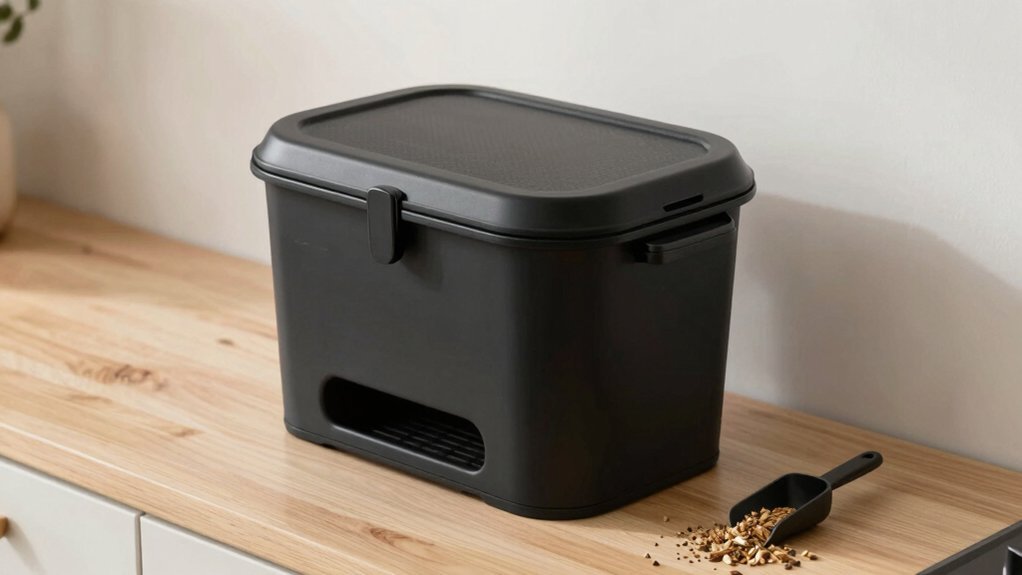
If you’re short on kitchen space, a compact bottom‑drain bokashi bin lets you ferment scraps in a 2.5‑gallon setup without sacrificing odor control. Use two food‑grade buckets: an inner 2.5‑gallon bucket for waste and an outer bucket to catch leachate. Drill 20‑30 holes (1/8‑ to 1/4‑inch) or cut a few slots in the inner bucket’s base; sand the edges smooth. Nest the inner bucket tightly inside the outer one, adding rubber bands around the rim if needed to eliminate air gaps. Seal the lid airtight and keep it closed after each layer of bran and scraps. When fermentation finishes, lift the inner bucket and pour the collected bokashi tea from the outer bucket through a spigot or into a container. This design stays sealed, blocks pests, and fits comfortably on a countertop or under a sink. For best results, select EM-1 cultures in your bokashi bran to ensure rapid fermentation and effective odor control in your compact setup. Effective Microorganisms are carried in the bokashi bran to start digestion of the scraps.
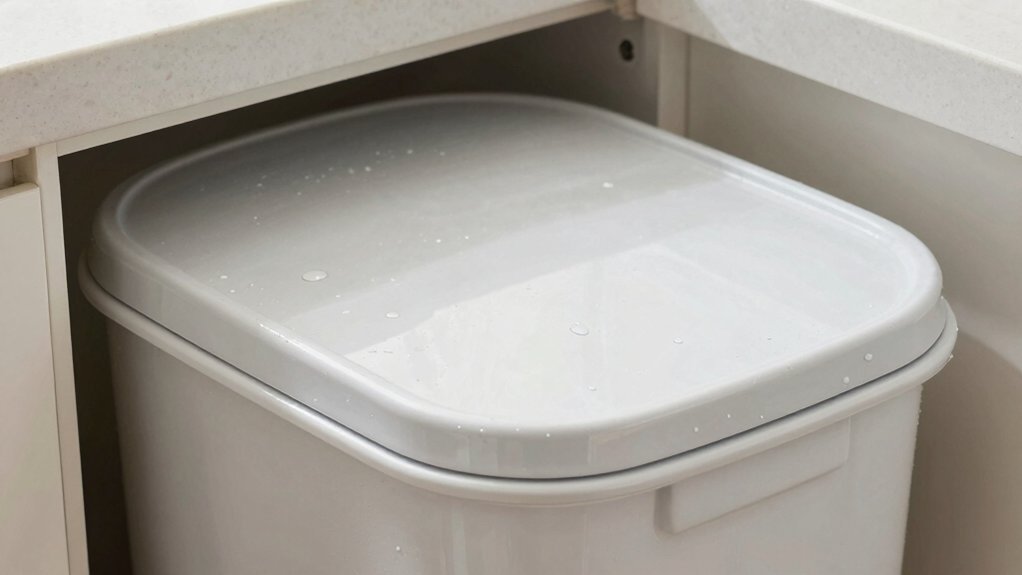
Use a Countertop Collection Bin and Load the Bokashi Bin Daily
Place a lidded countertop bin right next to your prep area so you can toss scraps in as you cook. Each evening, transfer the contents to the main bokashi bin, add bran, and press down to keep the load compact. This daily routine keeps your kitchen tidy, cuts odor, and maintains the anaerobic environment needed for successful fermentation. It also prevents methane buildup by diverting waste from landfills. Unlike black soldier fly systems that require temperature regulation targeting 75F to 90F, bokashi bins operate effectively at room temperature, making them ideal for apartment dwellers who want consistent results year-round.
Countertop Bin Placement
Wondering where to keep your kitchen scraps for a smooth bokashi routine? Place a small countertop collection bin right by your sink or prep area. This spot lets you toss banana peels, coffee grounds, and veggie trimmings as you finish chopping, so nothing lingers on the counter. Choose a well‑ventilated corner—near a window or an open cabinet door—to keep odors at bay. Opt for a bin with a secure lid and a compostable liner; the lid seals in smells while the liner makes cleanup a breeze. Keep the bin compact and lightweight so you can lift it easily into your bokashi bucket each day. By positioning the bin where you work most, you’ll maintain a tidy workflow and avoid clutter in a small kitchen. The anaerobic fermentation process works best when waste is added daily, minimizing odor buildup. Once your bokashi bin is full, the fermented material can be transferred to a vertical garden system or compost tumbler to complete the composting cycle in a small apartment space.
Daily Transfer Routine
A daily transfer routine keeps your bokashi system running smoothly in a small kitchen. Use a countertop collection bin to gather scraps each night, then empty it into the bokashi bucket before you go to bed. Press the waste down, sprinkle 1‑2 heaping tablespoons of bran, and seal the lid tightly. Rinse the countertop bin after each transfer to curb odors and flies. A sturdy handle on your collection bin makes transporting scraps between counter and bokashi bucket more convenient and ergonomic. Consistency matters: loading daily maintains low‑oxygen conditions and lets you rotate two buckets so one ferments while the other fills.
- Press scraps down to eliminate air pockets.
- Add 1‑2 heaping tablespoons of bran per layer.
- Seal the bokashi lid promptly after each load.
- Rinse the countertop bin after emptying. Two‑bucket system allows continuous filling while the other ferments.
Compact Loading Technique
After you finish the daily transfer, keep the countertop collection bin handy and dump its contents into the bokashi bucket in one go. The bin captures scraps all day, so you open the fermenting bucket just once, reducing lid traffic and keeping the interior anaerobic. Add the waste in thin layers, sprinkling bokashi bran over each one. Press the layer flat with a plate, press tray, or even a potato masher to eliminate trapped air. Compact loading lets the material settle evenly, improves bran‑waste contact, and limits odor. In tight kitchens this method fits on a counter, handles mixed scraps effortlessly, and prevents overfilling, ensuring consistent fermentation without mess. Bokashi fermentation produces less carbon dioxide than traditional composting, making it a more eco‑friendly option for small spaces.
Troubleshoot White Fuzzy Growth and Excess Liquid Quickly
If you see white fuzz and a lot of liquid in your small‑space bokashi bin, don’t panic—both are usually normal signs of the fermentation process, and you can curb them with a few quick actions. The white growth is often beneficial actinomycetes thriving in low‑oxygen, carbon‑rich conditions, while excess liquid simply means wet scraps are releasing moisture. Tackle both by adjusting airflow, moisture, and layering.
- Sprinkle a fresh layer of bokashi bran over the fuzzy spots and press it down.
- Cover the top with thick paper or a lid liner to limit air exposure.
- Drain the leachate promptly and add dry carbon material to soak up extra moisture.
- Reduce how often you open the bin and compact scraps evenly to keep oxygen out.
- The presence of mycelium networks indicates a healthy, fermenting soil environment.
Inspect the Rim Regularly to Keep Insects Out and Maintain a Clean Seal
Ever wonder why a few crumbs on the bin’s rim can invite flies and ruin your airtight seal? Keep the lip spotless. After each load, wipe away bran, fruit pulp, or liquid that drips onto the edge. A clean rim preserves the oxygen‑free environment bokashi needs and stops insects from detecting food odors. Inspect the lid interface daily; any gap or warped edge lets air in and pests out. Make sure the lid snaps snugly shut, especially in cramped kitchens where you open it often. Dry the sealing surfaces—moisture mixed with residue becomes a pest magnet. Spot cracks or warping early, and replace or repair the rim before odors or infestations appear. Consistent checks keep the bin discreet, odor‑free, and insect‑proof. Adding more organic waste can help maintain proper moisture levels and reduce the chance of foul smells.
Frequently Asked Questions
How Often Should I Replace the Bokashi Bin Lid?
You should replace the lid only when it no longer seals airtight—usually after a few months of heavy use or if you notice leaks, mold, or inconsistent fermentation. Otherwise, clean and reuse it.
Can I Use a Reusable Silicone Cover Instead of Plastic Bags?
You can use a reusable silicone cover if it seals tightly and stays airtight, but test it first; silicone often fits and cleans well, yet gaps or pressure buildup can still cause odor or spoilage.
What’s the Best Way to Prevent Insects in a Cracked Container?
Seal the crack or move the bin to a new airtight bucket, then spray extra liquid bokashi each addition to boost acidity. Keep lids closed, use a sealed collection container, and wipe any maggots promptly.
How Do I Know When the Moisture Level Is Too High?
You’ll know it’s too high when the lid sweats, droplets form, or a white fuzzy mold appears; the contents feel soggy, drip when squeezed, and a sour, vomit‑like odor lingers.
Is It Safe to Add Dairy or Meat to a Small‑Space Bokashi Bin?
Yes, you can add dairy and meat, but keep them dense, limit liquids, and use extra bokashi bran. Pack tightly, drain excess moisture regularly, and seal the bin firmly to maintain anaerobic fermentation.
In Summary
By keeping the lid tight, chopping scraps small, and balancing moisture, you’ll prevent leaks and odors. Layer waste with bokashi bran every few centimeters, and seal each layer with a bag, cardboard, or plate. A compact bottom‑drain bin and a daily‑filled countertop container keep things tidy in tight spots. Watch for white fuzz or excess liquid, and check the rim for insects. Follow these steps and your bokashi system will stay clean, efficient, and space‑friendly.


Leave a Reply