

You’ll maximize apartment space by choosing stackable systems like worm bins, bokashi, or electric composters. Layer your setup vertically under sinks, in closets, or corners to handle food scraps without sacrificing floor space. Control moisture and odors by balancing carbon-rich bedding with scraps, ensure proper drainage, and harvest finished compost when it’s dark and crumbly. Use your finished product for potting soil or donate surplus to community gardens. Whether you prioritize speed, space, or convenience shapes which system works best for your lifestyle.
Why Stackable Systems Win in Apartments
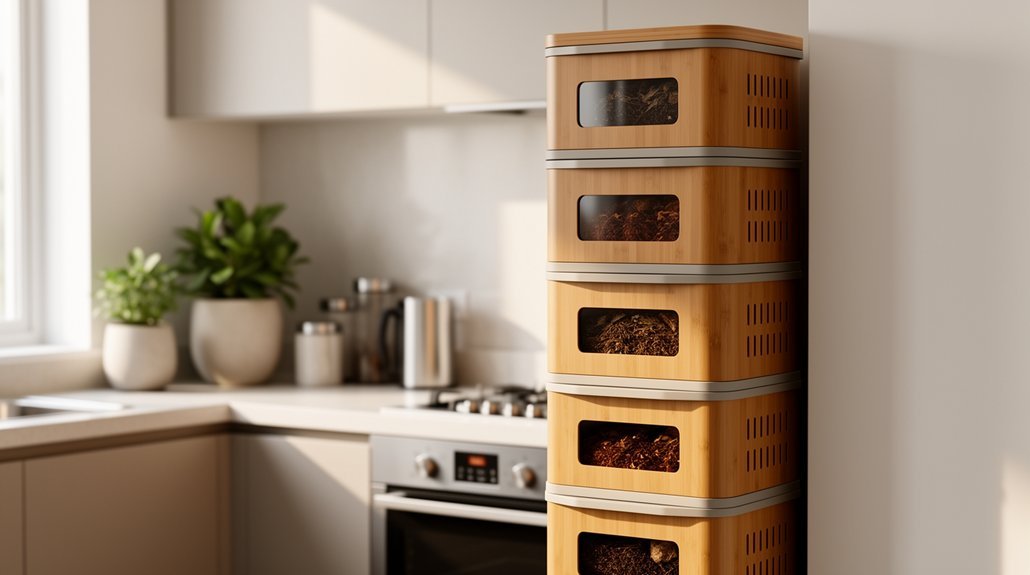
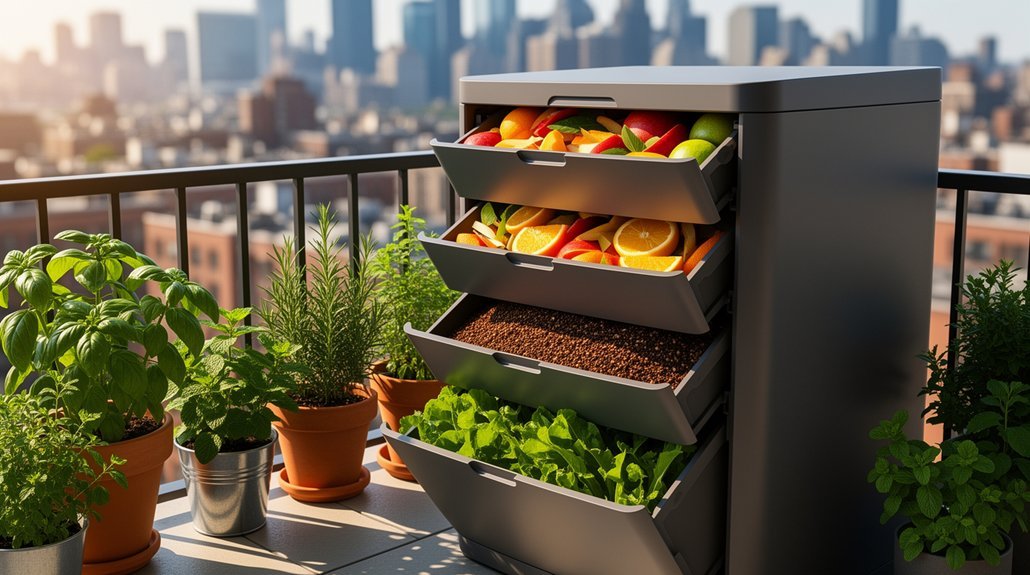
Why do stackable composting systems outperform traditional bins in apartments? You’ll find they’re purpose-built for your space constraints. Stackable units use vertical space efficiently, fitting into kitchens, closets, and balconies without consuming precious floor area. Unlike bulky backyard bins, modular designs adapt to small apartments where storage is limited.
You’ll also appreciate how layered containment keeps odors and mess controlled. Separating fresh scraps, active breakdown, and finished compost into different chambers reduces air exposure and pest risk—critical in shared buildings. Each layer handles independently, making maintenance cleaner and more orderly. In-unit options like bokashi bins are particularly suitable for small spaces, producing compost tea usable directly on plants. Models like the Blütezeit 3-Tray Worm Composter are specifically designed for apartments, balconies, and kitchens with space-efficient configurations.
Day-to-day handling becomes simpler too. You’ll manage smaller batches easily, lift compact trays without strain, and maintain better airflow. Stackable systems scale with your needs, starting small and expanding as your composting habits grow.
Worm Bins: Let Worms Migrate Up, Harvest Castings Below
You’ll set up your vertical migration system by placing fresh bedding and food in a lower bin, which naturally draws worms downward and leaves finished castings behind in the upper chamber.
Once you’ve created this attractive lower habitat with proper moisture and ventilation holes, you can harvest the mature castings above through simple scooping and screening. The lower bin habitat should follow a 4 parts bedding, 2 parts living material, 1 part food ratio to ensure worms have optimal nutrition and environment for downward migration. For best results, use high-grade stainless steel or durable plastic bins that won’t crack or degrade over time in your apartment environment.
This efficient design lets you continuously produce finished compost while keeping your worms active and thriving in your compact apartment setup.
Vertical Migration System Design
How can you harvest finished compost without manually separating worms from their castings? You’ll design your system around vertical migration—worms naturally move upward toward fresh food and oxygen while castings accumulate below.
| Design Element | Function |
|---|---|
| Stacking trays with perforated bottoms | Enable upward worm movement and drainage |
| 50–60 cm minimum depth | Allows proper maturation and cocoon hatching |
| Fresh food at top layer | Draws worms into new bedding |
| Open or mesh base | Facilitates castings collection |
Position new trays above older ones, allowing worms to migrate naturally through perforations. Add fresh organic material to your top layer consistently—worms follow their food source upward. As they climb, castings remain below for easy harvesting. A common misconception is that all trays should be loaded at once, but the optimal approach is to add trays gradually as previous trays fill with material. Maintaining an ideal temperature range of 55-77°F supports efficient worm migration and decomposition throughout your stackable system. This passive system minimizes handling while maximizing your harvest efficiency.
Harvesting Finished Castings Efficiently
Once your bin reaches 95–99% finished castings, you’re ready to harvest—but preparation matters. Stop feeding your bin beforehand so worms consume remaining food scraps, then stir the contents for even decomposition.
In stackable systems, you’ll capitalize on worms’ natural behavior by placing fresh food in the upper tray. Worms migrate upward toward the new food source, leaving finished castings below ready for harvesting. This passive separation requires minimal effort on your part. For best results, stop feeding 1–2 weeks before harvest to encourage worm migration to the upper tray.
Once worms have migrated, implement these harvesting steps:
- Dump finished material into thin layers under strong light
- Scrape away top sections as worms retreat downward
- Screen remaining castings to remove bedding and debris
Return any visible worms to your active bin, add fresh bedding, and resume feeding. Finished worm castings appear as dark brown, tiny, round bits resembling rich soil that can be applied directly to gardens or houseplants as a natural fertilizer. You’ll complete the entire cycle efficiently within 30 minutes.
Bokashi: Layer, Ferment, Finish Elsewhere
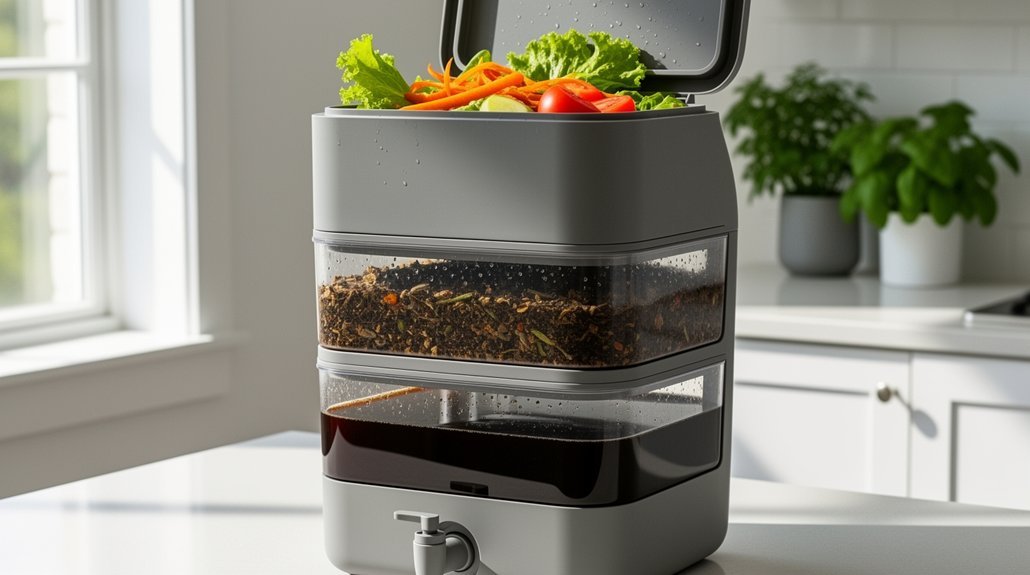
What makes Bokashi different from traditional composting? You’re using anaerobic fermentation to “pickle” food scraps in a sealed bucket rather than break them down aerobically. This process accepts meat, dairy, cooked food, and oils—items that’d slow traditional composting.
You’ll layer scraps with Bokashi bran in an airtight bin, press them down, and drain leachate every 2–3 days. Within 7–14 days, your bucket’s fermented. Then you’ll bury the pre-compost in soil—a garden bed, large container, or community garden plot—where microbes finish decomposition over 2–4 weeks. Wooden tampers and stainless steel pounders can help you efficiently compress and pack down your layered scraps for optimal fermentation.
This two-step system works brilliantly in apartments because it stays sealed, produces minimal odor, and eliminates pest problems. The Bokashi tea you drain regularly can be diluted and used as a natural fertilizer for your houseplants or garden. You’ll just need a finishing destination for your fermented material.
Electric Composters: Speed, Odor Control, and Higher Cost
Why’d apartment dwellers turn to electric composters after trying passive systems? Speed and odor control. You’ll process food waste in 2–8 hours rather than weeks, keeping your kitchen fresher daily. These units tackle a primary concern: smell in compact spaces where holding scraps overnight feels undesirable.
Electric composters offer three key advantages:
- Odor management – Activated carbon filters or sealed designs dramatically reduce kitchen odors compared to open bins
- Daily convenience – Fast cycles support frequent cleanup without accumulating waste
- Flexible inputs – Many handle meat and dairy, expanding what you can compost
However, you’ll pay substantially more—typically $300–$700—for this convenience. You’ll also need electrical power and counter space. The output remains a dried byproduct requiring further composting or disposal, not finished garden compost. Most countertop electric composters range from 10.5 cups to 19 liters in capacity, making them suitable for different household sizes and cooking frequencies. To achieve truly finished compost, consider pairing electric composters with vermicomposting systems that can process the dried output into nutrient-rich castings.
Space Planning: Under-Sink, Closet, and Corner Placement
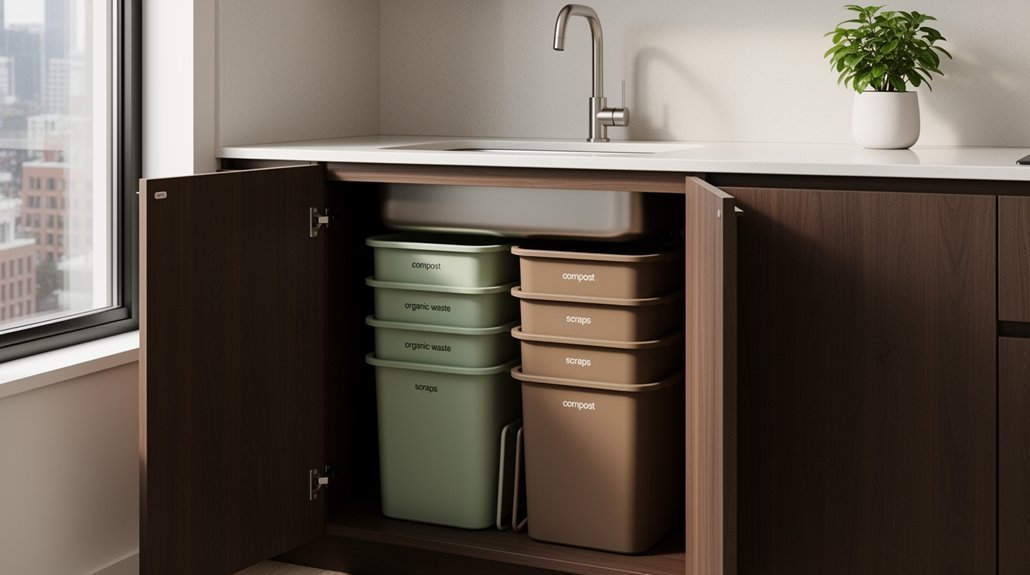
While electric composters handle speed and odor control, they demand counter real estate and a power outlet—luxuries most apartments can’t spare. Instead, you’ll find stackable systems work best in three strategic locations.
Under your sink, compact bins fit neatly into dead space, staying dark and room-temperature while drainage trays catch excess moisture.
Closets offer similar benefits with existing shelves that hold smaller buckets or stacked containers away from kitchen traffic.
Corner placements let you use vertical space efficiently when cabinet room’s limited. Before selecting your location, assess total food waste produced by your household to determine whether a single bag system or multiple containers will meet your composting needs.
Before choosing your spot, measure dimensions carefully and ensure you can easily access the bin for adding scraps and routine maintenance. For long-term success, consider that proper drainage holes prevent waterlogging and support faster decomposition in confined spaces.
A dark, stable location supports faster composting regardless of which placement you select.
Worm Bins vs. Bokashi vs. Electric: Quick Comparison
You’ll find that speed and space requirements differ dramatically across these three systems, so your apartment’s layout and your timeline should guide your choice.
Worm bins need 3–6 months to produce finished compost but occupy minimal floor space, while Bokashi ferments waste in just 2 weeks yet still requires a final composting stage before you can use it. Bokashi uses an activator composed of micro-organisms to achieve this rapid fermentation process. For worm bins specifically, mycorrhizal fungi in the finished compost enhances nutrient absorption for your indoor plants.
Electric composters offer the fastest results and work in tight corners, though they consume electricity and typically cost more than biological alternatives.
Speed And Processing Power
Choosing between composting methods often comes down to how quickly you need results. Here’s what you’re working with:
- Electric composters deliver the fastest processing—reducing kitchen scraps to dry, soil-like material in hours rather than weeks. Most portable electric composters achieve 80% to 90% waste reduction within 3 to 6 hours.
- Bokashi ferments waste in roughly two weeks, rapidly stabilizing scraps though they’re not yet finished compost.
- Worm bins take two to three months for mature compost but excel at steady, ongoing processing with a productive colony handling half its weight daily.
For apartments, speed isn’t everything. Electric composters reduce volume fastest but produce pre-compost. Bokashi offers balanced fermentation speed without odor. Worm bins require patience but generate biologically active compost. To maximize worm bin efficiency, cut your waste small before feeding it to the bin, as smaller pieces increase surface area for enzyme breakdown and accelerate processing. Choose based on your timeline, space, and whether you prioritize rapid results or finished quality.
Space Requirements And Setup
Speed matters, but so does fitting your composting system into an apartment that wasn’t designed with decomposition in mind. Worm bins generally demand more surface area than alternatives, requiring ventilation holes and bedding depth. A standard 10-gallon bin works well for kitchens or closets, but you’ll need roughly 1/2 to 1 1/2 pounds of worms per square foot. Remember that vermicomposting depends on surface area, not volume, so a shallow bin with greater dimensions will outperform a deeper container with the same footprint.
Bokashi systems occupy minimal space with their sealed, vertical bucket design—ideal for tight kitchen storage. For apartment dwellers with limited room, reinforced seams prevent leaks when the bucket is stored near living areas. Electric composters trade compactness for appliance footprint, sitting on countertops like small kitchen appliances without needing drainage trays or ventilation.
Choose worm bins if you’ve got a basement or balcony. Select bokashi for cramped spaces. Pick electric units when you prioritize convenience over footprint.
Moisture and Odor: Prevent Problems Before They Start
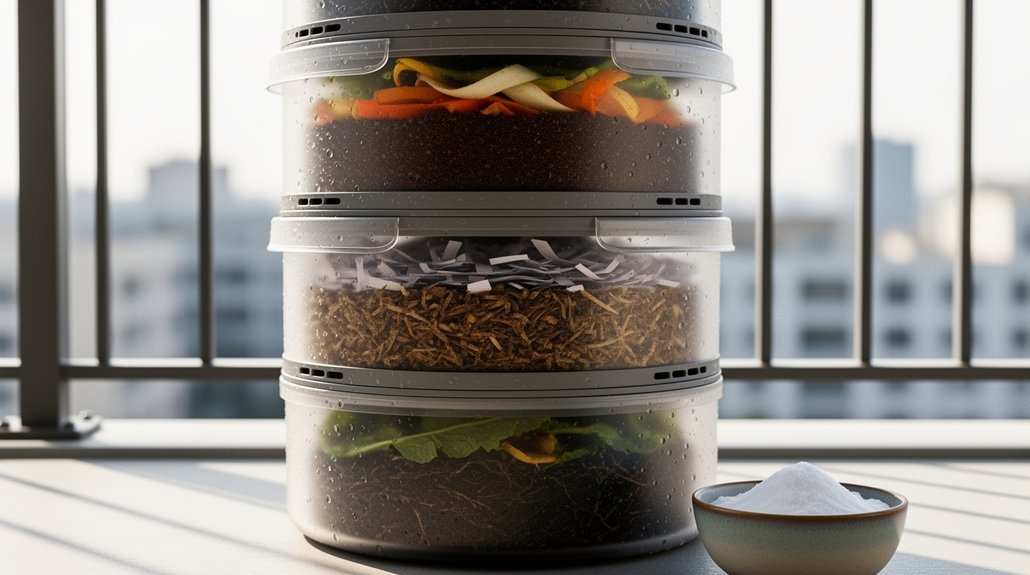
Why do stackable composting systems so often develop unpleasant smells? The culprit is typically poor moisture balance combined with inadequate airflow. You’ll prevent odor problems by managing these three critical factors:
Poor moisture balance and inadequate airflow are the primary culprits behind unpleasant odors in stackable composting systems.
- Maintain proper moisture levels—keep material damp like a wrung-out sponge, not wet. Excess moisture blocks oxygen and creates anaerobic conditions that produce foul odors.
- Add carbon-rich bedding regularly—shredded paper, cardboard, or dry leaves absorb excess liquid, improve airflow, and offset wet food scraps. Layer bedding whenever you add kitchen waste.
- Ensure adequate aeration—mix scraps with bedding rather than compacting them in dense layers. Tight, airless pockets encourage rotting and ammonia smells.
For apartment systems, check moisture frequently since indoor temperatures and humidity fluctuate. Drain leachate promptly—standing liquid becomes anaerobic and intensifies odors. If you’re using a compost collection service, the pickup logistics handle moisture management for you, eliminating the need for frequent monitoring.
Knowing When Compost Is Ready to Harvest
You’ll recognize mature compost by its dark brown color, crumbly soil-like texture, and pleasant earthy smell—these visual signs tell you decomposition’s complete.
The timing varies depending on your stackable system’s design and seasonal conditions; apartment composters can finish in weeks during warm months or take several months in cooler seasons.
You can confirm readiness by checking that the pile’s no longer hot, feels dry to lightly moist, and shows no recognizable food scraps or leaves. Hot composting and frequent turning can significantly accelerate the maturation process in smaller apartment-friendly systems.
Visual Signs Of Maturity
How can you tell when your apartment compost is truly finished? Look for these visual indicators of maturity:
- Dark, uniform color – Your compost should appear dark brown to nearly black throughout, without patchy or layered sections that suggest incomplete breakdown.
- Soil-like appearance – Finished material resembles aged potting soil, signaling readiness for harvest and indicating the pile’s volume has reduced by roughly half.
- Absence of recognizable materials – You shouldn’t spot visible food scraps, newspaper, leaves, or grass. Small woody pieces may remain but are easily sifted out.
Additionally, your pile should feel cool rather than warm, as active decomposition generates heat. When your compost looks settled and stable with no obvious daily changes, you’re ready to harvest and use it in your apartment gardens or planters. This crumbly texture supports healthy root growth and indicates the microbes have completed their work, leaving behind a nutrient-rich end product.
Texture And Decomposition Stages
Can you spot the difference between yesterday’s coffee grounds and finished compost? That’s your first clue about decomposition stages. Your pile progresses through distinct phases: mesophilic microbes initially break down soft materials, then thermophilic microbes take over during the heat-intensive stage, accelerating breakdown of fats and cellulose. As temperatures drop, fungi and actinomycetes become active, refining texture further.
Watch for texture changes as your indicator. Fresh compost shows recognizable food scraps and leaves. As decomposition advances, materials become loose and brittle. Finished compost feels crumbly and soil-like with dark brown-to-black coloring. You’ll notice large fragments disappearing and particle size decreasing markedly. The rich, earthy smell accompanying these texture changes confirms that humus formation is progressing properly.
When your pile stops steaming and feels fluffy rather than wet or dense, you’re ready to harvest. That uniform, crumbly texture means substantial humus formation has occurred.
Timing Based On System Type
When’s your compost actually ready? Timing depends entirely on your system type. Here’s what you’ll encounter:
- Bokashi systems ferment waste in 4-6 weeks, producing pre-compost ready for burial or secondary composting
- Vermicomposting takes longer—you’ll harvest when worm castings fully replace original bedding and no recognizable food scraps remain
- Electric countertop composters shorten processing time significantly, with harvest beginning once visible scraps disappear
Apartment collection services eliminate guesswork since scheduled pickups mean you’re not waiting for in-home curing. If you’re using bokashi, you’ll benefit from timing harvests around planting cycles or seasonal container needs. The key? Don’t harvest prematurely. Dark, earthy, fully stabilized material works best for your plants. Using finished compost in potted plants or community gardens diverts valuable nutrients from landfills while supporting healthier ecosystems in your urban environment.
What to Do With Finished Compost in a Small Apartment
Once you’ve successfully created finished compost in your apartment, you’re probably wondering what comes next. You’ve got several excellent options for your dark, crumbly compost.
Mix it into potting soil when repotting houseplants or refreshing container gardens. You can also top-dress established plants with a thin layer, minimizing root disturbance while providing slow-release nutrients. This approach works particularly well in small spaces since it requires minimal compost.
If you’ve accumulated surplus compost, consider sharing it with your community. Local community gardens, rooftop projects, or neighbors with plants will likely welcome the donation. Keeping organic material in circulation benefits your neighborhood while freeing up your apartment space.
Store unused compost in sealed containers or reusable bags to control odors and pests until you need it.
Should You Compost at Home or Use a Community Program?
Now that you’re ready to start composting in your apartment, you’ll need to decide whether you’ll maintain a home system or participate in a community program.
Consider these key differences:
- Space and effort – Home systems demand regular monitoring and indoor/outdoor setup, while community programs eliminate storage needs and maintenance responsibilities.
- Material acceptance – Community facilities handle meats and compostable foodservice items that break down poorly in home piles, offering greater flexibility.
- Control versus convenience – Home composting gives you strict oversight of inputs and odor management, but community programs simplify participation through drop-off services.
Your choice depends on priorities. Choose home composting if you value maximum control and have dedicated space. Opt for community programs if convenience and limited living space matter more than hands-on management.
Frequently Asked Questions
How Often Should I Feed My Worm Bin, and What Quantities Work Best for Apartments?
You’ll feed your apartment bin once or twice weekly with about one cup of scraps per feeding. Start conservatively, observe how quickly food disappears, and adjust based on your worm population and bin size.
Can I Compost Meat, Dairy, and Oils in a Bokashi Bucket Safely?
Yes, you can safely compost meat, dairy, and small amounts of oils in your bokashi bucket. The anaerobic fermentation process suppresses odors and reduces pathogens. Balance oily scraps with dry materials and bran for best results.
What Is the Typical Lifespan of an Electric Composter Before Replacement Is Needed?
You’ll typically get 2–5 years from your electric composter, depending on build quality and use frequency. Daily heavy use, poor maintenance, and overloading shorten lifespan considerably. Regular filter changes and proper care extend durability considerably.
How Do I Prevent Fruit Flies in Indoor Stackable Composting Systems Year-Round?
You’ll prevent fruit flies year-round by keeping your lid sealed, burying scraps two inches deep, maintaining dry bedding, avoiding overfilling, and emptying frequently during warm months.
Are There Any Local Regulations or Lease Restrictions on Apartment Composting I Should Know?
You’ll need to check Denver’s Universal Recycling Ordinance if your building has 8+ units—it requires composting by September 2026. Review your lease for container restrictions, and verify your property manager’s specific composting policies before starting.
In Summary
You’ve got solid options for composting in your apartment. Whether you’re stacking worm bins, fermenting with bokashi, or running an electric composter, you’ll reduce waste while creating nutrient-rich soil. Start small, monitor moisture and odors closely, and don’t hesitate to join a community program if home composting feels overwhelming. You’re making a real environmental impact from your limited space.




Leave a Reply