

Pick a shallow, sturdy bin with a lid and drill fine‑mesh vents for airflow. Shred cardboard or newspaper, add a little water, and mix until it feels like a wrung‑out sponge. Toss a banana peel on the moist bedding for a couple of days to jump‑start microbes. Order red wigglers—about one pound per square foot of bin surface—and let them settle for a week. Spread a thin layer of bedding, release the worms, and seal the lid. Feed small, chopped scraps every 2‑3 days, keep the bin at 60‑80 °F, and adjust moisture to avoid odor or sogginess. Follow these steps and you’ll discover even more tips for a thriving indoor worm composter.
Pick a Breathable Bin for Indoor Worm Composting
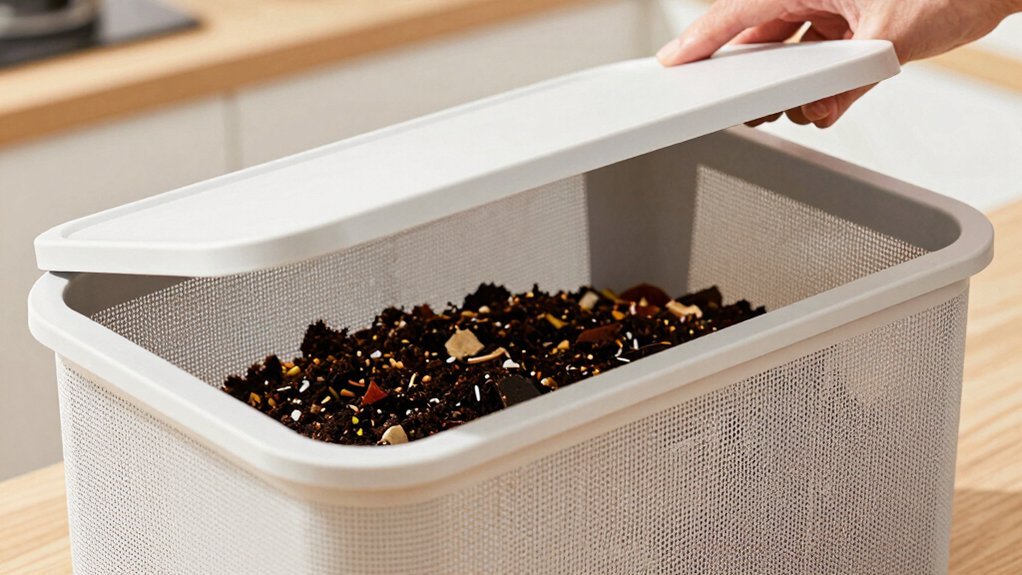
How do you choose a breathable indoor bin for worm composting? Pick a bin that’s opaque and sturdy, then drill a lid with holes and additional vents in the sides for ventilation. An opaque bin blocks light, keeping worms calm, while the lid with holes and side perforations create steady airflow. Favor a design that maximizes surface area over depth—think a shallow tray rather than a deep bucket—so worms spread evenly and oxygen reaches every corner. Keep the bin no deeper than 15 inches, and elevate it on bricks or a tray to improve drainage and collect leachate. You’ll start with about one pound of redworms per square foot of surface area, adjusting as the colony grows. This setup ensures proper airflow, moisture balance, and a healthy indoor worm composting environment. To keep your compost tools organized nearby, consider using adjustable bamboo drawer dividers that are spring-loaded and easy to install without tools.
Prepare Moist Carbon‑Rich Bedding for Indoor Worm Composting
Looking for a bedding that keeps your worms happy and your kitchen smelling fresh? Start with shredded cardboard and other carbon‑rich bedding like unbleached newspaper. Shred until pieces are about the size of a postage stamp, then place them in a bucket. Add a little water, stir, and let it sit a few minutes. Squeeze a handful—if only a drop or two drips out, you’ve hit the ideal 80 % bedding moisture. This pre‑wet bedding mimics a wrung‑out sponge and stays breathable, preventing sour odors in your indoor worm composting bin. Mix in a handful of aged compost or coconut coir for texture, then spread the moist, breathable bedding in the bin before introducing your worms. To help manage any potential odors during indoor composting, consider using a ceramic compost crock with a built-in charcoal filter designed for odor control.
Jump‑Start Microbes With a Banana Peel for Indoor Worm Composting
Want a fast, reliable way to kick‑start the microbial community in your new indoor worm bin? A single banana peel works as an instant starter food, igniting a microbial bloom that prepares the habitat for vermicomposting. Place the peel on top of your moist bedding during the worm bin setup and let it decompose for a couple of days. The quick‑decomposing peel feeds microbes, creating a “fire” that fuels the ecosystem before you add any worms. This early boost stabilizes temperature, pH, and nutrient flow, making the indoor bin more inviting for future worm colonies.
Banana peel jump‑starts microbial bloom, stabilizing temperature, pH, and nutrients before adding worms.
- Add a fresh banana peel to the bedding.
- Keep the bin moist but not soggy.
- Wait 48‑72 hours for the microbial bloom before introducing worms.
For ongoing success, maintaining proper moisture and aeration in your composting setup is essential to support microbial activity and odor control.
Order Red Wiggler Worms for Indoor Worm Composting
You’ll want to compare Glider’s shipping options before you click “order,” since they offer both standard and expedited delivery. Choosing the faster service can get your red wigglers into the bin before the microbes start blooming.
The cheaper standard route works fine if you’re not in a rush and can wait a few extra days.
Source Glider
Where do you get the red wigglers that turn kitchen scraps into rich compost? You can buy them online or from local garden centers, community farms, and worm‑caring groups. Expect a moist, aerated container and budget $25–$40 per pound. Quarantine the batch for a day, then spread them onto pre‑moistened bedding in your indoor bin before adding food scraps. Keep the bedding damp, not soggy, and watch the worms reproduce quickly, filling the bin with active vermicomposting. After a few weeks, you’ll start harvesting castings, the dark, nutrient‑rich soil amendment that boosts plant health. Many beginner-friendly kits feature food-safe plastic construction to ensure safety and durability for indoor use.
- Online retailers with guaranteed moisture levels
- Local garden stores or cooperative farms
- Community worm‑exchange networks for starter populations
Shipping Options
How can you guarantee your red wigglers arrive alive and thriving? Choose reputable suppliers that specialize in Red Wigglers and offer guaranteed live arrival. Order the starter quantity—about one pound per indoor bin surface area—to keep costs manageable; prices range $25‑$40 per pound, with bulk discounts possible. Opt for insulated shipping containers that protect worms from extreme temperatures and light, and request fast, tracked shipping to minimize transit time. If you’re using opaque indoor bins, the worms will stay concealed and stress‑free after unpacking. Verify that the seller ships only healthy, non‑invasive stock and includes clear instructions for acclimating the worms to your bin. This careful approach ensures a healthy start for your composting project. For enhanced composting results, consider integrating bokashi bran with your worm bin to improve odor control and accelerate waste breakdown.
Determine the Right Worm Quantity for Your Bin
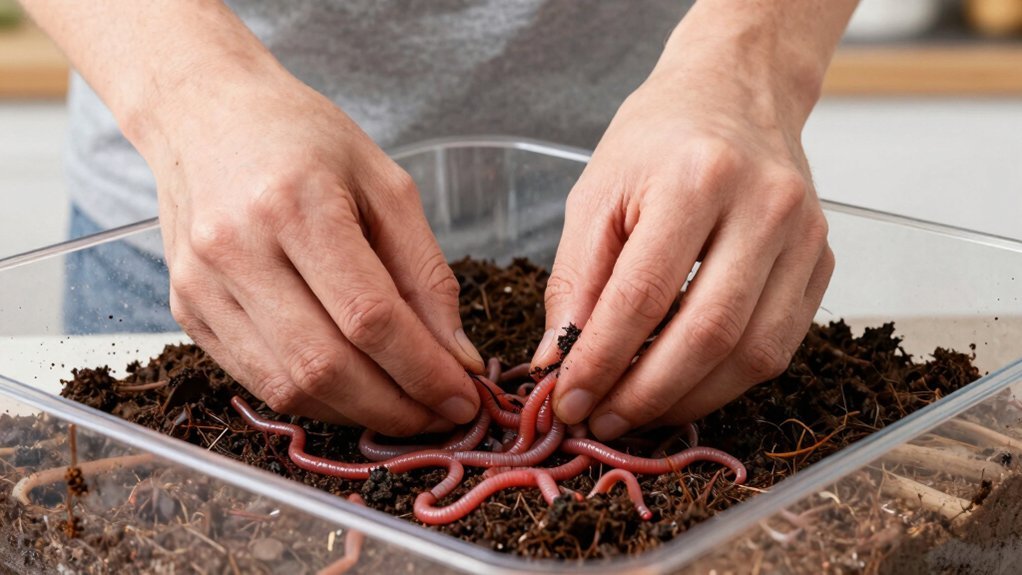
You’ll want to match your bin’s surface area with about one pound of red worms per square foot, so a 1.5 × 2 ft bin starts around three pounds.
Begin with roughly 500–1,000 worms and let the population grow as you add food, adjusting the density if you notice excess scraps or crowding.
As your feed rate increases, you can scale up the worm count to keep composting efficient without overloading the space.
For best results, consider using a 5-tray worm composter system that allows for modular expansion and efficient airflow to support larger worm populations.
Bin Size Recommendation
Wondering how many red worms you really need? Your bin size dictates how many worms thrive, so focus on surface area, not depth. A 1 ft × 2 ft bin offers about 3 sq ft, supporting roughly 3 lb of red worms and matching a 2–3 lb weekly feeding capacity for indoor vermicomposting. Keep the container shallow—under 15 inches—to avoid compaction and let worms move freely.
- Measure surface area – calculate length × width; use 1 lb per sq ft as a starting point.
- Match feeding capacity – aim for a bin that holds 2–3 lb of scraps, which aligns with 2–3 lb of worms.
- Adjust as population grows – start with 1 lb, then add more worms when you see the bin filling up without overcrowding.
Using a worm composting thermometer will help you monitor optimal conditions for worm health and reproduction.
These steps ensure optimal capacity and healthy worm composting.
Worm Density Guidelines
Ever wondered how many red worms you really need for a given bin? Worm density matters, and a solid rule is one pound of red worms per square foot of bin surface area. A 1.5 ft × 2 ft bin, for example, should start with about three pounds of worms. Begin with roughly one pound in a small indoor bin and let the population grow to its equilibrium population. As the vermicomposting system matures, the numbers can swell into the thousands, supporting a higher feeding rate of 7–12 pounds of food waste per week. Design your bin to maximize surface area for oxygenation and worm movement; deeper containers risk compaction and hinder distribution. This approach keeps your worm density balanced and your compost thriving.
Adjusting for Feed Rate
How many worms should you keep to match your weekly feed rate? Aim for about 1 lb of worms per square foot of bin surface. In a 3‑sq‑ft bin, that’s roughly 3 lbs of red wiggler population, which can handle a 7–12 lb feeding rate once your system is established. Start with 1–2 lbs in urban setups, let the worms multiply, then adjust as you notice how quickly they process the material. Burying scraps in 0.5–2‑inch pockets spreads food evenly and prevents clumping, keeping your composting bins healthy.
- Measure bin area and stock 1 lb worms per sq‑ft.
- Feed 7–12 lb of waste weekly once the system is established.
- Bury small, pre‑cut scraps in multiple spots to aid distribution.
Let the Bin Settle Before Adding Worms
After you’ve assembled the bin, let it settle for about a week before adding the worms so the microbes can bloom and establish a stable habitat. During bin settling you’ll focus on moisture and bedding.
Mix shredded newspaper or coconut coir with a splash of water until the medium feels like a damp sponge.
Add a handful of partially rotted kitchen scraps to jump‑start microbial activity, but keep feeding light.
Place the bin in a dim, sheltered corner to reduce stress and maintain steady temperature.
The waiting period lets bacteria, fungi, and protozoa multiply, creating a rich, aerated environment.
When the smell is earthy and the texture is moist, you’re ready to introduce 1–2 pounds of red wigglers for successful indoor worm composting.
Introduce Worms and Secure the Bin to Prevent Escape
Ready to keep your worm crew from escaping? First, spread a thin layer of moist bedding in the bin, then gently release Red Wigglers onto the surface. They’ll burrow quickly if the bin is dim, so keep it under low‑light conditions for the first night. Finally, secure the lid and check that all holes are properly drilled for airflow without creating large gaps.
- Light control – place the bin under soft light only initially; darkness later deters escape.
- Airflow holes – drill 1/4″–1/2″ holes in lid and bottom, then cover with fine mesh to keep worms in.
- Bedding depth – bury food scraps deep in the bedding to keep odors low and worms anchored.
Set a Gentle Feeding Schedule for Indoor Worm Composting
You’ll feed your worms every 2–3 days, using just a half‑cup to a cup of chopped scraps each time, then gradually raise the amount to about two cups a week as the colony grows.
Keep the pieces small (½–2 inches) and bury them in several spots to balance moisture and prevent odors.
After each feeding, give the surface a quick stir and cover it with bedding to keep airflow steady and fruit flies at bay.
Gentle Feeding Frequency
Ever wondered how often you should feed your indoor worms? Your worm bin feeding cadence should be gentle, not daily. Aim for a few days between meals to avoid odors and keep aeration high. Start with small food scraps, about half‑inch to two inches, then apply a gradual feeding increase as the colony grows.
- Bury scraps in multiple spots under the bedding to spread nutrients and reduce surface smells.
- Maintain moisture by checking that the bedding feels like a wrung‑out sponge; add a drizzle of water if it feels dry.
- Monitor activity and pause feeding when worms slow down, preventing mold and overfeeding.
Following this schedule keeps your compost healthy, odor‑free, and productive.
Portion‑Size Control
How much should you actually put in the bin each time? Aim for a modest portion size that keeps bedding moisture steady and prevents fruit flies. Start with 0.5‑2 inch pieces, bury them gently, and watch the worms. A feeding schedule of every three to five days works for most indoor worm bins, delivering about 7‑12 pounds per week in larger setups. If the bedding feels soggy, cut the portion size; if it’s dry, add a bit more. Overfeeding overwhelms aerobic conditions, leading to odors and pests. Adjust portion size based on worm activity, cocoons, and an earthy smell. Consistent, measured portions keep composting efficient and your worm bin thriving.
Maintain 60‑80 °F Year‑Round for Healthy Worms
Wondering how to keep your worm bin thriving all year? You need a stable worm bin temperature between 60‑80°F for indoor vermicomposting. Insulate the bin in winter and keep it out of direct sun in summer; a simple blanket or foam board does the trick. Good airflow and drainage prevent hot spots and help moisture management, while regular bedding and feeding adjustments keep microbes active and temperature steady.
- Bin insulation – add thermal layers, avoid drafts.
- Airflow & drainage – drill holes, use a mesh tray, keep bedding moist but not soggy.
- Feeding schedule – feed smaller amounts in cooler months, increase when temperature rises, and always mix with damp newspaper or coconut coir.
Monitor the bin daily with a cheap thermometer; quick tweaks keep the environment within the 60‑80°F window and your worms happy.
Troubleshoot Common Indoor Worm Composting Issues: Odor, Moisture, and Temperature
Why do your worm bins sometimes smell, feel soggy, or get too hot? An odor usually means food isn’t buried under bedding, so cover scraps with a thick layer of dry leaves or shredded newspaper. Keep moisture like a wrung‑out sponge—squeeze a handful; only a drop or two should escape. If it’s wetter, add more dry bedding; if drier, mist lightly. Temperature should hover between 60–80 °F. Insulate the bin, place it in a shaded spot, or use a low‑heat lamp to avoid extremes. Feed every 2–3 days in small amounts, stirring after each feeding to boost aeration and prevent mold. Elevate the bin on bricks, drill ¼‑½‑inch holes in the lid and sides, and ensure proper drainage to maintain healthy airflow.
Frequently Asked Questions
Can I Use a Plastic Container Instead of a Wooden One?
Yes, you can use a plastic container, just make sure it has ventilation holes, a lid that’s not airtight, and a shallow depth so the worms get enough oxygen and moisture.
How Often Should I Add Fresh Bedding After Feeding?
You should add fresh bedding every one to two weeks, depending on how quickly the worms consume the old material; keep the bin moist, and top it with a thin layer of shredded newspaper or coconut coir after each feeding.
Do I Need to Sterilize the Bedding Before Use?
You don’t need to sterilize bedding; just rinse it, let it dry, and mix it with a bit of shredded newspaper. Worms tolerate normal microbes, and over‑sterilizing removes beneficial food sources.
What Is the Best Way to Prevent Fruit Fly Infestations?
You prevent fruit flies by keeping the bin covered, adding dry bedding after food, and feeding only small amounts. Clean spills promptly, use a fine mesh lid, and avoid over‑watering to keep them away.
Can I Keep the Worm Bin in a Refrigerator?
No, you shouldn’t keep the worm bin in a refrigerator. Cold stalls their activity, kills beneficial microbes, and can cause the bin to freeze, ruining compost production and harming the worms.
In Summary
Now you’ve got the bin, the bedding, the worms, and a feeding routine—everything you need to turn kitchen scraps into rich compost right at home. Keep the temperature steady, watch for odors, and adjust moisture as needed. With a little attention, your red wigglers will thrive, and you’ll enjoy a steady supply of nutrient‑dense soil for your plants. Happy composting!



