

You’ll stop compost bin smells by emptying your bin weekly, maintaining a 2:1 to 4:1 brown-to-green ratio, and ensuring proper drainage with bottom holes and elevated stands. Add baking soda or activated charcoal every couple of weeks to neutralize odors quickly. Layer dry carbon materials like shredded paper or leaves after each deposit to block smell buildup. Choose a sealed container with a tight-fitting lid and charcoal filters you replace every three to six months. For stubborn odors, electric composters with microbial technology offer advanced solutions worth exploring further.
Empty Your Bin Weekly to Stop Smell Before It Starts
When’s the last time you emptied your compost bin? If it’s been longer than a week, you’re likely breeding odor problems. Food scraps decompose faster as moisture builds, and leaving them sitting creates sour, rotten smells that linger indoors.
Your emptying frequency depends on how much waste you generate. High-volume kitchens and summer heat accelerate decomposition, so you might need to empty every four to five days. Light-use households typically stay comfortable on a weekly schedule.
Don’t forget the cleanup step. Residue clings to bin walls and bottoms even after you’ve removed everything. A quick rinse prevents old residue from rotting between cycles. Pair weekly emptying with a tight-fitting lid and you’ve established your foundation for odor control. Moisture from watery scraps fosters anaerobic bacteria and sulfur gases that intensify smells over time. Regular charcoal filter replacement every 4-6 months maintains effective odor control throughout the year.
Foods to Avoid (and What You Can Compost Instead)
What you put in your compost bin matters just as much as how often you empty it. Certain foods create odors and attract pests that undermine your composting efforts. For gardeners interested in fermentation alternatives, wooden tamper tools can help create anaerobic conditions in bokashi buckets that complement traditional composting methods.
| Avoid | Why | Compost Instead |
|---|---|---|
| Meat, fish, bones | Decompose slowly; attract rodents and flies | Vegetable and fruit scraps |
| Dairy and oils | Smell, attract pests; block oxygen flow | Dry leaves and shredded cardboard |
| Pet waste | Contains dangerous pathogens and parasites | Plant-based kitchen scraps |
| Diseased plants | Spread fungi, bacteria, and viruses | Healthy garden trimmings |
| Treated wood and plastics | Contaminate finished compost with chemicals | Untreated paper products |
You’ll eliminate major odor sources by excluding these problematic materials. Stick to plant-based waste, yard trimmings, and uncoated paper instead. Industrial composting facilities or electric home composters with controlled temperatures can safely process some materials like meat and bones that home bins cannot handle.
Brown-to-Green Ratio: The Foundation of Odor Control
You’ll find that browns matter most because they supply the carbon that counterbalances nitrogen-rich greens while absorbing excess moisture and creating airflow through your pile. Balancing greens with carbons means aiming for a 2:1 to 4:1 brown-to-green ratio by volume—or roughly 25:1 to 30:1 by carbon-to-nitrogen content—to prevent the anaerobic conditions that cause foul odors.
Your layering technique for success involves mixing browns and greens throughout the pile rather than stacking greens on top, which allows better oxygen circulation and faster decomposition. Keep a dry pile of browns nearby so you can adjust ratios promptly as you add greens to prevent odor buildup. In addition to proper layering, using activated-charcoal filter systems in your countertop collection bin helps contain odors before materials reach your outdoor compost pile.
Why Browns Matter Most
How does a compost pile turn from fresh and promising to rank and putrid? You’re likely missing browns. When you skip brown materials, your kitchen scraps and grass clippings become a wet, compacted mess that starves microbes of oxygen. This anaerobic environment breeds stench—ammonia smells, rotten-egg odors, or that sewer-like funk that signals trouble.
Browns add carbon and create air pockets that keep your pile aerobic and odor-free. Dry leaves, shredded paper, straw, and wood chips aren’t optional extras; they’re your primary defense against smell. The target ratio of 25:1 to 30:1 carbon-to-nitrogen ensures your pile maintains the right balance for rapid, odor-free decomposition. Without them, you’re fighting a losing battle. Add browns immediately after each green addition to cover fresh scraps and absorb moisture. Keep a stockpile nearby so you can respond quickly when odors emerge. For households with limited outdoor space, countertop compost bins with charcoal filters can supplement your brown-to-green strategy by containing odors while you accumulate materials.
Balancing Greens With Carbons
Getting your browns-to-greens ratio right is where odor control truly begins. You’re aiming for roughly 2:1 to 3:1 browns to greens by volume—this sweet spot keeps your pile aerobic and odor-free. When greens dominate, you’ll notice ammonia smell, wet slime, and compaction that chokes off airflow. When browns dominate, your pile stays cool and decomposition stalls. The key’s balancing nitrogen-rich greens (food scraps, grass clippings, manure) with carbon-heavy browns (leaves, shredded paper, straw). This balance feeds microbes efficiently while absorbing excess moisture. You don’t need perfection—piles outside the ideal range still compost. But hitting that 2:1 to 3:1 target makes the real difference between a functioning system and a smelly headache. For kitchen scraps specifically, under-cabinet compost bins with tight-fitting lids help contain odors while you’re collecting greens for your outdoor pile. Turning the pile at least weekly helps prevent compaction and promotes decomposition while maintaining your carefully balanced ratio.
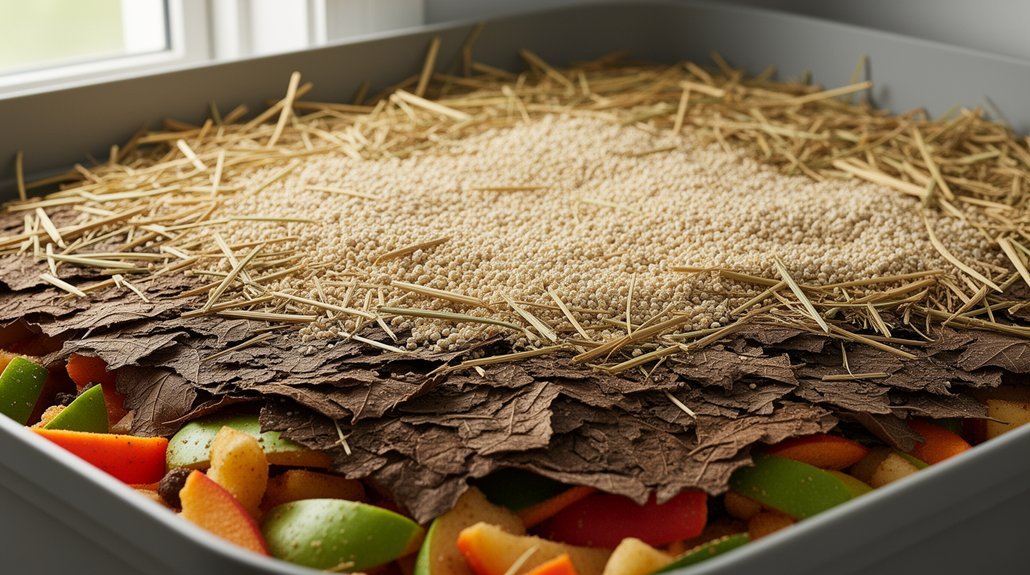
Layering Technique For Success
Why does layering matter more than simply mixing browns and greens together? Thin, repeating layers create a physical barrier that traps odors and keeps food scraps buried. You’ll want to follow a 3:1 browns-to-greens ratio by volume, using brown layers of 3–4 inches during building and a thicker 4–6 inch cap to finish.
This structure works because brown materials absorb moisture and maintain airflow, preventing the soggy, anaerobic conditions that generate foul smells. Each time you add kitchen scraps, cover them immediately with a brown layer—never leave food exposed. A properly layered pile feels like a wrung-out sponge, staying moist without becoming waterlogged. This consistent approach minimizes maintenance while effectively blocking odors and deterring pests. For indoor compost bins where ventilation is limited, activated charcoal filters provide an additional layer of odor control alongside proper layering technique. Adding crushed eggshells to brown layers provides additional calcium that supports microbial activity and strengthens the pile’s structural integrity.
Drain Moisture to Stop Compost Odor at the Source
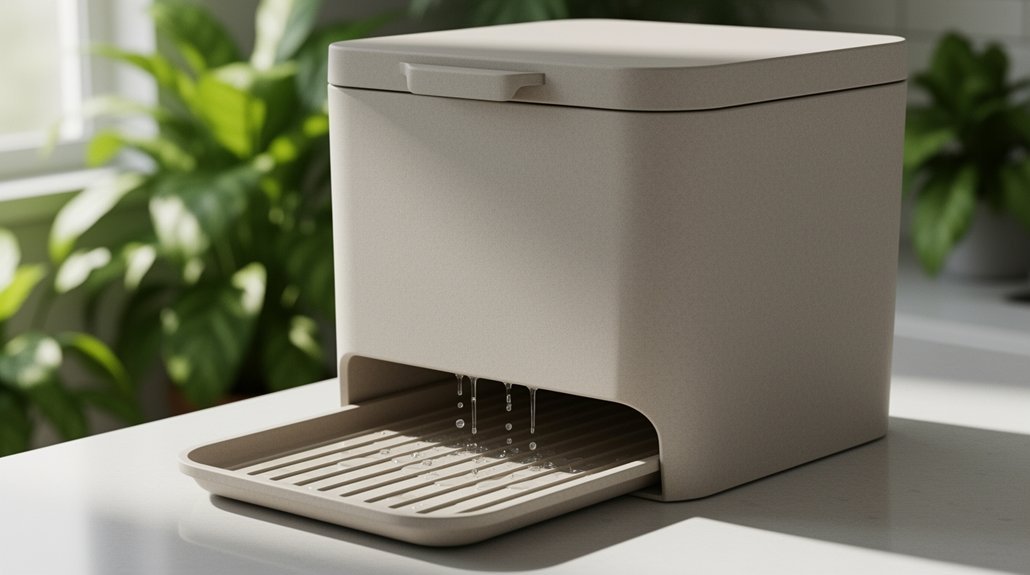
You can stop odor before it starts by removing excess water through leachate drainage, which prevents the anaerobic conditions that create rotten smells.
Proper ventilation and air intake work together to dry your pile—open-bottom bin designs let gravity pull moisture away while allowing oxygen to circulate through the material. Adding dry, absorbent materials like shredded paper or sawdust further accelerates moisture evaporation and reduces the soggy conditions that produce foul odors. Quality bedding materials with high moisture retention capacity can be mixed with these absorbent layers to optimize both drainage and aeration.
These two approaches tackle moisture buildup from different angles, giving you immediate control over the smell-producing environment.
Leachate Removal Methods
How does moisture escape your compost bin? You’ve got several practical options.
Bottom drainage holes let liquid drain freely instead of pooling. Elevating your bin on bricks or a stand creates an escape path for leachate. Below the bin, you can position a catch tray to intercept runoff before it reaches soil.
| Method | Setup | Benefit |
|---|---|---|
| Bottom holes | Drill 4–6 holes in base | Immediate drainage |
| Elevated stand | Raise bin on bricks | Air circulation underneath |
| Catch tray | Place container below | Easy liquid collection |
For drainage layers inside your bin, use gravel or pumice to prevent pooling at the base. These materials create physical barriers that support airflow while limiting contact between liquid and compost. When greens-to-browns ratios are imbalanced, excess moisture accumulates faster, making interior drainage layers even more critical to prevent anaerobic conditions. Avoid sealed-bottom bins—they trap moisture and amplify odor problems.
Ventilation and Air Intake
The difference between a fresh-smelling compost pile and one that reeks comes down to oxygen. When you guarantee adequate airflow, you prevent anaerobic pockets that generate sour, sulfur, and ammonia odors. You’ll want to choose bin designs that naturally support ventilation—open bins, wire mesh containers, or perforated-sided options all work well. For deeper piles, insert perforated PVC pipes vertically to create internal air channels, or use rolled chicken wire as a simpler alternative. Raised bases with porous materials improve bottom airflow and drainage. Regular aeration using compost forks or aerator tools breaks apart compacted layers, keeping material loose and oxygenated. Side vents help expel excess heat and moisture while introducing fresh air throughout your pile. Bulking materials like high-carbon browns help maintain air channels and prevent material from clustering into dense, oxygen-blocking masses. Designs with strategically placed air vents and deep fins optimize oxygen circulation to sustain microbial activity and prevent odor development.
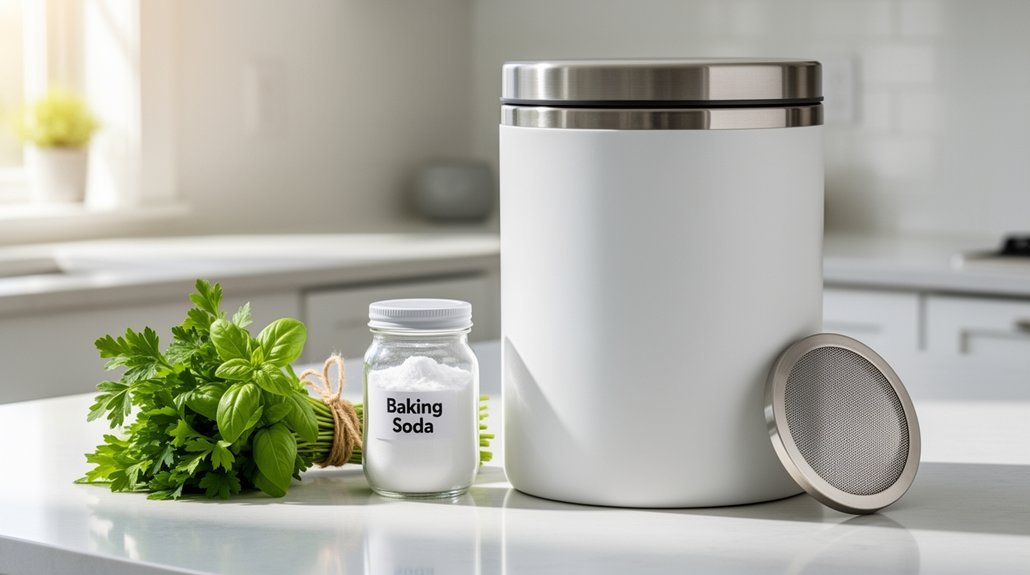
Add Baking Soda or Charcoal for Quick Deodorizing
When your compost bin starts smelling, baking soda offers a straightforward first line of defense. You can sprinkle it lightly over your compost surface every couple of weeks to neutralize acidic odors from food scraps.
For stronger smells, activated charcoal works better—its porous structure traps volatile compounds responsible for bad odors. Many modern compost bins with charcoal filters now include built-in odor control systems that use activated carbon to manage scent automatically.
You can mix both ingredients together: combine half a cup of baking soda with two tablespoons of activated charcoal and a tablespoon of cornstarch in a shaker jar. Add one to two teaspoons daily or after wet scraps. Replace the mixture weekly for best results. Ensure all components are thoroughly air-dried after cleaning to prevent mold and bacteria growth that can intensify odors.
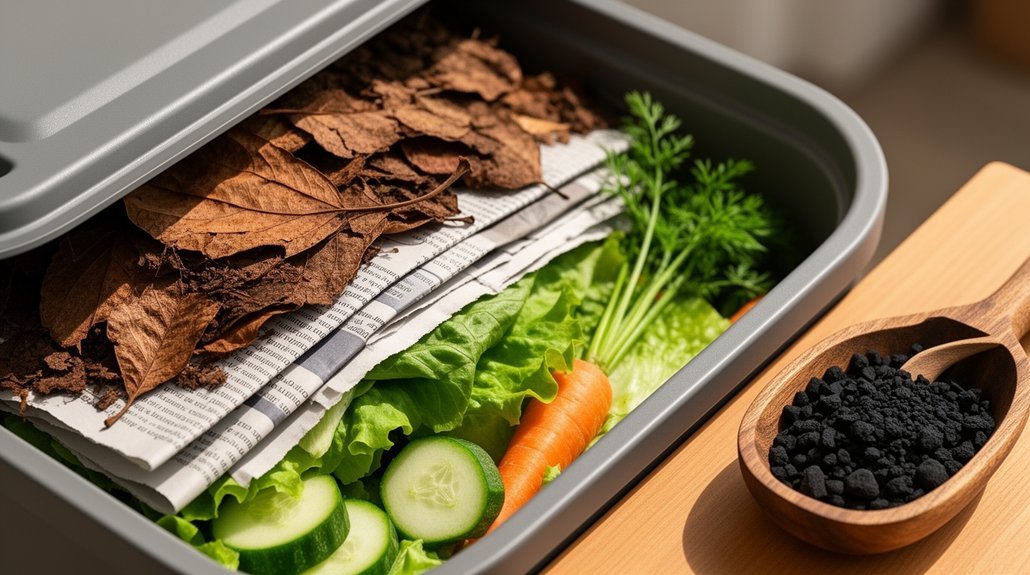
Layer Dry Carbon Materials to Block Smell Buildup
While baking soda and charcoal tackle existing odors, you’ll find that layering dry carbon materials prevents smell from building up in the first place. After adding food scraps, cover them with dry leaves, shredded cardboard, or straw to suppress odor release and restore airflow through dense waste.
Aim for a 2:1 or 4:1 carbon-to-nitrogen ratio in smelly bins. Coarse materials like wood chips work better than fine ones because they create air pockets that support aerobic decomposition. Keep a stash of dry browns nearby for immediate layering after each deposit, similar to how organizing storage containers requires keeping materials accessible and well-organized.
This approach works especially well for wet, compacted piles. Fresh dry carbon absorbs excess moisture, breaks up matted clumps, and restores porosity. Combined with routine turning, consistent dry carbon layering keeps your bin aerobic and eliminates recurring ammonia and rotten-egg smells. Regular turning every 7-10 days maintains adequate aeration for microorganisms and supports efficient breakdown of organic matter.
Pick the Right Sealed Container and Liner
How much of your compost odor problem stems from your container itself? You’ll dramatically reduce kitchen smells by choosing a bin with a tight-fitting, airtight lid. Sealed containers contain odors far better than vented caddies, especially when scraps sit for extended periods.
Match your container size to your household’s volume. Smaller kitchens benefit from compact bins stored near prep areas, while high-volume cooking demands larger capacity to prevent overflow. Models like the Typhoon Otto hold 84 ounces for smaller spaces, while the Exaco ECO 2000 offers 307 ounces for larger households.
Prioritize removable, dishwasher-safe lids and smooth stainless steel or plastic surfaces that resist bacteria buildup and odor retention. These materials clean easily and won’t hold lingering smells after washing.
Finally, use compostable liners that fit snugly inside your bin. They reduce direct contact with surfaces and simplify transport to outdoor piles or municipal collection points, minimizing mess and residue.
Charcoal Filters: When and How to Replace Them
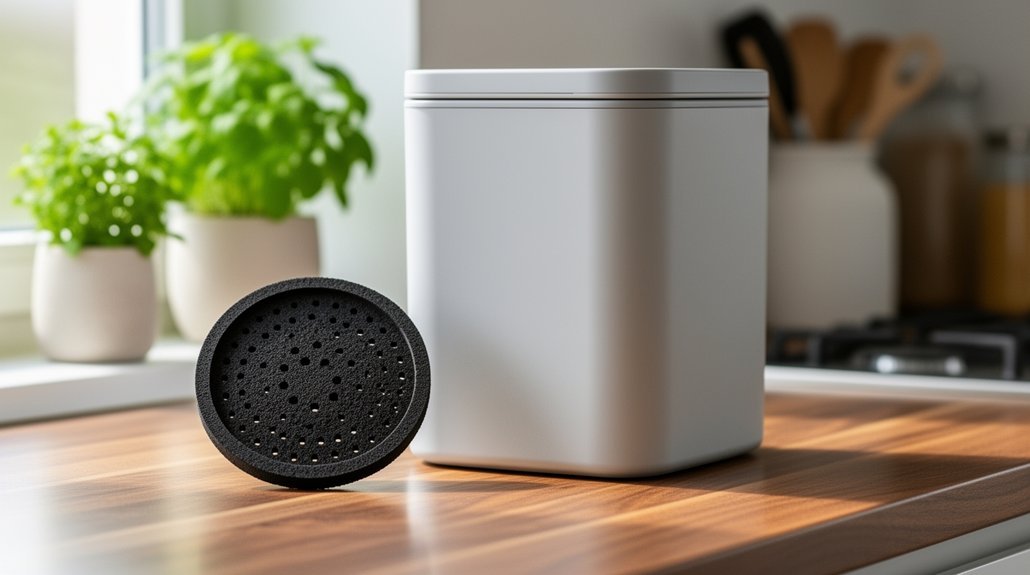
Do you notice stronger odors escaping from your compost bin despite using a sealed container? Your charcoal filter likely needs replacing. Most filters last three to six months, though heavily used bins may require changes every two months.
Replace your filter when you detect odor breakthrough or visible grime on the filter housing. The process is straightforward: lift out the old filter from your lid compartment and insert a new one. Some designs use paired filters for optimal odor control. By replacing your filter regularly, you help prevent methane emissions that would otherwise be released if food waste decomposes in landfills.
Before installing a replacement, clean the filter housing with mild detergent and water, then dry it completely. If your new filter is oversized, trim it with scissors to fit your lid diameter. Regular bin emptying extends filter life significantly.
Electric and Microbial Composters for Odor-Free Results
If charcoal filters aren’t solving your odor problem, electric and microbial composters offer a more active approach to keeping your kitchen smell-free. These systems use living microorganisms to digest waste in a controlled aerobic environment, maintaining optimal aeration, temperature, and moisture automatically.
You’ll benefit from multiple odor-control strategies:
- Oxidation catalyst technology neutralizes odors continuously at the source
- Multi-layer activated carbon filtration captures remaining smells
- Thermophilic microbial activity operates around 45–55°C for efficient breakdown
- Continuous aeration prevents the anaerobic conditions that create stench
The catch? Performance depends on your machine’s design, loading habits, and maintenance. Some models produce finished compost ready for houseplants, while others require brief curing. Expect noise levels around 35–40 dB and varying filter replacement needs. Electric composters reduce odors significantly but aren’t perfectly smell-proof in every situation. Systems like the GEME Terra II use permanent metal-ion oxidation catalyst technology, eliminating the need for consumable filter replacements and ongoing costs.
Frequently Asked Questions
Can I Use Essential Oils or Fragrances in My Compost Bin Safely?
You shouldn’t rely on essential oils for odor control—they mask smells rather than fix underlying causes. You’ll get better results using activated charcoal, dry materials, and addressing moisture issues directly.
How Do Compostable Liners Help Reduce Odors Compared to Regular Containers?
You’ll reduce odors with compostable liners because they create a barrier between scraps and bin surfaces, contain leachate, and limit bacterial growth. You’ll need fewer cleanings since liners trap moisture and sticky materials that cause strongest smells.
What’s the Difference Between Activated Charcoal and Regular Charcoal for Odor Control?
You’ll find that activated charcoal’s high-temperature processing creates microscopic pores that dramatically increase surface area for adsorbing odor molecules. Regular charcoal lacks this specialized treatment, making it far less effective for filtering kitchen compost smells.
How Often Should I Add Dry Materials to Maintain Proper Airflow?
You should add dry materials each time you add scraps if your bin receives daily kitchen waste. For less frequent additions, you’ll add dry material after every few additions or whenever you notice visible wetness.
Are There Specific Ventilation Designs That Work Best for Odor Prevention?
You’ll get the best odor prevention by combining passive perforated pipes with forced-air systems in enclosed bins. Add biofilter cover layers and ensure proper airflow through side vents for optimal results.
In Summary
You’ve got plenty of options to keep your compost bin fresh. By maintaining the right brown-to-green balance, emptying weekly, and adding baking soda or charcoal, you’ll eliminate most odors before they start. If you’re dealing with stubborn smells, sealed containers with charcoal filters work wonders. For the ultimate solution, you can’t beat electric or microbial composters—they’ll give you odor-free composting every time.


Leave a Reply