

Load your balcony bin with a cocopeat base, then alternate greens and browns in a 1:2 ratio, sprinkling cocopeat between layers to keep moisture sponge‑like. Inoculate each batch with a starter blend of Bacillus, Streptomyces, and a pinch of Trichoderma, and refresh weekly with a microbial booster. Set up a three‑bucket tumble: top active, middle replacement, bottom leachate collector, drilling holes for airflow and drainage. Rotate buckets weekly, monitor for an earthy scent and damp texture, and empty the leachate bucket to avoid sogginess. Keep these steps in mind and you’ll discover even faster, odor‑free results.
Pick the Right Microbes for Your Balcony Compost
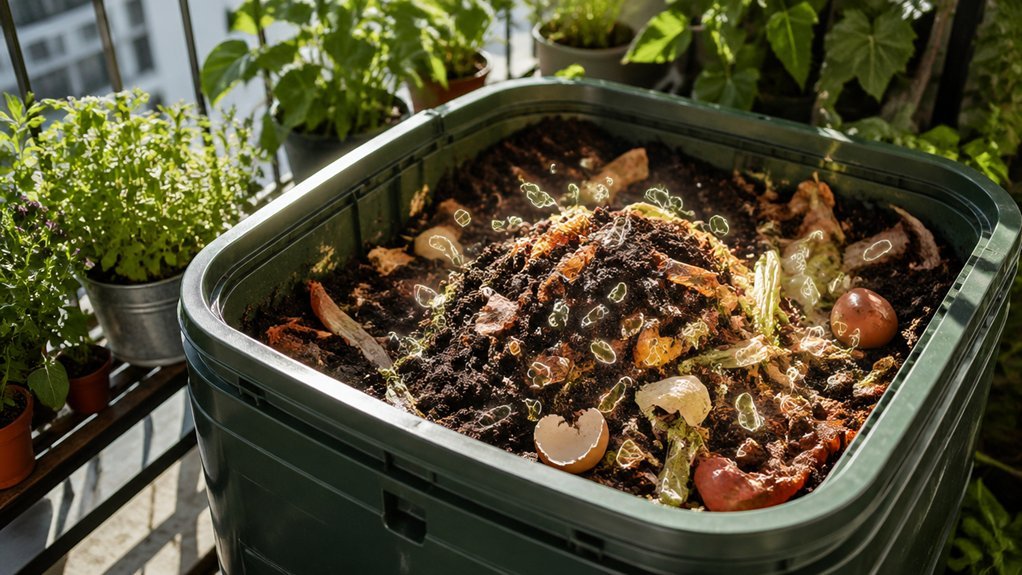
Because balcony bins are tiny and oxygen‑rich, you’ll want aerobic microbes that thrive in that environment—especially starter blends packed with Bacillus and Streptomyces, plus the fungus Trichoderma, which together accelerate decomposition. Begin with a cocopeat‑based microbe block; it serves as a microbial inoculant and holds moisture, giving Bacillus a foothold for rapid aerobic decomposition. Sprinkle a small amount of Trichoderma into the mix; its fungal hyphae break down tougher fibers and keep the system balanced. Refresh the community weekly with a Soil & Microbe Booster to introduce fresh strains and prevent stagnation. Keep the bin well‑ventilated, avoid soggy pockets, and watch for an earthy scent and spongy moisture—signs your microbes are working efficiently. The use of bokashi‑style juice boosters can help maintain a thriving microbial ecosystem in compact spaces bacteria and fungi balance.
Set Up a Three‑Bucket Tumble System for Balcony Compost Aeration
Ever wondered how to keep your balcony compost aerated without endless manual turning? Set up a three‑bucket tumble system and let gravity do the work for your balcony garden. You’ll have an active bucket, a middle replacement, and a bottom leachate‑collection bucket, each drilled with side and bottom holes for airflow and drainage. Every week you swap the middle bucket into the active position, dump the current active material into the replacement, and rotate the stack. This mimics turning, keeps oxygen flowing, and speeds decomposition. The system uses standard mason jar–sized components, similar to common jar‑compatible tools and a compact, modular setup for balcony spaces. airflow optimization
Drill Holes for Maximum Airflow and Leachate Drainage
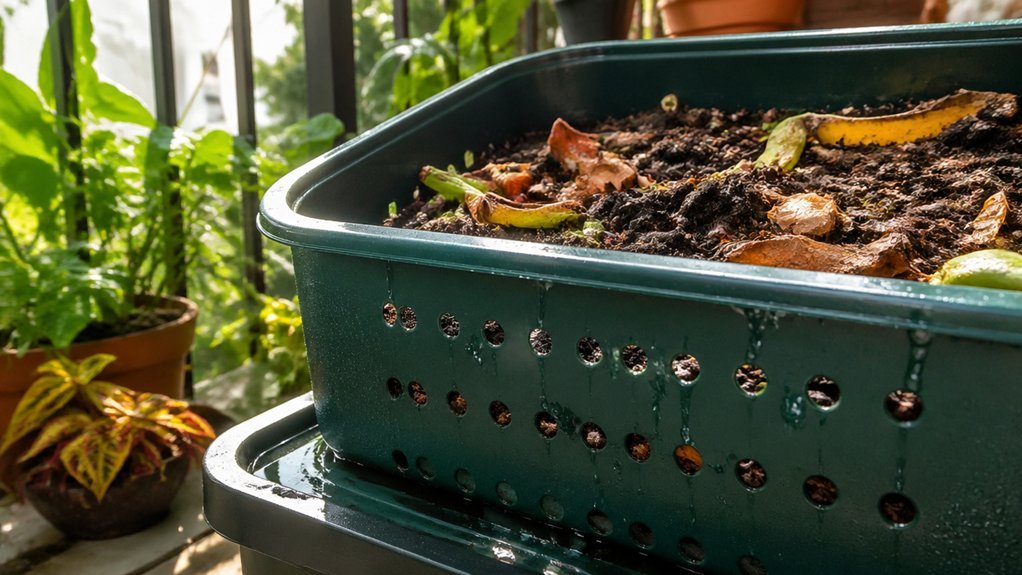
You’ll want to space four‑to‑eight holes evenly around the sides and bottom of the third bucket so air can flow freely and leachate can escape. Position the holes to create a direct drainage channel into the bottom bucket, keeping the active material moist but not soggy. By checking and clearing the openings each week, you’ll maintain optimal aeration and prevent blockages. Regular inspection supports consistent odor control and prevents clog-related drainage issues airflow optimization.
Hole Placement Strategy
Where should you drill the holes? Focus on the sides and bottom of the third bucket, creating a uniform aeration grid that reaches every layer of material. Consistent hole placement across all three buckets keeps airflow steady and prevents anaerobic pockets, while aligning hole size with material thickness balances moisture retention and leachate outflow. Regularly check for clogs to maintain optimal oxygen exchange and microbial activity. Regular maintenance reinforces consistent airflow and supports steady fermentation dynamics.
Drainage Channel Design
After aligning the side‑wall holes for even aeration, turn your attention to the third bucket’s drainage channel. Drill a grid of holes along the sides and a perforated bottom so moisture and gases flow freely while leachate slides into the collection bucket below. Size each opening to let air circulate but keep solid compost out of the leachate catcher.
Arrange the three‑bucket rotation—active on top, replacement in the middle, leachate collector at the bottom—so the drainage pathway stays uninterrupted. Check the bottom bucket regularly, emptying it before water backs up and blocks airflow. This design preserves steady airflow, prevents waterlogging, and keeps your composting bins operating efficiently.
Aeration Optimization Tips
How can you squeeze the most oxygen out of a rotating compost system? Drill holes in the sides and bottom of the third bucket, then rotate the buckets weekly so fresh material lands in a hole‑free bucket. This keeps the mix loose, prevents compaction, and fuels microbes with steady airflow. Use the middle bucket as a replacement while the bottom bucket catches leachate, ensuring drainage without overflow. Proper hole placement creates a constant aeration channel, eliminating anaerobic pockets and speeding decomposition.
Space holes 2‑3 inches apart for even airflow.
Keep hole diameter around ¼ inch to balance oxygen and moisture.
Alternate bucket usage each week to maintain active tumbling.
Position bottom holes to let leachate flow directly into the collection bucket.
Airtight, labeled organization can help you manage your composting setup more efficiently, especially if you keep spare components and measuring tools on hand. Airtight organization stays consistent with efficient storage practices used for kitchen systems and can improve overall workflow around your composting station.
Layer Greens, Browns, and Cocopeat to Keep Moisture Just Right
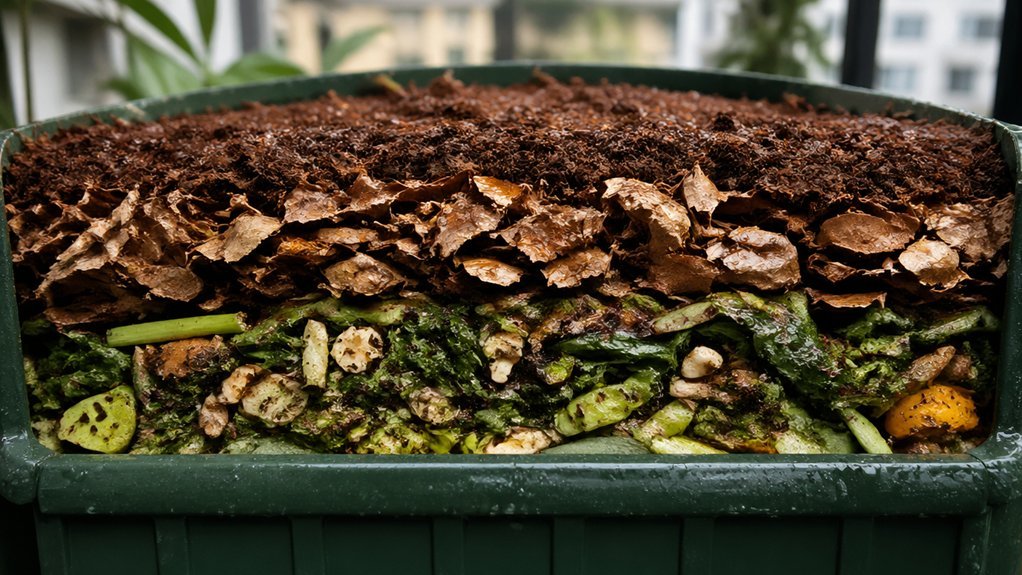
You’ll start by alternating greens and browns, then sprinkle cocopeat to keep the mix stable. The cocopeat acts like a moisture‑buffer, soaking up excess water while still letting air flow. Keep checking the texture—if it feels like a wrung‑out sponge, you’re right on track. Additionally, ensure proper 360° ventilation and regular turning every 1–2 weeks to maintain aerobic conditions and curb odors. airflow design
Layer Greens and Browns
A solid balcony compost starts with a base of cocopeat, then alternates layers of nitrogen‑rich greens and carbon‑rich browns. By keeping the mix airy, you boost composting efficiency and keep moisture in check. Aim for about two parts browns to one part greens by volume; this ratio feeds microbes while preventing foul smells. Shred kitchen scraps and dry leaves finely so they nestle between cocopeat particles, creating a wrung‑out‑sponge feel that stays moist but not soggy.
- Add a thin green layer (e.g., fruit peels).
- Top with a thicker brown layer (e.g., shredded newspaper).
- Lightly mist if the mix feels dry.
- Repeat until the bin is full.
These steps balance greens, browns, and moisture for a thriving balcony compost.
Add Cocopeat for Balance
Wondering how to keep your balcony compost from turning soggy or drying out? Add a thin sheet of cocopeat between each green and brown layer. Cocopeat acts like a moisture sponge, soaking up excess liquid and releasing it slowly, so you achieve a steady moisture balance without creating anaerobic pockets. Its fluffy texture creates air pockets that boost aeration, letting oxygen reach the microbes that drive decomposition. Spread the cocopeat evenly, avoiding compaction, and you’ll notice fewer odors and a more stable temperature. The result is a lively, well‑aerated mix where microbial activity thrives, speeding up breakdown while keeping the bin from becoming a swamp or a desert. Storage and shelf life considerations suggest keeping the compost in a cool, dry area when not in use to maintain microbial vitality.
Monitor Moisture Consistently
Ever wonder how to keep your balcony compost from swinging between soggy and bone‑dry? You’ll keep moisture in balance by layering greens, browns, and a cocopeat base. Check a handful; if it feels like a damp sponge, you’re good. If it drips, add drier browns; if it clumps, toss in more greens and cocopeat. A three‑bucket cycle lets excess liquid drain while the cocopeat bedding retains just enough humidity for microbes.
- Add a thin cocopeat layer at the bottom.
- Sprinkle greens, then browns, alternating.
- Moisten each layer to a sponge‑like feel.
- Squeeze a handful daily and adjust with water or browns.
This routine keeps your balcony bin lively and odor‑free.
Add a Microbial Booster to Accelerate Decomposition
Looking to speed up your balcony compost? Add a microbial booster and watch decomposition acceleration kick in. Choose a product that lists compost microbes and is designed for aerobic systems. Follow the label’s application rate—usually a handful per square foot—after you’ve mixed your initial layers and the pile shows active activity. The booster floods the bin with targeted bacteria and fungi, boosting nutrient cycling and enzyme production. This surge of life raises microbial diversity, helping break down tougher scraps faster. Sprinkle the booster evenly, then give the bin a gentle stir to distribute it. Keep an eye on moisture, but trust the added microbes to keep the process humming without needing extra aeration tweaks.
Rotate Buckets Weekly to Maintain Aerobic Conditions
When you rotate the buckets each week, you keep the compost aerobic by constantly exposing fresh material to oxygen and preventing anaerobic pockets. This simple rotation fuels faster breakdown, balances moisture control, and keeps your balcony composting system humming. Swapping the active top bucket with the prepped middle one creates fresh airflow, reduces compaction, and spreads moisture evenly.
- Pull the top bucket out.
- Slide the middle bucket up to become the new active bin.
- Fill the emptied bucket with fresh greens and browns.
- Return the filled bucket to the bottom position.
Doing this weekly maximizes surface‑area contact, prevents clogging, and maintains steady leachate drainage without extra effort. Your microbes stay happy, and the pile stays aerobic.
Collect Leachate, Empty Weekly, and Avoid Compost Tea
Where does the leachate go, and why should you empty it each week? It drips into the bottom bucket, keeping the top layers from becoming soggy and anaerobic. Regular leachate management prevents excess moisture, maintains aeration, and stops odor‑causing buildup. Remember, leachate isn’t compost tea—it lacks the finished nutrients and beneficial microbes you’d get from a brewed tea. Empty the bucket weekly, dispose of the liquid safely, and keep the middle bucket rotating to sustain airflow.
| Action | Reason | Frequency |
|---|---|---|
| Collect leachate | Remove excess moisture | Every week |
| Empty bottom bucket | Prevent soggy conditions | Weekly |
| Rotate middle bucket | Keep aeration steady | Weekly |
| Avoid compost tea | Leachate isn’t nutrient‑rich | – |
| Monitor quality | Ensure leachate management | Ongoing |
Troubleshoot Common Issues: Odor, Sogginess, and Slow Breakdown
If you notice a foul smell, soggy texture, or sluggish breakdown in your balcony compost, the culprit is usually an imbalance of moisture, airflow, or material ratios. First, check aeration: a lack of oxygen fuels odor and sogginess. Next, feel the mix; it should be as damp as a wrung‑out sponge, not dripping. Then, balance greens with browns to soak up excess moisture and provide carbon. Finally, schedule regular turnover—ideally once a week—to keep the pile aerated and prevent compaction.
- Add shredded newspaper or dry leaves (browns).
- Stir or tumble the bin to boost aeration.
- Chop large scraps into bite‑size pieces.
- Drain any leachate and adjust moisture levels.
Harvest Ready‑to‑Use Compost for Your Balcony Plants
Ever wondered how to tell when your balcony compost is truly ready for planting? You’ll know it’s finished compost when it’s dark, crumbly, soil‑like, and smells earthy, with no visible food scraps. Consistent moisture management and regular aeration have stabilized the breakdown, giving you a uniform texture and eliminating foul odors. Harvest the batch, then mix a handful with your potting soil to avoid nutrient shock—this works as a top dressing, soil mix additive, or potting mix amendment that boosts structure and moisture retention. Remember to keep the moisture level balanced during the final weeks; too wet stalls aeration, too dry halts microbial activity. By treating your compost as a soil amendment, you’ll give balcony plants the nutrients they need without over‑fertilizing.
Frequently Asked Questions
Can I Compost Meat, Dairy, or Oily Foods on a Balcony?
You shouldn’t compost meat, dairy, or oily foods on a balcony; they attract pests, smell, and slow decomposition. Stick to fruit scraps, veg peels, coffee grounds, and dry leaves for a clean, efficient bin.
How Do I Prevent Pests Like Flies and Rodents in My Balcony Compost?
Cover your bin with a tight lid, add a layer of dry newspaper or cardboard each time, keep food scraps buried, and place the compost away from walls. Regularly stir and spray a mild vinegar solution to deter flies and rodents.
What Temperature Range Is Optimal for Balcony Compost Microbes?
You should keep your balcony compost between 55 °F and 75 °F (13 °C‑24 °C). That range fuels microbial activity, speeds breakdown, and avoids overheating that kills beneficial microbes.
Can I Use a Simple Kitchen Trash Can Instead of a Bucket System?
Yes, you can use a simple kitchen trash can, but make sure it has a lid, a drill‑made drainage hole, and a breathable cover. Keep it in a shaded spot and turn it weekly for airflow.
How Often Should I Add Water to Maintain Proper Moisture?
You should spray your compost once a day, aiming for a wrung‑out sponge feel; if it feels dry, add a little more, but avoid soggy piles that drown the microbes.
In Summary
Now you’ve got a thriving balcony compost—microbes breaking down greens and browns, air flowing freely, and leachate managed. Keep rotating the buckets, watch moisture, and add boosters when needed. In a few weeks you’ll harvest dark, crumbly compost that fuels your plants, reduces waste, and proves that even a tiny balcony can run a powerful, eco‑friendly garden system. Enjoy the fresh, nutrient‑rich results!



