
Harvest when the bin’s about three‑quarters full and the material’s matured after three to four months. Keep moisture around 60‑70 % and temperature between 57‑77 °F, using a tray or mesh floor for drainage. Expose the surface with a bright lamp for 10‑15 minutes, then scoop thin layers each hour, screening through a ¼‑inch mesh to catch worms. Dry bottom castings briefly with a fan, then store the crumbly castings in an airtight but breathable container. Follow these steps and you’ll discover even more tricks for maximizing yields.
Harvest at Three‑Quarters Full for Indoor Worm Bins
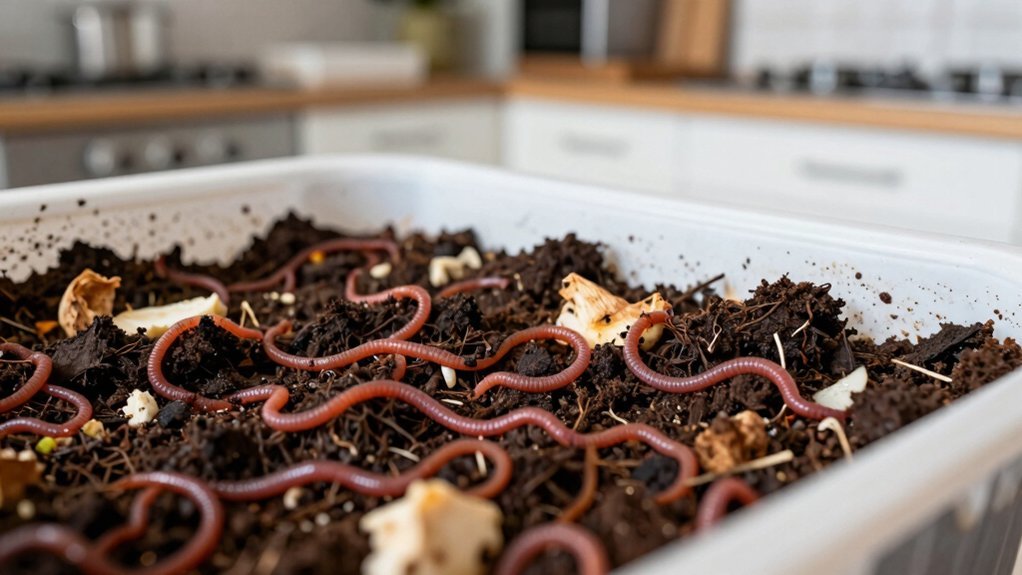
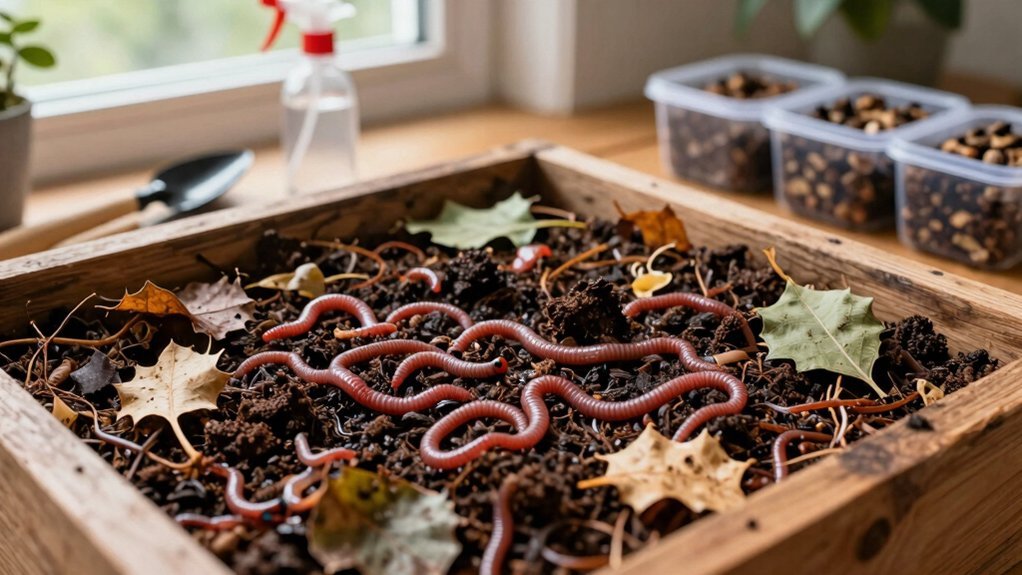
Harvest when the bin is about three‑quarters full of rich, earthy material to maximize castings while still leaving enough habitat for the worms. At this stage, the composting cycle has matured—usually after three to four months of steady feeding—so the material separates cleanly and the castings are nutrient‑dense. Scoop out roughly two to three litres per harvest, moving gently to keep worms and cocoons intact. Expect a few unfinished bits and a handful of worms mixed in; simply spread them back on top of the fresh bedding to keep processing. The bottom layer may be damp or worm‑heavy, so air‑dry it briefly before you refill. This cautious, gradual harvest protects the worm population, boosts yield, and keeps your indoor bin thriving. Using a bin with a 5-tray expandable system can enhance your ability to manage harvests efficiently and increase compost output.
Expose Top Castings With a Bright Lamp
You’ll notice the worms retreat as the bright lamp shines on the bin’s surface, exposing the fresh castings. Scoop off a thin layer every hour, letting the light guide the worms deeper while you collect the top material. Timing each removal right ensures maximum migration and minimal worm loss. For better moisture management, consider a bin with a built-in drainage system to prevent excess liquid buildup during harvesting.
Bright Light Worm Repulsion
Ever wondered how a simple lamp can coax the top layer of castings away from your worms? Bright light triggers worm repulsion, making the surface uncomfortable and pushing them down into fresh bedding. You can harvest with incrementally, scooping the exposed castings hour by hour while most worms stay below.
- Position a high‑intensity lamp just above the bin surface.
- Keep the light on for 15‑30 minutes, then gently scrape the softened top layer.
- Repeat the cycle until the desired amount of castings is collected.
This method leverages the worms’ natural aversion to bright light, giving you a controlled, low‑loss harvest without harsh screening or torches. It’s patient, steady, and keeps the vermicompost healthy. To maintain a clean and effective worm bin, consider using certified compost bin liners that help manage moisture and waste breakdown safely.
Layer‑by‑Layer Removal
Can a bright lamp really make the top layer of castings pop up for easy scooping? You’ll see worms scatter downward when the lamp shines, leaving a clean sheet of finished castings on the surface.
Start the light‑assisted harvest by turning the lamp on for about ten minutes, then gently scoop the exposed layer. Repeat this layer‑by‑layer removal each hour, taking only a thin slice so the worm population stays mostly undisturbed below.
A quick screen (¼‑inch) after each lift catches any stray worms that slipped into the castings. Because the worms keep moving away from the light, you lose only a few while the bulk of the material rises for easy collection. This steady, stepwise approach maximizes yield with minimal worm loss.
Using a mesh filtration size similar to that found in compost tea bags can help optimize the screening process and minimize worm loss during harvesting.
Timing For Optimal Migration
After the lamp reveals a thin sheet of castings, you’ll want to time the next light exposure so the worms migrate upward just enough to keep the harvest moving without shocking the colony. Light‑assisted harvesting works best when you treat exposure as a staggered pulse, letting the colony adjust between intervals. Start with a bright lamp for 10‑15 minutes, then pause and check how many worms have risen. Gradually extend the light period each hour, scooping off a bit more castings as they surface. This stepwise method respects migratory timing, minimizes worm loss, and keeps the worm bin harvest efficient.
Key steps for optimal migration
- 10‑minute initial burst of bright light.
- 15‑minute pause, assess worm movement.
- Extend light by 5‑10 minutes each hour, harvest castings.
For best results in labeling your compost bins during this process, consider using weather-resistant compost bin stickers to clearly identify bins and avoid confusion during harvest.
Screen Castings Using a ¼‑Inch Mesh to Separate Worms
Screening your worm castings with a ¼‑inch mesh quickly separates the fine, nutrient‑rich material from the worms and larger debris. Set a half‑inch hardware‑cloth frame over a plastic tote, dump the finished castings onto the screen, and push the material around. The small particles fall through, giving you clean vermicompost, while the worms, egg cocoons, and chunky bits stay on top. Expect a few worms to slip through; just return them to the bin or re‑screen later. After the first pass, scoop the larger clumps and any remaining worms back into the top layer to minimize loss. If you want extra yield, cure the screened castings for about six weeks, then run a second screening to recover more worms. Using compostable bags made of plant-based PLA and PBAT can help manage food scraps efficiently in your indoor worm bin setup.
Dry Bottom Layers to Prevent Clumping and Odor
You’ll want to keep the bottom layer just moist enough to stay active without turning soggy, so drain any excess worm tea into a catch bucket.
A fan or a brief open‑air period after harvest will dry the material, cutting clumps and the smells that attract worms upward.
Maintaining proper moisture with features like built-in spigots helps prevent worm drowning and manage liquid effectively.
Control Moisture Balance
Ever wondered how a dry bottom layer keeps your worm bin odor‑free? You need a solid moisture balance: keep the top damp for worms, but let the base stay dry. When the bottom gets soggy, open the bin, set a catch bucket for drainage, and add fresh bedding to soak up excess liquid. A thick cover bedding layer and occasional fan bursts speed drying after harvest. Watch for condensation and worm wandering; if the lower zone stays moist, bury food and cut feeding to pull moisture upward.
- Open bin & place drainage bucket
- Add dry bedding & cover layer
- Use fan or ventilation to accelerate drying
Prevent Over‑Wet Accumulation
How can you keep the bin’s base dry enough to stop clumping and odor? Start by giving the worm bin moisture a clear escape route: drill a few holes in the tray or use a false‑bottom design so compost drainage flows into a catch bucket. When the bottom layer feels soggy, lift the lid partially and fan the area to speed drying bedding. Add shredded cardboard, paper, or dry leaves as a top‑dress to soak up excess liquid and rebalance moisture. Spread food evenly instead of piling it in one spot, and sprinkle a thin layer of finished castings to accelerate drying. Check the base daily; if it stays damp, remove some wet material and replace it with dry bedding. This routine keeps the lower zone airy, prevents clumps, and eliminates foul smells.
Keep Moisture at 60‑70 % and Ensure Good Airflow
- Vent placement – drill small holes near the top and bottom for cross‑draft.
- Bedding mix – blend shredded newspaper with damp food scraps, aiming for a damp‑but‑not‑wet feel.
- Drainage design – use a tray or mesh floor so excess liquid exits, preserving even moisture throughout the bin.
Maintain 57‑77 °F and monitor regularly; proper moisture and airflow speed up decomposition and keep your worm crew thriving.
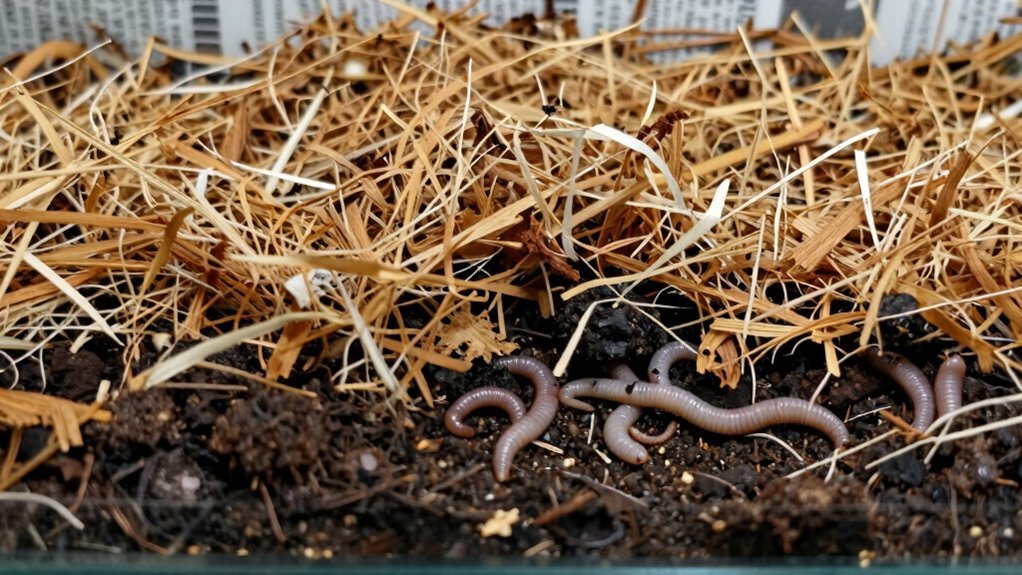
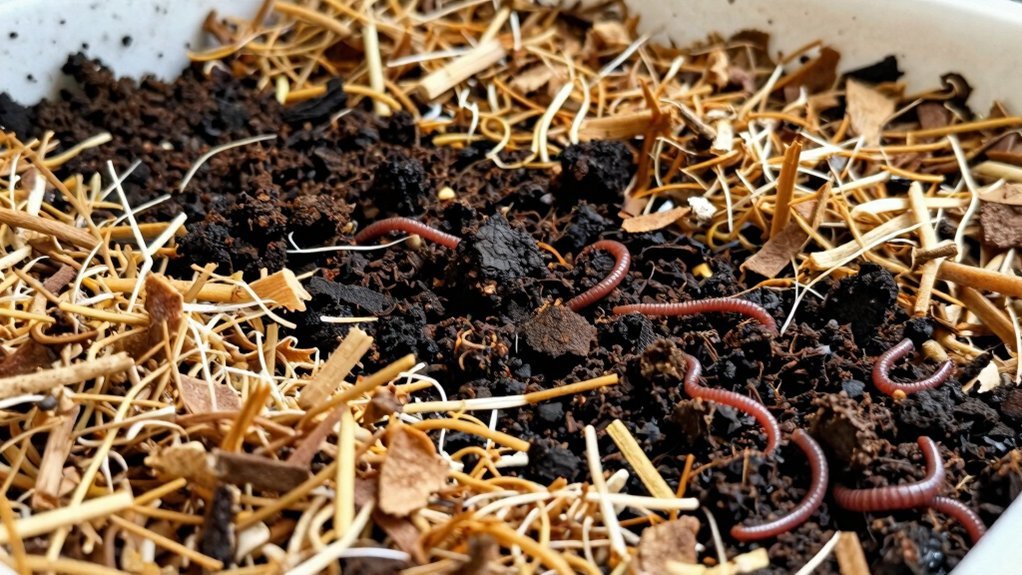
Seed New Bedding With a Bit of Finished Compost
After you’ve set up proper moisture and airflow, seed the fresh bedding by sprinkling a thin layer of finished compost over the surface.
Sprinkle a thin layer of finished compost over the moist, airy bedding to cue worm migration.
Use about one‑quarter of the total volume as this starter, spreading it evenly so the worms sense a clear cue.
The finished compost introduces beneficial microbes that jump‑start decomposition and cut odors, while its familiar scent prompts worm migration upward into the new bed.
As you seed new bedding, keep the remaining three‑quarters of the bin filled with clean, carbon‑rich material for the next feeding cycle.
Watch the worms move quickly toward the composted patch; their accelerated migration signals a healthy transition and prepares the bin for the upcoming harvest.
Maintaining this balance ensures a smooth, odor‑free shift between generations.
Set Up a Two‑Bin or Flow‑Through System for Continuous Harvest
If you arrange two bins in a vertical stack, the worms will naturally migrate from the fed top bin down into fresh bedding, letting you harvest the lower bin’s castings while the top stays active.
First, drill drainage holes about ¼ inch in the bottom of the upper bin so worms can slip down without compacting the lower layer.
Next, seed the fresh bedding in the top bin with a handful of finished castings; this jump-starts migration and keeps the worm population healthy.
Finally, plan a 30-day cycle, emptying the lower bin for harvesting while the top bin continues to receive food.
- Drill drainage holes – ensures smooth movement.
- Add old castings – accelerates migration.
- Harvest lower bin – continuous castings supply.
This two-bin system gives you steady output without disrupting the active top bin.
Avoid Overfeeding and Trim Scraps to Boost Microbial Activity
You’ll keep the bin healthy by feeding only what the worms can actually process and trimming any excess scraps. Small, chopped pieces give microbes more surface area, speeding breakdown and preventing odor.
When you notice food piling up, pause feeding and add fresh bedding to rebalance the system.
Control Food Portion Control
A well‑balanced feed—small, chopped scraps added only when the worms are actively processing the previous batch—prevents soggy, foul piles and keeps microbial activity high. When you practice food portion control, you’ll see faster digestion and healthier worm bin feeding, which translates into smoother harvesting tips. Follow these steps:
- Measure a handful of chopped scraps per square foot of bedding; adjust only if the surface looks clean after 2‑3 days.
- Pause adding new food until you spot worm activity—white casts moving and fresh tunnels forming.
- Freeze‑thaw leftovers for a few hours before feeding to reduce moisture and speed microbial breakdown.
Trim Excess Scraps
| Action | Benefit |
|---|---|
| Cut scraps into ½‑inch pieces | Increases surface area for microbes |
| Freeze excess before adding | Controls feeding rate |
| Thaw and bury in bedding | Enhances microbial activity |
| Add in small batches | Prevents overfeeding |
| Monitor bin volume | Keeps within processing capacity |
Monitor Bin Temperature (57‑77 °F) and Keep It Dark but Ventilated
Wondering how to keep your worms thriving while you harvest? You need a stable microclimate: 57‑77 °F temperature, darkness, and proper ventilation. Check the thermometer daily; if it drifts below 68 °F, move the bin to a warmer spot or add a heat mat. Use a lid or cloth to block light, because darkness cues worms to stay deep and stay out of the way during harvesting. Provide a few small air holes or a breathable cover—enough to let oxygen in and excess moisture escape, but not so much that the bin dries out.
- Temperature – Aim for 57‑77 °F; adjust with heating or cooling as needed.
- Darkness – Cover the bin tightly; avoid direct light.
- Ventilation – Add modest airflow to prevent odors and anaerobic pockets.
Store Harvested Castings in a Dry Container for Garden Use
One simple step after harvesting is to let the castings dry in a well‑ventilated space before you store them. Spread the harvested castings on a tray, stir occasionally, and keep the area airy to avoid mold.
Once they feel crumbly, transfer them to a dry storage container—either an airtight bucket with a loose‑fit lid or a breathable bin that still allows ventilation. Place the container in a cool, shaded spot like a garden shed, away from direct sunlight, to keep temperature stable.
Label the jar with the harvest date and original bin so you can track aging. Before you add the castings to soil, break up any clumps and sift out larger pieces for a uniform texture. This routine preserves nutrient quality and ensures your garden benefits fully.
Frequently Asked Questions
What Are the 5 Mistakes That People Commonly Make When Composting With Worms?
You overfeed, let bedding get too wet or dry, harvest too early or too aggressively, ignore temperature and airflow, and skip seeding new bedding with finished material, which all stall worm activity.
Should I Put Coffee Grounds in My Worm Bin?
Yes, add coffee grounds, but keep them modest and mix them with dry bedding. Sprinkle thin layers, balance carbon, watch moisture, and you’ll boost nitrogen without causing compaction or odor.
Does Rubbing Two Sticks Together Attract Worms?
No, rubbing sticks together won’t attract worms. They respond to moisture, temperature, food, and light, not friction sounds. Focus on proper bedding, moisture, and light cues for successful harvesting.
How Often Should I Harvest a Worm Bin?
You should harvest every six to eight weeks, once the bin’s castings are about three‑quarters full. Feed a week before, watch for upward worm migration, and adjust timing as the bin matures.
In Summary
By keeping your bin three‑quarters full, lighting the top castings, and screening them with a ¼‑inch mesh, you’ll harvest clean, odor‑free worm castings every time. Maintain 60‑70 % moisture, good airflow, and a temperature between 57‑77 °F while avoiding overfeeding. A two‑bin or flow‑through setup lets you harvest continuously, and storing the castings dry preserves their garden‑boosting power. Follow these steps, and your indoor worm bin will thrive.


Leave a Reply