
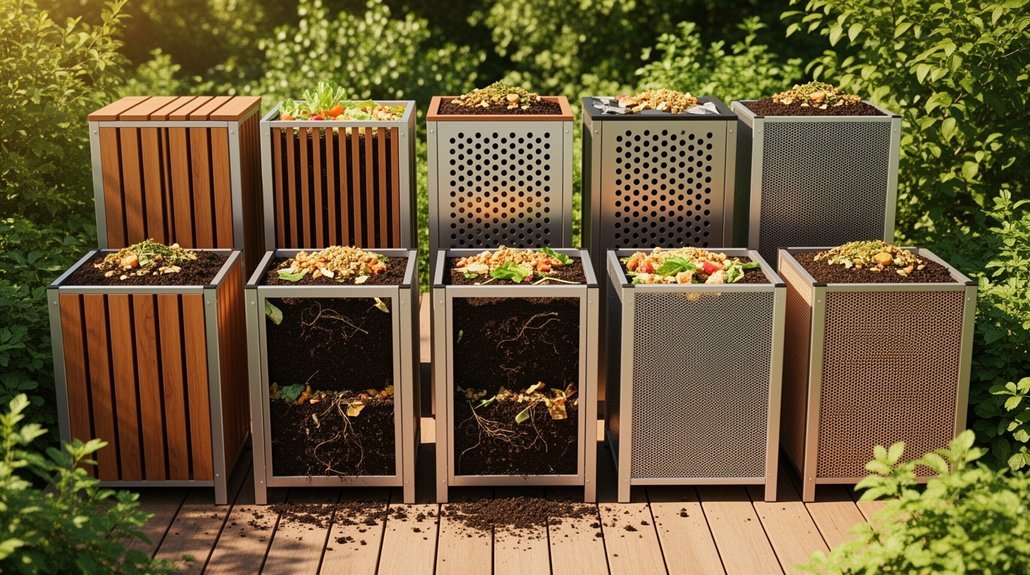
You can build a compost bin with natural airflow that completes decomposition in 15–21 days without mechanical systems. Passive designs like open pallets, hardware cloth bins, and slatted wooden boxes leverage buoyancy-driven airflow to supply oxygen efficiently. Brick bins without mortar and straw-bale structures offer durable alternatives. The key’s maintaining proper volume—roughly 3 cubic feet minimum—and spacing gaps strategically for ventilation. Each design balances containment with airflow differently, and understanding which fits your space and feedstock will transform your composting process.
Why Passive Airflow Speeds Decomposition
Because composting’s aerobic microorganisms rely on oxygen to break down organic matter efficiently, oxygen availability directly drives decomposition speed. When oxygen concentration falls below 5%, anaerobic zones develop, slowing breakdown considerably.
You don’t need mechanical blowers to maintain adequate oxygen levels. Passive aeration through natural convection delivers sufficient oxygen for active composting. As microbial metabolism heats your pile to 55–70°C, warm air rises and pulls cooler fresh air downward, creating continuous circulation. Research shows passive aeration achieves comparable or superior results to active aeration over 15–21 days. Similar to how fermentation tools require proper design for efficient material processing, duct design must balance airflow with the porosity characteristics of your compost materials.
This buoyancy-driven airflow requires only proper bin design—perforated pipes or duct openings support passive airflow without energy input. You’ll benefit from faster decomposition, reduced odors from anaerobic activity, and maintained conditions favorable to beneficial microbes.
Sizing Your Bin: Volume and Airflow Requirements
You’ll need to balance your bin’s volume against its airflow design—too small and it won’t retain heat effectively, too large and dead zones form in the center where decomposition stalls.
Your bin’s walls and vent placement matter more than total capacity alone; side vents alone often leave stagnant pockets, while bottom-to-top airflow paths keep oxygen flowing through the entire pile.
Getting the geometry right means choosing dimensions that work with your wall design to distribute air evenly, ensuring you’re not just filling space but actively composting throughout. Server-side rendering during the offline time period ensures your compost design specifications load efficiently on both pc and mobile devices.
Minimum Volume For Active Decomposition
How large should your compost bin be to actually heat up and break down materials fast? You’ll need a minimum of 3 feet by 3 feet by 3 feet—roughly one cubic yard—to retain enough heat for active decomposition. Smaller piles often fail to maintain the thermophilic temperatures necessary for faster breakdown, though they can still decompose slowly.
This size balances two competing needs: retaining heat while allowing oxygen to penetrate the pile’s center. Anything larger than five cubic feet becomes harder to aerate naturally without turning or forced airflow. Your climate and feedstock matter too. Warm weather and finely chopped materials heat more reliably in smaller volumes, while cold weather demands larger mass or better insulation to sustain microbial activity. Layering waste with moisture control aids helps prevent soggy scraps that slow microbial activity and fermentation efficiency. To reach and maintain the optimal peak temperature, ensure your greens and browns are balanced at a 25:1 to 30:1 carbon-to-nitrogen ratio, which provides aerobic organisms the nutrients they need to reproduce rapidly and generate heat.
Airflow Pathways And Wall Design
Once you’ve sized your bin to the minimum 3×3×3 feet, the next critical factor is designing walls that let oxygen flow through the pile while keeping materials contained. Open-sided designs using pallets, hardware cloth, or chicken wire enable passive airflow that solid walls can’t match. If you prefer solid walls, you’ll need active management like turning or internal aeration to prevent anaerobic zones.
Inside your pile, create air pathways by inserting vertical sticks, stalks, or drilled PVC pipes. These structures channel oxygen toward the pile’s center where decomposer microbes need it most. Coarse bulking materials like twigs and corn stalks naturally preserve internal voids. Your goal is a connected network of air spaces—not just surface ventilation—ensuring oxygen reaches throughout the entire mass. Like the content creator engagement shown on social platforms, successful compost requires ongoing interaction and feedback to maintain optimal conditions. Compartment count and structural design both influence how effectively air distributes through organized systems.
Open Pallet Stalls: The Simplest DIY Option
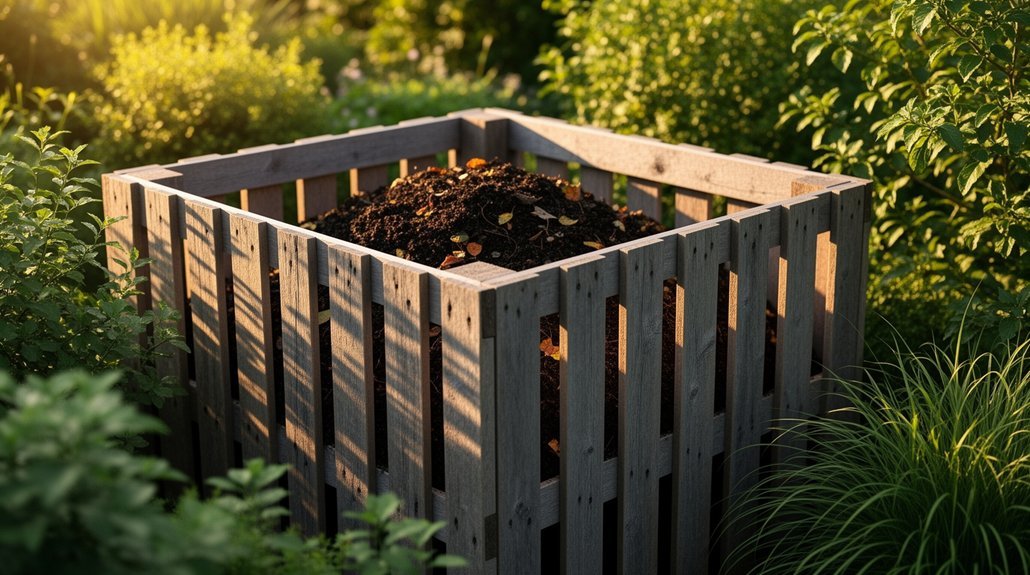
Why spend money on a manufactured compost bin when you can build one from reclaimed pallets in an afternoon? You’ll stack three uncut pallets to form two sides and a back wall, then attach a fourth with hinges for easy front access. This simple setup creates roughly 3 ft × 3 ft × 3 ft of capacity—the minimum recommended size for rapid aerobic composting.
The open slats do the real work. They naturally ventilate your pile without drilled holes or mechanical systems, letting oxygen reach the beneficial bacteria throughout your compost. You’ll avoid the anaerobic odors and slow decomposition that plague sealed bins. The open bottom invites soil organisms upward, accelerating breakdown. You can source pallets free from retailers, making this the most affordable DIY option available. For comparison, countertop placement options like commercial caddies require ongoing filter maintenance and limited capacity, whereas pallet bins offer unlimited composting potential. Like 404 error pages, poorly designed compost systems fail to function when critical access points are blocked or misconfigured.
Hardware Cloth Bins for Maximum Oxygen Flow
If you’re looking to maximize oxygen flow in your compost pile, hardware cloth bins deliver superior ventilation through their open mesh design. Unlike solid-sided containers, the mesh allows continuous airflow through all sides, supporting passive oxygen movement that aerobic decomposers need.
You can build a 3 ft x 3 ft x 3 ft bin by bending hardware cloth into a circle or attaching it to a frame. The sturdy mesh maintains shape under load without sagging, preserving consistent air space around your compost mass. Wire requires post support to prevent structural collapse as material weight increases over time.
For pest protection, line the ground with ¼ inch hardware cloth to block burrowing animals while still allowing water drainage and beneficial organism entry. Regular turning with a compost fork weekly keeps oxygen penetrating deeper, while maintaining proper moisture balance prevents odor and oxygen loss. Balanced compost conditions support the aerobic decomposition process that breaks down organic materials efficiently.
Slatted Wooden Compost Boxes: Durable and Portable
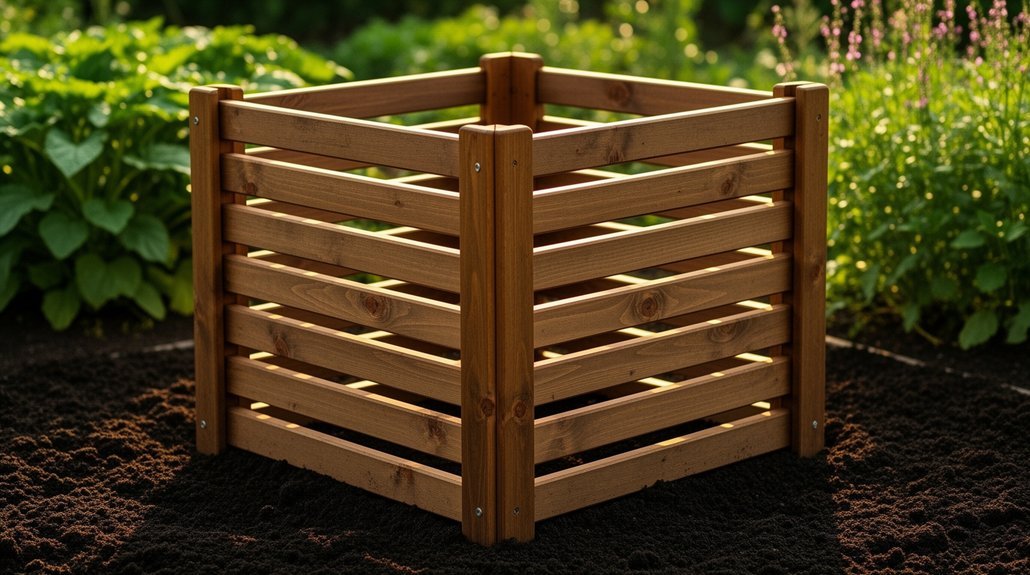
You’ll find that vertical slat construction with metal rods creates a rigid frame while preserving the open airflow your pile needs for efficient decomposition. The spacing between slats lets oxygen flow freely through the walls, and you can move or reconfigure the bin as your garden layout changes since the modular design relies on bolted connections rather than permanent installation. Using untreated wood like cedar prevents harmful chemicals from leaking into your compost while maintaining structural integrity. Strategic placement of air vents throughout the design further optimizes oxygen circulation for consistent decomposition rates.
Cedar or other rot-resistant wood ensures your bin withstands years of moisture and weathering, making slatted boxes a practical choice for gardeners seeking both reliable performance and flexibility.
Vertical Slat Construction Method
How do you build a compost bin that’s both durable and easy to relocate? Start by assembling prebuilt side panels on-site rather than constructing everything in place. This approach reduces handling once the structure becomes heavier. Build your end walls first, then add back boards to form a U-shape before installing inner walls.
Use sturdy 4×4 posts as vertical corner supports, then attach horizontal 2×6 slats with screws or nails in repeated rows. Space slats about 1–2 inches apart for consistent airflow. Pre-drill holes before driving fasteners to prevent splitting and ensure alignment stays square to support beams. Installing hardware cloth inside walls after the frame assembly provides additional containment while maintaining the airflow benefits of the slatted design. For applications beyond traditional garden composting, such as kitchen waste management, consider how your bin’s ventilation design complements different composting methods and scales.
This modular construction method keeps your bin portable while maintaining structural integrity throughout the composting process.
Airflow and Material Retention
Once you’ve assembled your slatted wooden frame, the spacing between boards becomes your primary tool for balancing two competing needs: allowing oxygen to reach the composting material while keeping leaves, grass, and kitchen scraps contained within the bin.
You’ll find that board spacing typically ranges from half-inch to two-inch gaps. Here’s what you should know:
- Tighter spacing (½–¾ inch) retains finer materials like grass clippings better
- Medium gaps (1–2 inches) optimize airflow for faster decomposition
- Level, consistent installation across all sides prevents material spillage during turning
You’re balancing ventilation against containment. Narrower gaps improve retention when you load, turn, or harvest finished compost. Wider spacing maximizes oxygen exchange but risks losing smaller debris. Your design choice depends on whether you prioritize material containment or maximum aerobic decomposition. Adding a compost activator to your bin accelerates the decomposition process regardless of your chosen gap spacing. The removable front boards allow you to easily access and pull finished compost from the bottom of the bin without disturbing the active material above.
Portability and Long-Term Durability
What makes a compost bin last through years of filling, turning, and harvesting? You’ll want cedar lumber, which naturally resists decay, paired with 2×4 framing and mending plates that strengthen joints. These reinforcements help your bin withstand repeated loading and unloading cycles.
Portable design features extend durability while keeping your bin flexible. Loose front boards fitted into slots let you access material without dismantling the structure. Hinges and hook-and-eye latches keep removable sections functional through countless openings. You can disassemble and relocate your bin when turning piles or removing finished compost. Weekly turning of materials accelerates the composting process and requires easy access to contents. A sturdy handle enhances portability when transporting your bin between locations.
This combination of durable materials and disassembly-friendly construction means you’ll get years of reliable use. Your slatted wooden box handles moderate yard waste volumes while adapting to your changing composting needs.
Three-Bay Systems for Batch Composting
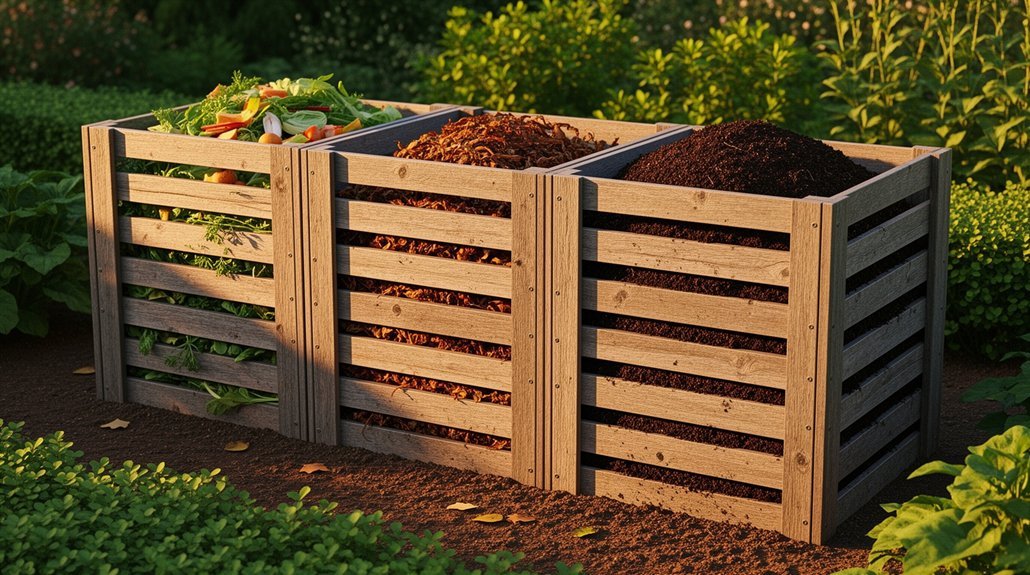
Most successful batch composting operations rely on a three-bay design that separates material into distinct stages: fresh feedstock in the first bay, actively decomposing material in the second, and finished compost in the third. This approach maximizes your efficiency while maintaining quality control.
- You fill Bin 1 with new scraps, then rotate material to Bin 2 for turning and aeration, where microbial activity peaks around 140°F. The outer bin walls contain material, preserving pile shape and maintaining insulating layers during turnover. Tools like the compost aerator tool with a steel corkscrew design can effectively break up clumps and draw core material to the surface for improved decomposition speed.
- You move cured compost to Bin 3 for storage, keeping finished product separate from fresh additions.
- You maintain consistent 4 × 4 × 4 ft bay dimensions across all compartments, supporting uniform turning and predictable decomposition cycles.
This workflow reduces idle time, prevents mixing stages, and keeps your composting system continuously productive.
Brick and Block Bins Without Mortar
You’ll build a sturdy brick or block bin by stacking without mortar, which lets you create deliberate gaps that pull oxygen directly into your pile. These strategic airflow openings—whether you space blocks 1/2 inch apart or arrange bricks in a half-running-bond pattern—keep decomposition moving fast while you sidestep the mess of mortar work.
Staggered layers and ground contact protect your bin from weather shifts and settling, so you’re investing in a durable structure that’ll handle multiple seasons of composting. Alternating block orientation through the structure enhances air circulation and prevents the walls from shifting under the weight of decomposing materials.
Stacking Without Mortar
How can you build a sturdy compost bin without the mess and expense of mortar? You’ll find dry-stacking offers simplicity and flexibility that mortared masonry can’t match.
When you stack blocks or bricks without mortar, you’re working with straightforward techniques:
- Stagger your rows – Alternating block placement strengthens the structure and prevents shifting as you build upward.
- Use running-bond patterns – This brick alignment method aligns joints naturally and increases wall stability without additional materials.
- Insert posts through openings – Concrete block bins benefit from posts threaded through the hollow centers, anchoring your bin securely.
You’ll appreciate how dry-stacked designs stay dismantleable and adaptable. If you need to expand, relocate, or modify your bin later, you can do so without breaking apart mortared seams. Keep your height moderate and your base level for best results. Starting with a bottom layer of aeration materials such as woodchips, brown leaves, or sticks will ensure proper airflow throughout your composting heap.
Airflow Through Strategic Gaps
While dry-stacking creates structural flexibility, it also offers an unexpected advantage for composting performance: the gaps between unmortared blocks naturally support the airflow your pile needs. You’ll find that strategically placed openings—especially along lower walls and opposite sides—create a chimney-style circulation pattern. Cool air enters through bottom gaps while warm air rises and exits higher up, pulling oxygen throughout your compost mass. This passive exchange reduces your need for frequent turning.
Position gaps to avoid blockage from soil or tight placement against obstacles. A raised base amplifies this effect further. Aim for a bin design with slots and openings on all sides to maximize the natural circulation pattern and support healthy microbial activity. The result? Your pile stays aerobic with minimal intervention, odors diminish, and decomposition accelerates naturally.
Weather Protection and Durability
What separates a compost pile that thrives through seasons from one that deteriorates is often the structure sheltering it. Brick and block bins without mortar offer you durable weather protection that lasts years longer than temporary open piles.
You’ll benefit from three key advantages:
- Moisture regulation – Walls shield your compost from heavy rain and intense sun, preventing waterlogging and nutrient loss through leaching.
- Structural integrity – Masonry resists rot, insect damage, and repeated freeze-thaw cycles better than untreated wood, maintaining its shape under repeated weather stress.
- Flexible maintenance – Dry-stacked blocks let you reposition individual pieces if settlement shifts the bin over time, extending its service life indefinitely. Air spaces between sidewall slats are necessary to ensure proper aeration throughout the composting process.
This approach gives you a genuinely permanent garden installation.
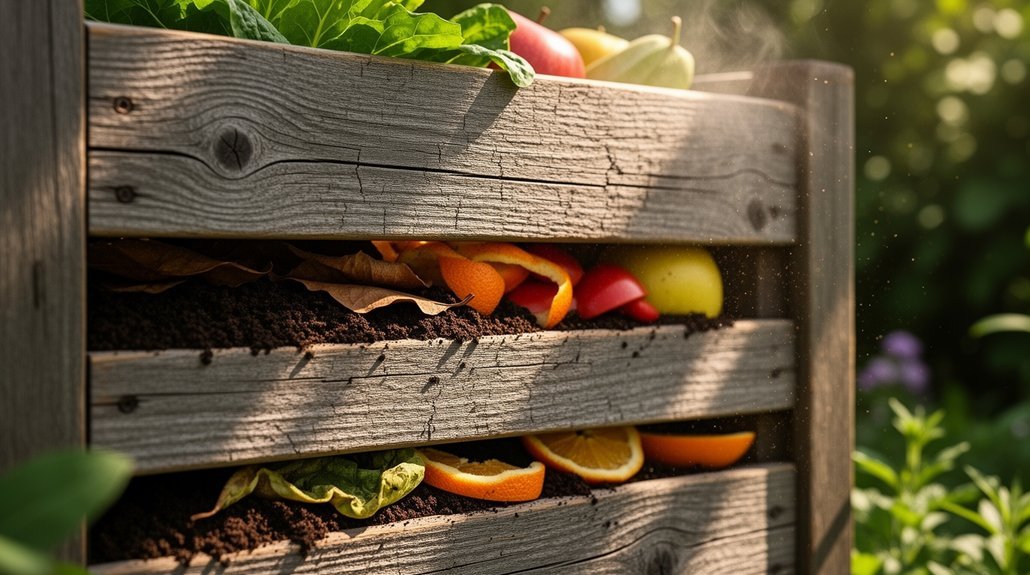
Natural-Material Bins: Straw Bales and Cardboard
Why settle for expensive commercial bins when you can build a functional compost enclosure from materials already on hand? Straw bales offer excellent natural airflow through their loose, fibrous structure, passively ventilating your pile while retaining heat and moisture for active decomposition. Stack four bales in a square, and you’ll create an adjustable, expandable bin that gradually breaks down and becomes part of your finished compost.
Cardboard provides a simpler, more temporary alternative for small-scale systems. While it lacks straw’s breathability, you can improve airflow by cutting slots or perforating the walls. Cardboard absorbs excess moisture from kitchen scraps, though prolonged wetness weakens the material quickly.
Both options support zero-waste composting—your bin structure becomes feedstock once decomposition completes.
Fixing Poor Airflow: Troubleshooting Common Issues
Even the best-designed compost bin can fail if oxygen doesn’t reach the pile’s core. You’ll notice problems through telltale signs like rotten-egg odors, indicating anaerobic decomposition.
Address airflow issues with these steps:
- Turn your pile regularly—weekly turning reintroduces oxygen and restarts microbial activity in stalled systems.
- Break up compaction—use a pitchfork to loosen dense zones where air can’t penetrate, especially in the center.
- Adjust moisture and materials—add dry brown materials to absorb excess water, which blocks oxygen movement; your compost should feel like a wet sponge, not soggy.
You’ll also want to check your bin’s placement. Ensure it sits on wood pallets for drainage rather than concrete, which traps moisture and odors. Adequate ventilation openings prevent the bin from becoming airtight, maintaining gas exchange essential for healthy decomposition.
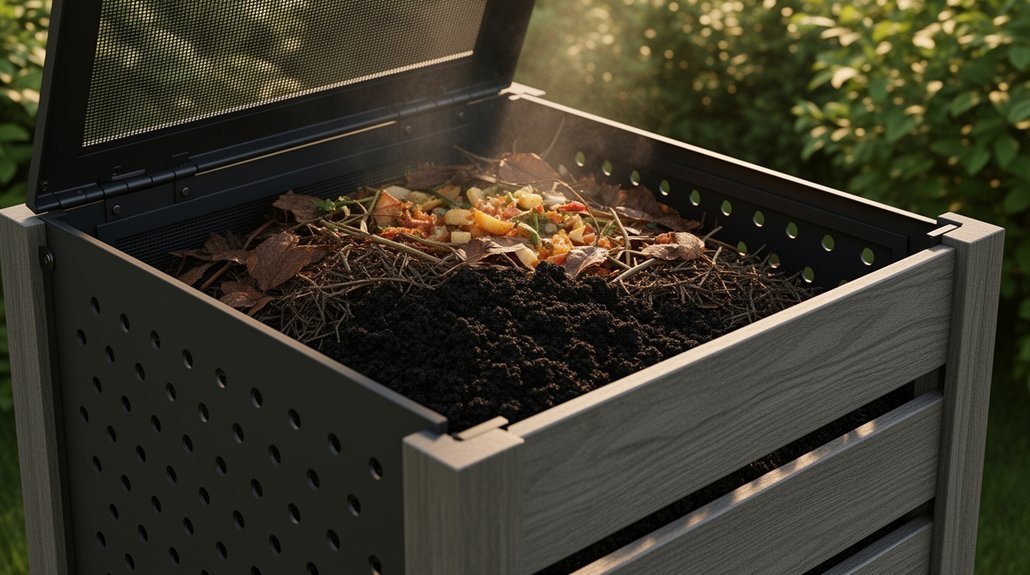
Building Your First Bin: Materials, Tools, and Timeline
Once you’ve diagnosed and fixed airflow problems in an existing bin, you’re ready to build your own system from scratch. You’ll start with basic materials: wooden pallets, plastic bins, or wire mesh. Hardwood pallets like oak outlast pine in outdoor conditions. For tools, you’ll need a power drill with bits ranging from 3/16 to 3 inches, screws, nails, and safety gear. Most simple designs—like three-sided pallet bins or plastic tote composters—take just a few hours to assemble.
Choose level ground with partial shade and good drainage for your site.
When you fill your new bin, layer bulky browns first, then alternate greens and browns while maintaining consistent moisture. This foundation sets you up for efficient, odor-free composting.
Frequently Asked Questions
How Do I Prevent Rodents or Pests From Entering My Naturally Ventilated Compost Bin?
You’ll prevent rodents by using hardware cloth on walls and base, keeping gaps under one inch, securing lids with latches, and avoiding meat, dairy, and oils. Cover food scraps with browns regularly.
Can I Use a Naturally Aerated Bin Indoors or in a Confined Apartment Space?
You shouldn’t use a naturally aerated bin indoors. You’ll face odor, moisture, and airflow problems in confined spaces. You’re better off choosing sealed fermentation systems or moving your compost outdoors.
What Climate Conditions Make Passive Airflow Bins Less Effective for Decomposition?
You’ll find passive airflow bins struggle in prolonged cold, high moisture, extreme heat, and dry conditions. These climates weaken convective airflow, compress materials, overheat microbes, or desiccate piles, slowing decomposition considerably.
Should I Cover the Top of My Open-Design Bin During Heavy Rain or Snow?
Yes, you should cover your open-design bin during heavy rain or snow. You’ll want a breathable cover like a tarp or vented lid that deflects moisture while preserving side airflow. Remove it when conditions dry.
How Often Should I Relocate or Move a Portable Compost Bin to New Ground?
You’ll relocate your portable bin only when it becomes compacted, stops heating, or you need access for turning. Move it after heavy rain if moisture’s unbalanced. Frequent movement isn’t necessary if aeration’s adequate.
In Summary
You’ve now got ten solid designs to choose from, and you’ll find that passive airflow is your secret weapon for faster decomposition. Whether you’re building a simple pallet stall or a hardware cloth bin, you’re investing in a system that’ll work for you. Start with what you’ve got, monitor your pile’s progress, and don’t hesitate to adjust your design as you learn what works best for your space and materials.


Leave a Reply