
You can build a fully functional compost thermometer for under $30 using a K-type thermocouple probe, basic hand tools, and scavenged materials like copper pipe and stainless steel stems—cutting commercial unit costs by two-thirds. Match your probe length to your bin depth: 12 inches for small barrels, 16 inches for medium bins. Insert it 8–12 inches from the edges at a 45-degree angle, targeting the active decomposition zone. Aim for 90°F to 140°F for active breakdown, with 150°F as your ideal sweet spot. The specifics of probe placement, shaft material selection, and sensor choice each substantially impact your accuracy and results.
Build a DIY Compost Probe for Under $30
Why spend $100 on a commercial compost thermometer when you can build an accurate one for less than $30? You’ll find plenty of budget-friendly options online. One documented build used a Jaycar thermometer for $14.95, combined with scavenged hardware-store materials. Another builder reports spending roughly $2 on an eBay fridge thermometer and basic supplies.
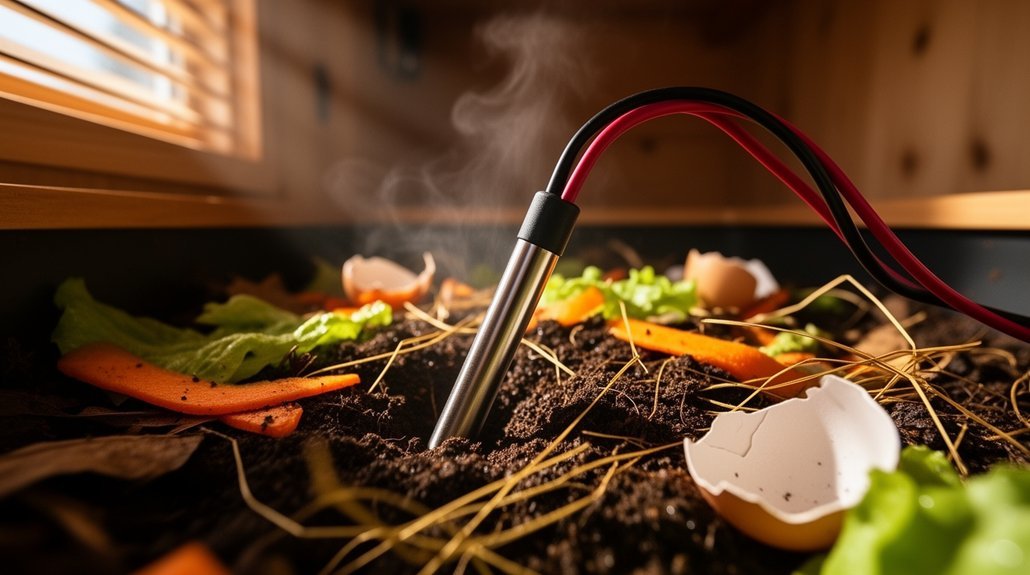
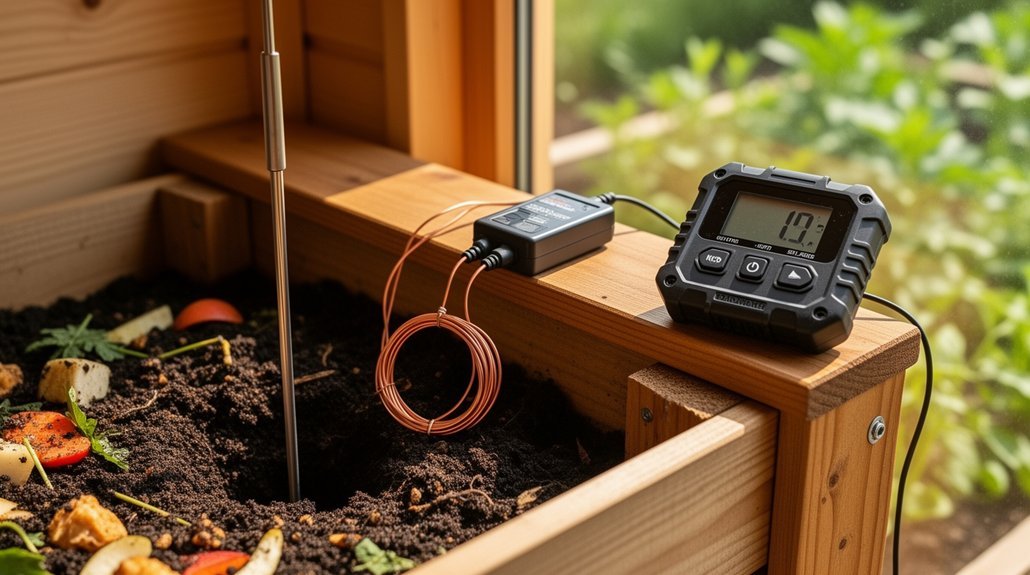
Start by sourcing a K-type thermocouple probe—the industry standard for compost temperature sensing. Pair it with an affordable thermocouple reader or multimeter. For housing, consider plumbing-supply parts like copper pipe and end caps, which cost just a few dollars. A 16-inch stainless steel stem provides the depth needed for accurate core temperature readings in larger compost piles. DIY units can be left in the heap for days to continuously monitor temperature changes without needing to be checked frequently.
You’ll only need basic tools: screws, drill bits, pliers, and a hacksaw. The result? A functioning thermometer that rivals commercial alternatives without draining your wallet.
Compost Probe Shaft: Wood vs. Steel-What Matters
When you’re building a compost probe, the shaft material you choose directly affects how quickly you’ll get accurate temperature readings and how long your tool will last through repeated use.
Steel conducts heat far more efficiently than wood, meaning your sensor stabilizes faster as you push the probe into different layers of your pile, but you’ll need to weigh that advantage against steel’s vulnerability to rust in wet conditions.
Wood avoids corrosion entirely and is simpler to fabricate, yet it can warp, rot, and splinter over time in the acidic, biologically active environment of active composting. Cedar and redwood offer natural rot resistance that can extend the lifespan of your wooden probe shaft with minimal maintenance. For kitchen composting applications where you’re monitoring smaller-scale bins, high-density plastic materials similar to those used in hanging compost bins can also serve as functional shaft alternatives.
Thermal Conductivity Differences Matter
How you choose your probe shaft—wood or steel—dramatically affects how accurately your sensor reads compost temperature. Steel conducts heat roughly 200 times faster than wood, making it a thermal bridge that bleeds warmth from your compost into the cooler air. This heat leakage distorts your readings, especially near the probe’s surface.
Wood’s low thermal conductivity—around 0.1–0.2 W/m·K compared to steel’s 15–20 W/m·K—insulates your sensor tip from conductive losses along the shaft. You’ll get more reliable measurements because the wood minimizes unwanted heat transfer between your compost and the external environment. When you secure the probe into a drilled branch, the wood’s natural insulation properties preserve the accuracy of temperature readings at the sensor tip. Maintaining proper moisture levels between 40-60% also supports consistent thermal conditions for accurate temperature monitoring.
For DIY probes, dry fallen branches work well because they’re abundant, durable, and keep your temperature data honest.
Stabilization Time And Accuracy
Once you’ve positioned your probe in the compost pile, you’re not done—you’ve only started gathering reliable data. Stabilization time depends on consistent sampling, not shaft material alone. You’ll know maturity’s approaching when temperature rises only about 10°F above ambient after turning; no rise suggests stabilization’s underway.
Steel shafts give you repeatable probe placement, essential for tracking heating and cooling trends accurately. Wood can absorb moisture, swell, and soften in damp conditions, throwing off your insertion depth and skewing readings. Wood’s lower thermal conductivity means it won’t wick heat away from your sensor as readily as steel would. Like dried materials used in outdoor displays, wood’s moisture absorption in composting environments can compromise structural integrity and measurement consistency.
However, steel conducts heat more readily than wood, potentially wicking warmth from your sensor tip. You’ll need proper thermal insulation around your sensing element regardless of shaft material. Match your probe choice to frequent monitoring—steel wins for consistent small-scale composting setups.
Durability For Repeated Use
Your probe’s material choice affects not just accuracy, but how long it’ll actually last through weeks or months of regular use.
| Factor | Wood | Steel |
|---|---|---|
| Moisture cycling | Swells, shrinks, warps | Dimensionally stable |
| Repeated insertion | Fibers crush and fuzz | Maintains shape reliably |
| Maintenance | Requires sealing, drying | Minimal structural care |
Steel shafts tolerate repeated penetration into compacted compost far better than wood, which degrades in moist, acidic environments. Wood fibers wear down quickly with frequent daily use, while metal maintains straightness and reduces wobble over time.
Steel’s dimensional stability supports consistent insertion depth across uses. Galvanized or stainless steel resists corrosion without leaching concerns. Wood requires more upkeep—sealing, drying, eventual replacement—as surfaces deteriorate. For tiny home composting with regular monitoring, consistent temperature readings are essential for tracking decomposition progress, especially when using compostable food scrap bags that break down alongside your compost material. steel’s lower maintenance burden and durability make it the practical choice, especially when paired with durable outdoor compost bins that benefit from consistent temperature readings throughout the composting cycle.
Pick Your Sensor: Digital Thermometer or Thermocouple
When you’re building a temperature monitoring system for your tiny home compost bin, you’ll face a fundamental choice: deploy a ready-made digital thermometer or assemble a custom thermocouple probe.
Digital RTD thermometers offer simplicity and reliability. You’ll get sealed probes with stainless steel stems, built-in displays, and accuracy around ±0.95°F. They’re ideal for quick spot checks without setup complexity. Many digital thermometers feature integrated probe handles for convenient operation in outdoor composting environments.
Thermocouples suit DIY enthusiasts who want customization. You’ll pair the sensing junction with simple electronics, adapt it into compact housings, and integrate it with controllers or data loggers. They’re flexible but demand more assembly. Proper drainage holes and ventilation design in your compost bin will work alongside your temperature probe to ensure optimal monitoring conditions.
For tiny bins, consider your priorities. If you want straightforward monitoring, go digital. If you’re planning automation or custom integration, thermocouple systems deliver the adaptability you need.
Size Your Probe to Match Your Bin or Barrel
You’ll want to match your probe length to your container’s depth so the sensing tip reaches the compost’s active core, not just the cool outer layer.
For tiny home systems, a 12-inch probe typically works for compact bins, while a 16-inch model gives you better flexibility in slightly larger containers. Consider pairing your probe with a 1.3-gallon countertop bin to ensure your container size aligns with your monitoring needs.
The right length ensures you’re reading genuine microbial heat activity rather than surface conditions that don’t reflect your compost’s true temperature. A fast response sensor will measure temperature changes in 20 seconds, giving you quick feedback on your pile’s microbial activity levels.
Probe Length For Container Type
How does container size shape your thermometer choice? Your probe’s length must match your bin’s dimensions and design.
For tiny home composting setups, you’ll find three common scenarios:
- Small bins and barrels (12-16 inches): Compact containers need shorter probes that fit through tight openings without contacting walls or bottoms. You’ll maneuver easily through narrow access points.
- Medium backyard bins (16-20 inches): Standard plastic, wooden, and tumbling units work best with versatile mid-range probes. This length spans most home composting depths effectively. Consider pairing your probe with interchangeable screens to separate finished compost from active material and maintain optimal moisture levels.
- Large bins and deep barrels (24-48 inches): Taller containers require extended stems to reach active composting zones without reading only surface material.
Match your probe length to your container’s depth, shape, and access port location. You’ll get accurate readings while avoiding awkward handling or incomplete temperature data. Hermetic sealing helps reduce fogging on your probe’s dial for clearer temperature visibility in humid composting environments.
Reaching The Active Interior Zone
Why does probe depth matter so much for accurate compost monitoring? You’ll capture decomposition conditions only when your probe tip reaches the active interior zone where oxygen, moisture, and microbes balance optimally.
Surface readings mislead you—the outer layer cools quickly and doesn’t reflect actual breakdown activity. Your thermometer’s stem length must match where heat concentrates inside your specific container. The sturdy pitted steel tip design ensures your probe easily penetrates into compact dense compost without bending or breaking under pressure. For countertop compost bins with capacities around 1.3 gallons, you’ll want a shorter probe that accommodates the limited interior depth while still reaching the active decomposition zone.
| Container Type | Active Zone Depth | Recommended Probe Length |
|---|---|---|
| Small barrel | 8–12 inches | 12 inches |
| Medium bin | 12–16 inches | 16 inches |
| Large pile | 24–36 inches | 36 inches |
In tiny home setups, narrow access ports limit insertion angles. You’ll need a probe long enough to penetrate the core yet maneuverable through tight openings. Matching probe reach to your bin’s geometry ensures you’re monitoring genuine compost heat, not ambient air temperature.
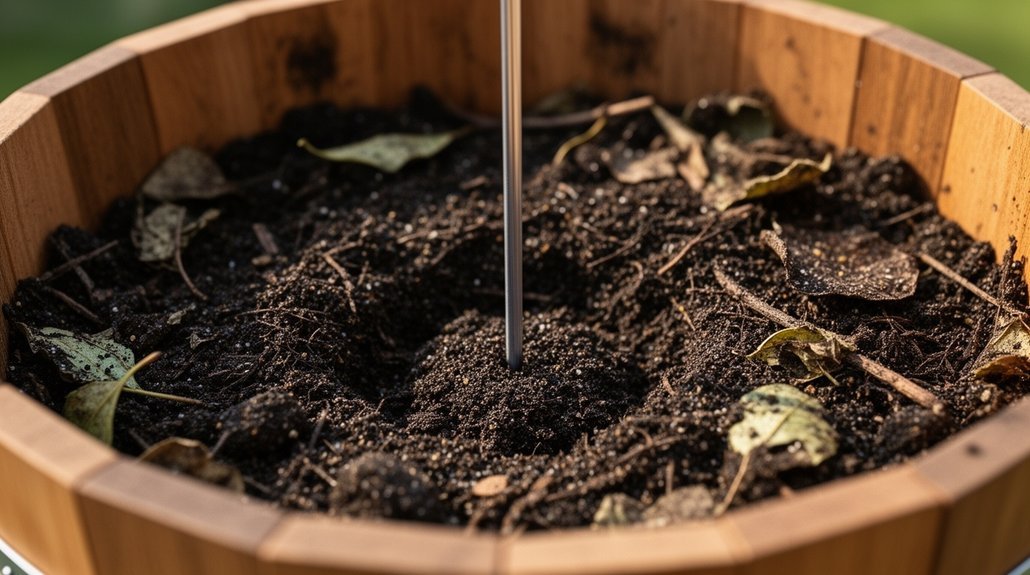
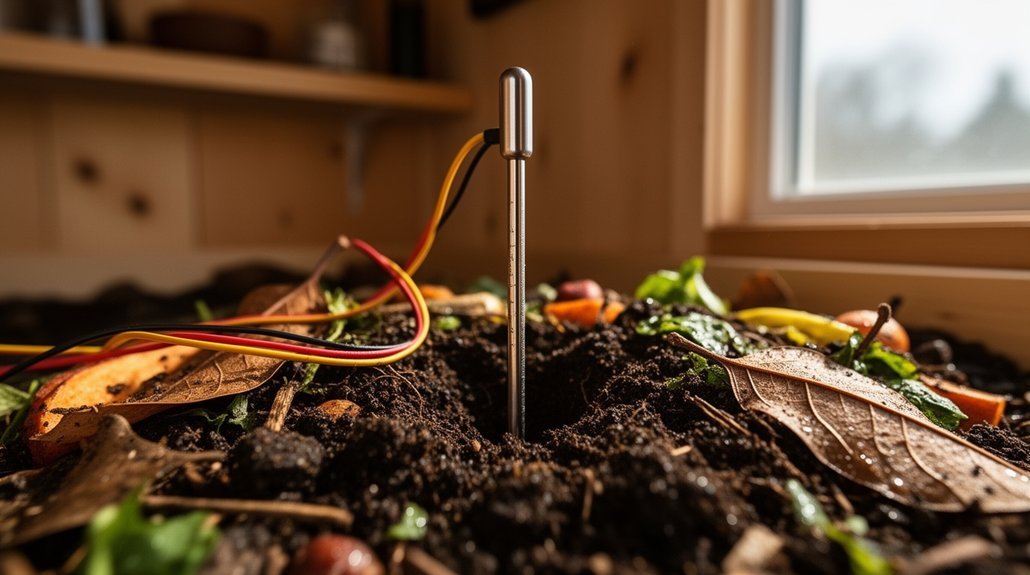
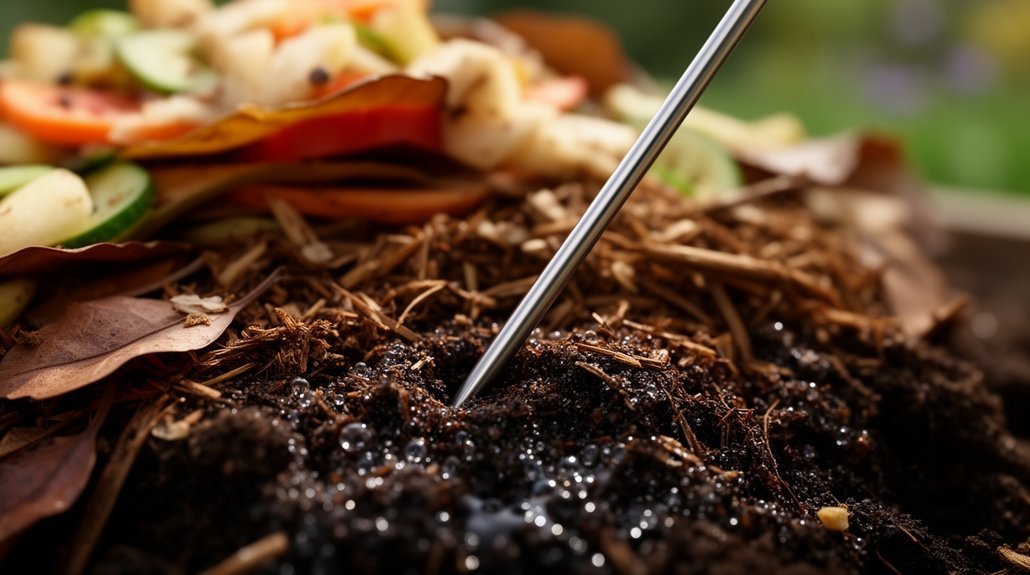
Place Your Probe in the Hot Core: Depth and Position
Where’s the real action in your compost pile? It’s buried deep in the core, not lounging near the surface.
Target your probe insertion about 8–12 inches from the outer edges, angling it at 45 degrees to penetrate without excessive disturbance. You’ll want the sensing tip—typically the bottom 2–4 inches of the stem—fully embedded in that hot zone. Aim for roughly 16 inches deep in small piles, where microbial activity peaks. Taking measurements from 3-4 different locations helps you capture temperature variability across the pile and ensure you’re reading from the most active decomposition zones. For compact composting systems in tiny homes, consider using removable inner liners to facilitate easier temperature monitoring and maintenance of your pile.
Here’s what you’re working with:
- Long-stem thermometers (12–24 inches) let your tip reach the warmest compost mass
- Stabilization time takes a few minutes before you’ll get accurate readings
- Geometric center placement beats edge or surface spots every time
Let the probe rest there. Leaving it in place tracks temperature trends over time without repeated reinsertion.
Waterproof Your Display and Sensor Electronics
You’ll need to protect both your sensor probe and display electronics from the moisture and temperature swings that composting environments create.
Start by selecting robust housing materials—like weatherproof enclosures or PVC tubing with epoxy sealing—and reinforce cable entry points with heat-shrink tubing and strain relief to prevent water from wicking along wire strands. For the thermistor probe itself, consider encapsulation methods such as hot glue or liquid electrical tape to seal the sensor leads and prevent direct water contact while maintaining accurate temperature readings.
Your display shield must isolate the controller board from condensation while keeping the screen visible, using gaskets and silicone seals around seams and fastener holes to block moisture ingress.
Protective Housing Materials
Protecting your temperature probe’s display and sensor electronics from moisture is essential for reliable composting data, and the right housing material makes all the difference.
You’ll find three primary options suited for composting environments:
- Plastic housings offer affordability and corrosion resistance, ideal for budget-conscious DIY setups where heat isn’t a primary concern
- Stainless steel provides superior durability and strength against mechanical stress, perfect for long-term outdoor installations exposed to water and abrasion
- Ceramic excels in high-temperature zones near active compost cores, delivering excellent electrical insulation and heat resistance
Select IP67 or IP68-rated enclosures to handle your compost system’s moisture exposure. Pair your chosen housing with two-part polyurethane sealants for water-vapor protection, avoiding epoxy which performs poorly underwater. The ease of maintenance through removable or easy-to-open housing designs ensures you can access your probe for cleaning or sensor replacement without compromising the system’s protective integrity. Match your material selection to your worst-case exposure scenario—whether rain, splash, or submersion—ensuring your probe delivers consistent readings throughout the composting season.
Cable Strain Relief Methods
Your housing material protects the probe’s internals, but the cable entry point remains vulnerable—it’s where moisture sneaks in and mechanical stress concentrates. You’ll want a strain relief method that secures your sensor cable while preventing water intrusion at the enclosure edge.
For a DIY compost probe, compression bushings work well for small cables. You simply insert the cable through the bushing, which compresses around the jacket and spreads stress over a longer section. Alternatively, a cable gland provides dual protection: mechanical retention and edge guarding. Heat shrink tubing reinforces the transition at your connector exit, creating a gradual stress transfer from rigid components to flexible cable. Plastic compression bushings can snap into pre-drilled holes and absorb push, pull, and twisting forces that occur during installation and regular probe maintenance.
For vertical probe installations, consider a basic cable clamp to counteract hanging loads.
Display Shield And Sealing
Where does moisture attack your compost monitoring setup most? Your display electronics and sensor connections face constant threats from humidity, splashes, and condensation near wet organic material.
You’ll protect these vulnerable components by applying waterproofing treatments strategically:
- Clear urethane seal coating on exposed circuit boards creates a moisture barrier without blocking visibility or airflow
- Glue-lined heat shrink around sensor connections and cable joints prevents water infiltration at stress points
- Epoxy compounds on solder joints and probe assemblies deliver long-term protection against environmental degradation
For your display enclosure, use weatherproof housing that blocks rain while maintaining sensor airflow. The Sensor Weather Shield provides dedicated protection from rain and snow exposure. Balance protection against over-sealing, which traps heat and distorts readings. Your goal: shield electronics from the elements while preserving measurement accuracy for reliable compost temperature monitoring.
Insert and Remove Without Breaking Wires
How do you pull a temperature probe from deep compost without snapping its delicate wires? You’ll use a rigid carrier—a wooden dowel or reinforcing rod—that transfers stress from the cable to the shaft itself. Fasten your probe-and-wire bundle to the dowel at regular intervals, every 10 inches or so, keeping everything aligned during insertion and removal. Drill a hole through the dowel’s end to cradle the probe tip, then cut a hacksaw kerf through that hole to create a split-clamp grip around the probe body. Route the cable through a second drilled hole nearby so the wire doesn’t bend sharply at the exit point. Thermistors used for temperature sensing are especially vulnerable to wire fatigue when subjected to repeated bending forces in the hot, moist composting environment. This rigid mounting system absorbs the mechanical strain, protecting your sensor connections from fatigue and failure.
Compost Temperature Targets: When It’s Hot Enough
What temperature signals that your compost pile is genuinely working? You’re hitting the sweet spot when your probe reads between 90°F and 140°F—the zone where thermophilic microbes thrive and break down materials fastest.
For reliable pathogen and weed-seed elimination, you’ll want sustained temperatures of 131°F to 160°F. This range ensures sanitation while maintaining active microbial populations. Many experienced composters target around 150°F as an ideal balance.
Watch for these temperature zones:
- Below 90°F: Decomposition slows significantly; sanitation becomes unreliable
- 90°F to 140°F: Active breakdown occurs; strong microbial activity dominates
- Above 160°F: Beneficial microorganisms decline sharply; turn your pile to cool it
If you’re consistently exceeding 160°F, add carbon-rich material and turn frequently to prevent self-sterilization and maintain healthy decomposition.
What Your Temperature Numbers Tell You About Decomposition
Your compost’s temperature is basically a live readout of microbial metabolism—the heat you’re measuring comes directly from billions of microorganisms breaking down organic material and releasing energy.
| Temperature Range | What It Means |
|---|---|
| Below 90°F (32°C) | Decomposition slows significantly |
| 90–140°F (32–60°C) | Most rapid breakdown occurs |
| 104–149°F (40–65°C) | Active thermophilic composting |
| Above 160°F (71°C) | Risk of killing beneficial microbes |
A rising temperature signals the shift from mesophilic to thermophilic decomposition. Stable high readings indicate sustained aerobic activity. Temperature drops during active composting suggest oxygen shortage or declining feedstock. When your pile cools below 70°F after heating, you’re nearing completion—assuming moisture and aeration remain adequate. Remember: temperature alone doesn’t prove finished compost; poor readings can also reflect inadequate oxygen or dry material.
Solve Slow Readings and Stabilization Delays
Why does your compost temperature reading lag behind the actual pile conditions? You’re likely dealing with thermal mass, insulation, or poor probe placement—all common culprits in DIY setups.
Direct contact matters most. When your probe sits in a thermowell or dead space, you’ll see 30-second delays and readings that run 1–2 degrees high. Immerse it directly into the compost instead.
Check these issues first:
- Thermal barriers: Air gaps and extra material around your sensor slow heat transfer significantly
- Loose contact: Unstable mounting or incorrect insertion depth causes fluctuating, drifting readings
- Wrong positioning: Placing your probe in low-flow zones or near heat sources creates false readings
Compare your probe against a reference sensor to isolate the problem. If lag persists, replace the probe—it may be poorly designed or damaged.
Keep Your Probe Durable Through Frequent Use
Once you’ve nailed down accurate readings, protecting that probe from the wear and tear of regular composting becomes your next priority. Choose a 316 stainless steel probe tip for moisture resistance and repeated service. Pair it with mineral-insulated metal-jacketed cable for optimum protection against harsh conditions. If you’re handling your probe frequently, select a fully sheathed design over exposed probes—they sacrifice some response speed but gain durability where it matters.
Add metal over-braiding to your cable assembly for extra abrasion resistance. Include small overmolds and cable strain relief at the probe entry point to block moisture intrusion. Regular inspections of cable insulation, sheath integrity, and strain relief catch early wear before failure occurs. These choices upfront reduce ongoing maintenance demands significantly.
Frequently Asked Questions
Can I Use a Compost Probe in Multiple Bins or Barrels Simultaneously?
No, you can’t use one probe simultaneously in multiple bins. You’ll need to move it between containers for spot checks, or invest in multiple probes or wireless sensors for continuous monitoring across your bins.
How Do I Calibrate My DIY Probe for Accurate Temperature Readings?
You’ll calibrate your probe using a two-point method: place it in an ice bath at 0°C and a warm water bath near your expected operating range. Compare your probe’s readings against a certified reference thermometer, then calculate and apply the offset correction to your measurements.
What’s the Expected Lifespan of a Homemade Compost Thermometer Probe?
Your homemade compost thermometer typically lasts 2 months to several years, depending on battery life, material durability, and corrosion resistance. You’ll extend longevity by protecting the shaft, securing connections firmly, and removing batteries between uses.
Should I Remove the Probe During Heavy Rain or Extreme Weather?
You should remove your probe during heavy rain if it’s not weatherproof or has exposed electronics. Keep the display protected under an overhang. For severe storms, temporary removal’s safer if your design lacks sealed housing and corrosion-resistant materials.
Can I Upgrade My Analog Thermometer to Digital Readout Later?
You can upgrade your analog thermometer to digital later if the sensor element separates from the display. You’ll need to match the sensor type, route probe wires carefully, and guarantee proper calibration for accurate readings.
In Summary
You’ve now got the tools to monitor your compost’s decomposition in real time. By tracking temperature changes, you’ll know exactly when your pile’s working hard and when it needs adjustment. Your DIY probe gives you that essential feedback without breaking the bank. You’re ready to optimize your tiny home composting system and transform kitchen scraps into gardening gold efficiently.


Leave a Reply