
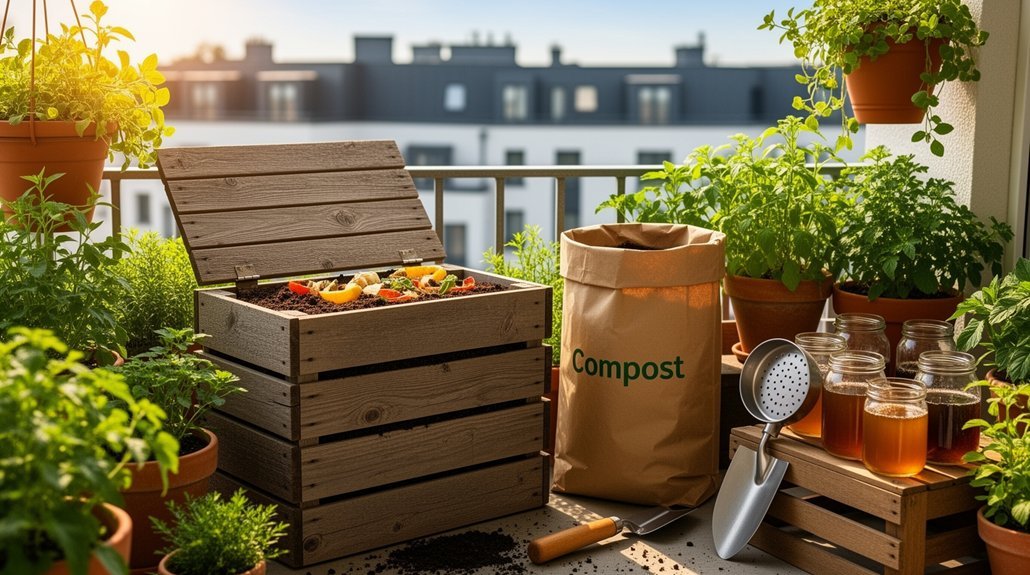
You’ll transform your balcony into a productive composting station with a properly sized container—typically 50–150 liters—elevated for drainage, and equipped with ventilation holes. Choose plastic for heat retention, metal for durability, or DIY for customization. Add inoculants like finished compost or bokashi bran to accelerate decomposition. Maintain moisture like a wrung-out sponge, turn weekly, and balance greens with browns. You’ll harvest nutrient-rich compost in 2–3 months, ready for your container plants. The right setup opens up specific techniques that maximize your results.
Why Container Choice Matters for Balcony Compost
Why does your container choice make or break balcony composting? Your container directly impacts six critical factors: space efficiency, moisture management, aeration, odor control, pest resistance, and maintenance ease.
On a compact balcony, you’ll need a system that fits tight corners without creating trip hazards or blocking furniture. Poor drainage leads to waterlogged bins and unpleasant odors that disturb neighbors in shared-air environments. Inadequate ventilation slows decomposition and increases anaerobic smells in close quarters.
A well-designed container with proper drainage holes, ventilation openings, and secure lids protects your compost quality while minimizing neighbor impact. Your choice also determines which composting method works best—bokashi bins, worm bins, or DIY plastic totes each require different container features. Most ceramic compost crocks feature charcoal filters in lids that control odors for 4-6 months, making them excellent for balcony environments. Material options like plastic, wood, or metal each offer distinct advantages for balcony environments, with durability and climate suitability influencing long-term performance.
Selecting the right container ensures consistent, successful composting within your space constraints.
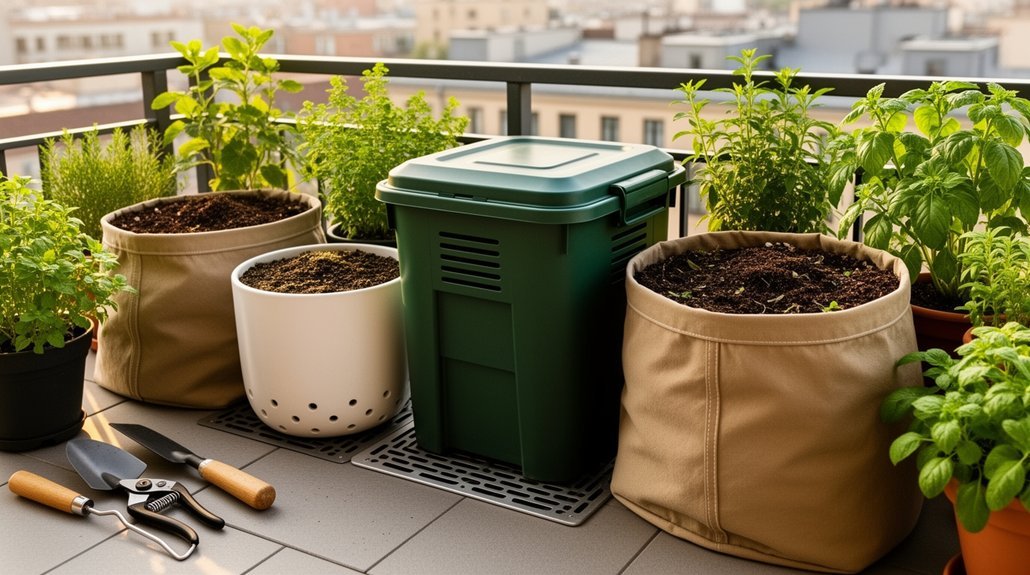
Plastic, Metal, or DIY: Which Material Works Best
How do you narrow down your material options when plastic, metal, DIY, and wood bins all promise different advantages? Your choice depends on what matters most in your balcony setup.
Plastic bins offer lightweight convenience and heat retention—ideal if you’re prioritizing low maintenance and compact space. Black plastic bins are particularly effective because they capture heat and speed decomposition.
Plastic bins bring lightweight convenience and superior heat retention—perfect for balcony composters seeking low-maintenance, space-efficient solutions.
Metal delivers superior durability and pest resistance, though it costs more upfront and can overheat in direct sun.
DIY options let you customize airflow and drainage for unusual dimensions while keeping costs down, but build quality directly affects longevity. Consider using stackable design principles to maximize your balcony’s vertical space when building your own bin.
Wood bins provide excellent airflow for aerobic composting and a natural aesthetic, yet they demand seasonal maintenance.
Consider your balcony’s sun exposure, available space, budget, and how much upkeep you’re willing to handle. Each material trades different benefits.
How to Size Your Bin for Your Household
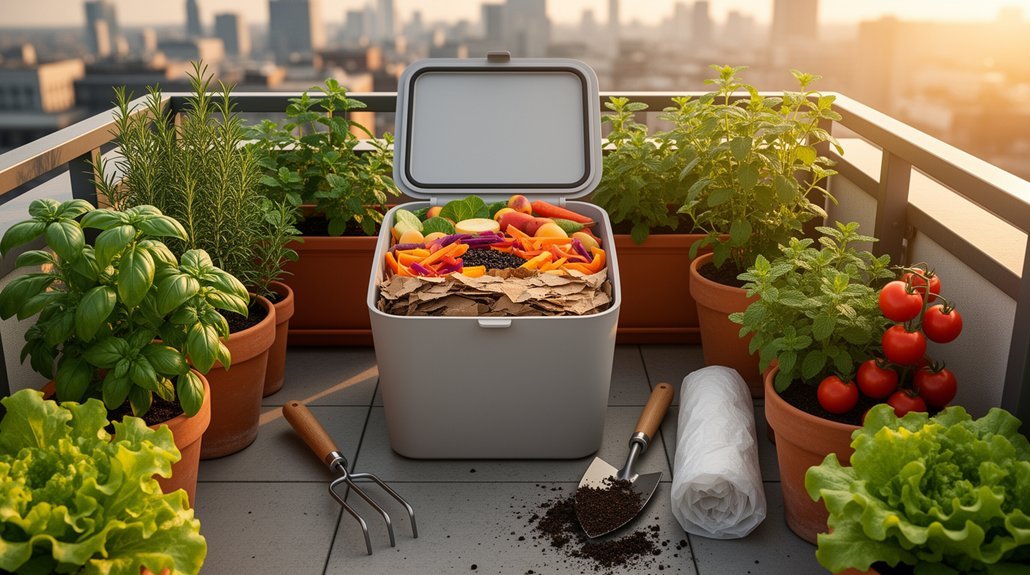
Getting the right bin size isn’t complicated—it’s really about matching capacity to your household’s actual waste output. For urban balconies, you’ll typically want a compact bin between 50–150 liters. A 65-gallon container works well for one to four people, while a 110-gallon bin suits those with regular garden waste. Consider your weekly kitchen scraps and garden debris—homes generating lots of wet waste may need extra space for dry materials like shredded cardboard. The balance of moisture, oxygen, and mass drives decomposition efficiency, so ensure your bin isn’t overfilled or too empty to maintain proper heating. If you’re serious about continuous composting, plan for two bins: one active and one curing. This setup ensures uninterrupted production without overwhelming your limited space. A compost turning fork makes rotating materials between bins easier and accelerates decomposition by improving aeration throughout the pile.
Match your bin size to actual waste volume, not just headcount, and you’ll maintain composting balance effortlessly.
Why Elevation Improves Drainage and Airflow
When you place a compost bin directly on your balcony’s concrete or tile surface, water doesn’t disappear—it pools beneath the container and keeps the base perpetually damp. Elevation changes everything. By raising your bin even a few centimeters on pot feet, blocks, or slats, you create crucial gaps for water drainage and air circulation underneath.
This under-bin airflow accelerates moisture evaporation and prevents stagnant, humid conditions that suffocate aerobic decomposition. Elevated bins maintain the moist-but-not-wet consistency your compost needs. Drainage holes stay functional instead of sealing against the floor, and leachate won’t accumulate to drown beneficial microbes. Better ventilation supports faster heat generation and odor control. Your compost stays loose and active rather than compacted and anaerobic. Layering your bin with jute fiber blankets creates an additional barrier that balances moisture retention with airflow, further supporting the aerobic conditions necessary for efficient decomposition. Without elevation, the drainage hole itself becomes submerged in pooled water, halting all drainage much like a pot sitting directly on a ceramic saucer.
Choosing Drainage Holes and Moisture Management
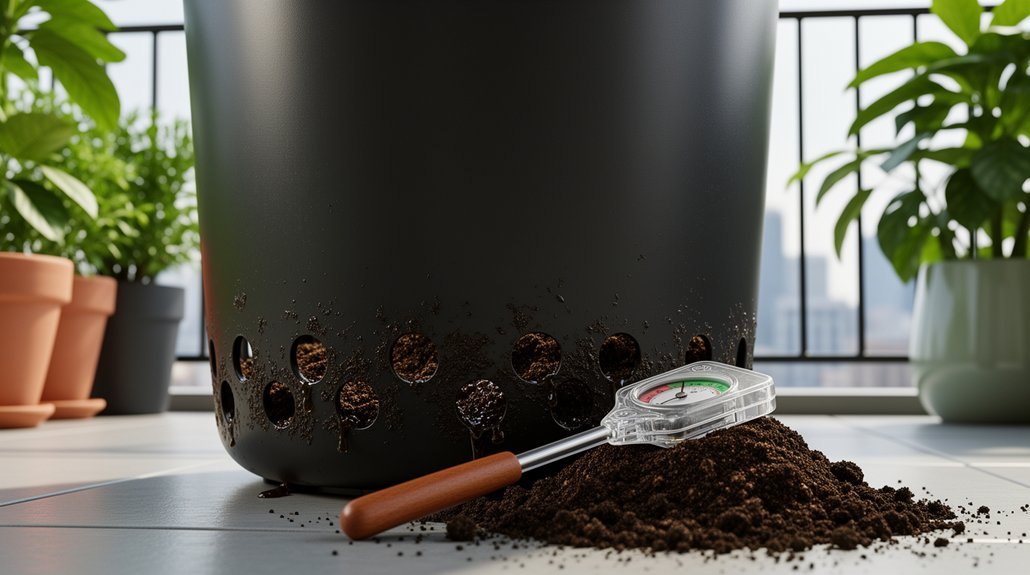
You’ll want to drill multiple drainage holes—at least two for a 5-liter bin and three for larger containers—to prevent waterlogged compost that suffocates roots and promotes rot. Position these openings strategically around the bin’s base and lower sides, spacing them apart so a single clog won’t trap moisture throughout your pile. Place a tray underneath to catch excess liquid runoff, which you can monitor and redirect rather than letting it pool on your balcony. Proper drainage holes also promote airflow and faster composting, which accelerates the breakdown of organic materials in your bucket. Maintaining the right carbon-to-nitrogen ratio alongside proper drainage ensures your apartment compost remains odor-free and efficient.
Preventing Waterlogged Compost Piles
Waterlogging silently sabotages your balcony compost pile by trapping moisture and suffocating the microbes that drive decomposition. You’ll want drainage holes in both the base and side walls to prevent stagnant liquid from collecting and displacing oxygen. Without proper drainage, you’ll face rotting, anaerobic waste instead of active compost.
Target the “moist” range—damp but never soggy. Too much moisture suppresses aerobic microbial activity and creates odors; too little slows breakdown entirely. You can reduce waterlogging by adding dry carbon materials to absorb excess moisture, turning your pile regularly to redistribute moisture pockets, and covering your bin during rain. The holes drilled all over sides of your bottomless bucket interior composting chamber allow excess liquid to drain into the surrounding soil layer while maintaining contact with the plants you’re growing.
On balconies, place a catch basin beneath your container to collect runoff and protect surfaces below. These simple practices maintain the stable conditions your small bin needs.
Strategic Hole Placement Techniques
Where should you position drainage holes to maximize airflow and moisture control? Space holes evenly across your bin’s bottom and sides—roughly 5 cm apart—rather than clustering them in one area. This distributed placement ensures consistent airflow throughout your compost mass and prevents moisture pooling.
Add multiple rows of side holes in staggered bands to reach different levels of material. A perforated lid enhances ventilation in enclosed systems. Raise your bin on bricks or beams so liquid drains freely without backing up at bottom holes. Drilling holes if your container lacks built-in ventilation is essential for maintaining adequate oxygen circulation throughout the composting process. For indoor kitchen composting, consider compact designs with activated charcoal filters to manage odors while maintaining airflow.
Pair drainage holes with coarse base materials like branches and leaves to maintain air pockets. Cover openings with fine mesh to deter pests while preserving airflow. This strategic approach balances active aeration with effective moisture release for faster decomposition.
Managing Excess Liquid Runoff
How do you keep your balcony composter from becoming a waterlogged mess? Strategic drainage holes prevent stagnant liquid that drowns your pile and slows decomposition. Aim for a “wrung-out sponge” moisture level—moist but never soggy.
Combine drainage with smart layering. Alternate wet kitchen scraps with chunky dry materials like torn cardboard and dried leaves. This balanced approach reduces compaction and lets air flow throughout, not just at the base. Consider using recyclable kraft cardboard for your dry layer materials, which breaks down effectively while supporting proper aeration.
Consider your environment too. Shade reduces evaporation, so you’ll water less. A top covering of straw or cardboard retains moisture without oversaturation. Water during morning or evening hours to minimize losses. For optimal results, maintain surface slope to facilitate efficient drainage of excess moisture. If you use collected rainwater or greywater, apply it carefully to maintain optimal moisture without flooding your system.
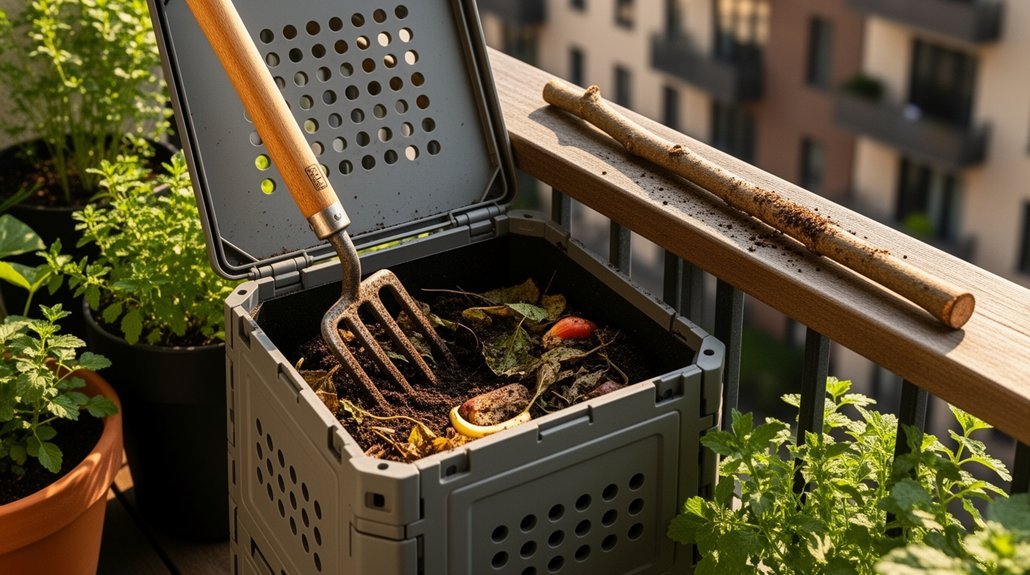
Aeration Tools That Speed Up Decomposition

You’ll find that turning tools, passive ventilation systems, and manual stirring techniques each offer distinct advantages for your balcony setup. Turning tools like corkscrew aerators and winged designs actively mix your compost while creating air channels, whereas passive systems rely on built-in air gaps and drainage to maintain oxygen flow with minimal effort. Manual stirring techniques—whether you’re using a crank aerator or simply inserting tools at multiple points—give you direct control over aeration frequency and intensity based on your pile’s moisture and compaction levels. For optimal results in hot composting, aim to aerate every 2–4 days after your initial turn to keep the pile active and accelerate decomposition. Consider pairing your aeration efforts with compostable food scrap bags to ensure you’re adding quality organic material that decomposes efficiently alongside your turning schedule.
Turning Tools For Mixing
Since decomposition relies on microbial activity that thrives in oxygen-rich environments, the right turning tools can dramatically accelerate your compost’s breakdown.
You’ll find several effective options for mixing your balcony compost:
- Pitchforks offer versatility for lifting, mixing, and breaking up clumps across various material types
- Garden forks handle wider ranges of compost sizes with flexible turning motions
- Compost aerators (plungers and corkscrews) insert deeply to loosen compacted material
- Specialized turners designed specifically for bins maximize efficiency in confined spaces
- Hand tools work well for smaller balcony setups requiring minimal space
For urban gardeners, pitchforks remain your strongest all-around choice. They’re particularly valuable when your compost becomes heavily compacted. If you’re working with lighter, less-dense material, simpler forks may suffice. Compost aerators with plunger or corkscrew designs are especially beneficial for small heaps or limited space where deeper insertion and thorough turning are difficult to achieve with standard tools. Regular aeration every one to two weeks helps maintain proper moisture balance and accelerates decomposition. Choose based on your pile’s density and available balcony space.
Passive Ventilation Systems
What if you could maintain steady airflow through your compost without electricity or constant manual turning? Passive ventilation systems make this possible. You can install perforated PVC pipes horizontally at your bin’s base or vertically through the pile’s center.
As heated air rises naturally, cooler fresh air gets drawn in from lower openings, delivering oxygen throughout your compost mass. This design reduces anaerobic zones that cause odors while supporting aerobic microbes that accelerate decomposition. Unlike forced air systems that may be overkill for smaller compost volumes, passive ventilation scales efficiently to smaller pile sizes. Consider pairing your passive ventilation system with airtight container designs that balance odor control with necessary airflow.
For balcony composting, passive systems work exceptionally well—they’re low-cost, require no power, and need minimal maintenance. Layer browns and greens around your pipes to maintain pore space, and keep moisture balanced so airflow stays effective.
Manual Stirring Techniques
While passive systems create steady airflow without your intervention, manual stirring gives you direct control over aeration and lets you respond to your pile’s needs in real time.
You’ll find several tools work well for balcony composting:
- Compost cranks and stirrers fit snugly in confined bins and require minimal space
- Compact aerators with corkscrew ends create air channels while lifting material efficiently
- Small shovels work perfectly for complete mixing in tight quarters
- Garden forks break up dense clumps that block oxygen flow
- Digging forks lift material from edges toward the center for even decomposition
Turn your compost every few days during active breakdown. Insert your tool deep, then rock it to open air pockets. Move material from outside edges to the center and back out to equalize decomposition rates. This hands-on approach accelerates breakdown while eliminating anaerobic odors. The center of the pile is the hottest area and drives the decomposition process most effectively.
Turning, Stirring, and DIY Mixing Techniques
How you aerate your balcony compost makes all the difference between a thriving bin and a smelly mess.
Weekly turning restores oxygen and accelerates decomposition while redistributing moisture and heat evenly. You can choose from several effective methods:
| Method | Best For | Frequency | Key Benefit |
|---|---|---|---|
| Hand stirring with stick | Small containers | 2-3x weekly | Breaks clumps, exposes surface |
| Bucket transfer system | Limited space | Weekly | Eliminates manual turning |
| Tumbler bins | Consistent results | 1-2x weekly | Finished compost in 6-12 months |
| Full turning | Larger bins | Weekly | Complete oxygen exchange |
Maintain moisture like a wrung-out sponge and ensure drainage holes support airflow. Light, frequent stirring beats occasional heavy turning in tight urban spaces. You’ll prevent waterlogging, reduce odors, and achieve faster decomposition. A three-bucket system rotates weekly to keep material active while avoiding the need for manual turning, which is ideal for balcony gardeners with limited space.
Greens and Browns: The Right Mix for Balconies
Getting the browns-to-greens ratio right is where most balcony composters stumble. You’ll want a starting point of roughly 3:1 browns to greens by volume—this carbon-heavy blend prevents the soggy, smelly mess that plagues small-space systems. Greens like fruit scraps and coffee grounds supply nitrogen but attract moisture and flies. Browns like dry leaves and shredded cardboard absorb that excess moisture while reducing odor. The skeleton of the pile is built primarily from browns, which create the air pockets essential for aerobic decomposition in confined spaces.
Key adjustments you’ll need:
- Stinky odor? Add more browns immediately.
- Soggy texture? Layer browns on top and shield from rain.
- No heat generation? Increase nitrogen-rich greens.
- Desiccated pile? Add greens and water.
- Surface flies? Cap food scraps with straw.
Your balcony’s limited space demands this balance from day one. Small, layered additions work better than bulk dumps.
The Best Carbon-Rich Materials for Faster Compost
You’ll find that dry leaves, shredded paper, and straw are your most accessible carbon sources for balcony composting. Balancing these browns with nitrogen-rich greens prevents odor and moisture buildup in your compact bin while maintaining the airflow you need for faster decomposition. Leaf mold compost particularly enhances soil texture and water-holding capacity, making it ideal for container gardening in limited spaces.
The key’s choosing materials you can source consistently—whether that’s leaves from nearby parks, cardboard from deliveries, or coffee grounds from your kitchen.
Common Browns for Balconies
What makes certain materials ideal for balcony composting? You’ll want to prioritize browns that decompose quickly and work well in compact spaces.
- Shredded leaves — decompose faster than whole leaves and improve pile structure
- Shredded paper and cardboard — absorb excess moisture and prevent compacted layers
- Paper products — newspaper, paper towels, and brown bags are easy to source
- Woody plant trimmings — provide long-lasting carbon when chopped or shredded
- Straw and hay — offer structure and aeration without taking up excess space
In urban settings without abundant tree leaves, shredded paper and cardboard become your most accessible carbon sources. For worm bins specifically, keep bedding loose and absorbent to maintain proper moisture control and airflow. Avoid grease-coated or waxed materials, which break down poorly and contaminate your finished compost.
Balancing Greens With Carbon
Selecting the right browns is only half the equation—pairing them with your nitrogen-rich kitchen scraps determines how quickly your balcony compost actually breaks down.
You’ll achieve optimal decomposition by maintaining a 25–30:1 carbon-to-nitrogen ratio. This balance prevents odors and anaerobic conditions while keeping your pile actively heating. Shredding materials before adding them increases surface area, allowing microbes to work faster.
| Material | Benefits | Best For |
|---|---|---|
| Shredded cardboard | Compact, improves airflow | Regular layering |
| Dry leaves | Efficient breakdown | Quick decomposition |
| Paper products | Moisture absorption | High-water scraps |
Add carbon after each kitchen scrap addition to prevent fly attraction. Match wet inputs with dry carbon to maintain a crumbly texture. Avoid woody materials if you’re targeting faster turnaround times.
Jump-Start Your Batch With Inoculants and Starters
Why does new compost sometimes take weeks to break down while established systems work quickly? The answer lies in microbial populations. Inoculants and starters introduce beneficial bacteria and fungi that accelerate decomposition, giving your balcony system an immediate advantage.
New compost takes weeks to break down without microbial populations. Inoculants and starters introduce beneficial bacteria and fungi that accelerate decomposition.
You can jump-start your batch using:
- Finished compost sprinkled between fresh scraps
- Bokashi bran layered in airtight buckets
- Worm castings mixed into worm bin bedding
- Commercial starters containing active microorganisms
- Garden soil or leaf mold in small amounts
These microbial seeds reduce lag time significantly, particularly valuable in space-limited setups. They improve early-stage breakdown of tough materials like stems and leaves while controlling odors in fermentation systems. Match your starter type to your method: bokashi bran for fermentation, castings for vermicomposting, finished compost for aerobic bins. Store starters in cool, dry conditions to maintain viability.
Maintaining Airflow and Stabilizing Your Setup
Once you’ve seeded your bin with active microorganisms, you’ll need to create an environment where they can thrive—and that means oxygen. Drill holes on the sides, lid, and bottom of your container to ensure consistent airflow. More perforations increase circulation and accelerate decomposition while reducing odors.
Start with a loose base layer of thick branches and twigs to create air pockets that prevent compacting. This coarse foundation also directs excess moisture downward instead of allowing it to stagnate.
Elevate your bin on timber beams or bricks to improve airflow beneath the container. Use a weighted lid to retain heat and moisture while protecting against wind and rain. Position your setup on a stable, secure spot away from edges to prevent tipping and spills.
How to Harvest Finished Compost From Small Bins
When’s the right time to pull finished compost from your balcony bin? You’ll know it’s ready when it’s dark, crumbly, and resembles used coffee grounds—with no visible food scraps or recognizable bedding.
Here’s your harvesting approach:
- Check readiness: Finished compost takes 2-3 months in worm systems or 3-4 months in tray systems
- Choose your method: Lift the bin aside, transfer unfinished material back, then collect mature compost below
- Sift if needed: Use a compost sieve to separate fine material from larger chunks, returning fragments to the bin
- Design matters: Bottom-opening panels or hatches make removal easier in tight spaces
- Return scraps: Cover leftover partly-decomposed material with fresh browns and greens to continue breaking down
This workflow keeps your balcony garden productive without excessive handling.
Using and Storing Your Finished Balcony Compost
Now that you’ve harvested your finished compost, you’ll want to put it to work or store it properly for later use. You can mix your compost directly into potting soil to boost fertility and structure for container plants, or simply top-dress them with a thin layer around the base. This nutrient-rich material works especially well for herbs, flowers, and compact crops like hanging lettuce.
For storage, place your cooled compost in a clean, dry, covered container to prevent excess moisture and contamination. Keep it in a breathable state to manage humidity levels. When you’re ready to use stored compost, any coarse pieces that didn’t fully decompose can return to your bin for additional breakdown, maximizing efficiency in your small-batch system.
Frequently Asked Questions
What Should I Do if My Balcony Compost Smells Bad or Attracts Pests?
You should add more carbon-rich browns like shredded paper to absorb moisture, turn your pile weekly for airflow, and cover food scraps with browns after each addition. Reduce wet ingredients and ensure proper drainage.
How Long Does It Typically Take for Balcony Compost to Fully Decompose and Be Ready?
You’ll typically see finished balcony compost in 1–2 months with vermicomposting, 2–3 months with tumblers, or 6–12 months with passive methods. You’ll know it’s ready when it’s dark, crumbly, and earthy-smelling.
Can I Compost Meat, Dairy, or Oils in My Balcony Bin Safely?
You shouldn’t compost meat, dairy, or oils in your balcony bin. They’ll attract pests, create strong odors, and require hot composting temperatures you can’t maintain. Stick with plant-based scraps instead.
What Temperature Range Is Ideal for Faster Decomposition in Small Balcony Systems?
You’ll achieve faster decomposition in your small balcony system by maintaining temperatures between 40–65°C (104–149°F). Aim for around 60°C (140°F) for optimal microbial activity and speedier breakdown of your compost materials.
How Often Should I Turn or Aerate My Balcony Compost Pile for Best Results?
You’ll get best results turning your balcony compost weekly for balance, or every three to four days if you’re pursuing hot, active decomposition. Use a thermometer to guide your timing instead of following a fixed schedule.
In Summary
You’ve successfully created nutrient-rich compost in your small space. Now you’ll want to use it strategically in your container garden or share it with neighbors. Store your finished compost in airtight containers away from direct sunlight to maintain its quality. You’re not just reducing waste—you’re closing the loop on your urban gardening journey while improving your plants’ soil naturally.


Leave a Reply