

Pull a sealed pail of frozen scraps onto a sturdy surface, mist the block lightly with a garden sprayer for a minute, then add a splash of water and stir until the slurry turns runny. Use compostable gloves, keep batches separate, and label each container to avoid mix‑ups. Choose easily blendable scraps—potato skins, carrot tops, coffee grounds, wilted lettuce—remove woody stems, and store them in a seal‑proof pail with a dry paper layer for odor control. Once the “compost smoothie” is smooth, transfer it to your bin for rapid microbial action, and you’ll discover even more tips ahead.
How to Defrost Kitchen Scraps Quickly and Evenly
How can you get frozen kitchen scraps ready for the garden without a day‑long wait? First, pull the sealed pail from the back door and set it on a sturdy surface. Use a garden sprayer to mist the frozen block lightly, then let the spray melt the outer layer for a minute. While the surface softens, give the blender a quick whirl with a half‑full water baseline, adding enough water to reach a runny consistency. Pour the thawed slurry back into the pail, stir, and let it sit another two minutes. If the mixture stays too thick, repeat the mist‑and‑stir cycle until it flows evenly. For best results, consider using compostable gloves during handling to protect your hands and maintain clean separation of batches compostable gloves and the rest of your gear. Label each container before freezing to avoid mix‑ups, and in milder climates, watch for odor and move any smelly batches to the freezer promptly. This method gets your kitchen scraps ready for composting in minutes, not hours.
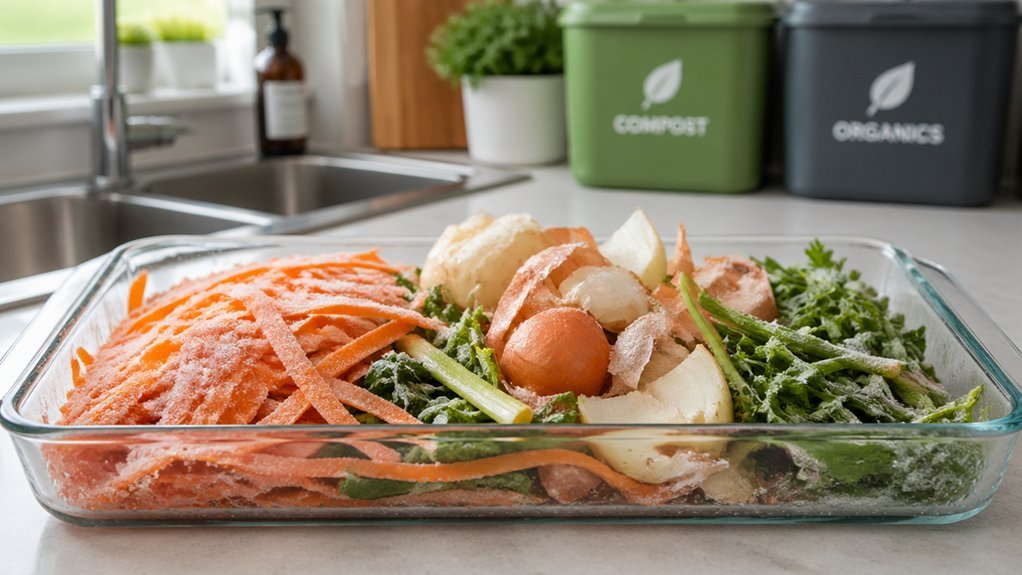
Select the Right Scraps and Prep Them for Thawing
Pick the scraps that blend or chop easily—potato and onion skins, carrot tops, orange peels, avocado skins and seeds, wilted lettuce, coffee grounds, tea bags (strings removed), leftover cooked veggies, and even paper towels. You’ll want kitchen scrap pieces that are small enough to fit your blender or grinder without jamming. First, sort out any large, woody stems; they’ll slow the thaw and may need pre‑cutting. Toss the chosen scraps into a sturdy plastic tub, seal it, and freeze them. When you’re ready to thaw, move the tub to the counter, let the ice melt just enough for a smooth blend, and keep a pail handy for the resulting “compost smoothie.” Label the container clearly to avoid confusion and to keep the process efficient throughout winter. Regularly replacing odor-control filters in compatible crocks can help manage any smells during indoor storage filter replacement.
Pick a Seal‑Proof Container to Control Odor & Moisture
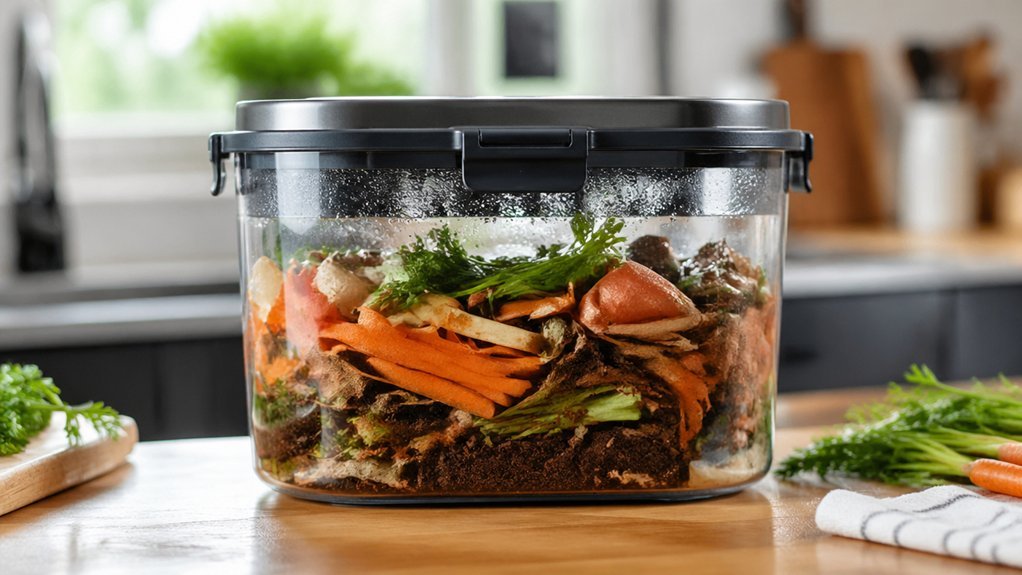
After chopping your scraps into blender‑ready pieces, transfer them into a seal‑proof container—think a sturdy plastic pail with a tight‑fitting lid or a screw‑top jar—so the defrosted mixture stays contained and odor‑free. Choose a spot near the back door or a cold‑storage corner; this keeps kitchen waste hidden and limits smell spread. Slip a dry layer of shredded paper or leaves between batches for extra odor control, and always snap the lid shut. Label each container or freezer‑safe bag to avoid cross‑contamination, and schedule regular emptying and cleaning to prevent mold. Your system stays tidy, moisture stays balanced, and the composting process runs smoothly.
| Container Type | Best Use |
|---|---|
| Plastic pail with tight lid | Large batches, easy to clean |
| Screw‑top jar | Small batches, portable |
| Freezer‑safe bag | Temporary storage, labeling |
| Labeled bucket | Long‑term storage, segregation |
Add a Touch of Water and Chop for Better Microbial Access
Ever wondered why a splash of water and a quick chop make frozen scraps so much more microbe‑friendly? Moisture helps feed the microbial community, while chopping increases surface area to promote faster breakdown surface area. Adding a little moisture while you blend frozen scraps creates a smoothie‑like texture that lets microbes swim through the pulp instead of crawling over icy clumps. Then, chop the softened bits into bite‑size pieces; the increased surface area lets bacteria and fungi infiltrate from every angle, speeding up breakdown.
The water also prevents the mixture from drying out, keeping the environment humid enough for active composting microbes. You don’t need a massive amount—just enough to loosen the mass. By moistening and chopping, you set the stage for a rapid, uniform fermentation, keeping the composting process efficient and odor‑controlled.
Transfer the Thawed Puree to Your Compost Bin for Fast Decomposition
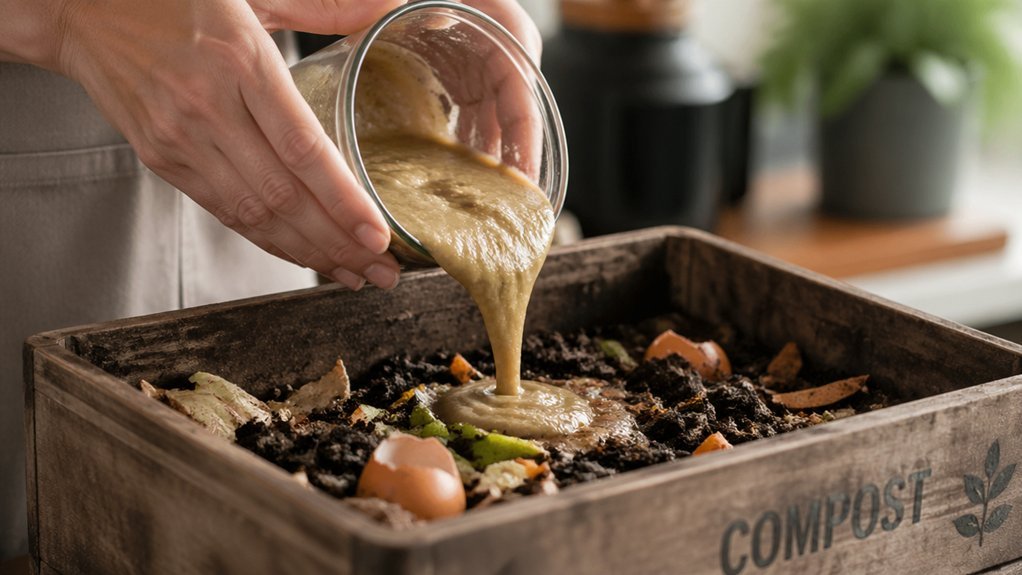
Want to speed up composting? Transfer the thawed puree straight into your compost bin while it’s still fine‑textured. The smooth blend lets microbes feast immediately, cutting weeks off the breakdown curve. Pour it in quickly after thawing, then lightly mix to expose more surface area. Label the container so you don’t mix the puree with other scraps or misidentify it later. In spring, you can also spread the puree on bare soil to jump‑start microbial activity and improve soil structure. Freezing first reduces handling in winter, and once the thawed puree hits the bin, the warm season accelerates its decomposition.
| Step | Action | Benefit |
|---|---|---|
| 1 | Pour thawed puree into compost bin | Immediate microbial access |
| 2 | Lightly mix | Increases surface area |
| 3 | Label container | Prevents material confusion |
| 4 | Spread on soil (optional) | Boosts soil health |
Frequently Asked Questions
What Kitchen Scraps Should Not Be Composted?
You shouldn’t compost meat, dairy, eggs, oily foods, grease, bones, or any greasy paper products. Skip diseased or moldy scraps, citrus peels, heavy‑blooming onion skins, and any cleaning‑chemical‑contaminated items.
How Do the Amish Compost?
You follow a simple, multi‑bin system: layer chopped greens and browns, turn regularly, keep moisture balanced, and use vermiculture in cold months. Seasonal timing and community sharing keep it efficient.
What Kitchen Scraps Make Good Compost?
You should compost fruit and vegetable peels, coffee grounds, tea bags, eggshells, and spent grains. Add brown items like shredded newspaper, cardboard, or dry leaves to balance carbon, moisture, and airflow.
How to Turn Food Waste Into Compost Quickly?
You speed up compost by chopping waste, freezing it, then feeding it into a Bokashi bin; after 2‑plus weeks, mix the fermented mash into a hot bin or bury it in soil for rapid breakdown.
In Summary
Now you’re ready to turn frozen leftovers into compost gold in no time. By picking the right scraps, sealing them tight, adding a splash of water, and chopping for microbial access, you’ll thaw them evenly and dump them straight into the bin. The process speeds up decomposition, cuts odor, and keeps your kitchen clean—so you’ll be composting like a pro with minimal effort.


Leave a Reply