

Pick a compact, ventilated bin and place it near the kitchen but away from direct sun, then line it with shredded cardboard, coconut coir, and peat moss dampened to about 80% moisture. Add a thin layer of aged compost, sprinkle crushed eggshells to keep pH near neutral, and introduce Red Wigglers once the bedding is stable. Feed fruit, veggie scraps, coffee grounds, and tea‑bag paper every few days, covering leftovers with damp newspaper. Collect leachate in a sealed bottle, dilute 1:10 before watering plants, and monitor moisture and odor daily; the next steps will show you how to harvest castings, troubleshoot pests, and scale the farm year‑round.
Choose the Ideal Window‑Sill Bin for Your Worm Farm
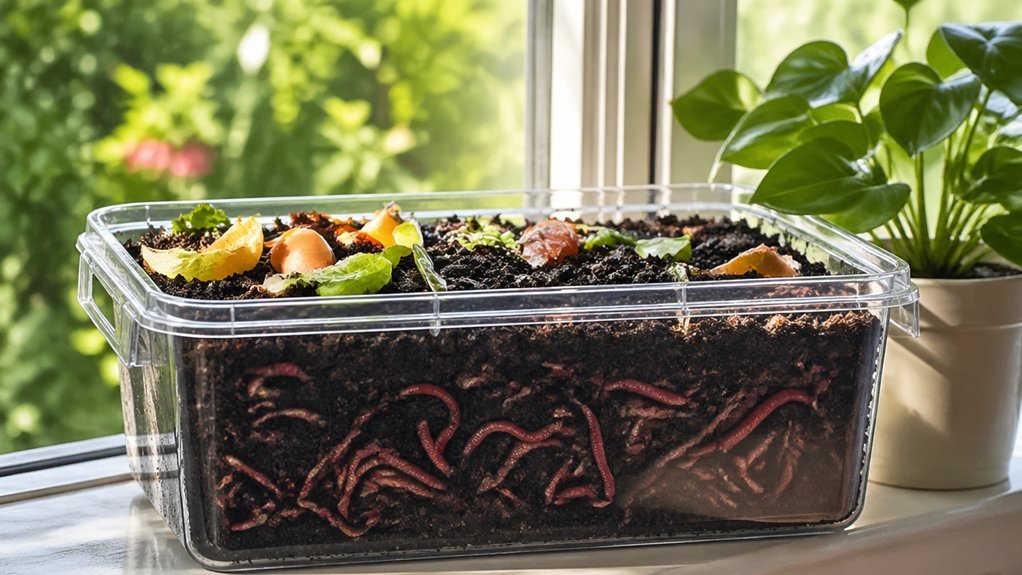
Where should you place your worm bin on a window sill? You want a spot that’s near the kitchen for easy scrap drops but out of direct sun to keep the temperature steady.
Place the bin near the kitchen, away from direct sunlight, for stable temperature and easy scrap drops.
Choose a stackable or tray‑based design with a tight‑fitting lid, ventilation holes, and a drainage layer—these features protect your window sill worm farm from excess moisture and help airflow for healthy vermicomposting.
Look for bins that include a thin insulation pad or can hold a moisture‑regulating bedding, ensuring the worms stay comfortable in limited light.
If you plan a multi‑bin system, pick units with clear labels and a simple gate or transfer tray so you can shift worms gradually without disturbing the whole setup.
This compact, modular approach maximizes space while maintaining optimal conditions.
To further enhance odor control and airflow in compact setups, consider bins with activated charcoal filters or dedicated ventilation features to help maintain a stable environment for the worms. ventilation/odor control
Prep the Bedding for Your Window‑Sill Worm Farm
How do you create a worm‑friendly bedding that mimics their natural underground home? Start by shredding brown cardboard, coconut coir, and unbleached paper into fluffy strips. Mix in a handful of aged compost, peat moss, and a few straw pieces for texture. Moisten the blend until a gentle squeeze releases only a drop or two of water—about 80 % moisture. Spread the damp bedding evenly in your window‑sill bin and let it sit for a day, allowing the material to settle and the scent to mellow. This brief pause aids worm acclimation, giving them a familiar, cozy environment before you introduce them.
- Feel the soft, earthy aroma rise as you stir.
- Notice the cool, damp texture that promises a safe haven.
- Imagine the tiny worms eagerly burrowing, ready to thrive.
Set Moisture & pH for a Window‑Sill Worm Farm
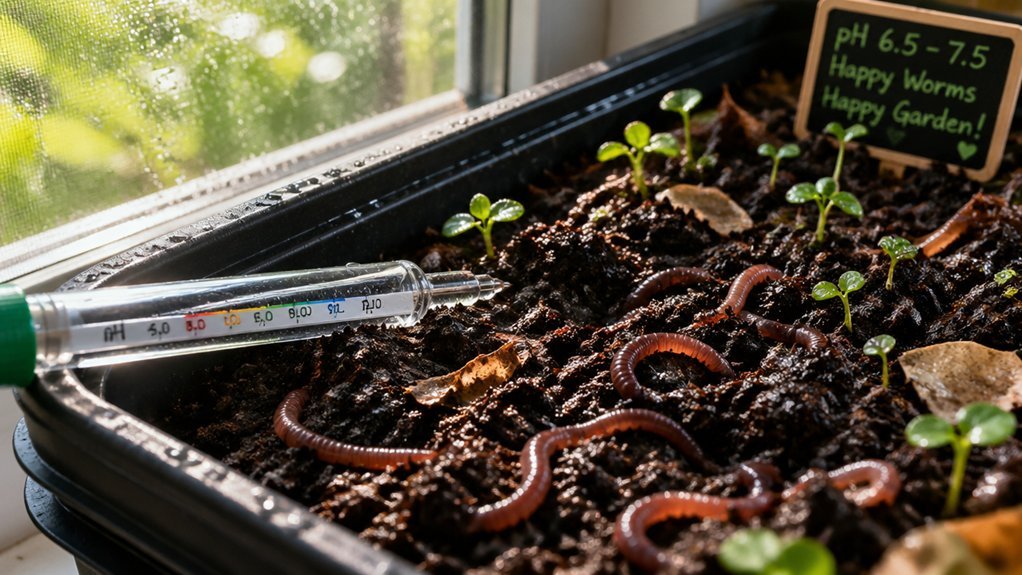
A good rule of thumb is to keep the bedding’s moisture around 80 %—just enough that a squeezed ball releases a single drop or two of water.
Use shredded cardboard, coconut coir, and peat moss to hold that level while staying airy.
Shredded cardboard, coconut coir, and peat moss retain moisture while keeping the substrate airy.
Check the moisture daily: if the ball feels dry, mist lightly; if it drips, add a layer of dry material or improve drainage.
Simultaneously monitor pH with a hydrometer, aiming for a near‑neutral range of 6.0–7.0.
If the reading drifts low, sprinkle a pinch of crushed eggshells; if it climbs high, add a bit of garden lime.
Keep the top layer damp, never soggy, and adjust water or drainage promptly to prevent foul odors and drowning worms.
To support long-term stability, consider selecting a container with a sturdy, low‑friction interior surface that minimizes wear on bedding and worms 8.6 inches height.
Introduce Red Wigglers to Your Window‑Sill Worm Farm
Keeping the moisture and pH in check, you can now add the star of any window‑sill farm: Red Wigglers (Eisenia fetida). Gently spread a thin layer of damp bedding—shredded cardboard, coconut coir, or newspaper—so the worms feel safe and the moisture stays around 80 %. Place the starter batch in the coolest, mint‑scented spot away from direct sun, letting them burrow into the soft, dark medium. Within a few days you’ll see them wiggle through the bedding, signaling they’re comfortable and ready to work. Feel the excitement charcoal filters, sense the satisfaction, and enjoy the anticipation.
Feed Your Window‑Sill Worm Farm: What, How Much, When
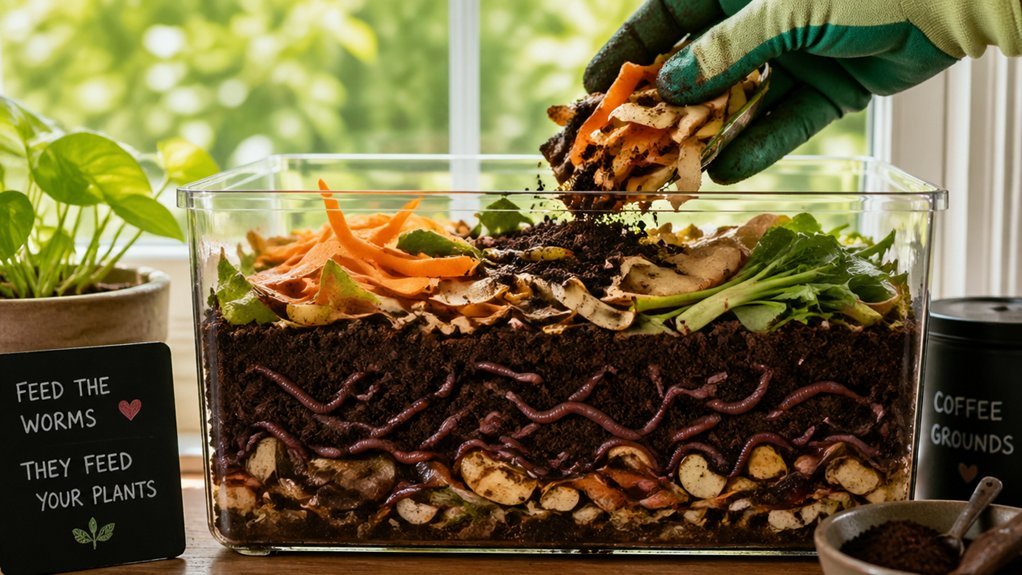
You’ll start by offering fruit and veggie scraps, coffee grounds, eggshells, and tea‑bag paper, while steering clear of meat, dairy, and glossy paper.
Feed every two to three days, beginning with a modest amount that matches roughly your worms’ body weight and adjusting upward as they settle in.
Place the food on one side of the bin and cover it with a damp newspaper or hessian to keep moisture right and encourage the worms to migrate across the surface.
Food Types
Kitchen scraps, coffee grounds, and damp newspaper make up the core diet for a window‑sill worm farm, and you’ll feed them in small, regular portions. You’ll want a balanced mix of fruit and veg peelings, stale bread, cheese bits, and cooked grains. Add a pinch of coffee grounds for nitrogen and a handful of shredded, damp newspaper to keep moisture steady. Avoid citrus overload, onions, and any meat or fish. Keep the worm bin tidy, and the composting feed will stay fresh without turning soggy. Fresh fruit‑veg scraps – bright, aromatic, and instantly appealing. Coffee grounds – earthy, stimulating, and a quick nitrogen boost. Damp newspaper – soft, moist, and a perfect bedding for the worms. Nitrogen balance helps ensure efficient breakdown and helps prevent odors in compact setups.
Feeding Frequency & Quantity
How often should you feed your window-sill worm farm? Aim for a feeding frequency of every 2–3 days; worms can theoretically eat their body weight in food waste each day, so this cadence matches their capacity without overloading the system. Start with a modest handful of scraps when the farm is new, then gradually increase the amount as the worms become active. Spread the food on one side of the bin, covering it with a damp worm bedding layer to keep moisture balanced and prevent rot. Add waste in thin layers, moistening each layer lightly, and always check for leftovers before the next feed. This approach keeps the drain pan clear, maintains a healthy habitat, and maximizes compost production. Regular monitoring helps prevent odors and mold, ensuring a steady, odor-free operation odor control.
Manage Airflow & Temperature on a Window‑Sill Worm Farm
Ever wondered why your window‑sill worm farm feels stuffy or too hot? You’ll notice that poor ventilation, fluctuating temperature, and uneven moisture can stress your worms. Keep the lid vented, add side holes, and use breathable bedding to let fresh air flow. Position the farm away from direct sunlight, and consider a shaded indoor spot or a thin insulation layer to hold temperature between 55°F and 75°F. Check moisture with a squeeze test; the bedding should feel damp, not soggy. Over‑watering clogs air pores, while drought dries them out, both hurting oxygen exchange. Introducing a moisture-control aid like a bokashi blend can help manage liquids and maintain steadier conditions moisture management.
Collect Worm Leachate From a Window‑Sill Worm Farm
You’ll want to harvest the leachate into a clean container, keeping it away from the worms to avoid stress.
Store it in a sealed bottle in the fridge and use it within a week as a mild fertilizer or garden spray.
Odor control features provide an added safeguard when managing leachate to minimize odors during storage and handling.
Harvesting Leachate Safely
A few simple steps keep your window‑sill worm farm’s leachate clean and usable. First, place a sturdy drain pan beneath the tray so the drainage flows directly into a collection container, preventing puddles on the sill. Next, check that the porous liner and holes stay intact; they filter solids, keep worms inside, and let only leachate pass. Finally, empty the pan daily or whenever it fills, and if the liquid looks dark or smells strong, dilute it before any garden use.
- Secure the pan – feel the relief of a mess‑free window.
- Inspect the liner – enjoy the confidence that only pure leachate drips down.
- Empty and dilute – relish the pride of safe, effective fertilizer.
Storage and Reuse Tips
To you’ve emptied the pan and ensure the leachate stays clear, collect it directly into a clean bottle or cup, then seal it with a lid. Store the sealed container at room temperature and use the leachate within a few days to prevent mold. When you’re ready to reuse, dilute the liquid 1:10 with water before watering plants, mimicking a mild nutrient feed and avoiding fertilizer burn. Record each drainage event—volume and frequency—to track worm activity and adjust feeding or moisture as needed. Proper storage keeps the leachate fresh and your garden thriving.
| Step | Action |
|---|---|
| 1 | Capture leachate in a clean bottle |
| 2 | Seal with a lid immediately |
| 3 | Label with date and volume |
| 4 | Store at room temperature, use within days |
| 5 | Dilute 1:10 before applying to plants |
Preventing Odor Build‑up
Where do the smells come from? They arise when excess leachate sits in the pan, creating anaerobic pockets that release a sour stench. Good leachate management stops that. First, install a drainage pan with a tap or outlet, then lay a coarse fabric mat beneath it to filter solids and keep worms from escaping. Keep the worm bed’s moisture balance in check by reducing feed near the collection point and avoiding soggy conditions. Finally, use a covered but ventilated lid on the window sill; the lid traps odors while the holes let gases escape.
- Tap‑drain tray – captures liquid cleanly, preventing spills.
- Moisture‑balanced feeding – stops sour smells before they start.
- Ventilated cover – offers odor control without suffocating the worms.
Harvest Castings From Your Window‑Sill Worm Farm
Harvesting the castings from your window‑sill worm farm is as simple as moving the settled material from the lower tray to a fresh top tray once the bin is roughly half full. You’ll notice the nutrient‑dense worm castings gathering at the bottom, so gently lift the lower tray, tap off excess leachate, and slide the castings into a container. If a few worms cling, sift with a coarse mesh or give them a quick shake. Keep the new top tray moist but not soggy, and repeat the cycle every few weeks for continuous harvest.
| Step | Action |
|---|---|
| 1 | Check tray is ½ full |
| 2 | Lift lower tray |
| 3 | Tap off leachate |
| 4 | Transfer castings to container |
Troubleshoot Common Issues in Your Window‑Sill Worm Farm (Odor, Moisture, Pests)
If you notice a sour smell, soggy bedding, or tiny winged pests, it’s usually a sign that feeding, moisture, or ventilation needs tweaking. Your worm farm thrives when you balance moisture, odor control, and pest prevention. Keep bedding at roughly 80 % moisture—squeeze a handful; a few drops mean you’re good, but bone‑dry soil needs a mist or a damp tray. Overfeeding creates rot and odor, so feed in small portions and cover scraps with a damp worm blanket. Bury food on one side and leave the other side clean to deter fruit flies. Check drainage holes and use a breathable lid to improve aeration.
Sour smell, soggy bedding, or winged pests signal feeding, moisture, or ventilation tweaks needed.
- Reduce feed, cover leftovers, and mist bedding.
- Clear holes, add a breathable lid, and move the bin from direct heat.
- Bury food on one side, keep the other side clean, and monitor weekly.
Scale Your Window‑Sill Worm Farm for Bigger Spaces
Scaling a window‑sill worm farm for larger spaces is as simple as adding modular trays or a bigger bin that still fits the sill, while keeping each layer well‑ventilated and properly drained. Start with a sturdy tray and place a second one on top, using a worm bins gateway to separate harvestable castings from active feeding zones. Ensure each new tray has airflow/drainage holes and a layer of damp shredded cardboard or coconut coir to maintain 80% moisture. As you add trays, gradually increase kitchen‑scrap feed to match the growing worm population.
A larger bin design can replace the stacked trays if you need more capacity, but keep the same drainage layout. This scaling method lets you expand without crowding, preserving a stable, healthy habitat.
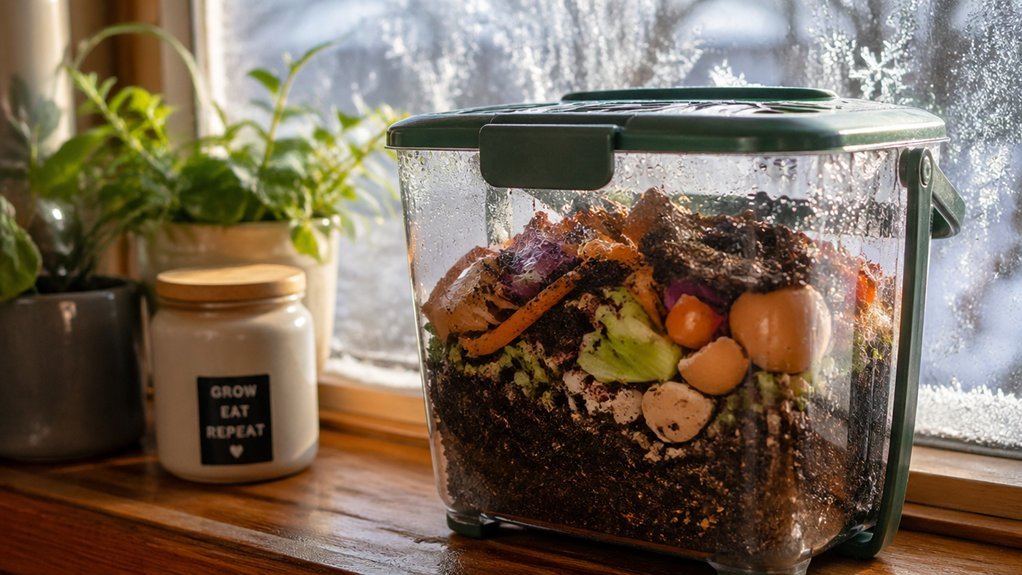
Keeping Your Window‑Sill Worm Farm Healthy All Year‑Round
You’ll keep your worms thriving by staying on top of temperature and moisture all year. Keep the sill cool and shaded, aiming for 40‑84°F, and check the bedding’s moisture with a quick squeeze test to hit about 80% humidity. Rotate feed, bury it in the bedding, and adjust the light schedule so the farm stays stable and odor‑free.
Temperature Control Strategies
Keeping your window‑sill worm farm within the 40 °F–84 °F window is essential, because extremes either freeze or “cook” the worms. Good temperature regulation starts with solid insulation: slip foam between the base and the bin, then drape a breathable blanket to buffer heat loss or gain. Keep an eye on ambient conditions; if a room warms in summer, move the bin to a shaded spot, and in winter, place it near a gentle heat source but away from drafts. Layering bedding and feedings adds a thermal cushion, smoothing out daily swings and keeping worm activity steady.
- Wrap the bin — a snug blanket feels like a cozy sweater for your worms.
- Shift locations — relocate to cooler or warmer corners as the season changes.
- Add ice packs or heat pads — quick fixes that rescue the farm from sudden spikes.
Moisture Management Techniques
Temperature swings can make moisture levels swing too, so once you’ve insulated the bin, turn your attention to keeping the bedding consistently damp. Aim for about 80 % moisture; a light squeeze should give one or two drops. Use a damp worm blanket or old hessian sack to buffer humidity, especially in cooler months. Bury food in the bedding to cut odors and fruit flies, which also curbs surface evaporation. After each feeding, check the squeeze test and add dry bedding or lightly aerate if it’s too wet. If water pools, improve drainage by adding a thin layer of newspaper at the bottom.
| Action | Tool | Frequency |
|---|---|---|
| Check moisture | Squeeze test | Every feed |
| Add dry bedding | Shredded newspaper | As needed |
| Improve drainage | Layer of newspaper | Monthly |
| Cover with blanket | Damp hessian | Nightly |
| Aerate bedding | Small fork | Weekly |
| Remove excess liquid | Absorbent pad | When pooling |
Frequently Asked Questions
What Are the 5 Mistakes That People Commonly Make When Composting With Worms?
You overfeed, let it dry or soggy, ignore aeration, add meat or citrus, and expose the bin to extreme light or temperature—each mistake kills worms and stalls compost.
How to Set up a Worm Farm Step by Step?
You start by choosing a shallow container, line it with damp newspaper, add shredded cardboard or coconut coir, introduce Red Wiggler worms, sprinkle a pound of castings, then place a thin kitchen‑waste layer and keep moisture steady.
What Do Worms Hate the Most?
You worms hate soggy, rotting food, overfeeding, and bright light. They also despise citrus, onion scraps, and crowded, poorly aerated bins. Keep moisture around 80%, provide shade, and avoid these irritants.
Can Coffee Grounds Go in Worm Compost?
Yes, you can add coffee grounds, but mix them lightly into the bedding, keep them moderate, and balance with plenty of carbon material. Bury them to avoid compaction, acidity, and fruit‑fly issues.
In Summary
You’ve got everything you need to turn a sunny sill into a thriving worm farm. Pick the right bin, prep the bedding, balance moisture and pH, then welcome your red wigglers. Feed them wisely, harvest the rich castings, and troubleshoot any odor or pest hiccups. As you scale up, keep the environment stable year‑round, and watch your garden‑grade compost grow effortlessly. Enjoy the sustainable, low‑maintenance bounty right at your window.
Leave a Reply