
Use a compact, dual‑chamber rotating tumbler that fits your balcony rail and lets you start a fresh batch while the first finishes. Choose a BPA‑free recycled‑plastic model with a sealed lid, charcoal filter, and one‑hand sliding doors for easy loading. Keep a 3:1 brown‑to‑green ratio, chop scraps small, and turn the drum three to five times a week to boost aeration without odors. Position it in a sunny, sheltered spot and use a kitchen‑scrap bin with a filter for seamless integration. Follow these steps and you’ll get fast, quiet, odor‑free compost while staying condo‑friendly.
Why a Compact Rotating Compost Is Ideal for Condos
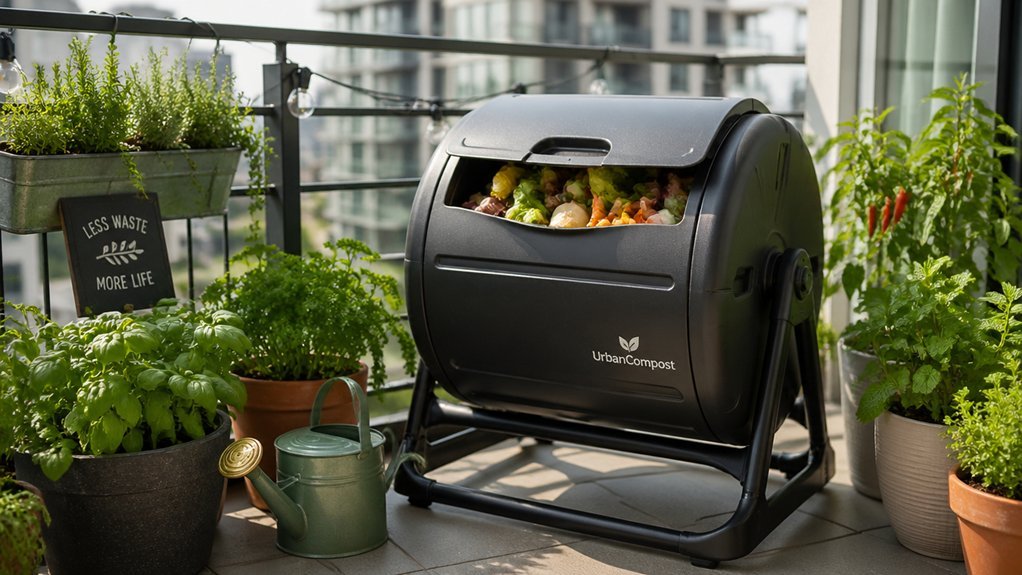
Why settle for a bulky compost bin when a compact rotating tumbler fits perfectly into condo life? You’ll love the dual‑chamber tumbler because it lets you start a fresh batch in the second chamber while the first one finishes, keeping the process continuous and odor‑free. Its sealed lid and elevated frame curb pests, making it truly condo‑friendly. A 37‑gallon model with a 28 × 30 × 36‑inch footprint delivers space‑efficient composting without crowding your balcony or kitchen. Rotate the drum a few times each week and maintain a 3:1 brown‑to‑green ratio to speed decomposition. Even if outdoor space is scarce, the compact design offers the perfect balance of size, ease, and speed for urban living. This approach aligns with practical, year‑round composting guidance that emphasizes container quality and odor control for compact living spaces odor control.
Identify Core Features of a Condo‑Friendly Rotating Tumbler
Looking for a compost tumbler that fits a condo balcony without sacrificing performance? You need a compact, dual‑chamber design that lets you start a fresh batch while the first finishes, plus one‑handed sliding doors for easy access. Choose BPA‑free recycled plastic for durability, and make sure the unit offers built‑in pest and odor control—sealed lids, aeration vents, or charcoal filters keep smells and critters at bay. Aim for around 37 gallons capacity, and a manual crank that you can turn without heavy lifting. Maintenance should be simple: removable parts, quick‑clean surfaces, and no electric hookups. A reliable condo solution also benefits from a design that minimizes weight when full and incorporates a stay‑cool exterior to reduce heat transfer to balcony surfaces. Condo-friendly design principles help ensure safe, compliant placement on tight outdoor spaces.
Choose the Right Small‑Balcony Rotating Tumbler
After pinpointing the key features of a condo‑friendly rotating tumbler, the next step is picking the right small‑balcony model.
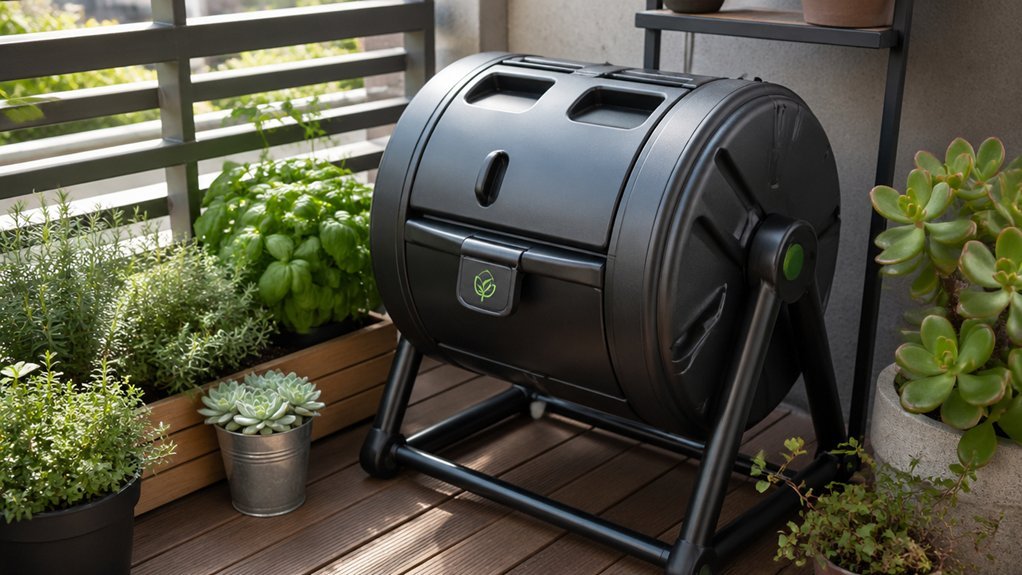
Look for a compact compost tumbler that fits your balcony footprint—usually 12‑18 inches in diameter and under 30 lb.
Choose a unit with a sturdy, recycled‑plastic body, a secure lid, and a sliding access door so you can turn it with one hand.
A sunny or semi‑sunny spot speeds decomposition, so position it where it catches light.
Prioritize odor control: a tight‑sealing lid and vent holes prevent smells from drifting onto neighboring units.
Avoid open‑design bins, which invite pests and odors.
With these specs, you’ll keep your balcony tidy while turning waste into nutrient‑rich soil.
add-on venting features can further help maintain a calm, odor‑free balcony environment by enhancing air exchanges without exposing nearby neighbors to smells.
FCMP Dual‑Chamber Tumbler: Space‑Saving Benefits
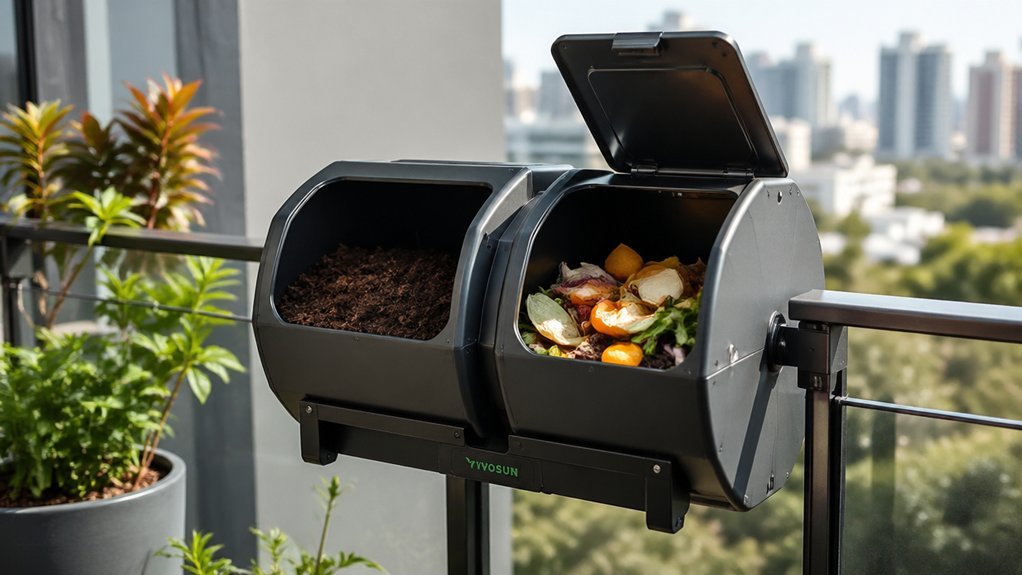
You’ll love how the compact dual‑chamber design lets you keep one batch turning while the other finishes, saving precious balcony space. The unit also employs dual activated carbon filters to help manage odors during continuous use odor control.
Compact Dual‑Chamber Design
The FCMP Dual‑Chamber Tumbler’s compact design lets you fit a full compost system into a condo’s limited space without sacrificing functionality. Its dual‑chamber layout separates active decomposition from finished material, so you can keep composting continuously while one chamber finishes. The 37‑gallon unit measures 28 × 30 × 36 inches, making it patio‑friendly and easy to tuck into a balcony or tiny kitchen nook. BPA‑free, UV‑inhibited recycled plastic and a steel frame keep it lightweight yet sturdy. Multiple aeration holes control odor and pests, and the manual rotation eliminates noisy motors, preserving a peaceful condo environment.
| Feature | Size | Benefit |
|---|---|---|
| Dual‑chamber | 28 × 30 × 36 in | Continuous batching |
| Capacity | 37 gal | Holds enough material |
| Material | BPA‑free recycled plastic | Safe, durable |
| Frame | Steel | Stable on balconies |
| Aeration | Multiple holes | Low odor, pest control |
One‑Hand Sliding Access
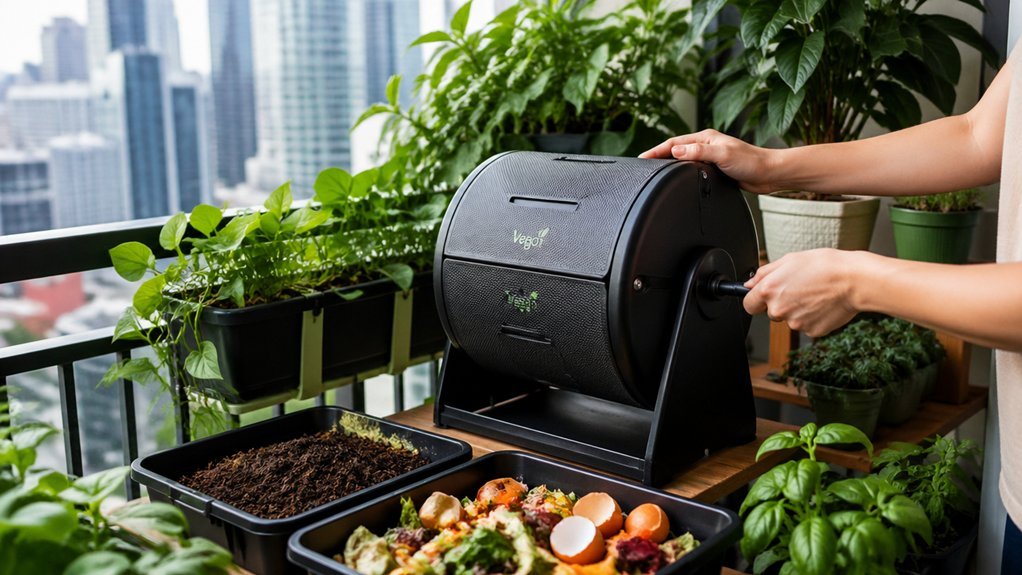
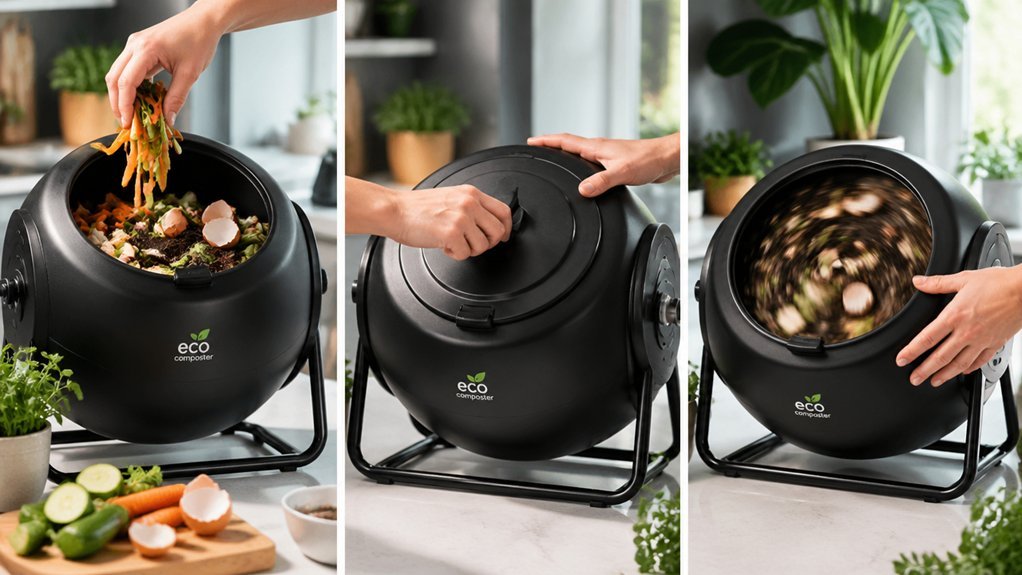
Ever wondered how easy composting can be on a balcony? With the FCMP Dual‑Chamber Tumbler, you get one‑hand access that makes loading and turning a breeze. The sliding lids glide open with a simple push, letting you drop kitchen scraps into the upper chamber without juggling tools or balancing a lid. Because the lids are positioned on both chambers, you can flip the tumbler, reach in, and stir the material using only one hand—perfect for tight condo balconies where space and convenience matter.
The BPA‑free, UV‑inhibited recycled plastic and steel frame keep the unit sturdy yet compact, supporting true condo‑friendly composting while you stay in control of every batch.
Step‑by‑Step Setup of a Two‑Chamber Tumbler on a Balcony Rail
Wondering how to fit a two‑chamber compost tumbler onto a balcony rail without compromising safety or aesthetics? You’ll also want to ensure the bags you use for scraps are compatible with compact, condo-friendly setups that minimize odor and leaks eco-friendly waste bags.
How to Keep Odor & Pests Under Control on Your Balcony
You’ll want to seal the tumbler tightly while still allowing a few small aeration holes to keep airflow steady, so odors don’t build up. A secure lid with an odor‑blocking gasket or a charcoal‑filter insert will keep pests out and smells contained. Proper use of rinsed coconut coir bedding can help maintain steady moisture and aeration in the tumbler, supporting healthier composting conditions neutral pH. Place the unit in a sunny, sheltered spot on a level rail, away from direct wind drafts that could disturb the seal.
Seal Aeration Techniques
Can a simple sealable tumbler keep balcony compost odor‑free and pest‑proof? You’ll find that a tight seal on your tumbler creates an airtight chamber, forcing microbes to work efficiently while keeping smells locked inside. To boost aeration without opening the lid, rotate the tumbler a few times each week; the internal gears stir the mix, delivering oxygen to every bite‑size piece. Position the unit where sunlight filters through but direct heat won’t warp the plastic. Adding a charcoal filter or built‑in vent fine‑tunes airflow, letting fresh air in while still maintaining that essential seal. Odor control considerations from compact bin designs emphasize using airtight lids and optional carbon filters to help manage smells in small spaces.
Secure Lid Sealing
How can you keep balcony compost odor‑free and pest‑proof? Choose a compact, enclosed tumbler with a secure lid that seals tightly after each addition. A lid equipped with an odor‑control carbon filter traps smells while you rotate the bin, preventing escape onto the balcony.
Opt for a sliding or pop‑up lid that lets you add scraps one‑handedly without exposing the interior to outdoor air, which keeps pests out and odors down. Dual‑chamber designs let you turn the compost without opening the container, maintaining a sealed environment.
Place the sealed system on a level, shaded spot away from living areas, and you’ll enjoy a clean, pest‑free balcony while your compost breaks down efficiently.
Strategic Placement Choices
When you position your compost tumbler on a balcony, aim for a sunny or dappled spot that receives a few hours of light each day but stays out of direct, scorching rays that could warp the plastic. Good balcony placement balances warmth with protection, letting the tumbler stay breathable while keeping odors and pests at bay. Keep the lid sealed and rotate regularly to maintain aeration, and watch the browns-to-greens ratio—about 3:1—to avoid excess moisture that fuels smells. Smaller scraps and a carbon‑rich top layer further control humidity, turning your compact bin into a low‑impact, odor‑free compost hub.
- Place the tumbler where wind can circulate but rain won’t splash it.
- Use a dual‑chamber design with a tight‑fitting lid for pest deterrence.
- Layer browns over greens and chop waste to keep the ratio steady.
What Materials to Add to a Condo Rotating Compost
What should you toss into your condo’s rotating compost to keep it thriving? Start with a solid base of garden soil or finished compost to inoculate the tumbler and jump‑start microbes.
Start with garden soil or finished compost to inoculate the tumbler and jump‑start microbes.
Then add a mix of browns‑to‑greens at roughly 3:1—think shredded newspaper, cardboard, and dry leaves for browns, and fresh vegetable scraps, fruit peels, and coffee grounds for greens. Chop scraps into bite‑size pieces; smaller bits tumble faster and release nutrients quicker.
Avoid meat, dairy, and cooked leftovers—they attract pests and cause odors in a condo setting.
If you have a dual‑chamber tumbler, load each side separately to keep the balance steady and rotate regularly for aeration.
This blend keeps your indoor compost healthy and odor‑free.
Balancing Green‑Brown Ratios for Fast Decomposition
Ever wondered why your rotating compost feels sluggish? You’re probably missing the right green‑to‑brown balance. Aim for three parts browns to one part greens to keep carbon and nitrogen in sync, which fuels microbes and speeds decomposition. Chop everything into bite‑size pieces; smaller fragments let air flow, boosting aeration and heat buildup. If the mix feels soggy, toss in extra shredded paper or cardboard—those browns soak up moisture and restore the ratio. Keep an eye on texture: a moist, crumbly feel means you’re on track, while a wet, clumped pile signals too many greens.
- Use 3 : 1 browns‑to‑greens ratio
- Chop materials for better aeration
- Add browns when moisture spikes
With this rhythm, your tumbler will heat up, break down waste faster, and deliver ready‑to‑use compost in 6–8 weeks under warm conditions.
Turning Frequency for Small Condo Compost Tumblers
A proper green‑to‑brown mix sets the stage, but keeping that mix aerated is where turning frequency matters.
In a condo‑friendly tumbler you’ll want to turn the drum a few times each week—usually three to five rotations—to supply oxygen without cooling the pile.
If you over‑turn, you’ll lose heat and slow the process; under‑turning leaves anaerobic pockets and odor.
Choose a model with a hand crank or easy‑access door so those weekly turns stay painless.
Dual‑chamber designs let you practice continuous batching, letting one batch finish while you start the next, keeping the system busy without extra space.
With regular turning, expect finished compost in one to two months, faster than passive bins yet still manageable on a balcony or kitchen corner.
Drainage & Moisture Management in Compact Rotating Bins
How can you keep a compact rotating bin from turning into a soggy mess? First, place the tumbler on a level surface so drainage works naturally. Check that the built‑in drain holes or tray aren’t clogged; empty any leachate daily to avoid waterlogging. Balance wet greens with dry browns—shredded paper, cardboard, or sawdust—to keep moisture at a safe level and preserve aeration. Rotate evenly after each addition, especially in dual‑chamber models, so moisture spreads and no spot stays saturated.
Place the tumbler level, keep drains clear, balance greens with dry browns, and rotate regularly for even moisture.
- Keep the bin upright and level for optimal drainage.
- Add dry browns to maintain a 3:1 browns‑to‑greens ratio and prevent excess moisture.
- Rotate consistently to promote aeration and even moisture distribution.
Integrating a Kitchen Scraps Bin (E.G., Bamboozle) With Your Tumbler
Wondering how to keep your condo composting system tidy and odor‑free? Pair a kitchen scraps bin like the Bamboozle with a rotating tumbler to separate collection from active composting. The bin’s charcoal‑filter lid handles daily fruit, veg, and coffee grounds, giving you immediate odor reduction while you live in a small space. When the bin fills, dump its contents into the tumbler’s dual‑chamber compartment; the tumbler’s constant aeration speeds decomposition to 1–2 months. Keep the flow steady by emptying the bin every day, preventing mess and pest attraction. Choose a compact bin and a small, condo‑friendly tumbler to fit on a balcony or utility shelf without crowding your living area. This workflow maintains cleanliness, maximizes efficiency, and keeps smells at bay.
Seasonal Adjustments for Condo Rotating Composters
You’ll want to keep your tumbler’s temperature steady by positioning it near a sunny window or using a small heater in winter, while opening vents just enough in summer to boost airflow without drying out the mix.
Adjust the ventilation schedule each season—more frequent openings when it’s warm, fewer when it’s cool—to maintain oxygen levels and prevent mold.
Finally, seal any gaps and use tight‑fitting lids to keep pests out, especially during colder months when insects seek warmth.
Seasonal Temperature Management
Ever wonder how to keep your condo tumbler humming through winter and summer? You can control compost temperature by making seasonal adjustments that respect your limited space. In winter, place the tumbler where sunlight streams, add extra bulking browns, and keep the moisture level steady to avoid a cold, sluggish pile. In summer, turn more often, feed fresh greens, and watch the airflow/moisture balance so heat doesn’t spike. The goal is a consistent, odor‑free process that stays within your apartment’s constraints.
- Position near a sunny window in cold months.
- Add extra dry browns to boost insulation and airflow.
- Turn more frequently and add greens during warm periods.
Ventilation and Airflow Adjustments
Keeping your compost humming year‑round means mastering airflow as much as temperature. In a condo, a dual‑chamber tumbler lets you add fresh scraps to one side while the other finishes, keeping ventilation steady and aeration constant. In summer, turn the drum more often to boost airflow and prevent heat buildup. In winter, add a little extra dry brown material—shredded paper or cardboard—to keep the mix from compacting and to preserve oxygen pathways. Choose open or mesh components only if your building permits them; enclosed units trap moisture and choke airflow. Position the tumbler near a sunny window or a shaded spot as needed, and watch moisture levels, adjusting browns to maintain crisp, oxygen‑rich compost.
Pest Prevention Strategies
Wonder how you can keep pests out while your condo tumbler works year‑round? Use a dual‑chamber tumbler to batch fresh material in one side while the other finishes, so you never leave open scraps that attract insects. Keep the unit sealed, choose a model with odor‑control lids or charcoal filters, and turn the drum a few times each week to maintain aeration. Balance dry browns and greens at roughly 3:1, and avoid meat or dairy in open designs. Position the tumbler in a sunny or lightly shaded spot to speed decomposition and reduce odor buildup, which further deters pests.
- Seal all openings and use odor‑control features.
- Rotate regularly to keep the interior aerated.
- Stick to a 3:1 brown‑to‑green ratio and exclude animal‑based scraps.
Harvesting and Storing Finished Compost Indoors
How do you keep your finished compost fresh and odor‑free indoors? Start by transferring the material from your Bokashi Bucket to a sealed container. Use a lid with a charcoal filter, like the Bamboozle bin, to provide odor control. Scoop the finished compost into a breathable tote, then store it in a cool, dark pantry or under the sink. If you have a Reencle Home Composter, empty the drawer daily and keep the output sealed until you’re ready to use it. For longer storage, move the compost to a larger outdoor bin or spread it in a pot immediately; this prevents indoor accumulation and keeps the scent at bay. Always label the container to avoid confusion.
Frequently Asked Questions
Are Rotating Composters Any Good?
Yes, rotating composters work well for you if you have limited space and can turn them a few times weekly; they speed up decay, reduce odors, and keep pests contained, making condo composting practical.
Which Method Is Best for Composting in Small Apartments?
You should choose a compact dual‑chamber tumbler; it fits small spaces, lets you rotate batches quickly, contains odor, and requires minimal maintenance, making it the best condo‑friendly compost method.
Which Is Better, Lomi or Reencle?
You’ll find Reencle better for condo living; its motion‑sensor lid, multiple settings, and larger capacity give you more control over odors and processing speed, while Lomi feels tighter and less versatile.
Do HOAS Allow Composting?
You should check your HOA’s rules first; many allow indoor or sealed balcony composters, but some forbid any bins or require specific containers. Review covenants, then choose a compliant, odor‑controlled tumbler.
In Summary
Embrace the convenience of a compact, dual‑chamber tumbler on your balcony and turn kitchen scraps into rich, odor‑free compost. By managing moisture, rotating regularly, and adjusting for season, you’ll harvest nutrient‑dense soil without cluttering your condo. Keep the system simple, integrate a kitchen bin, and store the finished compost indoors for thriving houseplants or garden projects. Enjoy sustainable living right at home.

Leave a Reply