
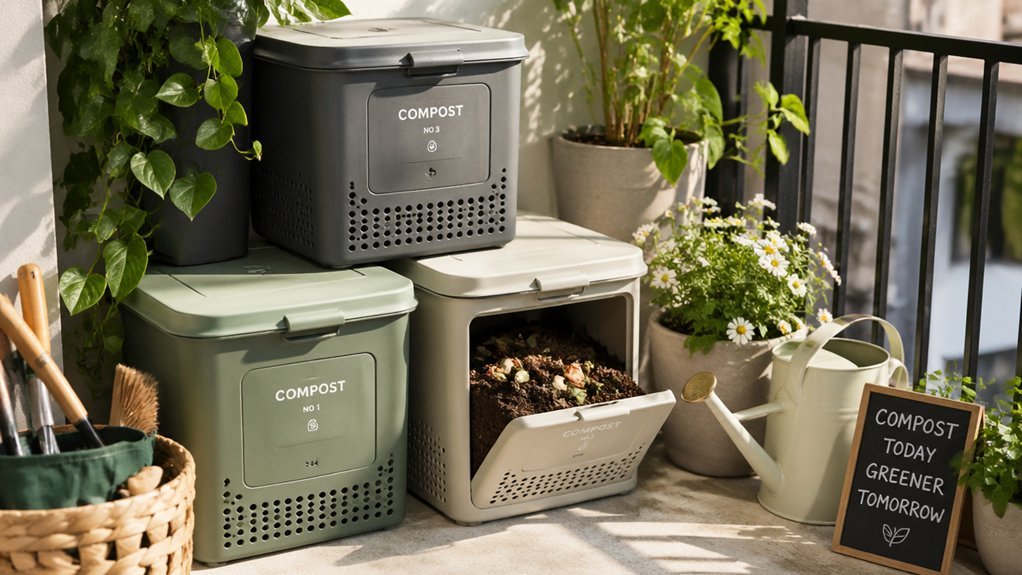
You can fit three compost bins on any balcony by picking one of five smart layouts that balance space, mobility, and airflow. A compact side‑by‑side pallet or wire‑panel set lets you stack bins tightly while keeping drainage and pest‑proofing in check. A modular frame lets you reconfigure bins for sunlight or wind changes, with removable panels for easy transfers. Each layout supports a three‑stage process—from fresh scraps, to aerated breakdown, to finished compost—so you stay in control. Keep going and you’ll discover the exact steps to build and maintain your chosen system.
Select the Ideal Balcony Compost Layout
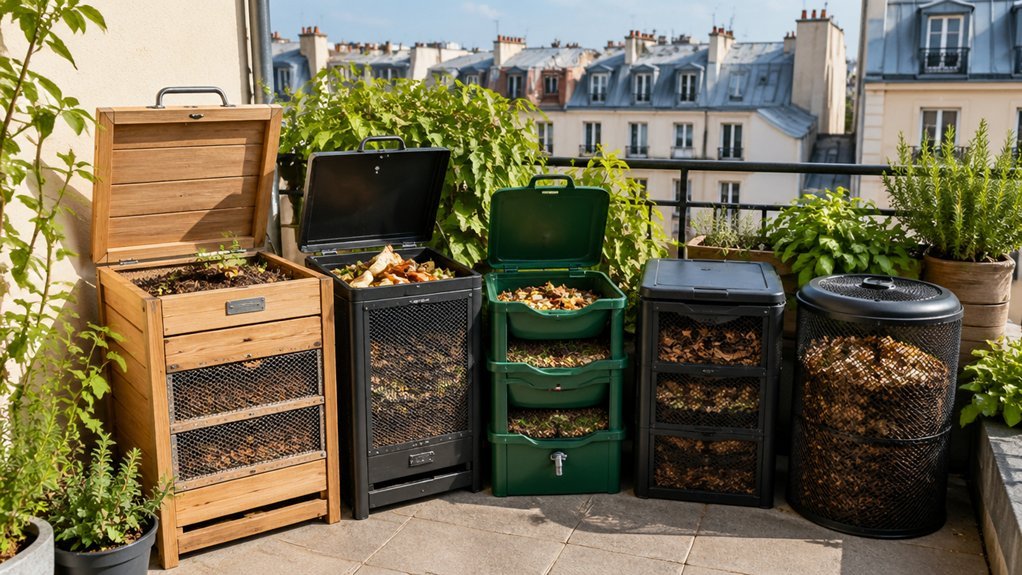
Where do you start when choosing a balcony compost layout? You assess space, then pick a multi-bin composting system that fits. A three-bin layout works well: Bin 1 takes fresh scraps, keeping a browns‑to‑greens balance of roughly 2–3 : 1; Bin 2 holds breaking‑down material, where you aerate with a pitchfork or aerator; Bin 3 cures the finished compost.
For compact balcony systems, consider pallet‑based bins or wire‑panel bins that stack neatly and stay level. Ensure the ground is stable and well‑drained to prevent wobble.
Pest prevention is essential on balconies so seal openings and use mesh to guard against pests. If you later need to move material to curbside composting, the three‑stage flow makes transfer straightforward and keeps your balcony tidy.
Odor control is also a practical consideration, as tight spaces benefit from airtight lids or filters to minimize smells during operation.
Compare Space‑Saving vs. Mobile Layouts
After picking a three‑bin system that fits your balcony, you’ll decide whether to squeeze the bins into the smallest possible footprint or opt for a setup you can rearrange on the fly.
A space‑saving layout tucks the three‑bin system side‑by‑side, using four‑sided airflow insulation and tight edge sealing to keep moisture control tight while preserving a compact profile.
A mobile layout leans on modular design, lightweight materials, and removable panels, letting you shift bins for easier bin‑to‑bin transfer and adapt to changing sunlight or wind.
Both approaches support continuous balcony composting, but they differ in flexibility, weight, and how you manage airflow and access.
- Tight footprint with airflow insulation
- Modular design for quick reconfiguration
- Lightweight materials for easy relocation
- Enhanced accessibility and moisture control balcony composting efficiency
Build Your Chosen Balcony Compost Layout
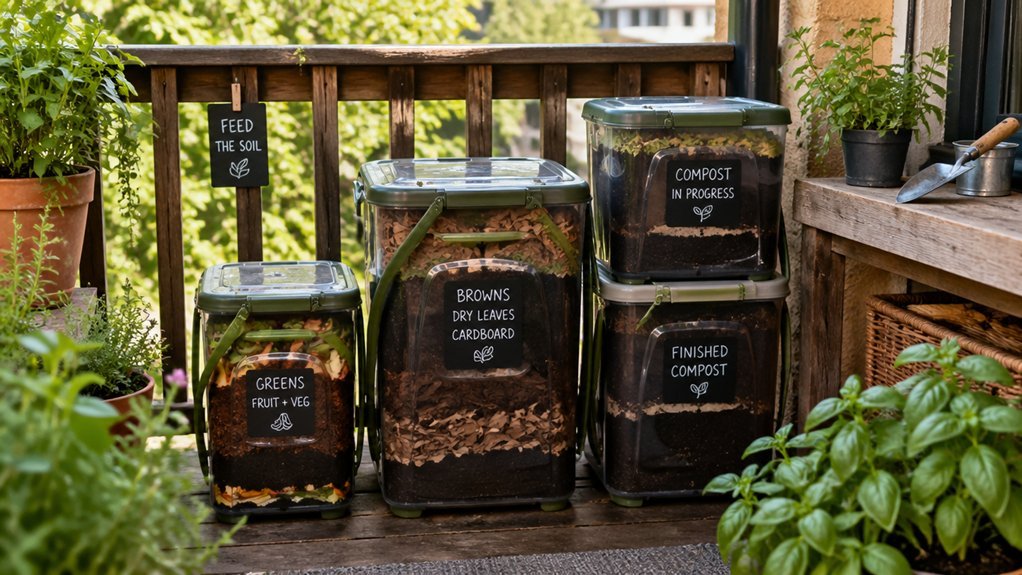
Start by arranging the three bins according to the layout you chose—whether you’re tucking them side‑by‑side for a tight footprint or setting them on lightweight, modular frames for easy reconfiguration. Fill Bin 1 with a 2:1 brown-to-green mix of chopped kitchen scraps and yard waste, then monitor the temperature as it climbs to 130°F–150°F. When it peaks, turning the material into Bin 2 while leaving a thin layer behind to seed fresh inputs and keep airflow high. Aerate Bin 2 with a pitchfork or aerator; this speeds decomposition and lets you add a booster like Super Hot Starter if you like. Finally, move the semi‑finished matter into Bin 3 for the curing stage, where it matures into dark, crumbly finished compost ready for your balcony garden temperature optimization to maintain efficient breakdown and prevent odor.
Maintain and Troubleshoot a Balcony Compost System
Ever wondered how to keep your three‑bin balcony compost humming smoothly? You’ll maintain the three-bin system by treating Bin 1 as fresh input, watching temperature monitoring for the 130‑150 °F peak, then moving semi‑cooked material to Bin 2 and finally to Bin 3 for final curing. Keep greens and browns balance in check, aim for a damp sponge feel, and practice aeration/turning every few weeks. Temperature monitoring: Move material when Bin 1 hits 130‑150 °F. Aeration/turning: Use a pitchfork or aerator if Bin 2 feels wet or clumped. Moisture management: Add dry browns to restore balance; keep the mix damp, not soggy. Pest prevention: Secure hardware cloth, close lids, and seal gaps. These steps keep your balcony composting efficient, odor‑free, and ready for the next batch. Ventilation safety
FAQ: Common Balcony Compost Questions

Keeping your three‑bin balcony compost humming smoothly sets the stage for the most common questions you’ll encounter. You’ll wonder if balcony composting can fit on a narrow rail; a compact three‑design with side‑by‑side bins does. Front‑access panels let you add scraps without climbing, and pest‑proofing with hardware cloth keeps critters out. Level foundations matter—use shims or a sturdy tray to prevent wobble on uneven balconies.
How do you balance greens and browns? Aim for a 1:2 ratio, and keep moisture like a damp sponge; add water or dry leaves as needed.
Rotating compost moves material from Bin 1 to Bin 2 to Bin 3 every 6–12 months, while compost maturation occurs in the final bins. Regular turning and a booster starter speed up the process.
To ensure safe use of finished product, allow for proper harvesting and tea extraction windows, and maintain a 1:10 dilution when applying compost tea to prevent root burn. 1:10 dilution
Frequently Asked Questions
Can You Have a Compost Bin on a Balcony?
Yes, you can place a compost bin on a balcony; just choose a compact, ventilated container, keep it balanced with scraps and yard waste, turn it weekly, and monitor moisture to avoid drips.
How to Compost With 3 Bins?
You start by filling Bin 1, keep it at 130‑150°F, then move the hot material to Bin 2 for aeration and boosters; once it looks like compost, transfer it to Bin 3 to cure before use.
What Three Items Should Not Be Placed in a Compost Pile?
You shouldn’t add meat, dairy, or greasy foods; avoid large woody branches; and keep pet waste (unless properly processed manure) out of your compost pile.
How to Use Two Compost Bins?
Start by filling Bin 1 with fresh scraps, then once its temperature peaks, transfer the material to Bin 2, aerate it, and keep adding new waste only to Bin 1 for continuous composting.
In Summary
Pick the layout that fits your space, habits, and budget, then set it up and keep an eye on moisture, airflow, and temperature. With a bit of routine—stirring, feeding, and troubleshooting—you’ll turn balcony waste into rich compost, boost your garden, and reduce landfill waste. Enjoy the satisfaction of a thriving, eco‑friendly balcony garden.


Leave a Reply