
Facing north keeps your balcony compost cooler and more stable, which slows down temperature swings and reduces odor. The shade limits direct sun, so the pile stays moist longer and microbes stay active without drying out. A north‑facing spot also catches steady breezes, improving airflow and gas exchange while protecting the bin from harsh winds. This balance of cool, moist, and well‑ventilated conditions speeds decomposition and keeps smells down, and if you keep going you’ll discover the exact setup steps.
How to Set Up a North‑Facing Balcony Compost
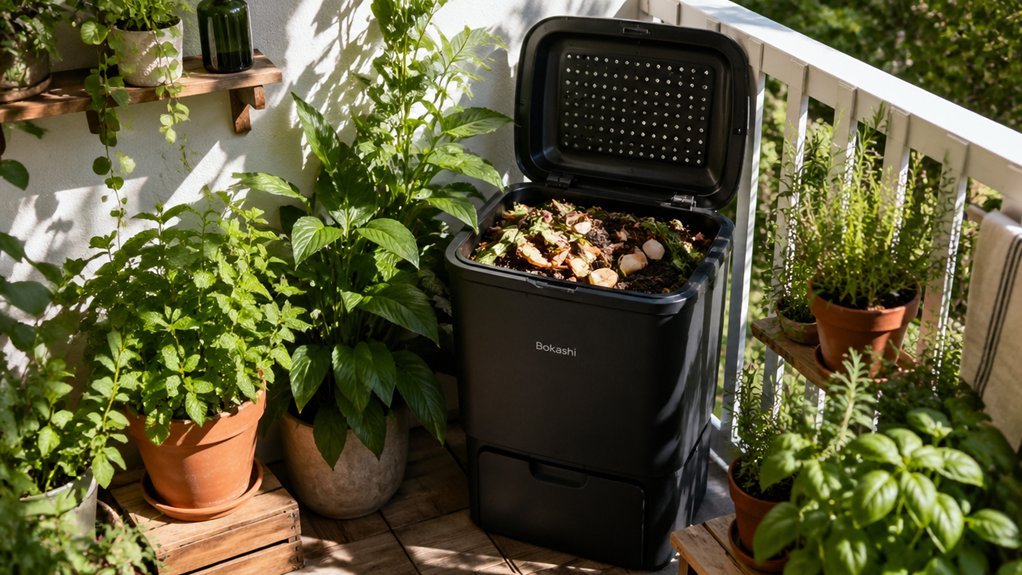
Ever wondered how to turn your north‑facing balcony into a thriving compost hub? Start by choosing a compact, enclosed bin or a small worm farm that fits your rail and keeps odors in check. Position it away from wind gusts and heat sources so the cooler, shaded air stays steady. Layer dry browns—shredded paper, leaves—with kitchen greens in equal thickness, aiming for a balanced carbon‑to‑nitrogen mix that fuels microbial activity despite limited light. Add a handful of red wigglers if you opt for vermicomposting; they thrive in the cooler, moist environment you’ll maintain. Keep the pile moist but not soggy, sprinkling water when it feels dry. Turn the contents gently every week to aerate and speed decomposition, and watch the composting process turn waste into rich soil for your balcony garden. Regularly monitor for odors and adjust moisture or aeration as needed, using compact aeration options to keep the system running efficiently Compact Aeration.
Why North‑Facing Compost Keeps Moisture Stable
Why does north‑facing compost stay moist longer? You’ll notice that a north‑facing balcony gets less direct sunlight, so evaporation slows and the compost retains water throughout the day. The cooler temperatures on a north‑facing deck prevent rapid top‑soil drying, letting you stretch the time between waterings. Removable inner pails and odor control features in modern bins can also help maintain moisture by keeping the contents sealed between uses inner pail and reducing odor-driven disturbances that might otherwise dry out surface layers.
Why Cooler Temperatures Keep Your Compost Healthy
You’ll notice that cooler temps slow microbial activity, which keeps the pile from overheating and stinking.
The lower heat also means less moisture evaporates, so you won’t have to water as often.
Slower Microbial Activity
Curious how a cooler north‑facing balcony can actually benefit your compost? On a North-facing balcony, lower temperatures slow microbial metabolism, which means decomposition proceeds gently. This slower activity prevents rapid heat spikes that can choke oxygen, keeping aerobic conditions stable and avoiding anaerobic pockets. Sensitive microbes that break down lignin and cellulose survive longer, turning tough plant matter into valuable humus over months instead of weeks. You’ll notice a steadier release of nutrients, giving your garden a consistent feed. Because the process is slower, you’ll need to aerate more often and watch moisture, but the trade‑off is a healthier, more balanced compost that retains its microbial diversity. Aeration helps maintain sufficient oxygen levels and supports steady decomposition under cooler conditions.
Reduced Moisture Loss
The slower microbial activity you just read about also means the pile stays cooler, which cuts evaporation dramatically. On a north‑facing balcony, the milder temperature keeps the compost’s moisture loss low, so you won’t need to water as often. Cooler air also reduces wind‑driven drying, letting the surface stay damp longer. Because the pile stays consistently moist, small batches and seedlings nearby stay hydrated and healthy. You’ll notice a steadier nutrient release, feeding your plants without the spikes that hot, dry spots cause. In practice, this means fewer trips to the tap, less effort monitoring soggy patches, and a more reliable compost that supports your balcony garden all season. Activated-charcoal filter further helps maintain odor control in compact spaces, ensuring a fresher balcony environment while you manage your composting routine.
Less Heat‑Induced Odor
Why does a cooler balcony keep your compost from stinking? A north‑facing spot stays shade, so microbial activity slows and heat‑induced odors drop. You’ll notice less ammonia and sulfurous smells because lower temperatures curb volatilization of those compounds. Additionally, a stable humidity level helps prevent moisture fluctuations that can accelerate odor release soft-grip handle in some bins and keep the container easier to manage.
Choose the Right Bin for a North‑Facing Balcony Compost
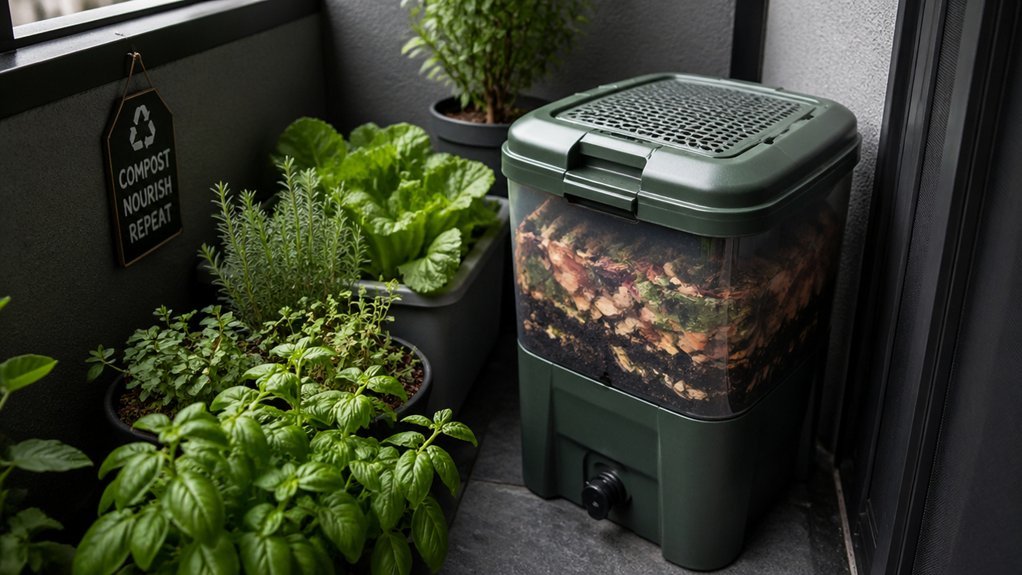
Looking for a bin that thrives on a north‑facing balcony? You need a container that locks in moisture, curbs odor, and fits a compact, wind‑prone space. Choose a sealed or vented tumbler that lets you turn the mix without losing heat. Opt for a vertical or stacked system to maximize airflow and keep your balcony gardening area tidy. Position the bin in a semi‑sheltered spot, shielded from gusts but still exposed enough for steady temperature. Sealed tumbler options help manage moisture and odor in high‑wind settings secure enclosure and can be designed to minimize heat loss while you mix and rotate your compost.
Match Compost Layers to Shaded Light Conditions
You’ll start by placing light‑tolerant materials on top, then mix in moisture‑retaining additives to keep the shade‑damp environment balanced. A practical approach is to manage moisture with measured airflow and use odor‑control strategies to sustain a healthy bin atmosphere, especially in low‑light balcony conditions. moisture control
Layer Light‑Tolerant Materials
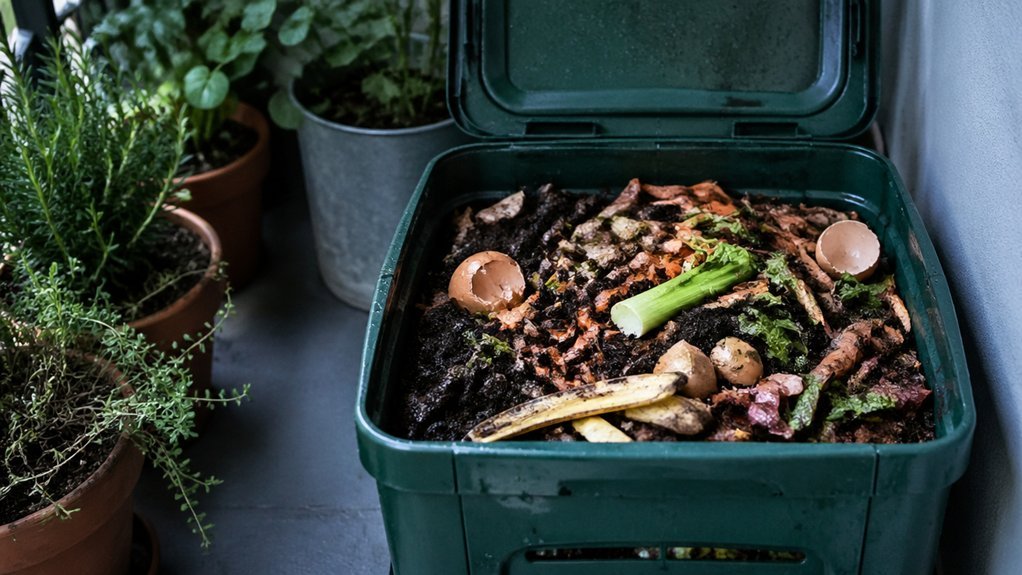
Ever wondered how to make a north‑facing balcony compost thrive in shade? By layering compost materials you can tailor each stratum to the limited light and cooler temperatures. Put the lightest, fast‑decomposing matter on top so it catches the faint sun, then add denser, heat‑retaining layers beneath to keep microbes active. Mix in leaf mold or aged manure for nutrients while keeping the surface airy enough to reflect minimal light. Finish with a thin, breathable mulch that regulates moisture and temperature.
- Top: shredded newspaper, straw – quick‑release carbon.
- Mid‑layer: leaf mold, aged manure – nutrient‑rich, dense.
- Lower: coarse wood chips, cardboard – structural, heat‑holding.
- Surface: fine mulch – moisture‑balancing, airy.
Moisture‑Retaining Additives
Wondering how to keep your north‑facing balcony compost moist without drowning it? Start with a 2–3 cm top mulch of pea straw; it cuts evaporation while letting rain seep through. Build the bulk of the mix with 60 % compost material and 40 % soil, then blend in moisture-retaining additives like perlite or coconut coir directly into the root zone. These additives soak up water and release it slowly, keeping the blend consistently damp but never soggy.
Because north‑facing pots receive less light, deepen the compost layer to store more moisture and buffer the cooler, shadier environment. Test daily with a finger: if it feels dry an inch down, add a splash of water; if it sticks together, wait before watering again. This balanced approach lets you maintain a thriving, moisture‑rich compost despite low light.
Shade‑Friendly Nutrient Mix
How can you keep a north‑facing balcony compost productive despite limited light? Focus on a shade‑friendly nutrient mix that holds moisture, releases nutrients slowly, and stays airy. Start with a 2‑3‑inch base of worm castings and well‑rotted compost to boost microbes. Add a light, well‑draining potting layer on top to prevent compaction. Mulch with pea straw or shredded bark to cut evaporation and keep roots cool. Choose leafy greens and herbs that thrive in shade, avoiding fruit‑heavy crops.
- Thick organic base (2‑3 in)
- Light potting top layer
- Mulch cover (pea straw/shredded bark)
- Shade‑tolerant plant selection (spinach, lettuce, parsley, cilantro)
Position Your Compost Bin for Optimal Airflow on a North‑Facing Balcony
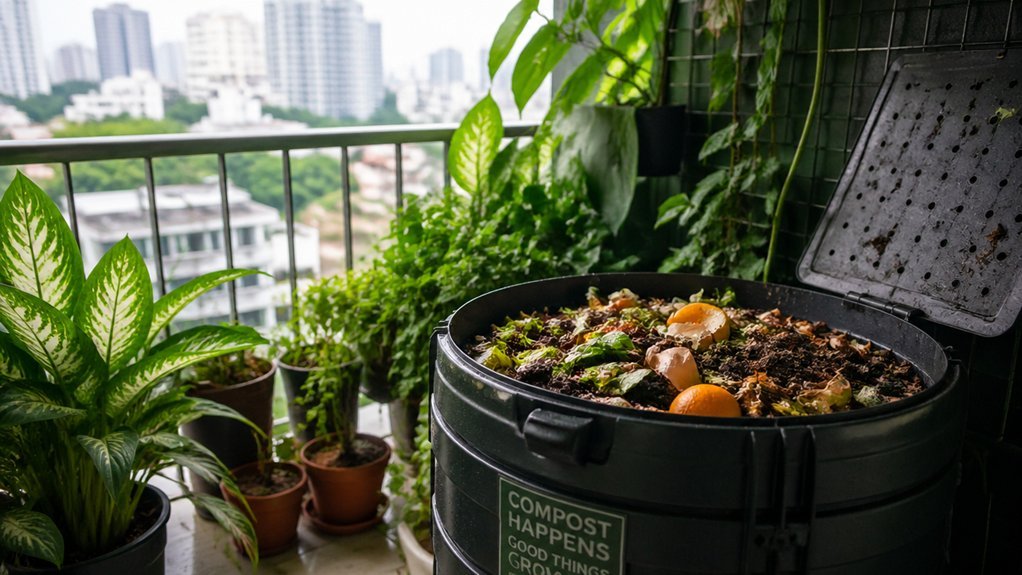
Looking for the best airflow on a north‑facing balcony? Position your compost bin where the wind blows strongest, away from walls and dense plantings that trap stagnant air. Elevate the bin on a stable stand or a few bricks so air can circulate underneath, preventing a soggy base. Keep the lid loosely fitted or add vent holes to promote gas exchange while keeping pests out. Choose a spot that offers partial shade and steady breezes, which balances moisture and temperature for consistent microbial activity. By maximizing airflow, you speed up decomposition, reduce odors, and keep your balcony compost thriving without overheating.
Build Light‑Filtering DIY Windbreaks for Compost
You can hang light‑filtering mesh screens that let sunlight reach the compost while cutting wind gusts, and you’ll be able to tilt the panels to match the prevailing breeze direction.
Choose low‑maintenance materials like UV‑stable fabric or rust‑proof metal so the windbreak stays sturdy without constant upkeep.
If you have space, a compact, heavy‑leaf plant such as rosemary can double as a living windbreak, adding moisture retention without sacrificing airflow.
Light‑Filtering Mesh Screens
Light‑filtering mesh screens cut wind speed by 20‑40 % while still letting 60‑80 % of ambient light reach your balcony compost, keeping moisture and temperature more stable. You’ll notice steadier humidity because the screens act as a gentle windbreak, slowing evaporation without choking airflow. Secure them with rust‑proof ties or brackets, and choose a breathable mesh (0.5–1.0 mm aperture) so oxygen circulates and odors stay at bay. Pair the screens with hardy herbs like rosemary or boxwood for extra dampening and shade.
- Clip weather‑resistant straps to balcony railings.
- Stretch a 0.5 mm‑aperture mesh across the edges.
- Anchor corners with metal brackets.
- Plant wind‑tolerant shrubs nearby.
Adjustable Panel Angles
– After securing the mesh screens, you can boost control by adding adjustable panels that tilt 15‑30 degrees to let enough sunlight in while still breaking up wind. These balcony windbreaks act like miniature sails: when the sun peaks, you open the panels a bit more, and when gusts pick up, you close them to deflect air toward the bin’s top. The angle prevents soil blow‑off and cuts evaporation, keeping moisture steady for faster decomposition. Because the panels are lightweight and slatted, you can re‑angle them each season without tools, matching the sun’s path and prevailing breezes. This flexibility lets you maintain ideal light exposure while shielding the compost from harsh drafts.
Low‑Maintenance Materials Choices
A few sturdy mesh panels or slatted screens can turn a breezy balcony into a gentle, light‑filtered zone that still lets air circulate. When you choose low‑maintenance materials for windbreaks, prioritize durability and ease of installation. Pick rust‑proof aluminum or UV‑stabilized polycarbonate that won’t warp under sun or rain. Use snap‑fit brackets so you can swap panels without tools, and seal edges with silicone to keep moisture out. A simple, modular design lets you expand or reconfigure as your compost mat mat, and you:
. 1. Aluminum mesh panels, 2. Polycarbonate slatted screens, 3. Stainless‑steel snap brackets, 4. Silicone sealant. These choices keep wind speed low, moisture steady, and maintenance minimal.
Use Straw or Leaf Mulch as Natural Insulation for Compost
Ever wondered how to keep your balcony compost stable in fluctuating weather? You can add a thin Mulch blanket of straw or leaves to buffer temperature swings. Straw’s lightweight, airy structure insulates while letting air circulate, preventing odors and surface weeds.
Leaf mulch breaks down into organic matter, feeding microbes and enriching the pile. Aim for a 2‑3‑inch layer to keep moisture from evaporating too fast in windy conditions, yet avoid soggy buildup that invites mold. This natural insulation maintains a balanced moisture level, supports beneficial soil organisms, and keeps the compost active year‑round. By applying mulch thoughtfully, you’ll protect your north‑facing balcony compost without extra equipment.
Manage Rainfall and Drainage on a North‑Facing Balcony
Mulch keeps the compost’s temperature steady, but without good drainage a north‑facing balcony can quickly turn soggy. You’ll want containers that have plenty of holes and are made of non‑porous material, so moisture doesn’t seep into the floor. Elevate each pot on feet or a tray; this creates a gap for water to escape and lets air circulate around the roots. Use saucers with drainage holes and angle the pot bases so excess rain slides off instead of pooling. Pick a moisture‑retentive, shade‑tolerant mix and top it with pea straw to lock in just enough dampness without drowning the microbes.
Elevate porous, non‑porous pots on trays, angle saucers, and use moisture‑retentive, shade‑tolerant mix with pea straw.
- Choose pots with wide‑mouth drainage holes.
- Place pots on raised trays or bricks.
- Install sloped saucers that channel water away.
- Use a breathable, moisture‑holding potting mix.
Turn and Aerate Your North‑Facing Balcony Compost Properly
Turning and aerating your north‑facing balcony compost is essential for keeping microbes active and odors at bay. Because sunlight is limited, you must stir the pile regularly to boost ventilation and prevent anaerobic pockets. Mix the dry outer layer with the wetter core, adding a handful of shredded paper or cardboard to improve porosity. Use a bin with built‑in ventilation or drill small side holes for passive air exchange. Aim for a moisture level like a wrung‑out sponge—moist but not soggy. A quick turn every few days keeps the compost aerobic and smelling fresh.
| Action | Why it matters |
|---|---|
| Stir outer & inner layers | Balances moisture, avoids foul smells |
| Add dry bulking material | Increases airflow, improves structure |
| Use vented bin or holes | Enhances passive ventilation |
| Turn every few days | Maintains aerobic microbes in low‑light conditions |
Monitor Moisture Levels With Low‑Light Indicators
Because north‑facing balconies get barely any direct sun, you need moisture indicators that work reliably in dim light to keep your compost from drying out or becoming soggy. In low‑light conditions, choose indicators that react within 1–2 hours after watering so you can tweak your schedule before the soil dries or turns soggy. Check them at the same time each day; reduced light slows evaporation, masking moisture shifts. Opt for devices that track both soil moisture and root‑zone oxygen, preventing rot when humidity climbs. Pair the readings with a simple 2–3‑day watering plan tailored to your plant type and container size for steady moisture.
Moisture indicators that react within 1–2 hours, tracking soil and root‑zone oxygen for reliable low‑light compost care.
- LED‑lit moisture strips that glow when wet
- Color‑changing clay pellets showing moisture levels
- Digital probes with low‑light LCD displays
- Bioluminescent fungi that brighten in moist zones
Troubleshoot Common Issues in Shaded Compost Bins
What’s slowing your shaded compost? Low temperatures and dim light curb microbial activity, so decomposition drags. Check moisture: excess water creates anaerobic pockets, foul odors, and a compacted mass. Keep the mix balanced—mix equal parts brown (dry leaves, shredded cardboard) with green (kitchen scraps, fresh plant material) to maintain aeration and generate heat. Add a well‑draining, moisture‑retentive base like shredded cardboard or straw, and make sure your shaded compost bins have vents for airflow. Turn the pile every week to introduce oxygen and break up clumps, which speeds breakdown despite the shade. If the texture stays soggy, sprinkle dry browns and improve drainage. Regularly monitoring these factors will keep your compost healthy and moving toward crumbly, finished material.
Final Checklist: North‑Facing Balcony Compost Success
After fixing moisture and aeration in your shaded bin, it’s time to lock in the details that keep a north‑facing balcony compost thriving. Use a well‑drained, soil‑based mix, add energy‑efficient LED lights for occasional photosynthetic boost, and keep the pile in a sheltered corner to buffer cooling winds. Monitor temperature and moisture daily, aiming for a cool, consistently moist environment. Layer greens, browns, and worm castings to enrich nutrients despite low light.
Optimize moisture, aeration, and LED light; shelter the bin, and layer greens, browns, and worm castings.
- Shade‑tolerant greens – lettuce scraps, herb stems, and coffee grounds.
- Carbon‑rich browns – shredded newspaper, cardboard, dry leaves.
- Worm castings – boost microbes and improve texture.
- LED light strip – 12‑hour low‑intensity cycle for photosynthetic support.
Frequently Asked Questions
Is a North Facing Balcony Good?
Yes, a north‑facing balcony works well if you pick shade‑loving plants, manage moisture carefully, and use reflective surfaces to boost light, so you can still enjoy a thriving container garden.
What Three Items Should Not Be Placed in a Compost Pile?
You shouldn’t put meat, dairy, or oily foods in your compost; avoid pet waste unless it’s fully processed; and keep glossy or coated paper out, because they attract pests, spread pathogens, and slow decomposition.
Where Is the Best Place to Position a Compost Bin?
You should put the compost bin on a level, stable spot that’s shaded but gets some light, away from strong winds, near your kitchen waste source, and a few feet from walls to avoid odors.
What Is the Best Direction for a Balcony to Face?
You should face your balcony south if you want most veggies and herbs thriving, because that side catches the most sunlight, giving plants the heat and light they need for prime growth.
In Summary
Now that you’ve set up a north‑facing balcony compost, you’ll enjoy steadier moisture, cooler temps, and healthier breakdown. Keep the bin in the shade, match layers to low light, and aerate regularly. Watch the moisture indicators and tweak as needed. With these simple steps, your compost will thrive, turning kitchen scraps into rich soil for your garden. Follow the checklist, and you’ll see the results in no time.


Leave a Reply