
Load about one pound of red wiggler worms for each square foot of bin surface and fill the tote with bedding to roughly 75 % of its volume. Keep the bedding damp like a wrung‑out sponge and add kitchen scraps in small batches, burying each under the bedding and rotating spots weekly. Maintain a temperature of 55–77 °F and a C:N ratio near 25‑30:1 to avoid odors. If you keep these ratios right, you’ll see a thriving bin, and the next steps will show you how to harvest and maintain it efficiently.
How to Set Up an Indoor Worm Composting Bin in 5 Simple Steps

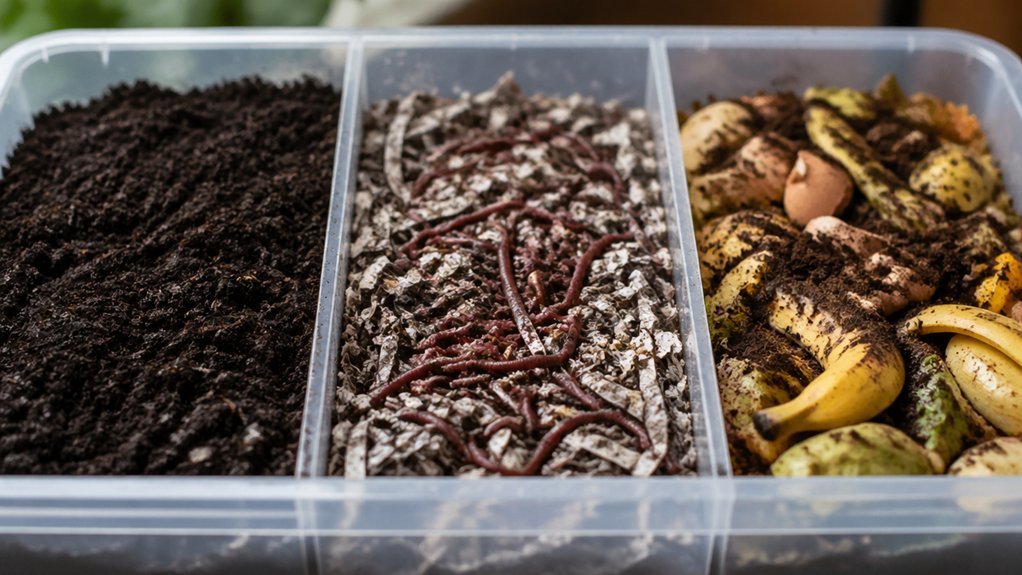
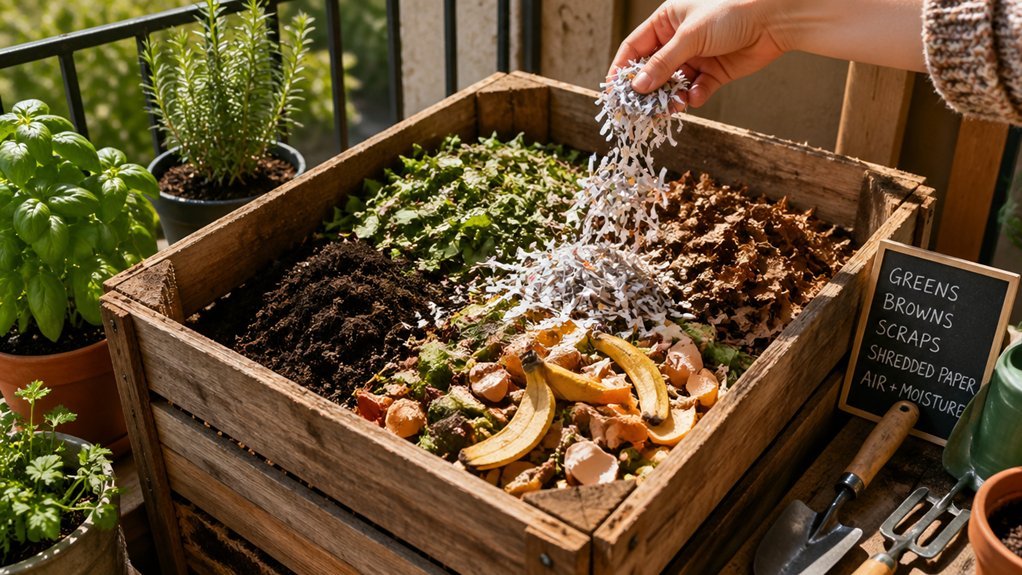
Ever wondered how easy it’s to start an indoor worm bin? First, pick two sturdy, opaque 14‑gallon totes; drill up to 20 holes in the bottom of the top tote and set the second underneath to catch leachate. Next, fill the bin with bedding—shredded newspaper, cardboard, or coconut coir—until it’s about 75 % full, then dampen it to a wrung‑out sponge consistency. Introduce red wiggler compost, aiming for roughly 1,000 worms per pound of waste, and give them a quick water mist and a day of light to spur burrowing. Afterwards, begin feeding small portions of kitchen scraps, burying each batch under the bedding and rotating feeding spots once or twice weekly. This bin setup creates the right moisture, ventilation, and habitat for thriving composting worms and soon yields rich vermicompost. To optimize moisture balance, consider lining the bottom with a breathable layer to support aeration and reduce compaction drainage considerations.
Feeding, Care, and Harvesting: Keeping Your Indoor Worm Bin Productive
Now that your bin is set up, the next step is feeding and maintaining it so the worms stay active and the compost keeps flowing. Start with a feeding rate of 1/4 to 1/2 pound of scraps per pound of worms per week, and bury waste 1–2 times weekly to keep balance. Watch moisture levels; the bin should feel like a wrung‑out sponge. If food sits untouched for 2–3 weeks, pause feeding and wait up to two weeks. After 3–6 months, harvest vermicompost by using the dump‑and‑sort method: shine a light, let red wigglers migrate to a pile, then scoop the crumbly, chocolate‑cake‑like compost and return the worms with fresh bedding. Consistent bin care sustains a healthy worm population. Regularly replace odor control and monitor filters as needed to maintain a clean environment for the worms odor control.
Common Indoor Worm Composting Concerns and Quick Fixes

Why do indoor worm bins sometimes stink, dry out, or crawl with pests? You’re likely off‑balance on worm bin surface area, feeding rate, or moisture level. Red wigglers need a C:N balance near 25‑30:1; excess carbs or protein trigger odor, while too little moisture kills aerobic conditions. Monitoring temperature and moisture helps prevent odors and ensures steady composting activity; maintain a wrung‑out sponge feel and a temperature range of 55‑77°F. If the worm population outpaces the feeding rate, food piles and smells appear—reduce scraps or add more worms at 1 lb per square foot of surface area. For odor control, bury waste under bedding and avoid over‑feeding. In indoor vermicomposting, a balanced moisture‑temperature‑feed combo preserves healthy worms and a clean bin odor management.
Frequently Asked Questions
How to Make an Indoor Worm Compost Bin?
You’ll need two same‑size opaque plastic totes, drill holes for drainage and ventilation, fill the lower tote 75% with moist bedding, add red wiggler worms, then feed them kitchen scraps gradually.
What Are the 5 Mistakes That People Commonly Make When Composting With Worms?
You overfeed, add meat or dairy, ignore C:N balance, let moisture get too wet or dry, and neglect ventilation or crowding—each mistake creates odors, pests, or sluggish worm activity.
Is 40 Degrees Too Cold for Worms?
Yes, 40 °F is too cold for active worms; they’ll slow down or become dormant. Keep the bin between 55‑77 °F, add insulation, or move it to a warmer spot to maintain composting.
What Three Items Should Not Be Placed in a Compost Pile?
You shouldn’t add meat, dairy, or oily foods; avoid waxed cardboard, plastic‑wrapped items, or metal; and keep citrus‑heavy scraps limited, because they cause odors, pests, and pH imbalances.
In Summary
By following those five steps, you’ll have a thriving indoor worm bin that turns kitchen scraps into rich compost with minimal effort. Keep the bin moist, feed it regularly, and harvest the castings when they’re dark and crumbly. With a little attention, your worms will stay healthy, your smells will stay low, and you’ll enjoy a steady supply of nutrient‑dense soil for houseplants—all year round.
Leave a Reply