
Probiotic inoculants jump‑start a balanced, aerobic microbial crew that quickly breaks down kitchen scraps, keeping odors low and heat high. The microbes crack complex organics into simple compounds, fueling a thermophilic phase that speeds composting and suppresses pathogens. By maintaining a 20:1‑30:1 C:N ratio, proper moisture, and regular turning, you keep the community thriving in a small bin. If you keep going, you’ll discover how to choose the right inoculant and apply the finished compost for thriving apartment gardens.
Why Use Probiotic Inoculants in Apartment Compost?

Why bother with probiotic inoculants in your apartment compost? You’ll see faster breakdown of food scraps because the added microbes accelerate decomposition. By mixing probiotic inoculants into the top layer or during watering, you keep microbial activity high without letting heat skyrocket, so odors stay mild and pests stay away. The cultured bacteria and yeasts from EM1 or compost‑derived sources boost nutrient cycling, turning waste into richer soil for your indoor plants. This inoculation also expands microbial diversity, strengthening plant‑microbe interactions in compact growing media. Follow the product’s dilution and frequency guidelines, and you’ll maintain a balanced, low‑maintenance composting system that delivers healthier, more nutrient‑dense feed for your greenery. Odor control and efficient spigot design are additional considerations when using Bokashi setups in limited spaces.
Balancing Carbon & Nitrogen for Probiotic Compost Success
How do you keep your probiotic compost thriving? You maintain a proper carbon-to-nitrogen ratio, aiming for 20:1–30:1, so beneficial microbes get the energy and nitrogen they need. Mix dry leaves, paper, sawdust, or pine needles with grass clippings, coffee grounds, and kitchen scraps. Turn the pile regularly to keep it aerobic, avoid overheating, and let the thermophilic phase work its magic. A fluffy layer of brown leaves creates structure and airflow. A dark, moist patch of green clippings fuels rapid microbial growth. A sprinkle of shredded paper or cardboard balances excess nitrogen. Aeration tools improve airflow and speed up decomposition during turning.
What Probiotic Microbes Actually Do Inside a Compost Pile
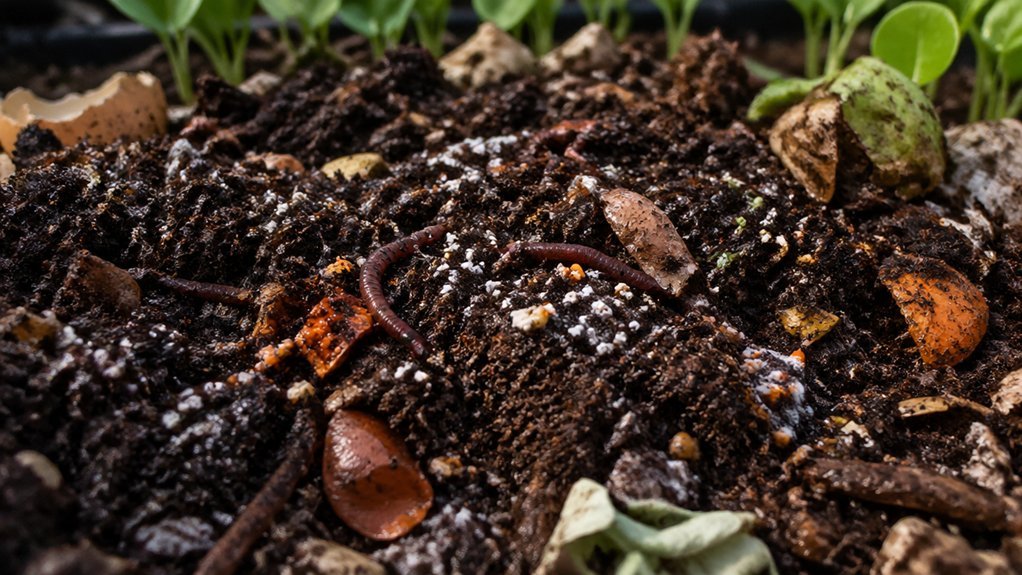
You’ll see the microbes cracking organic matter into simpler compounds, which fuels the pile’s heat and drives the thermophilic phase. As temperatures rise, different microbial groups take over, keeping the process fast and safe. The end result is a nutrient‑rich, disease‑suppressive amendment that boosts soil health. The specific composting method (e.g., with a dual‑chamber tumbler or odor‑control tools) can influence the rate at which these microbial communities establish and maintain the active thermophilic stage. twin-chamber design
Bial Breakdown of Organic Matter
- A swirl of bacterial filaments feasting on shredded leaves, turning brown ribbons into dark, crumbly humus.
- Yeast colonies puffing on fruit scraps, producing fragrant alcohols that dissolve stubborn pectin.
- Actinomycetes threading through woody chips, cracking lignocellulose and releasing earthy aromas.
Your compost now teems with a balanced, active community, primed to enrich the garden once cured.
Heat Generation and Microbial Succession
Heat roars inside a thriving compost pile as thermophilic microbes feast, pushing temperatures from a comfortable 105 °F up to a scorching 150 °F and signaling rapid decomposition. You’ll notice the heat generation spike as mesophiles finish their work and hand off to thermophiles, which dominate the active phase. The probiotic strains you added—EM1 bacteria and Bokashi fungi—kick‑start this transition, breaking down cellulose and proteins faster than native microbes alone. Regular turning keeps oxygen flowing, preventing anaerobic hotspots and keeping the microbial succession smooth. As the pile cools, beneficial, stable microbes take over, cementing a mature, pathogen‑free compost ready for the garden.
| Stage | Temperature | Dominant Microbes |
|---|---|---|
| Early | 70‑105 °F | Mesophiles, EM1 |
| Peak | 105‑150 °F | Thermophiles, Bokashi |
| Late | 70‑95 °F | Stable beneficial fungi |
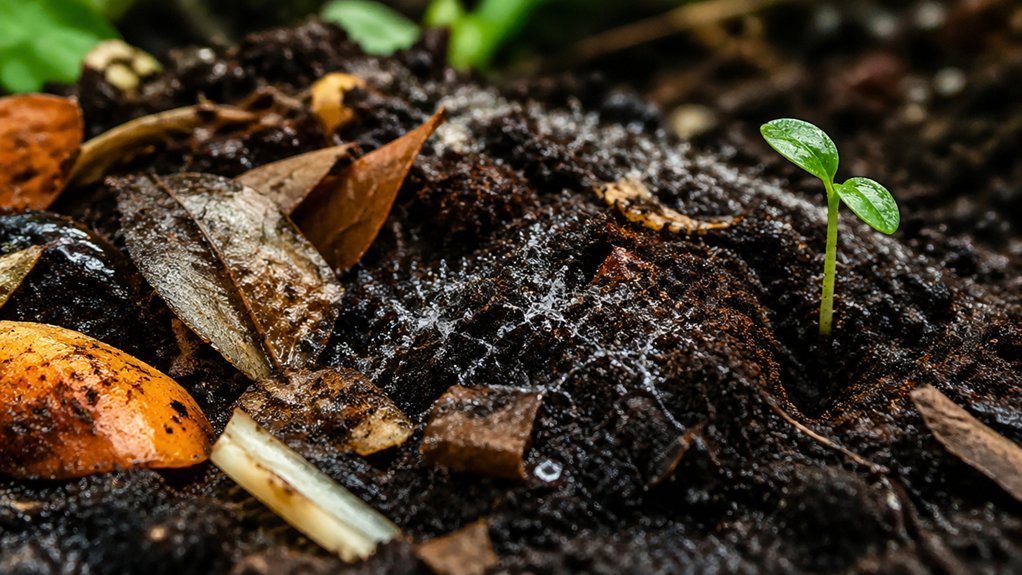
Nutrient Release and Soil Enrichment
Typically, the probiotic microbes you introduced—EM1 bacteria and Gro‑Kashi fungi—speed up the breakdown of complex organics, converting them into nitrate, phosphate, and potassium that roots can absorb instantly. As they ferment, they release organic acids that dissolve mineral particles, boosting nutrient bioavailability. The heat they generate drives thermophilic activity, which kills pathogens and accelerates maturation, leaving a stable, microbially rich amendment. When you mix the finished compost into soil, the probiotic microbes continue to cycle nutrients, improve structure, and foster symbiotic relationships with plant roots. Warm, glowing piles where microbes feast on cellulose; Bright, mineral‑rich granules that dissolve at the root surface; A thriving underground network of bacteria and fungi feeding plants. Countertop
How to Choose the Right Probiotic Inoculant for Small Spaces

You’ll want a space‑saving inoculant that works as a foliar spray or top‑dressing for shallow containers, so look for liquid or fine‑powder formulas with clear dilution instructions.
Choose a multi‑microbial blend—bacteria, fungi, and protozoa—that includes Bacillus, Pseudomonas, or Trichoderma to boost nutrient availability and disease resistance.
Make sure the product is compatible with compost‑based carriers like molasses or tea, ensuring the microbes thrive in your compact setup.
Important concept: European Nightcrawlers are commonly used for composting and soil aeration, so selecting inoculants that align with those practices can improve outcomes in small spaces.
Space‑Saving Inoculant Options
Ever wonder how to keep your microbiome thriving when space is at a premium? You can pick probiotic inoculants that double as soil amendments, fitting tight corners without bulk. Opt for granular topsoil mixes that slip straight into a pot, or a liquid spray that coats the medium with a thin, active layer. Choose formulations built for potting media—EarthBox-compatible PWG, multi‑microbial blends of bacteria, fungi, and protozoa—so roots get instant colonization. Slow‑release or ready‑to‑use formats cut reapplication, while established strains like PGPR, EM1, or endophytic yeasts guarantee reliability. Granular mix that fits a 2‑inch pot and stays put. Linking concept: self-watering and growth medium–inclusive systems
Microbial Diversity for Containers
Choosing the right probiotic inoculant for a container garden means matching microbial function to the limited volume you have. In small spaces you’ll want blends that pack soil microbes with proven rhizosphere and endophytic traits, like Bacillus and Pseudomonas, because they thrive in tight media and boost plant vigor. Pick products that also contain lignocellulose‑degrading fungi or yeasts; they speed up breakdown of yard waste and kitchen scraps, keeping the compost warm but not overheated. Look for inoculants that stay compatible with the moisture levels you can maintain, preventing anaerobic pockets. Track progress by noting faster temperature rises, quicker C:N balance shifts, and healthier foliage—signs that the beneficial bacteria are doing their job in your container system. Dried BSF Larvae can provide high-protein supplementary input for pets and poultry, illustrating how nutrient-rich inputs can influence microbial activity in small-space systems.
Step‑by‑Step: Inoculating Your Kitchen Compost Bin
Want to jump‑start your kitchen compost? First, gather a handful of EM1 or Gro‑Kashi microbes and sprinkle them over a layer of carbon‑rich browns—dry leaves, shredded paper, or sawdust. Next, add your nitrogen‑rich greens—vegetable scraps, coffee grounds—then mix thoroughly to distribute the probiotics evenly. Finally, seal the bin loosely, let heat build, and turn after 24 hours to keep oxygen flowing.
- A thin brown layer cushions microbes, creating a fluffy carpet that absorbs moisture.
- Green scraps provide nitrogen, fueling rapid microbial growth and heat.
- Probiotic powder activates a balanced community, accelerating composting and suppressing odors.
Monitor temperature; when it reaches 105‑150 °F, the thermophilic stage is underway, and your bin will soon produce nutrient‑rich, cured compost.
Maintain Aeration in Tiny Compost Bins
You’ll want to poke small holes in the bin walls so air can slip in, then turn the contents every few days to keep oxygen flowing.
Keep the moisture like a wrung‑out sponge—neither soggy nor bone dry—so microbes stay active.
If the pile cools, add a handful of dry browns and give it another turn to revive the heat.
Perme Small Holes
How do you keep a tiny compost bin breathing? You rely on Perme Small Holes to deliver steady aeration while you feed probiotics. The holes are spaced just right to let excess moisture and gases escape, keeping the interior dry enough for thermophilic microbes to thrive. When the pile stays around 105‑150 °F, decomposition speeds up and odors fade.
- A row of ¼‑inch perforations along the lid lets fresh air rush in.
- A second tier of tiny gaps at the base draws heat upward, preventing hot spots.
- A final set of micro‑holes around the sides creates a gentle draft that dries the material, discouraging mold.
Turn Regularly
Why bother turning your tiny compost bin every few days? You’re feeding probiotic bacteria with oxygen, and aeration is the shortcut to fast, odor‑free breakdown. A quick stir every few days prevents heat spikes, spreads the thermophilic phase evenly, and stops the pile from compacting. When you flip the contents, oxygen‑loving microbes rush in, accelerating the decomposition of food scraps and keeping anaerobic smells at bay. Consistent turning also keeps moisture from pooling, which would otherwise drown the microbes. In a small bin, a simple fork or hand‑held tool is enough to lift and tumble the material, ensuring every crumb gets a breath of fresh air. The result? Faster maturity, smoother texture, and a healthier, probiotic‑rich compost ready for your garden.
Monitor Moisture Levels
Ever wonder how a tiny compost bin stays alive without choking? You keep moisture in the “hand‑squeeze” zone—damp, not dripping—so microbes stay active and odors stay fresh. At the same time, you preserve aeration by avoiding compacted spots that block airflow. A quick feel test tells you when to spray water or add dry carbon, while a gentle shake reveals if the pile feels too soggy or too dry.
- A damp, crumbly texture that falls apart in your hand.
- Visible air pockets between shredded leaves and paper.
- A faint, earthy scent instead of sour, anaerobic fumes.
Balancing moisture and aeration lets thermophilic microbes maintain the 105‑150 °F heat needed for probiotic composting.
Keep the Right Heat: How Probiotics Reach Ideal Compost Temperature
Wondering how to keep your compost hot enough for the probiotics to thrive? Focus on heat management by balancing carbon and nitrogen at roughly 20:1‑30:1, keeping moisture damp but not soggy, and ensuring plenty of airflow.
When you add Effective Microismsisms (EM1) or Bokashi starters, they boost thermophilic activity, pushing temperatures into the 105‑150 °F range where beneficial microbes break down organics fast and kill pathogens. Avoid meat, dairy, or oils, which can create anaerobic pockets and stall heating.
Turn the pile only when needed to release excess heat and prevent hot spots. Once the temperature stabilizes for several days, you’ll see vigorous probiotic action and a healthy, fast‑moving compost.
Turning and Mixing Techniques for Small Compost Bins
How often should you turn a small compost bin? Aim for every 1–2 weeks while the pile’s active. Regular turning prevents heat spikes, spreads probiotics, and keeps aerobic microbes thriving. Use a pitchfork or shovel to lift material from the bottom, flip it, and drop it back on top. This motion distributes moisture and oxygen, making the compost feel like a wrung‑out sponge (40–60% moisture).
- You lift the soggy base, flip it, and watch dark, rich layers cascade down.
- You sprinkle a handful of probiotic powder, then stir it into the fresh topsoil.
- You hear the soft thud of soil settling, a sign the pile is breathing evenly.
Common Mistakes That Kill Beneficial Microbes: and How to Avoid Them
Why do so many composters lose the beneficial microbes they work so hard to cultivate? You often over‑water, under‑aerate, or add forbidden foods, turning a thriving probiotic system into a dead zone. Keep the pile moist but not soggy, turn it regularly, and stay away from meat, dairy, oils, and pet waste. Use a diverse microbial mix—EM1, Gro‑Kashi, and compost‑derived organisms—to hedge against single‑strain failures. Finally, let the pile cure fully before use; an immature batch can stress plants.
| Mistake | How to Fix It |
|---|---|
| Too wet | Add dry leaves, monitor moisture |
| No airflow | Turn pile every 2–3 days |
| Forbidden foods | Exclude meat, dairy, oils |
| Single‑strain inoculant | Blend multiple probiotics |
| Premature use | Wait until compost is cured |
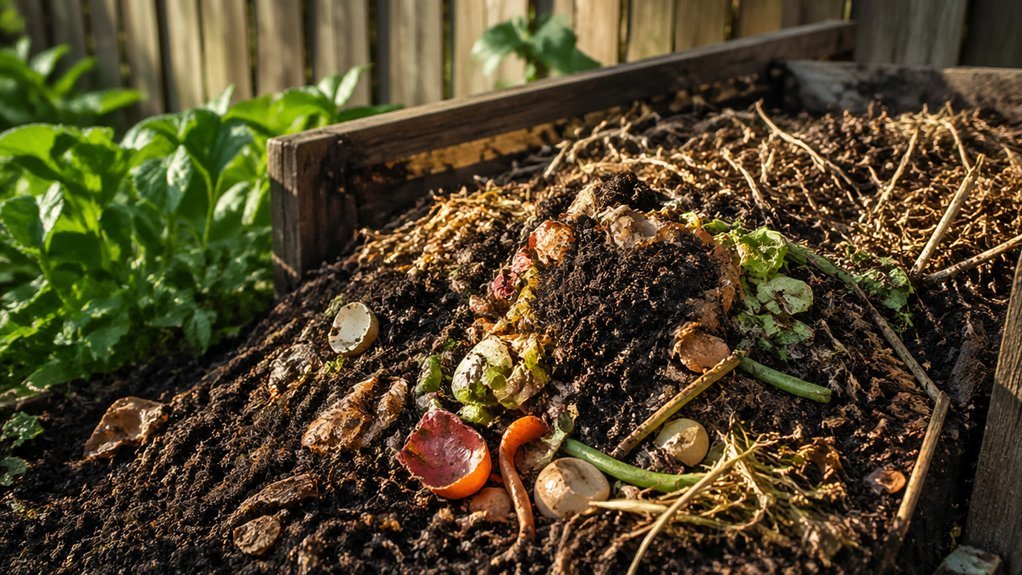
Spotting a Healthy Probiotic‑Enhanced Compost
A healthy probiotic‑enhanced compost looks dark, crumbly, and smells earthy, with no sour or ammonia odors. You’ll notice a steady temperature rise to 105‑150 °F during the thermophilic stage, a sign that microbes are hard at work breaking down carbon‑rich leaves and nitrogen‑rich coffee grounds. When you turn it, the material stays warm but never overheats, indicating balanced carbon‑to‑nitrogen ratios (20 : 1‑30 : 1). A quick visual check confirms the texture and scent, while a simple maturity test tells you it’s cured and ready for use.
- Dark, moist, crumbly texture
- Earthy aroma, no pungent ammonia
- Warm, even heat throughout after turning
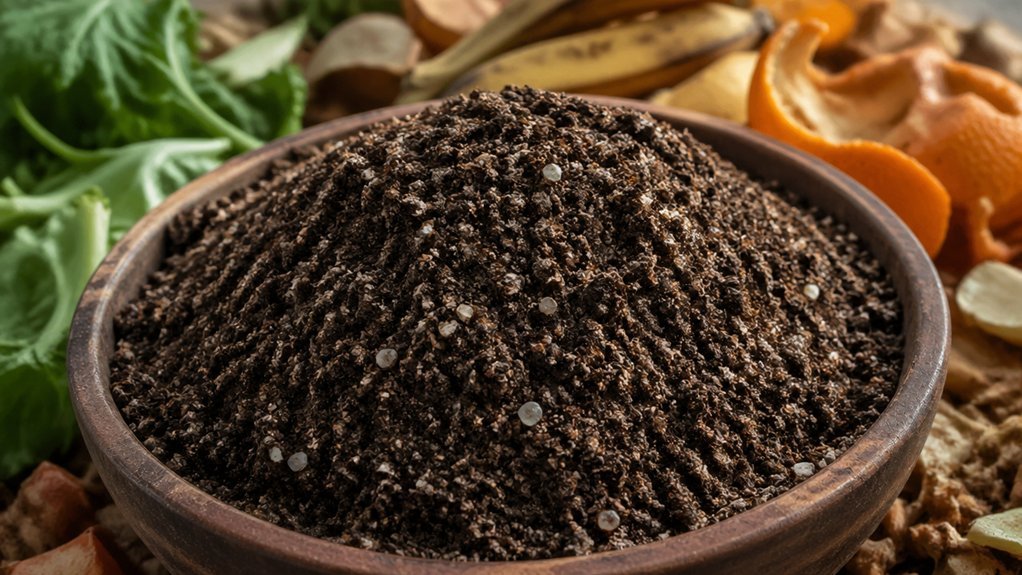
Applying Your Finished Probiotic Compost in Apartment Gardens
If you’ve cured your probiotic compost and confirmed its maturity, you can start using it in your apartment garden right away. Spread a thin layer—about an inch—over the surface of your container soil or mix it into the top few inches of your potting mix. This top‑dress supplies a steady stream of nutrients while keeping the microbial community active. Keep the soil consistently moist but not soggy; the microbes thrive on steady moisture and good aeration. Reapply modestly every few weeks to a month to sustain diversity and prevent nutrient depletion. Avoid piling too much, which could smother shallow roots. By treating each container as a mini‑ecosystem, your probiotic compost will boost growth and resilience throughout your apartment garden.
Linking Probiotic Compost to EarthBox PWG Growing Media
Now that you’re regularly top‑dressing your apartment containers, you can amplify those benefits by integrating the compost into EarthBox PWG’s probiotic growing media. The PWG suite already contains Malibu Compost Biodynamic Bus Blend, EarthBox Potting Mix, and Gro‑Kashi Garden Dregs Fertilizer, so adding your probiotic compost creates a seamless nutrient cascade. Mix a handful of compost into the base layer, then sprinkle TeraGanix EM1 as a soil inoculant to kick‑start microbial activity. The result is a living medium that releases nutrients slowly, improves moisture retention, and bolsters plant immunity.
- Rich, dark compost blended with EarthBox potting mix
- EM1 inoculant dotted throughout the root zone
- Gro‑Kashi Dregs providing ancient fermentation microbes
You’ll notice stronger growth, fewer pests, and higher yields with minimal extra effort.
Quick FAQ: Top Questions About Apartment Probiotic Composting
Ever wondered which questions most people ask about apartment probiotic composting? You’ll want to know how to keep microbes active in a tiny space. First, use a balanced carbon‑to‑nitrogen mix (20:1‑30:1) and add EM1 or Gro‑Kashi inoculants to jump‑start probiotics. Second, ensure the bin reaches thermophilic temperatures (105‑150 °F) to kill weeds and pathogens—just stir regularly to maintain heat. Third, monitor moisture; it should feel like a wrung‑out sponge. Fourth, let the pile cure for at least two weeks; testing for a stable, earthy smell confirms maturity. Finally, after curing, spread the finished compost on balcony pots to boost plant immunity and yield, knowing you’ve avoided harmful pathogens.
Frequently Asked Questions
Why Do Cardiologists Warn Against Probiotics?
You should heed cardiologists because probiotics can trigger rare bloodstream infections, interact with heart medications, and cause excessive inflammation in vulnerable patients, potentially worsening arrhythmias or heart failure.
Can You Add Probiotics to Compost?
Yes, you can add probiotics to compost; just mix cultured microbes like EM1 into your organic material, keep it moist and aerated, and let the beneficial bacteria accelerate decomposition and enrich soil health.
How Do the Amish Compost?
You’ll pile kitchen scraps and garden waste, alternate greens and browns, keep it moist, turn it regularly for aeration, and let natural microbes do the work, producing dark, crumbly, ready‑to‑use compost.
Is There Any Scientific Evidence That Probiotics Work?
Yes, you’ll find dozens of peer‑reviewed studies showing probiotic microbes boost nutrient cycling, suppress pathogens, and improve plant growth, confirming they actively enhance compost and soil health.
In Summary
By adding probiotic inoculants, you accelerate decomposition, keep odors at bay, and create nutrient‑rich humus even in tiny apartment bins. The microbes balance carbon and nitrogen, break down food scraps faster, and produce a stable, plant‑friendly compost. Choose a high‑quality, space‑friendly inoculant, follow the simple inoculation steps, and watch your bin turn waste into gold. Then feed that gold to your indoor garden or EarthBox PWG for thriving, sustainable growth.
Leave a Reply