

You speed up decomposition by moving semi‑decomposed scraps from Bin 1 into a fresh, oxygen‑rich Bin 2, where retained heat and optimal moisture let thermophilic microbes work faster. Each stage keeps C:N balanced, aerates the pile, and prevents odor, while weekly turns keep the material from compacting. The final Bin 3 cures the material into dark, crumbly compost. Keep reading and you’ll discover how to fine‑tune moisture, temperature, and boosters for even quicker results.
What Is an Indoor 3‑Bin Compost System?
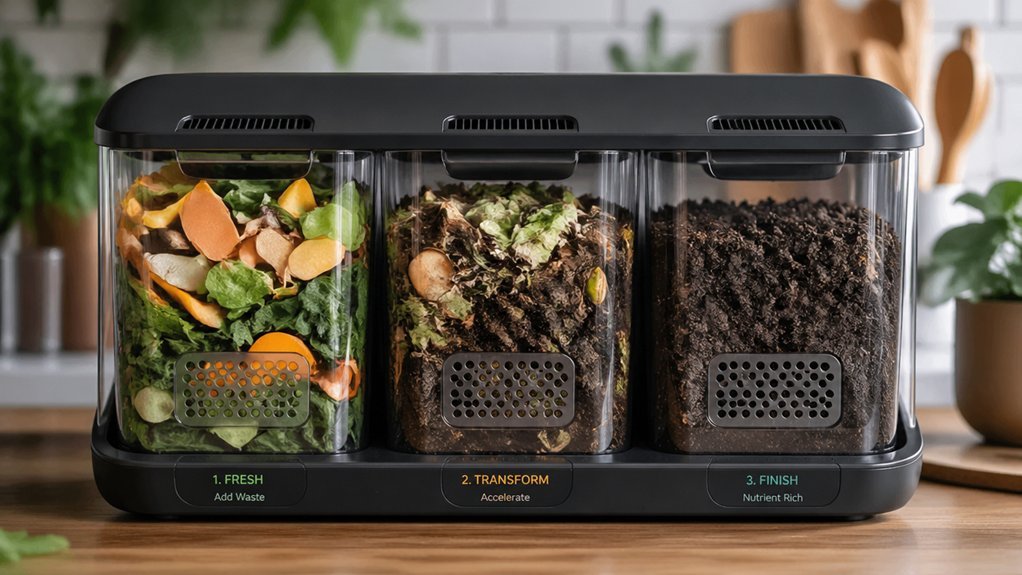
A 3‑bin indoor compost system is a compact, staged setup that lets you keep a continuous flow of material through three separate containers: the first bin for fresh scraps, the second for partially broken‑down matter, and the third for fully cured compost.
A compact, staged 3‑bin system maintains continuous indoor compost flow through fresh, partially broken‑down, and fully cured containers.
You load kitchen waste into Bin 1, where aeration and moisture begin decomposition. After a few days, you transfer the softened material to Bin 2, which receives fresh air and retains heat, accelerating thermophilic activity.
The heat generated in each bin fuels microbial growth, while regular turning maintains oxygen levels and prevents odor. Finally, the fully broken material moves to Bin 3, where it cures under steady aeration and residual heat, delivering ready‑to‑use compost for indoor or container gardening.
This staged approach keeps the process moving efficiently and consistently.
Why Separate Stages Cuts Indoor 3‑Bin Composting Time?
After you’ve loaded fresh scraps into Bin 1, moving the semi‑decomposed material to Bin 2 dramatically speeds the process. The three‑bin system lets you isolate high‑nutrient greens in Bin 1 while Bin 2 handles partially broken‑down matter, creating a focused, high‑temperature core. This staged decomposition introduces oxygen aeration in Bin 2, reviving microbes and preventing anaerobic pockets. Uniform material in Bin 2 supports steady thermophilic activity, and the transfers give you precise moisture management, keeping each bin in its optimal range. The result is faster heat buildup, quicker breakdown, and a shorter overall composting cycle. Dullrout Compost Bin for Countertop with Lid and the dual‑filter systems noted in premium designs can help manage odors during faster decomposition.
Balancing C:N With Greens and Browns in Each Bin
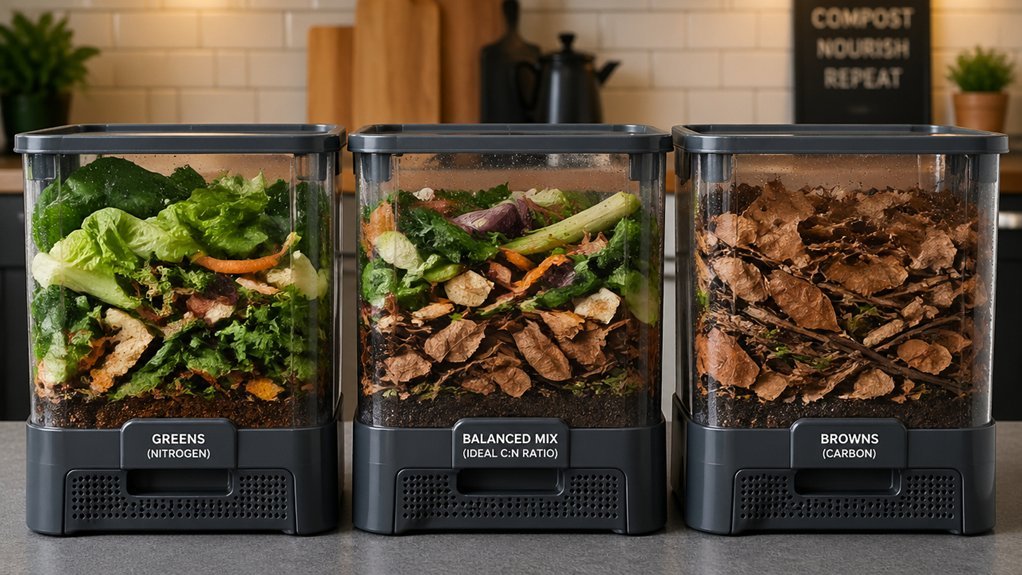
You’ll want a 2‑to‑1 ratio of browns to greens to keep the C:N balance near 25:1‑30:1, so start each bin with thin alternating layers and finish with a brown‑rich top. This pattern creates air channels that speed up microbial activity while preventing compaction. If the mix feels soggy, toss in more browns; if it’s dry, add a handful of greens to boost moisture and nitrogen. Incorporating compostable bag guidance can further optimize your setup by ensuring inputs are appropriate for your home or municipal composting pathway certification standards.
Optimal Green‑Brown Ratio
How can you keep your compost humming? Aim for a 25‑to‑30 carbon‑to‑nitrogen ratio by mixing 2‑4 parts browns with each part greens. Greens—fresh grass, fruit scraps, coffee grounds—pump nitrogen into the pile, while browns—dead leaves, wood shavings, shredded cardboard—supply carbon, buffer heat, and improve structure. In a three‑bin system, maintain roughly a 2‑to‑3 brown‑to‑green layering ratio in Bin 1 to retain moisture and keep microbes active. As you flip and transfer material to Bin 2, the established ratio supports aerobic conditions, ensuring steady decomposition without odor. Consistently measuring and adjusting this balance prevents excess moisture or dryness, keeping your indoor compost fast and efficient. Aeration aids in maintaining aerobic conditions and odor control across the bins.
Layering for Aeration
Maintaining the 2‑to‑3 brown‑to‑green ratio in Bin 1 sets the stage for proper aeration throughout the three‑bin system. Integrating a wide range of certified compostable bags ensures your liners support reliable microbial activity and help sustain a steady balance of greens and browns over time OK compost HOME certification.
Adjusting Moisture Levels
Ever wondered how a simple squeeze test can keep your compost bins humming? You’ll check moisture levels by squeezing a handful of material; it should feel like a wrung‑out sponge—damp but not dripping. In Bin 1, aim for a 2–4 : 1 ratio of browns to greens, which naturally buffers excess water while delivering carbon. If the mix feels soggy, toss in dry browns like shredded cardboard or leaves to restore aeration and prevent anaerobic spots. When it’s too dry, lightly mist greens until the texture is spongy. During each transfer, repeat the squeeze test, adjusting moisture so every bin maintains that sweet, sponge‑like feel. Consistent moisture fuels the composting process, keeps microbes active, and preserves optimal aeration throughout. Long-term reuse
How Pitchforks and Boosters Speed Up Indoor 3‑Bin Aeration
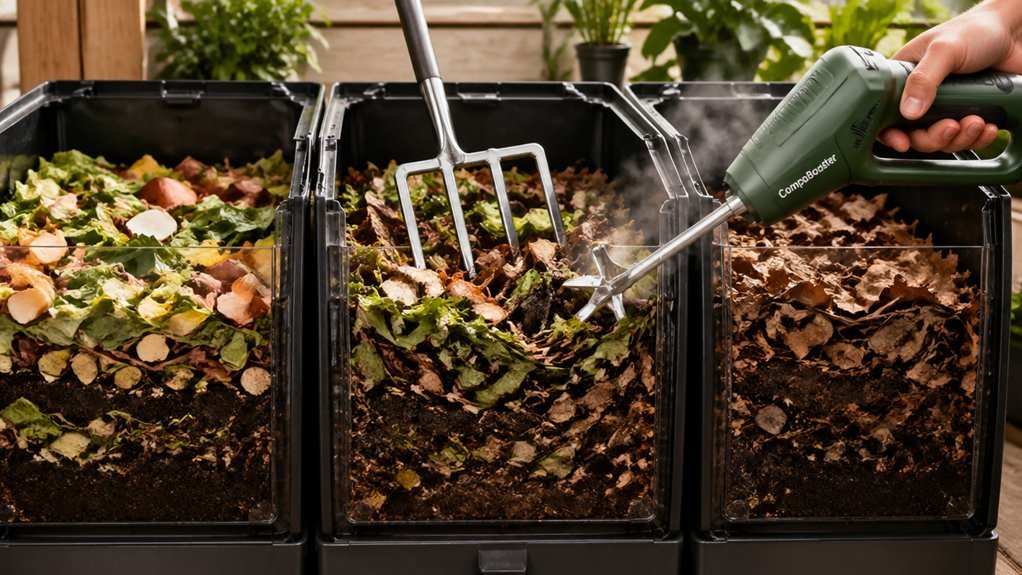
Ever wonder why a simple pitchfork can make your indoor 3‑bin system feel like a turbo‑charged compost? You thrust the pitchfork deep into the pile, breaking up compacted zones and flooding the material with oxygen. That aeration awakens aerobic microbes, which feast on the fresh air and crank up the compost temperature to the optimal 130–140 °F range. Each stir disrupts anaerobic pockets, keeping the breakdown steady and fast. Introducing activated carbon filters can further enhance odor control as you manage the bins by improving airflow and adsorption of volatile compounds odor control and helping maintain a balanced indoors-friendly environment.
Adding boosters such as Super Hot Compost Starter or Re‑Gen Compost Accelerator supercharges the process; they seed the pile with high‑activity cultures that latch onto the oxygen you supply. The result is a rapid surge in microbial activity, shorter transition to Bin 2, and a consistently hot, healthy compost heap.
Managing Moisture for Odor‑Free Indoor Composting
How can you keep your indoor 3‑bin compost odor‑free? Master moisture management by treating the pile like a wrung‑out sponge. Keep it damp but not soggy, and you’ll feed aerobic microbes while preventing foul smells. Use the three‑bin system to stage moisture: fresh greens in Bin 1 stay moist, while Bin 2 and Bin 3 cure through regular aeration. When the touch test feels too wet, toss in brown materials such as shredded cardboard to soak up excess water. Turning the bins every few days circulates air and moisture, eliminating anaerobic pockets that trigger odor.
- Add dry brown materials to balance excess moisture.
- Turn or shake each bin for aeration and even moisture distribution.
- Use the three‑bin system to stagger moisture levels and enhance odor control.
Temperature Peaks: When to Move Material Between Bins
When you see the pile in Bin 1 hit 130–150 °F, that’s your cue to shift the material to Bin 2 and introduce fresh oxygen. The temperature peak tells you the thermophilic phase is ending, so moving the hot core prevents overheating while still inoculating the next batch. Transfer again once Bin 2 looks and feels like finished compost, indicating the material’s ready for the final bin. The process benefits from using odor-control filters to maintain air quality during transfers Universal fit 6.7-inch diameter and to ensure consistent decomposition across bins.
Peak Temperature Indicators
What signals the compost’s most intense breakdown phase? You’ll see the temperature climb to 130‑150 °F, a clear sign that thermophilic decomposition is in full swing. That heat surge means microbes are thriving, aeration is adequate, and the moisture balance is right for rapid breakdown. When the reading peaks, it’s time for a bin‑to‑bin transfer to keep oxygen flowing and prevent a stall.
- Move material from Bin 1 to Bin 2 right after the peak to boost aeration.
- Watch the temperature drop; a steady decline shows the active phase is ending.
- Ensure the new bin’s moisture stays within the optimal range to sustain microbial activity.
Optimal Transfer Timing
Ever wondered why the heat spike in Bin 1 matters? When the temperature spikes to 130–150 °F, thermophilic microbes hit peak activity, signaling optimal bin transfer timing. Move the material to Bin 2 right at that rise to preserve aeration and prevent overheating.
Flip the semi‑cooked pile in Bin 2, exposing undigested bits and fresh oxygen, which fuels active decomposition. Keep fresh scraps feeding Bin 1 while you turn Bin 2 as needed to maintain airflow and steady heat.
Monitor Bin 2 until its texture and color become uniform; then it’s ready for Bin 3’s final cure. This timing ensures microbes stay productive, oxygen stays balanced, and decomposition speeds up across all three bins.
Turning vs. No‑Turn: Which Method Saves Time in an Apartment?
Which method really speeds up composting in a cramped apartment? You’ll find turning beats a no‑turn strategy because it forces aeration, distributes heat evenly, and keeps decomposition humming inside your composting bin. In a 3‑bin system, shifting material from one bin to the next creates a fresh oxygen supply and pushes cooler scraps inward, where thermophilic microbes thrive. A weekly turn in summer or a turn every three to four weeks in winter prevents anaerobic pockets and nasty odors, letting you process more volume in a tight space.
- Turn weekly in warm months, every 3‑4 weeks in cold months.
- Move material between bins to boost aeration and heat flow.
- Avoid stagnant zones that slow decomposition and emit smells.
Curing the Final Bin: Getting Dark, Crumbly Compost Ready
After you’ve finished turning and shifting material through the three bins, the last step is curing the final bin so the compost turns dark, crumbly, and ready to use. During curing, which lasts one to two months, the moist, uniform mix in Bin 3 slowly darkens and loses its clumpiness. You’ll know compost maturity has arrived when the color deepens, the texture becomes crumbly, and an earthy aroma fills the bin. If a few bulky scraps linger, sift them out before the finished compost is applied. Slightly unfinished material can serve as a veggie bed top‑dress, but for full Bin 3 readiness aim for dark crumbly compost. Use the finished compost in raised beds, containers, or seedling transplants to boost soil structure and moisture retention.
Troubleshooting 3‑Bin Compost Issues: Pests, Odors, and Slow Breakdown
What’s keeping your 3‑bin system from humming smoothly? Pests, odors, and sluggish breakdown often stem from simple oversights. You can curb rodents by installing mesh on the bottom bin, sealing gaps, and using removable front panels for quick cleaning. Odors signal anaerobic conditions; boost aeration by turning the pile with a pitchfork and moving material between bins regularly. Slow breakdown usually means an off‑balance C:N ratio—aim for 2–4 parts brown to 1 part green and keep moisture like a wrung‑out sponge; add bulking agents to prevent compaction.
Mesh, aerate, balance C:N, and keep moisture sponge‑like to prevent pests, odors, and slow compost.
- Rodent‑proofing: mesh, sealed gaps, removable panels
- Aeration & moisture: turn piles, transfer bins, wrung‑out sponge feel
- C:N balance: 2–4 : 1 browns to greens, add bulking agents
Frequently Asked Questions
What Can I Add to My Compost Bin to Speed up Decomposition?
Add fresh greens like veggie scraps, coffee grounds, and grass clippings, plus carbon‑rich browns such as shredded newspaper or dry leaves. Mix in a compost starter, keep it moist, and turn regularly for faster breakdown.
What Three Things Should Not Be in the Compost Heap?
Don’t put meat, dairy, or oily foods, moldy leafy greens, and any non‑compostable plastics or metals in your heap; they attract pests, spread pathogens, and won’t break down, slowing the process.
Why Use a 3 Bin Compost System?
You use a three‑bin system because it lets you rotate material, keep each stage at ideal moisture and temperature, and avoid overloading, so decomposition stays fast and steady.
Do Potato Peelings in Compost Attract Rats?
Yes, if you pile wet potato peels without balancing them with dry browns, you’ll create a moist, aromatic environment that attracts rats. Keep the mix dry, layer browns, and maintain high heat to deter pests.
In Summary
By keeping your three bins organized, you’ll see waste turning to rich compost in a fraction of the time. The first bin starts the breakdown, the second speeds it up with proper C:N balance and aeration, and the third cures the material into dark, crumbly soil. With regular turning, moisture control, and temperature checks, you’ll avoid odors, pests, and sluggish decay—making indoor composting fast, efficient, and rewarding.



