

Set three side‑by‑side bins on a level balcony corner, keep one active with kitchen scraps, a second curing, and a third finished. Fill Bin 1 with a 2:1 mix of dry browns and wet greens, turn it into Bin 2 when it’s full, and let Bin 2 rest while you refill Bin 1. Use slatted vents, rodent‑proof mesh, and a shallow tray for drainage, and keep the pile moist like a wrung‑out sponge. Insulate Bin 2 with straw or cardboard to hold heat, and harvest crumbly compost from Bin 3 when it darkens. Continue for for detailed steps on placement, materials, and scaling.
3‑Bin Rotation System Overview for Balconies
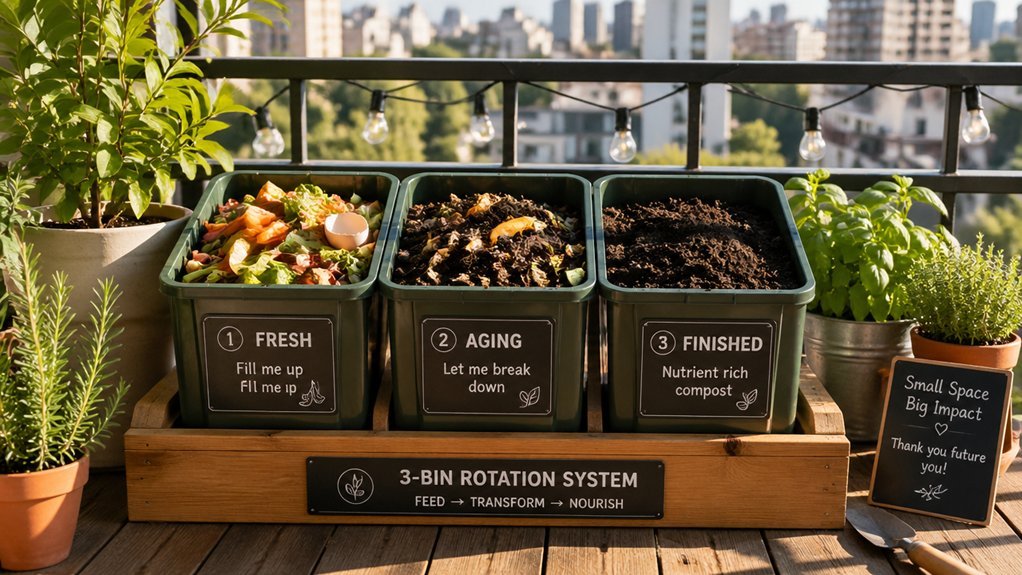
How does a 3‑bin rotation system work on a balcony? You line up three side‑by‑side containers, each sized to fit your rail or floor space, and start by filling Bin 1 with kitchen scraps. Once it’s full, you turn it to introduce oxygen, then move it to Bin 2 for the next stage of decomposition. While Bin 2 works, you begin filling Bin 1 again, and Bin 3, which has been turning the longest, empties its finished compost. This three‑bin rotation keeps material at different ages, ensuring steady breakdown and heat retention. Good airflow management—thanks to slatted sides or vented lids—prevents odor and speeds the process, while sturdy ACQ‑treated wood or wire panels protect pets and stand up to weather. Moisture balance, regular turning, and proper drainage complete the system. odor control
Choosing the Best Spot for Your Balcony Compost System
Pick a shaded corner on your balcony where the bins stay out of direct sun and wind, keeping temperatures steady and moisture from evaporating too quickly. Make sure the spot rests on a solid, level surface with good drainage and easy access to water so you can adjust moisture without creating soggy, anaerobic conditions.
Position the three‑bin system near your gardening area for quick turning, loading, and monitoring while keeping a small lip or enclosure to stop spills and deter pests. Ensure compatibility with your existing balcony setup to maintain airflow and avoid odor buildup.
Shade Placement and Sunlight
Where should you set up your balcony compost? Choose a spot that balances shade and light, keeping microbes happy while you stay comfortable. A shaded placement protects the bins from scorching sun, stabilizes temperature, and reduces moisture loss.
At the same time, a little indirect light lets you see the pile and spot problems early.
Position the system near a water source so you can adjust moisture quickly, and keep it against a wall or under an overhang to shield it from drafts.
- Locate the bins where afternoon sun is blocked but morning light filters in.
- Use a sturdy railing or wall as a windbreak.
- Ensure easy access to a faucet or hose for regular moisture checks.
- Add a light cover or straw for extra insulation in colder months.
To help maintain soil balance and prevent nutrient burnout, include periodic applications of mineral-rich rock dust such as Azomite to re-mineralize depleted balcony soils rock dust benefits.
Drainage and Wind Protection
Even if your balcony gets plenty of sun, you’ll want to locate the compost bins where a wall or railing can block the harshest rays and shield them from gusts that dry out the pile. Choose a spot with firm footing and easy access to a water source, so you can mist the material without worrying about sinking. Build a shallow tray or place the bins on a slatted pallet to create drainage gaps that channel excess water away, preventing waterlogging and anaerobic conditions. Position the system against a solid wall or add a lightweight windbreak—like a lattice or bamboo screen—to provide wind protection while still allowing airflow. For open‑pallet or wire‑panel designs, line the perimeter with straw or shredded paper, and use removable fronts for easy turning without compromising drainage. This setup keeps your balcony composting healthy, dry enough, and well‑ventilated to minimize odors.
Materials Needed for the 3‑Bin Balcony Compost System
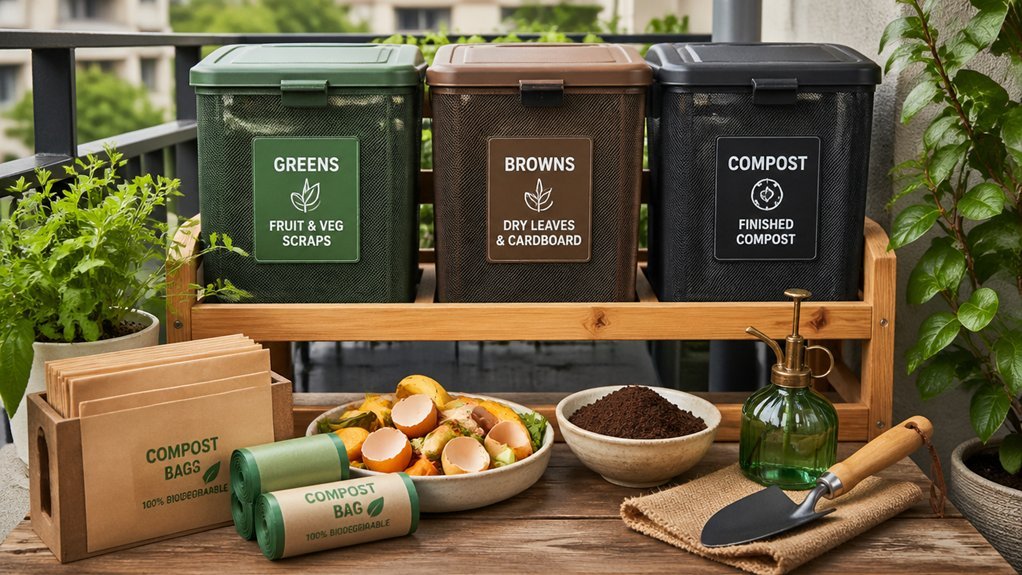
You’ll need a concise materials list that covers the 1× and 2× lumber, wire mesh, exterior screws, and any extra braces for stability. The essential lumber dimensions dictate the bin height and width, ensuring a snug fit for easy rotation. Grab the hardware and reinforcements now, then follow the $5 PDF plan to assemble everything within your $300 budget. For optimal odor control and air circulation, consider selecting lumber with smooth, rot-resistant finishes and aligning your build with a proper air-flow design as noted in odor control capabilities.
L Materials List Overview
Since space is limited on a balcony, the 3-bin compost system relies on a compact lumber kit: two 10-ft 1×4s, two 8-ft 1×4s, nine 8-ft 1×6s, four 10-ft 2×4s, twelve 8-ft 2×4s, and a roll of wire mesh. You’ll also need exterior pocket-hole screws and decking screws to hold everything together. Optional reinforcements—extra 1×4s and five 1½‑inch 2×4 pieces—add stability for windy balconies. The downloadable PDF (just $5) spells out each step, so you can focus on the composting materials that keep your balcony bin system running smoothly through the 3‑rotation cycle. A durable, insect-resistant setup supports steady composting progress by maintaining good aeration and containment for scraps weather-resistant materials.
Essential Lumber Dimensions
Wondering which cuts actually fit together? For the balcony system you’ll need twelve 2 × 4 × 8 ft boards, four 2 × 4 × 10 ft boards, nine 1 × 6 × 8 ft boards, and two 1 × 4 × 10 ft boards. These lumber dimensions form the frame, side walls, and top rails of your compost bins. The project benefits from selecting rot-resistant lumber and planning for proper drainage to maintain long-term stability capacity considerations.
Hardware and Reinforcements
The backbone of the 3‑bin balcony compost system is a mix of pressure‑treated 1 × 4, 1 × 6, and 2 × 4 lumber, exterior‑grade screws, and galvanized wire mesh, with optional 1 × 4 and 2 × 4 braces for extra rigidity. Use ACQ‑treated wood for all structural pieces; it resists rot and insect damage, keeping your three‑bin system sturdy year‑round. Secure each corner with stainless‑steel screws, then add reinforced cross‑braces to prevent wobble under load. Finally, staple the wire mesh to the back and sides, ensuring airflow while keeping pests out.
- 1 × 4 front trim brace, cut 3½ in shorter
- 2 × 4 side braces for lateral support
- Galvanized wire mesh for ventilation
- Exterior‑grade screws for corrosion resistance
Building the Three‑Bin Balcony Compost System
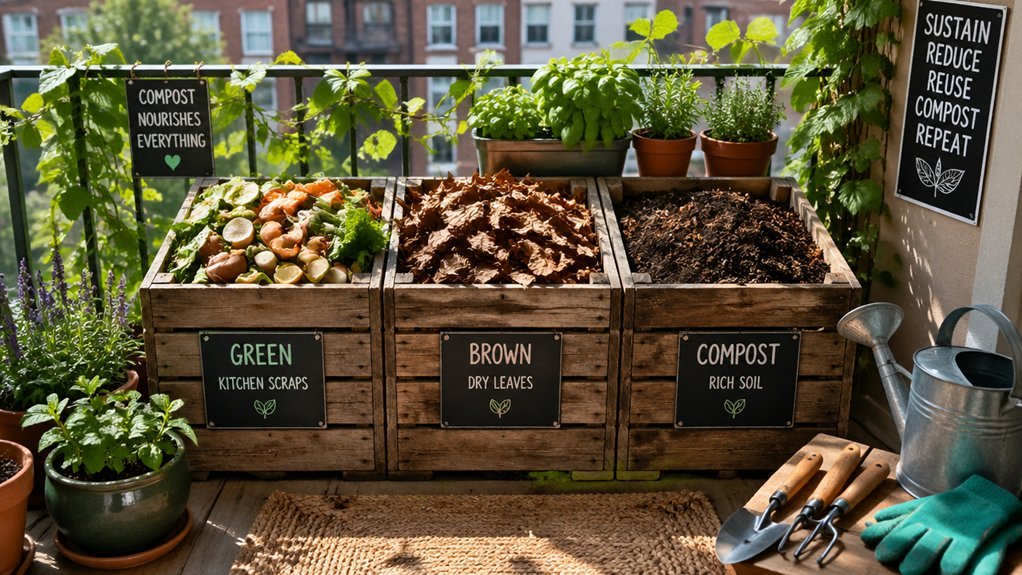
How do you assemble a three‑bin balcony compost system that keeps material moving smoothly from Bin 1 to Bin 2 and finally Bin 3? Start by cutting three 2‑ft‑wide, 3‑ft‑tall ACQ boards for the side panels, then attach 1x4s at the top and bottom for extra rigidity. Install a removable front panel on each bin, using sliding boards and a 24‑block separator to maintain airflow. Secure the bins side‑by‑side with 2×4 cross‑braces, trimming the front trim brace by 3 ½ inches if needed. Add wire mesh to the back for wind protection, then fit the front trim and lock the removable panels in place. Your composting system now follows a three‑bin rotation, and the balcony bin construction is stable, airtight, and ready for use.
Ventilation, Drainage, and Pest Prevention
You’ll keep the bins breathing by leaving sides open or using removable fronts, so each turn supplies fresh oxygen. Make sure water drains freely through bottom channels or a sloped base, and balance greens and browns to stop the mix from getting soggy or bone‑dry.
Seal any gaps, add a rodent‑proof mesh, and tuck food scraps under bedding to keep pests out while preserving airflow.
Air Flow Design
Ever wondered why a 3‑bin system feels so fresh? You’ll notice the airflow is built into every bin design, letting oxygen rush through layers and keep compost lively. Open fronts, slatted vents, and removable panels create a constant draft, while loose‑fitting covers let wind slip in without spilling material. Managing drainage and pest prevention together, you keep the pile aerobic and clean.
- Install rodent‑proof mesh at the bottom to block critters while allowing air to flow.
- Use slatted or removable front panels for adjustable ventilation.
- Add straw or bulking material around the perimeter to maintain insulation and aeration.
- Rotate piles regularly, stirring lightly to refresh airflow and prevent stagnation.
Moisture Control Measures
During each rotation, keep the compost’s moisture like a wrung‑out sponge by balancing wet greens with dry browns and stirring often; ample ventilation through slatted fronts and removable panels, proper bottom drainage or aeration, and a rodent‑proof mesh beneath the bins all work together to prevent soggy pockets, odors, and pests while maintaining a healthy, aerobic environment on your balcony.
To master moisture balance, add shredded paper or dry leaves whenever the mix feels slick, then turn the pile to restore porosity. Good moisture management also means checking the bottom tray for standing water; if it pools, adjust the drainage holes or insert a layer of coarse straw. Aeration stays high when you keep the slats unobstructed and occasionally lift the panels for a fresh breeze. Finally, bury kitchen scraps under a thick bedding layer and seal the bin edges with mesh to keep rodents out while preserving the ideal damp‑but‑dry texture.
Loading Bin 1 of Your Balcony Compost System
When you start loading Bin 1, combine a balanced mix of greens and browns and fill the container to roughly one‑third to halfway full, which guarantees good airflow. Toss kitchen scraps, coffee grounds, and garden clippings into the bin, then cover them with a layer of browns to keep odors down and pests away. Keep the pile damp, like a wrung‑out sponge, and adjust moisture by adding more browns if it feels soggy. As the material breaks down, shift the finished portion to Bin 2 and keep the cycle moving with fresh input.
Combine greens and browns, fill one‑third to half, keep damp, cover with browns, shift finished material to Bin 2.
- Use a 2:1 ratio of browns to greens for optimal carbon‑nitrogen balance.
- Bury new greens under existing browns to enhance aeration and reduce smell.
- Sprinkle a thin straw or shredded paper layer after each addition.
- Check the texture weekly; if it feels dry, mist lightly, and if too wet, add extra browns.
Weekly Turning Routine for the Balcony Compost System
How do you keep your balcony compost thriving without a daily chore? Your weekly turning routine is the key. Each week, use a pitchfork to lift material from Bin 1 and drop it into Bin 2, then stir the pile in Bin 2 to re‑aerate. Add fresh scraps to Bin 1 but stop feeding Bin 2 after the transfer, preserving the three‑bin flow. While turning, check moisture: sprinkle dry browns if it’s soggy, or mist and mix if it feels dry. Keep Bin 3 separate from new input, allowing it to finish breaking down. Watch temperature and odor; a pleasant, warm scent means good aeration, while foul smells signal anaerobic pockets. This disciplined weekly turning keeps your compost system efficient and your balcony composting odor.
Heat Management in Curing Bin 2
Your weekly turning keeps the pile aerated, but the real secret to a fast, odor‑free finish lies in managing heat in Bin 2. Keep a close eye on temperature, aiming for the sweet spot where thermophilic activity thrives without drying out the material. Balance moisture control by misting lightly if it feels dry, and avoid waterlogging that can stall heat buildup. Good aeration through gentle turning prevents anaerobic pockets while preserving the warm core.
- Monitor temperature daily; target 55‑65 °C for optimal thermophilic action.
- Adjust moisture: add a spray of water when the mix feels crumbly, but never soak.
- Turn lightly every 5‑7 days to maintain aeration without losing heat.
- Insulate the bin with a cardboard sleeve or straw to retain warmth between turns.
Harvesting Finished Compost From the Balcony System
Ready to reap the benefits of your balcony compost? You’ll know it’s time to harvest when the material in Bin #3 turns dark, crumbly and soil‑like. First, give each layer a quick turn to boost aeration, then lift the finished compost out. Slide Bin #2 into the #3 spot, and start a fresh batch in Bin #1. Keep moisture balanced and avoid soggy pockets; airy layers decompose faster. If worm castings appear, sprinkle them on potting soil or blend at a 1:3 ratio with your mix. Timing varies—most aerobic bins need 3–6 months, worm bins 2–3 months, and Bokashi pre‑compost just 2–4 weeks before soil integration.
| Step | Action | Outcome |
|---|---|---|
| 1 | Turn layers in Bin #3 | Airy, ready‑to‑harvest material |
| 2 | Remove finished compost | Harvest dark, crumbly soil |
| 3 | Shift Bin #2 → #3, start new batch in #1 | Continuous bin rotation |
Common Mistakes and Quick Fixes for Balcony Composting
Ever notice a sour smell or soggy mess in your balcony bins? That usually means something’s off with your composting routine. Overwatering, citrus or oily scraps, and lack of airflow can stall decomposition and ruin bin rotation. Here’s how to fix it fast:
- Add dry browns (leaves, shredded paper) to restore moisture control and stir gently.
- Move bins to a shaded, sheltered spot to protect worms from extreme sun and temperature swings.
- Turn the pile 2–3 times a week and follow a regular feeding schedule to keep odors at bay.
- Drain excess liquid weekly, check seals, and dry any overly wet greens with extra browns.
Implement these tweaks, and your balcony compost will stay healthy, odor‑free, and ready for the next rotation.
Scaling the System for Small Apartments or Rooftops
How can you keep a thriving compost system when space is limited? Use compact compost bins of 1–2 cu ft each, stacking them vertically or keeping them shallow to fit a balcony or rooftop. Choose lightweight, open‑frame or wire‑panel bins with removable fronts for airflow and easy turning. Place the three‑bin rotation—active, resting, finished—in a shaded, wind‑sheltered corner near a water source. Repurpose pallets or modular panels to keep the space‑efficient system affordable and adaptable as your balcony gardening needs evolve.
| Bin | Purpose |
|---|---|
| 1 | Active – add fresh scraps |
| 2 | Resting – allow decomposition |
| 3 | Finished – harvest compost |
| 4 | Spare – swap when needed |
| 5 | Expansion – add extra capacity |
Frequently Asked Questions
Can I Compost Meat or Dairy on a Balcony?
No, you shouldn’t compost meat or dairy on a balcony. They attract pests, create odors, and slow decomposition. Stick to fruit scraps, vegetable peels, coffee grounds, and yard waste for a clean, efficient system.
How Often Should I Water the Bins in Winter?
You should water the bins just enough to keep the material moist, about once a week in winter, checking daily; if it feels dry, spray lightly, but avoid soggy conditions that slow decomposition.
What Type of Cover Prevents Rain but Allows Airflow?
You should use a breathable rain‑cover like a fine‑mesh tarp or garden fabric; it blocks droplets while letting air circulate, keeping moisture balanced and preventing soggy, anaerobic conditions in your compost bins.
Do I Need a Special Bin for Pet Waste?
No, you don’t need a special bin; just use a sturdy, sealed container that fits your space, line it with a bag, and keep it away from food scraps to avoid odors.
Can I Use This System on a Sloped Balcony?
Yes, you can set it up on a sloped balcony; just level the bins with a sturdy frame or brackets, secure them to prevent sliding, and ensure proper drainage so moisture doesn’t pool.
In Summary
Now you’ve got a compact, three‑bin system that fits any balcony, you can turn kitchen scraps into rich compost without a mess. Just keep the bins rotating, watch moisture, and let the middle bin warm up for faster curing. With a little attention to airflow and pest control, you’ll harvest dark, crumbly soil ready to boost your plants. Enjoy the simplicity, sustainability, and the satisfaction of feeding your garden right from your balcony.



