
You’ll find a mini tumbling composter easy to assemble because every piece arrives pre‑cut, pre‑drilled, and pre‑finished, so you only need a screwdriver, a wrench, and a hammer. The axle and drum fit snugly without extra machining, and the hinged lid snaps on with a single latch. Built‑in vents eliminate drilling, while the dual‑chamber frame lets you swap drums without disassembly. Weather‑resistant seals keep moisture in and odor out, and a quick spin‑check confirms everything’s aligned—continue and discover more details.
What Makes a Mini Tumbling Composter Easy to Assemble
How does a mini tumbling composter stay so simple to put together? You start with a compost barrel that’s already a standard 55‑gallon drum or a compact food‑grade barrel. The tumbler mechanism hinges on a removable axle that lets you rotate the drum by hand, so no power source is needed. You drill 20–30 ventilation holes around the barrel for airflow and odor control, then attach a hinged lid with a latch for easy loading. A basic frame with four casters gives you mobility, and the pre‑drilled holes let you bolt the axle without extra tools. Layer greens and browns, spin the barrel, and the composting process begins—no complex parts, just straightforward assembly.
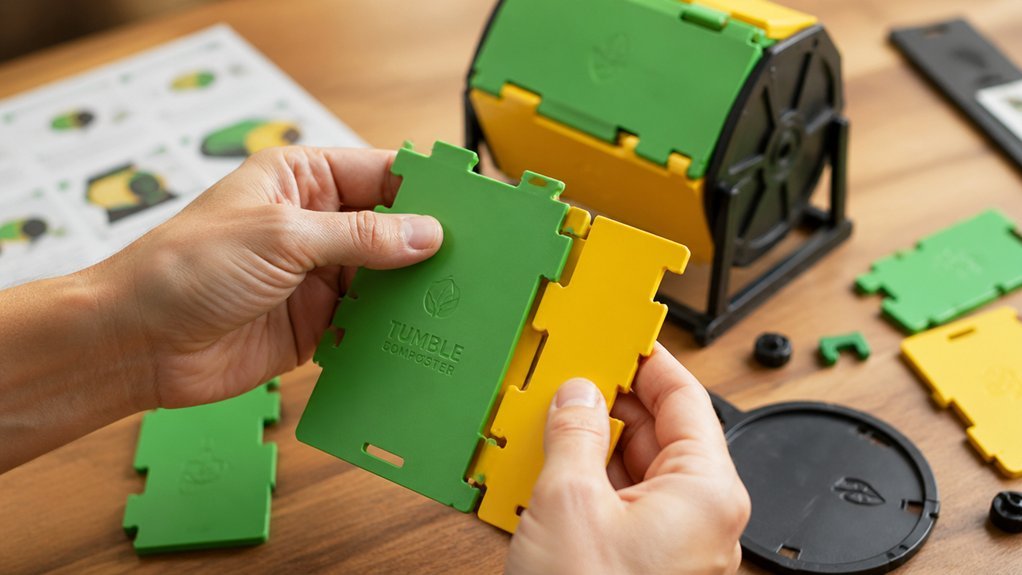
Pre‑Cut Parts for a Mini Tumbling Composter
You’ll notice the lumber comes already cut to the exact dimensions you need, so you can skip the saw and straight straight straight holes The‑‑. are holes the patterns pre are a‑ in the holes, and you’ve got everything hardwarelock. in the checklist.
This means you’ll assemble the composter in minutes, not hours.
Cut Lumber Dimensions
Ever wondered which exact cuts will make your frame fit the drum perfectly? You’ll need lumber dimensions that match the 55‑gallon barrel’s footprint: two upright supports cut to 35 inches, two footers at 34 inches, and two spacers at 29 inches. The 45‑degree miter on the top of each upright creates a clean joint for the barrel’s axle and lets airflow through the PVC cap without obstruction. After cutting, sand the edges, then seal with a weatherproof finish to protect against moisture. Drill the 1.5‑inch holes at the upright tops for the axle hardware, and make sure the spacers sit flush to keep the drum level. Properly sized pieces and smooth airflow pathways ensure the composter spins freely and aerates efficiently. Reinforced seams and a snug fit help prevent leaks during operation and contribute to smoother maintenance over time leak prevention.
Pre‑Drilled Hole Patterns
Where do the holes go, and why do they matter? You’ll find pre‑drilled hole patterns on every panel, marking exact spots for axles, ventilation, and mounting hardware. A uniform grid of ½‑inch vents spaced 6–8 inches apart maximizes airflow, while three 1.5‑inch holes line up for the axle or pipe and a single bottom hole serves as the main vent. The pattern also includes 20–30 tiny holes around the barrel for extra breathability. By following these pre‑drilled guides you eliminate guesswork, avoid mis‑alignments, and speed up assembly.
| Feature | Size | Placement |
|---|---|---|
| Axle holes | 1.5 in | Evenly spaced on side panels |
| Bottom vent | 1 in | Center of base |
| Ventilation grid | ½ in | 6–8 in apart across barrel |
| Small holes | ¼ in | Distributed around barrel perimeter |
Assembly Hardware Checklist
Where does the list start? You begin with two 35‑inch uprights, two 34‑inch footers, and two 29‑inch spacers, all pre‑cut from pressure‑treated lumber. Next, gather the metal hinge and galvanized latch for the lid, plus the locking ring that secures the drum during rotation.
Pull out the four casters, the 2×4 base pieces, and the axial pipe kit—two drilled holes for the axle, a bottom PVC airflow hole, and the capped 18‑inch pipe. Odor control is a key consideration in most compost bin designs, so ensure your setup allows for proper venting as you assemble.
Finally, collect the drill bits (½‑inch for ventilation holes) and the assorted screws, bolts, and washers that hold everything together. This hardware checklist ensures each component aligns correctly, giving you smooth rotation and a sturdy, compost‑ready composter.
Axle & Drum Fit for a Mini Tumbling Composter
You’ll want to line up the axle perfectly with the frame so the drum spins without wobble. Choose a drum that matches the axle’s diameter—typically ½‑ to 1‑inch—so it fits snugly yet still rotates by hand. Regular maintenance of the bearing surfaces helps prevent resistance during rotation. Quality control ensures consistent performance across batches.
Axle Alignment Tips
When you line up the axle with the drum bore, aim for a centered fit that rides in sealed bushings or bearings to eliminate wobble and keep rotation smooth.
First, check that the axle sits evenly between the pre‑drilled support brackets; both brackets should be at the same height so the drum stays level.
Use the evenly spaced holes or a pegged alignment system on the frame and drum to lock the axle in place, preserving consistent clearance.
Apply a thin layer of lubricant to the axle and tighten the removable end caps, preventing lateral drift as the drum spins.
Finally, spin the drum by hand; it should turn freely with minimal resistance before you load the tumbler.
Proper axle alignment ensures reliable drum rotation and a hassle‑free composting experience. alignment
Drum Size Compatibility
A well‑aligned axle sets the stage for fitting the drum, and the drum’s dimensions must match the axle’s bore to keep the unit balanced and easy to turn. When you choose a drum size, aim for the common 50–55‑gallon range; it’s large enough for productive compost but small enough to rotate by hand. Check that the axle diameter aligns with the drilled bore—most kits use a 1/2‑inch to 3/4‑inch rod or galvanized pipe. Verify axle compatibility by measuring the hole depth and ensuring the axle sits snugly without wobble. A removable, locking lid protects against pests while letting you load material quickly. Evenly spaced ventilation holes (20–30 around the barrel) maintain airflow, completing a well‑matched drum‑axle pair. continuous composting supports continuous waste processing and maturation in dual‑chamber setups to maximize efficiency.
Secure Mounting Methods
If you align the central axle precisely with the drum’s bore, the tumbler rotates smoothly and stays balanced, minimizing side‑to‑side strain. Drill exact holes for the axle, then seat the drum on bearings or bushings to eliminate wobble. Attach a bottom‑support pipe or rod that mates with the frame’s uprights, keeping the drum centered as weight shifts. Secure the frame with a crossbar that locks the axle in place, distributing load evenly and preventing tipping. Use a removable‑lid drum with a locking ring; it reinforces the axle connection and blocks odors or fuel escape. Double‑check that each bearing spins freely before tightening bolts, and you’ll have a sturdy, low‑maintenance compost tumbler ready for use. Magnetic adhesion helps keep placement consistent on metal bins and reduces accidental misalignment during rotation.
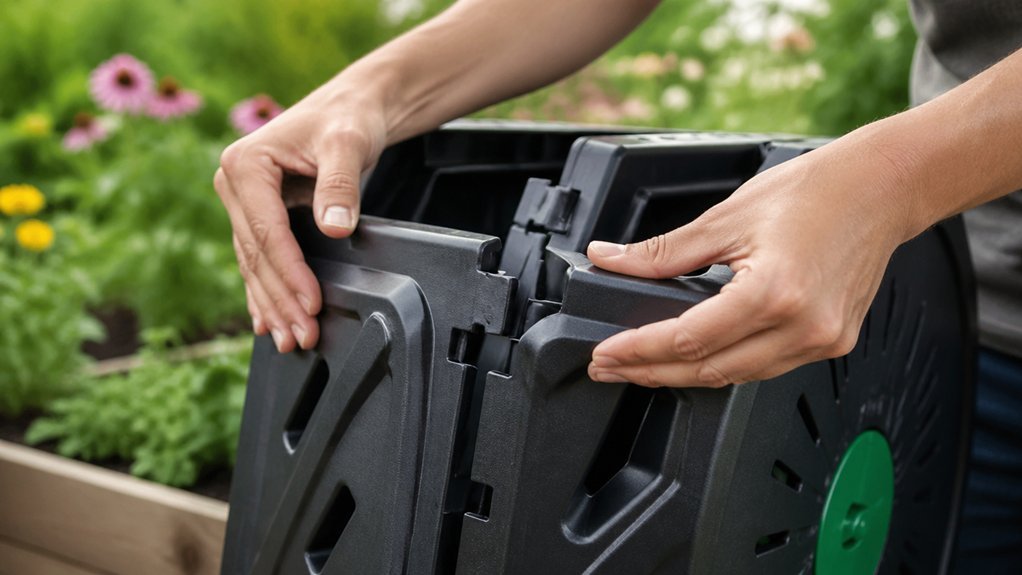
Attaching the Lid in One Simple Step
Ever wonder how to lock the lid in place with just one move? You’ll love the removable‑lid barrel design: a locking ring snaps over the lid, and a sturdy lid hinge lets the hatch swing open for loading without removing the whole lid. First, align the metal hinge with the pre‑drilled holes, then slide the latch into the top slot. When you push the lid down, the latch clicks into the ring, securing the lid instantly. No extra tools, no fuss—just a single, confident motion.
| Step | Tool | Result |
|---|---|---|
| 1 | Locking ring | Holds lid firmly |
| 2 | Metal hinge | Enables flip‑open hatch |
| 3 | Galvanized latch | Secures lid during tumbling |
Why the Built‑In Vents Save You a Drill
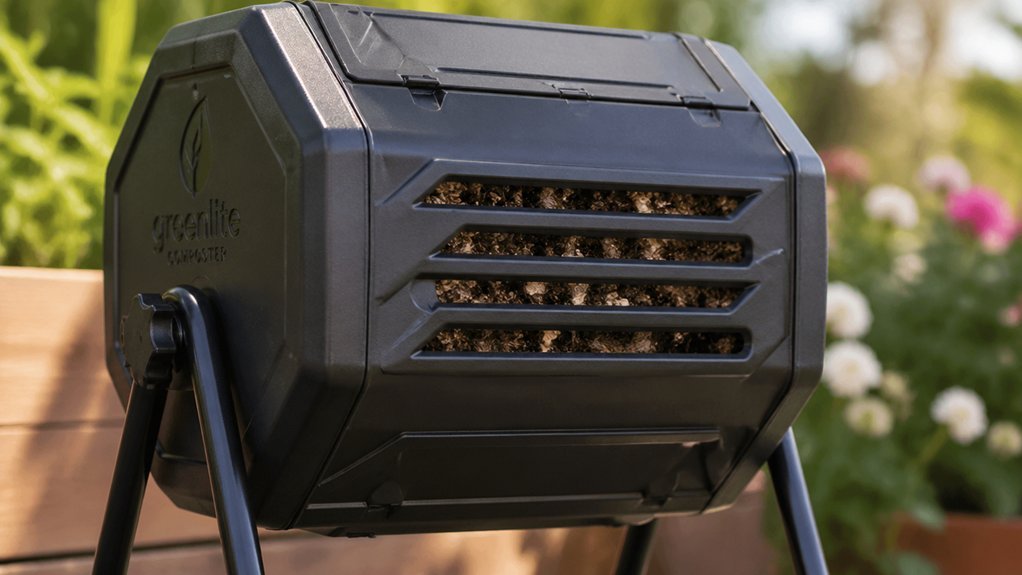
You’ll notice the vents are already built into the barrel, so you never have to drill a single hole.
This integrated aeration keeps oxygen flowing, speeds up decomposition, and prevents odors without any extra work.
Because the openings are pre‑sized and evenly spaced, assembly stays simple and you save both time and effort.
Ventilation Integrated, No Drilling Required
How often have you dreaded pulling out a drill just to make a few holes for ventilation? With the mini tumbler’s built‑in vents, you skip that step entirely. The pre‑installed ventilation channels line the barrel, delivering steady airflow the moment you spin the drum.
That constant oxygen boost fuels aerobic decomposition, while the balanced placement of holes prevents odor‑causing anaerobic pockets.
Because the vents are sized and positioned at the factory, you avoid uneven holes that could unbalance the unit or let excess moisture escape. The assembly stays clean, safe, and tool‑free—perfect for beginners who want a hassle‑free compost setup. No drilling means you focus on compost, not on prepping the tumbler.
Simplified Assembly, Time‑Saving Design
Why waste time drilling holes when the tumbler already comes with perfectly placed vents? You skip a drill, a measuring tape, and a whole set of instructions, because the built‑in ventilation is pre‑drilled with a 5/16‑inch bit and arranged in a 20‑to‑30‑hole pattern around the drum. This design gives you instant airflow, so aerobic decomposition starts right away without any guesswork. The integrated vent design also helps maintain consistent temperatures across batches, improving overall efficiency. inlet vents
Only a Screwdriver, Wrench, and Hammer Needed
Ever wondered how a mini tumbler can come together with just a screwdriver, a wrench, and a hammer? You’ll find that ordinary hand tools handle every step, so you avoid pricey equipment. The screwdriver drives the self‑tapping screws that lock the frame and hinge, the wrench tightens the axle bolts, and the hammer secures the casters and aligns the drum. This simplicity lets you focus on drilling ventilation holes, mounting the rotating drum, and attaching the hinged hatch without a learning curve.
| Tool | Role | Feeling |
|---|---|---|
| Screwdriver | Drives screws | Confidence |
| Wrench | Tightens bolts | Control |
| Hammer | Aligns parts | Satisfaction |
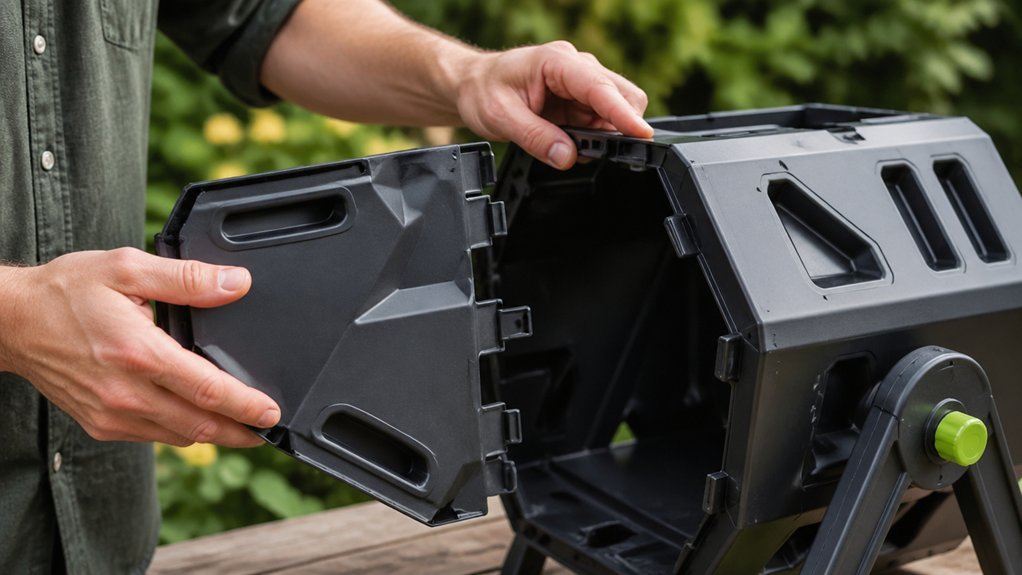
Puzzle‑Style Assembly Steps for Your Mini Tumbling Composter
Ready to piece together your mini tumbler like a puzzle? You’ll start by aligning the barrel’s ventilation holes with the base’s duct ports, then snap the locking ring onto the drum. Slide the hinge‑mounted hatch into the U‑shaped lid slot, securing it with self‑tapping screws. Next, attach the galvanized latch, then fit the casters under the pressure‑treated frame, checking that the drum sits level and rotates smoothly. Finally, run a PVC pipe through the bottom openings to channel fresh air into the barrel, ensuring steady aeration for compost.
Align ventilation, snap locking ring, secure hatch, attach latch, mount casters, and run PVC for steady aeration.
- Align barrel ventilation holes with base duct ports
- Secure hinge‑mounted hatch with self‑tapping screws
- Attach galvanized latch and mount casters for mobility
- Connect PVC pipe for continuous airflow through the barrel
Quick‑Lock Base Frame for a Mini Tumbling Composter
How does a Quick‑Lock Base Frame make setting up your mini tumbling composter a breeze? You line the frame’s four caster‑supported legs with the ground, click the 55‑gallon drum into the pre‑drilled slots, and the COMPOST TUMBLER is ready to spin. The QUICK‑LOCK BASE FRAME aligns perfectly, so you never wrestle with mis‑fits. Built‑in leveling tabs keep the drum balanced, even on uneven terrain, while pressure‑treated wood and corrosion‑resistant hardware survive rain and moisture. The low‑profile turning mechanism stays hidden, reducing manual effort and keeping the compost tidy.
| Feature | Benefit |
|---|---|
| Caster legs | Stable support on flat surfaces |
| 55‑gallon alignment | Easy drum attachment |
| Leveling tabs | Prevents tipping on uneven ground |
| Weather‑proof materials | Long‑term durability |
| Low‑profile mechanism | Minimal effort for rotation |
Dual‑Chamber Design for Ongoing Composting
Curious about never compost? You’ll love how a dual‑chamber design fuels ongoing composting without pause. While one drum fills, the other continues breaking down material, so you never wait for a full cycle. The two adjacent rotatable compartments share a sturdy frame, letting you rotate fresh inputs into the active chamber and shift finished compost into storage with a simple hatch. Insulated, sealed chambers retain heat and moisture, keeping microbes happy even in cooler weather. The lid and locking mechanism keep everything secure, and the transfer hatch makes moving compost effortless.
- Fill one chamber while the other matures
- Rotate drums to maintain steady throughput
- Use a shared frame for easy material transfer
- Retain heat and moisture with insulated, sealed chambers
Weather‑Resistant Seals for a Mini Tumbling Composter
A solid, weather‑resistant seal is the key to keeping rain, dust, and drafts out of your mini tumbling composter, ensuring the interior stays airtight and pest‑free. You’ll want gasketed lids, rubber O‑rings, or silicone sealants around every joint. Choose UV‑stable plastic or treated‑metal gaskets so cracking and corrosion never become an issue. When you snap the lid on, the seal should compress evenly, blocking moisture and maintaining a stable temperature for microbes. In winter, that same weather‑resistant seal cuts heat loss, letting you compost year‑round even in moderate climates. By installing these seals correctly, you protect the compost’s ecosystem, extend the unit’s lifespan, and keep pests out without extra effort.
Troubleshooting Common Fit Issues During the First Build
Ever notice the drum wobbling or binding after you snap everything together? You probably missed a step that keeps the composter’s axle aligned and the frame level. First, double‑check that the barrel sits square on the axle; a mis‑aligned nail stop will cause wobble. Next, verify you’ve drill holes the correct size—1.5‑inch for airflow and 1/2‑inch for ventilation—so the drum can spin without resistance. Finally, make sure the base is level and the caster wheels are firmly attached; an uneven base will make the drum bind when you turn it.
- Align the axle with the frame and secure it with a nail stop.
- Drill holes to the specified dimensions for proper airflow.
- Use a level to ensure the base sits flat on the ground.
- Tighten self‑tapping screws on the hinge and hatch to avoid rubbing.
Final Spin‑Check for Your Mini Tumbling Composter
How do you know your mini tumbler is truly ready for composting? Perform a final spin-check by rotating the turning barrel several full turns. Watch the axle or pipe glide through the frame without binding, and make sure the barrel stays centered as it turns. Secure the lid and hatch, then open them to confirm easy access for adding material before the next spin. Inspect for protruding screws or misaligned joints that could cause resistance, and tighten or realign as needed. Finally, verify the airflow system is clear: check ventilation holes and PVC cap fittings to ensure proper aeration. When every movement feels smooth and unobstructed, your tumbler is ready for efficient composting.
Frequently Asked Questions
What Is the Disadvantage of a Compost Tumbler?
You’ll find that compost tumblers often have limited capacity, so you’ll need to empty them frequently; they can rust or corrode, and turning them improperly may cause odors, slow heating, or uneven decomposition.
Should You Put Worms in a Tumbling Composter?
You probably shouldn’t put worms in a tumbling composter because the constant rotation disturbs them, reduces their population, and limits their ability to process material efficiently.
Are Tumbling Composters Any Good?
You’ll find tumbling composters effective; they speed decomposition, control odors, and reduce pest issues. Their rotating drum mixes material evenly, and the compact design fits small spaces while still producing usable compost.
What Is the Easiest Compost Bin to Build?
You’ll find a 55‑gallon drum with a removable lid, drilled ventilation holes, a hinged lid, and a sturdy base with casters the simplest compost bin to build, offering quick assembly and easy turning.
In Summary
Now you’ve seen how pre‑cut parts, a snug axle‑drum fit, single‑step lid attachment, built‑in vents, dual chambers, and weather‑proof seals make assembling a mini tumbling composter a breeze. By following the quick fit‑check and troubleshooting tips, you’ll have a sturdy, ready‑to‑spin system in no time—so you can start turning kitchen scraps into rich compost without hassle.


Leave a Reply