

You can collect nutrient‑rich worm tea right from a compact indoor bin, keeping your apartment clean and your plants thriving. Use a 2.5‑gallon Worm Bucket with a built‑in spigot and a shallow drip tray that fits under a sink or on a balcony. Fill the bottom tray with moist coconut coir bedding, stack two more trays for feeding, and add fruit,veg peels, coffee grounds, and eggshells. Drain the spigot every few days, dilute the tea 1:10, and water your container garden. Continue for and you’ll discover more setup tips.
Learn What Worm Tea Is and Why It’s Ideal for Small Spaces
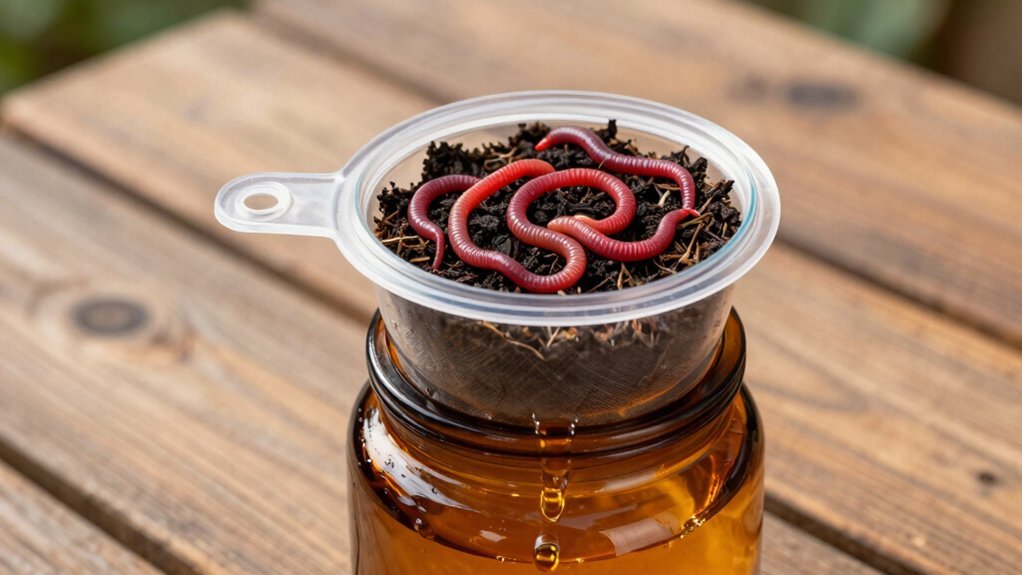
Ever wondered what worm tea actually is? You’re looking at the liquid by‑product that drips from a worm bin’s drip or spigot, a nutrient‑rich fertilizer you can collect without tearing the whole system apart. Worm tea packs a punch of microbes and minerals, and you can dilute it 1:10 or 1:20 to feed houseplants, garden beds, or balcony herbs. Because the collection tray sits under a sink or on a balcony, it fits snugly in apartments and tiny studios. Draining regularly keeps the bin from getting soggy, preserving a healthy environment for the worms. The result is a repeatable, ready‑to‑use liquid that boosts soil fertility while staying compact and low‑maintenance. Choosing a collection tray with proper drainage capacity prevents spillage and maintains a clean setup for small space composting.
Pick the Best Small‑Space Worm Bin for Tea Harvest
Looking for a compact worm bin that lets you harvest tea without a mess? The Worm Bucket Indoor Composting Starter Kit fits perfectly. Its 2.5‑gallon bin slides onto countertops or shelves, and the built‑in spigot pulls worm tea straight into a container, eliminating spills. The kit supplies coco coir bedding, so you start with a moist, breathable environment that supports active worms at 18–22 °C.
Follow the setup guides to add food gradually, preventing overload while the bin matures over 60–90 days. The drainage design separates liquid worm tea from solid castings, letting you harvest a dilute fertilizer whenever you need it. This beginner‑friendly, space‑saving system delivers consistent tea yields without the hassle of larger setups. Proper drainage and maintenance are essential for sustaining worm health and maximizing compost quality in small space composting.
Set Up a 3‑Tray Compact Worm Farm for Maximum Tea Yield
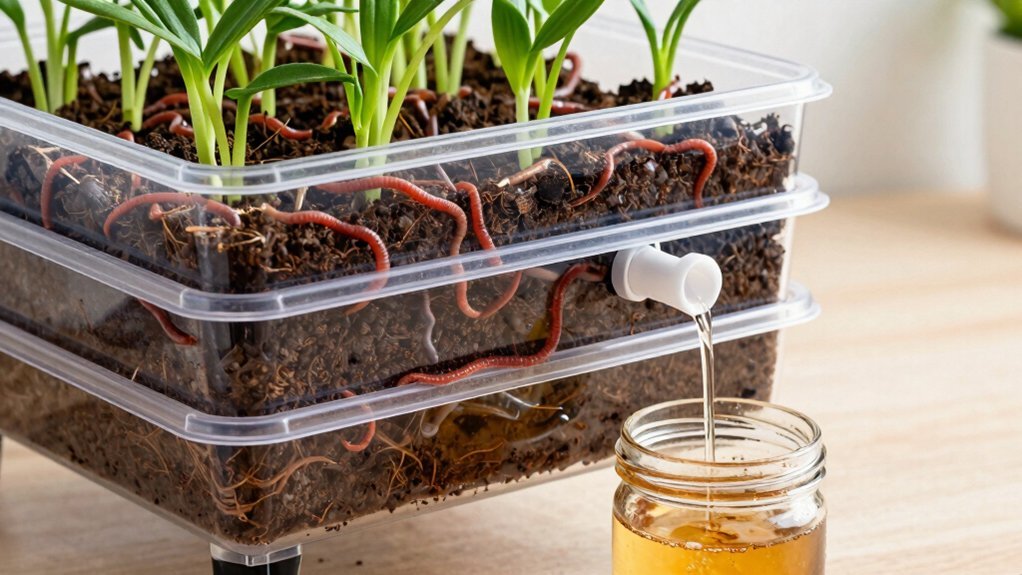
You’ll stack the three trays so the top one feeds the middle and the middle feeds the bottom, letting worm tea flow straight into the collection base. By keeping the coconut coir bedding moist and sealing the lid, you prevent pests and confirm the worms stay active for continuous liquid output. This compact configuration maximizes harvest while fitting snuggly under a sink or on a balcony. For added convenience, consider countertop placement options and odor control methods like charcoal filters to maintain freshness in small spaces.
Maximize Tea Harvest
How can you squeeze the most worm tea out of a tiny kitchen?
Keep feeding light and steady at first, then add a little more as the worm population expands.
Water each tray just enough to keep the coco‑coir bedding moist but not soggy; excess moisture will flow straight to the collection base, where the spigot lets you drain fresh worm tea within days.
Rotate the trays weekly so the top layer receives fresh food while the lower layer continues draining.
Harvest the tea before it sits too long, then refill the base with clean water to rinse any residue.
Electric composters with compact 4L capacity provide an efficient, space-saving solution suited for small kitchens where maximizing output is essential.
Compact Tray Configuration
Want to squeeze the most worm tea out of a tiny kitchen? Stack three shallow trays on a sturdy base, each with a perforated bottom that lets liquid drip into the layer below. A fitted lid keeps humidity high, while a simple tap at the bottom of the collection tray lets you pull the nutrient‑rich brew without lifting the worms. The top tray holds fresh bedding and food, the middle catches leachate, and the bottom gathers clean worm tea ready for fertilizing your herbs.
- Feel the excitement when the first drop of tea pools in the collection tray.
- Enjoy the simplicity of turning the tap and watching a clear, earthy liquid flow.
- Celebrate the efficiency of a compact system that delivers abundant worm tea every few days. Proper odour control is essential to maintain a pleasant indoor environment while composting in small spaces.
Prepare Coconut Coir Bedding for Healthy Worm Tea Production
Ever wondered how a simple brick of coconut coir can set the stage for robust worm tea? Wet the brick, let it swell for five minutes, then fluff it like a wrung‑out sponge. The coconut coir bedding now holds moisture, drains excess water, and creates airy pockets for microbes and red wigglers. Place the expanded layer at the bottom of your bin, then add your compost mix on top. This base stabilizes temperature, cuts odors, and ensures a steady drip of nutrient‑rich tea during collection. Choosing a pH-neutral coir helps maintain a balanced environment for worm health and microbial activity.
| Step | Action |
|---|---|
| 1 | Submerge brick in water |
| 2 | Wait 5 minutes for expansion |
| 3 | Squeeze gently to achieve sponge‑like dampness |
| 4 | Fluff and spread evenly in bin |
| 5 | Add compost layer above bedding |
Feed Red Wigglers Apartment‑Safe Scraps for Better Worm Tea
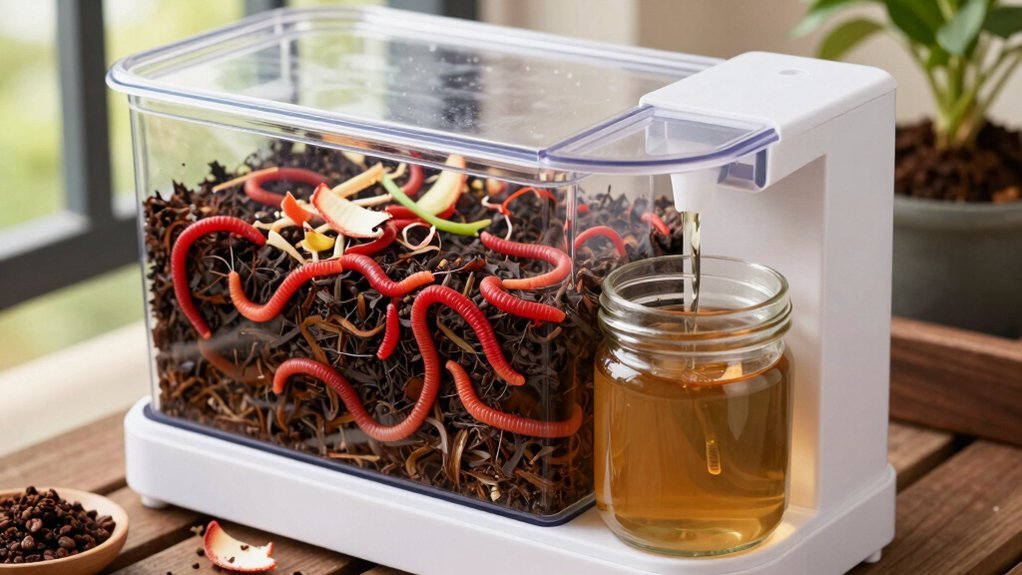
You’ll boost your Red Wigglers’ output by feeding them fruit and veggie peels, coffee grounds, tea bags, crushed eggshells, and shredded cardboard.
Keep the scraps free of meat and dairy to avoid odors and maintain a balanced moisture level.
When the worms process these apartment‑safe foods, the tea you harvest will be richer and more consistent for your plants.
Using a worm composting system with integrated ventilation slits can help control odor and improve aeration for healthier worm tea production.
Red Wigglers’ Preferred Scraps
Which kitchen scraps keep your Red Wigglers thriving and boost worm tea output? You’ll notice they love fresh, fibrous bits that stay moist but don’t rot too fast. Feed them a mix that balances nitrogen and carbon, and you’ll see richer tea and healthier castings. Keep the bin cool and the drainage sealed, and the scraps turn into liquid gold for your plants.
- Apple cores and peels – sweet, moist, and easy to chew, they spark rapid activity.
- Carrot tops and leafy greens – high nitrogen, they keep the worms energetic and the tea nutrient‑dense.
- Whole grain bread crumbs – provide steady carbs without overwhelming the system, ensuring consistent tea flow.
Optimized Worm Tea Harvest
Fresh kitchen scraps keep Red Wigglers active, and that activity drives a steady flow of worm tea from the bin’s collection tray. To optimize harvest, feed them 2–3 cups of chopped, apartment‑safe waste every two weeks. Keep the bin in a cool, stable spot (18–22 °C) and check that the spigot or drain is unobstructed for easy access. Moisture should feel like a wrung‑out sponge; too wet invites odor, too dry stalls drainage. After each feeding, worm tea will begin seeping into the reservoir within a few days, so collect it before it evaporates. Dilute the liquid as needed, and store any excess in a sealed container to preserve nutrients for later use. This routine yields a continuous, odor‑free supply of worm tea while the castings mature.
Set Up a Drip Tray and Spigot to Grab Your Worm Tea
Wondering how to harvest worm tea without disturbing your worms? Place a shallow drip tray directly under your compost bin and attach a small spigot at the tray’s lowest point. The tray catches the nutrient‑rich liquid as it drips from the bedding, while the spigot lets you pull the worm tea whenever you need it. Keep the tray level so water flows evenly, and position the spigot where you can reach it without bending. This setup prevents over‑saturation, cuts odor, and fits snugly on a countertop or under a sink.
A shallow drip tray with a low spigot harvests worm tea cleanly, keeping worms undisturbed.
- Feel the satisfaction of a clean, mess‑free harvest.
- Enjoy the confidence of knowing your worms stay untouched.
- Relish the convenience of instant, liquid fertilizer at your fingertips.
How Often to Drain and Dilute Worm Tea for Houseplants?
You’ll want to drain the worm tea every few days to keep it fresh, then dilute it before each feeding—typically a weak solution works best.
Adjust the dilution ratio based on how thirsty your houseplants are; a common starting point is one part tea to ten parts water.
Pay attention to each plant’s response and tweak the timing and strength as needed.
Frequency Drain Frequency
How often should you drain and dilute worm tea for houseplants? You’ll feel confident when you set a rhythm that matches your bin’s drainage. Check the spigot on your 3‑tray or 2.5‑gallon starter kit every few days; a fresh flow means it’s time to collect. If the leachate slows, boost aeration and moisture so the system stays lively. Consistent drainage prevents stagnation, protects roots, and keeps the tea potent.
- Every 2‑3 days – you’ll notice a bright, earthy scent and a steady drip, sparking excitement.
- Weekly check – a quick glance reassures you that the process remains smooth, easing anxiety.
- Adjust when needed – if the flow drops, tweak moisture; the sense of control fuels motivation.
Dilution Ratio Guidelines
What’s the ideal way to dilute worm tea for houseplants? You’ll want a 10:1 ratio—one part worm tea to ten parts water—right after you pull it from the worm tea collection system. Keep the batch in a cool, shaded spot and use it within 24–48 hours to prevent odors. Apply the diluted brew every 1–2 weeks, adjusting for plant size and watering habits. If leaves yellow or scorch, increase the dilution or skip a cycle.
| Plant Size | Dilution Ratio | Application Frequency |
|---|---|---|
| Small | 1 : 10 | Every 2 weeks |
| Medium | 1 : 10 | Every 1 week |
| Large | 1 : 10 | Every 1 week |
| Succulents | 1 : 15 | Every 2 weeks |
| Ferns | 1 : 8 | Every 1 week |
Plant‑Specific Timing Recommendations
When should you drain and dilute worm tea for each houseplant? You’ll keep your foliage thriving by timing the worm tea dosage to your plant’s growth cycle. Drain the spigot every 1–2 weeks while the bin feeds, then dilute at a 1:10‑1:20 ratio. Use the solution within 24–48 hours to prevent nutrient loss and root burn. Adjust frequency for slower growers, but never skip the dilution step.
- Feel the excitement when you see greener leaves after each fresh batch.
- Sense confidence knowing you avoid over‑feeding with the right worm tea dosage.
- Enjoy peace of mind as your houseplants flourish on a steady, safe schedule.
Fix Smelly, Wet, or Pest‑Infested Worm Tea
Ever notice your worm tea smelling sour, pooling, or attracting fruit flies? That usually means your compost bin is over‑wet or lacking airflow.
First, cut back feeding and add dry bedding like shredded cardboard to soak up excess moisture.
Next, install a sturdy drainage layer and a fine mesh screen over the tap to keep solids out and improve aeration.
Keep the bin covered with a breathable lid to block flies while still letting air in.
When you collect the tea, drain it promptly and dilute it at least 1:10 with water before applying to plants—this prevents nutrient spikes that can scorch roots.
Finally, maintain a stable temperature below 30 °C (86 °F) to keep odors in check and discourage pests.
Add Extra Trays Without Crowding
If your tea is already staying fresh, the next step is to boost capacity without choking the system. You can add extra trays to your Worm Bins while preserving airflow and drainage. Use the modular design: each tray slides into the previous one, leaving a narrow gap for air to circulate. Keep the stack stable by aligning the drain holes, and check that the spigot still reaches the lowest tray. This method expands harvest volume without crowding the worms or creating odor.
- Slide‑in trays – feel the satisfying click as each layer locks into place.
- Clear airflow gaps – enjoy fresh, odor‑free composting.
- Easy drainage alignment – watch the tea flow smoothly, knowing your system stays efficient.
Use Collected Worm Tea as Liquid Fertilizer in Container Gardens
Why not turn the tea you harvest from your worm bin into a powerful, ready‑to‑use liquid fertilizer for your container garden? You can simply open the spigot on your Worm Bucket Indoor Composting Starter Kit, collect the worm tea, and dilute it with water—about one part tea to ten parts water—to prevent burn on delicate roots. Apply the mixture during regular watering, and the nutrients will seep directly into the potting medium, boosting growth and vigor. Because the drainage layer and collection tray keep the tea fresh and free of standing water, you’ll have a steady supply without extra mess. Use this liquid alongside solid castings for a balanced feeding routine that maximizes yields in limited space.
Maintain a Continuous Cycle: Harvest, Re‑feed, and Re‑stock Worms
You’ve already seen how a steady stream of diluted worm tea can boost your container garden, now keep that momentum going by cycling the bin itself. Harvest the tea soon after it drains, then promptly re‑feed the tray with fresh kitchen scraps. A balanced feed‑to‑moisture ratio prevents soggy bedding and keeps the tea flowing without odor. If the worm population looks thin, add a handful of healthy compost worms to re‑stock and sustain production.
- Harvest – Pull the spigot, collect the clear liquid, and store it in a sealed bottle.
- Re‑feed – Toss in chopped veggies, coffee grounds, and shredded newspaper; stir lightly.
- Re‑stock – Drop in new worms, spread them evenly, and watch the cycle restart.
Quick Checklist for a Clean Apartment Worm‑Tea System
Wondering how to keep your apartment worm‑tea system spotless while it churns out liquid gold? Start by setting a harvesting alarm: collect tea every 3‑7 days, then dilute and store it.
Keep the spigot area clean—wipe it with a mild bleach solution after each draw and rinse thoroughly.
Avoid overfeeding; excess food fuels mold and foul odors.
Cover any light‑exposed trays with a dark cloth to prevent algae.
Maintain temperature at 18–22 °C (64–72 °F) so worms stay active but don’t overheat.
Inspect the bottom collection tray weekly for crusty build‑up; scrub with a soft brush and warm water.
Finally, rotate bins gently to prevent compacting, and you’ll enjoy a tidy, efficient Worm tea collection system in your apartment.
Frequently Asked Questions
Can I Use Worm Tea on Edible Crops Without Washing First?
Yes, you can apply worm tea directly to edible crops, but you should dilute it properly and let it dry before harvest; this reduces residue and ensures safe consumption without washing.
Will Worm Tea Attract Ants or Other Insects to My Apartment?
Yes, it can. Ants and other insects love the sweet, moist brew, so you’ll likely see them. Dilute the tea, keep it sealed, and store it away from entry points to deter pests.
How Long Can Stored Worm Tea Remain Effective Before It Spoils?
You can keep worm tea fresh for about two weeks in the fridge; after that, it loses nutrients and may start to sour, so use it promptly or discard it to avoid spoilage.
Is It Safe to Use Worm Tea in Hydroponic Systems?
Yes, you can safely use worm tea in hydroponics if you filter it, dilute it to about 1:10, and apply it after a few days of aeration to avoid pathogen spikes.
Do I Need to Filter Worm Tea Before Applying It to Plants?
Yes, you should filter worm tea before using it on plants. Straining removes debris and excess microbes, preventing clogging and ensuring nutrients reach roots efficiently without introducing unwanted organisms or foul odors.
In Summary
You’ve seen how worm tea thrives in tiny apartments, how a compact three‑tray bin maximizes yield, and how coconut coir and red wigglers keep everything healthy. By adding extra trays wisely, feeding kitchen scraps, and continuously harvesting the liquid, you’ll keep a steady flow of nutrient‑rich fertilizer for your container garden. Stick to the checklist, and your apartment‑friendly worm‑tea system will stay clean, productive, and hassle‑free.



