
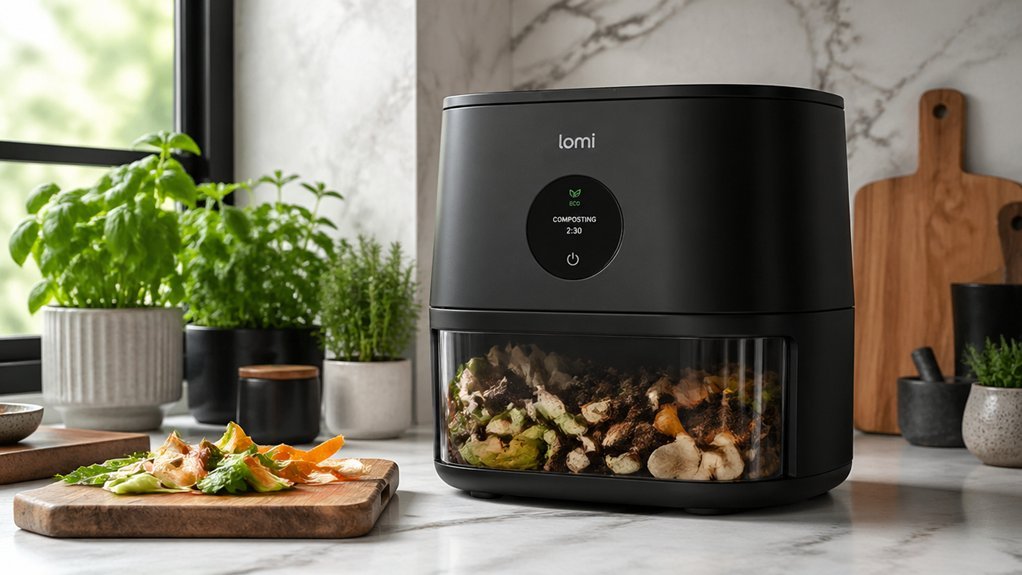
Pick a compact composter that fits your counter, stays under 45 dB, and handles 3–3.5 L of daily scraps. Look for a dual‑mode unit: thermal drying for wet waste and biological mode for tougher bits, both with automatic temperature and humidity control. Choose models with a smart touch panel, child lock, and replaceable activated‑carbon filters to keep odors low. Easy‑clean, removable blades and dishwasher‑safe parts will save you time, and monitoring the LED timer ensures each cycle finishes safely. Continue and you’ll discover how to match capacity, energy use, and plant‑friendly compost quality.
How to Choose the Best Countertop Composting Machine for an Apartment

Choosing the right countertop composting machine for an apartment means focusing on noise, size, and odor control. You’ll want a unit that stays under 48 dB, so your kitchen stays quiet while you cook. Look for a 3–3.5 L capacity with a 3-to-9-hour cycle; that lets you drop daily scraps without piling up. A smart touch panel or LED display makes operation painless, and a child lock adds safety. For odor control, pick models that pair turbo or quiet fans with replaceable activated-carbon filters and anti-odor covers—these keep the air fresh and prevent smells from drifting into your living space. Remember, most countertop composting machines produce a dehydrated “foodilizer,” not finished compost, so plan how you’ll use the end product. Odor control helps keep your kitchen comfortable during daily operation.
Pick the Right Compaster Size for Your Apartment
First, estimate how much food waste you generate each day and pick a unit whose 3–3.5 L capacity can handle it without overflowing.
Next, ensure the composting fits your counter space and stays under 45 dB, so it won’t disturb neighbors.
Finally, choose a model with odor‑control filters and a one‑touch start to keep your kitchen fresh and hassle‑free.
Additionally, consider choosing a compact unit with a dedicated waste bag or liner system to simplify cleanup and maintain hygiene during daily use odor control and ease of maintenance.
Measure Measure Daily Waste Output
Ever wonder how much food scrap you actually generate each day? Knowing your daily waste lets you match a composter’s capacity to real output measurement, preventing overload or underuse.
First, collect all kitchen scraps for a week in a kitchen bag, then weigh the total and divide by seven. Compare the average to the specs below and pick the model that fits your routine.
- Reencle Prime – 1.5 lb/day, ideal for tiny apartments
- Vego Kitchen Composter – ≈2.2 lb/day, mid‑size balance
- Lomi 3 – 3 L capacity, handles small‑to‑medium daily waste
- Eco 3 by FoodCycler – 3.5 L, 4–9 hr cycle for moderate output
- Reencle Gravity – 3.3 lb/day, generous capacity for larger waste streams
Use this simple output measurement to keep your composting system efficient and hassle‑free.
Match Capacity to Space
Now that you know your daily waste amount, you can pick a composter that fits your kitchen’s footprint. For compact apartments, aim for a 3‑4 L capacity unit—Eco 3 (3.5 L) or Lomi’s ~3 L bucket keep the footprint small while handling typical waste. If you need higher throughput without sacrificing space, choose a model that offers a 3.3 L to 4 L capacity and still provides a countertop fit. Measure your counter before buying; taller or ‑capacity units (4.2 L or more) may overrun limited space. Prioritize composters with removable bins and easy‑clean blades, so daily maintenance stays simple and your tight kitchen remains tidy, especially when considering models with durable, dishwasher‑safe components and replaceable filters for odor control. capacity options
Consider Noise and Odor Controls
Wondering how to keep your apartment quiet and fresh while composting? Choose a compact unit that stays under 45 dB and includes built‑in odor control. A 3–3.5 L capacity model handles daily scraps without overflowing and fits snugly on a kitchen counter. Look for a quiet turbo fan, closed design, and replaceable charcoal filters that trap smells. Dishwasher‑safe components simplify maintenance, and anti‑odor covers add an extra layer of protection. Avoid louder, larger machines that push 60 dB, because they’ll disturb neighbors and let odors linger.
- Noise level around 40–45 dB
- Activated carbon filters for odor control
- 3–3.5 L capacity for small spaces
- Quiet turbo fan and sealed chassis
- Replaceable charcoal filters and dishwasher‑safe parts
Dual‑Mode Operation: When to Use Thermal Drying vs. Biological Mode
You’ll pick Thermal Drying when your scraps are wet and you need a fast, high‑volume reduction, while Biological mode suits drier, tougher material that can benefit from deeper microbial breakdown. When switching modes, monitor the interior temperature to maintain safe operation and protect sensitive components. odor control
Choose Mode Based Waste Type
When you’re confronted with damp, soggy leftovers, you’ll seek the swift shrinkage of Thermal Drying; for tougher, fibrous scraps or bigger batches, Biological mode’s microbial breakdown yields deeper reduction. Pick the mode that matches the waste type: moisture‑rich peels and juices respond most to heat, while leafy stems, coffee grounds, and bulk food waste flourish in the biological process. The smart touch panel auto‑adjusts temperature and humidity, so you achieve peak results without manual tuning. Dual blades and the 3.3 L bin fine‑grind both inputs, and the odor‑control system keeps the kitchen fresh in either mode. For optimal performance, ensure the system uses a compost‑compatible growing medium approach to maximize resource reuse growing medium compatibility.
Optimize Cycle Time
How do you decide which mode will finish your kitchen waste fastest? First, gauge moisture. If you load mostly wet scraps, activate Thermal Drying; it slashes volume by ≥85% in just 3–8 hours, giving you the shortest Cycle Time. For drier or mixed waste where you want a finer compost, switch to Biological Mode, which achieves ≥90% reduction but needs 6–14 hours to let microbes work. Use the 3.3 L dual‑blade chamber to process a day’s worth of fruit, vegetables, cooked food, peels, napkins, and small bones. Remember that large bones or shells may not fully break down. Let the machine’s automatic temperature and humidity controls handle the transition, and you’ll keep Cycle Time optimal without sacrificing output quality.
Manage Odor and Noise
Wondering which mode keeps your kitchen fresh and quiet? You can toggle between Thermal Drying and Biological mode to balance odor control and quiet operation. Drying quickly tackles odor‑prone scraps, while Biological lets organic waste decompose slower, reducing moisture and smell over a longer cycle. The built‑in activated carbon filter and anti‑odor cover trap volatile compounds, and the turbo fan stays under 45 dB for a peaceful kitchen.
- Use Thermal Drying for citrus, coffee grounds, and small vegetable peels.
- Choose Biological mode for fruit pulp and garden waste when you have ample ventilation.
- Avoid heavy meat loads in Biological mode if the room is tightly sealed.
- Keep the anti‑odor cover sealed during high‑humidity cycles.
- Clean the activated carbon filter every 2‑3 months to maintain peak odor control.
Managing Odor & Noise of Countertop Composting Machines in Open‑Plan Apartments
Ever wondered why your kitchen smells and rattles when the composter runs? You can tame odor and noise by choosing a unit with solid filtration and a sealed design. Look for activated‑carbon filters or replaceable charcoal boxes, and make sure the lid closes tightly with an anti‑odor cover. A low‑speed turbo fan that stays around 45 dB (or 36 dB on silent models) keeps the hum steady instead of spiking. Proper maintenance of the filter and lid seals will keep your living space fresh and peaceful. Regular replacement of charcoal filters helps maintain odor control over time charcoal filters and ensures ongoing performance.
Essential Smart Controls & Safety Features for Apartment Composters
What makes a compact kitchen composter truly apartment‑ready isn’t just its size—it’s the suite of smart controls and safety features that keep it quiet, clean, and child‑proof. You’ll love the touch‑panel that auto‑adjusts temperature and humidity, and the one‑touch mode selector for drying or bio‑composting. Visible LED timers show progress, while an automatic shutoff prevents overheating. Odor‑control comes from activated‑carbon filters that trap smells before they escape your living room. Removable blades and bins make cleaning painless and reduce risk of injury Safe Blade Design.
Setup, Daily Use, and Maintenance for Long‑Lasting Performance
How do you keep your kitchen composter humming efficiently day after day? Start by placing it on a flat, stable countertop away from water, engage the child lock, then press the one‑touch button for Drying or Bio‑composting. Watch the LED timer for cycle progress, and keep the turbo fan clear for ≤45 dB operation.
| Task | Tip |
|---|---|
| Setup | Level surface, child lock on, carbon filter installed |
| Daily Use | One‑touch mode, monitor LED, keep fan unobstructed |
| Cleaning | Remove blades and bin weekly, wipe residue |
| Odor Control | Replace carbon filter as scheduled, keep anti‑odor cover |
Regular maintenance of blades, bin, and carbon filter preserves grinding efficiency and odor control, extending the machine’s lifespan.
Maximizing Compost Quality for Indoor Plant Care

Looking to boost the health of your indoor plants? You can fine‑tune compost quality from your kitchen composter by controlling moisture, particle size, and aeration. The Vego Kitchen Composter’s Vego mode lets you add scraps continuously, keeping the microbial community active and the nutrient‑rich “Vego Meal” balanced for potting mixes. Monitor temperature and pH via the Vego App to avoid over‑acidification, and mix the finished compost with a light growing medium to improve drainage. Consistent feeding and occasional stirring will preserve the airy structure indoor plants roots‑care soil.
- Keep moisture at a wrung‑out sponge level
- Use a 1:2 compost‑to‑soil ratio for pots
- Add a pinch of calcium carbonate if pH drops
- Stir the compost every two weeks
- Store finished compost in a sealed container to retain nutrients
Real‑World Energy Savings: How to Calculate Your Monthly Impact
Curious about how much electricity your kitchen composter actually adds to your bill? Start by noting the wattage per cycle—most electric composters run at about 150 W, which equals 0.15 kWh. Multiply that by the number of cycles you run each month; if you do 20 cycles, you’ll use roughly 3 kWh. Then apply your local rate, say $0.13 per kWh, and you get a monthly cost of $0.39. To gauge energy savings, compare that figure to the cost of disposing waste via trash services or landfill fees. Larger‑capacity models may run more cycles, raising electricity use but also cutting waste volume. By tracking cycle frequency and your electricity price, you can see exactly how the electric composter impacts your monthly cost and overall energy savings.
Quick Comparison Table of Top Countertop Composters for Small Spaces
Which countertop composter fits your tiny kitchen best? You’ll compare size, cycle time, odor control, and output quality to pick the right composting companion for small‑spaces. Below is a quick reference that highlights each model’s strengths and trade‑offs.
- Vego Kitchen Composter – Best overall for small‑spaces; multi‑mode processing, strong odor control, up to 90 % waste reduction, 3 L capacity.
- Lomi – Compact 3 L unit; simple grind‑and‑dry cycle, low noise, ideal for indoor countertop use.
- Eco 3 (FoodCycler) – 3.5 L; 4–9 hour cycle creates “Foodilizer” for soil blending, not true compost.
- Reencle Prime/Gravity – Larger input, app‑driven controls; output needs curing/sifting, louder, less suited for tight kitchens.
- Mill – Highest output capacity, app tracking; louder, ships grounds for external use, not ideal for cramped indoor spots.
Frequently Asked Questions
Are Electric Kitchen Composters Any Good?
Yes, they’re useful if you want fast, low‑odor waste reduction, but expect “ground coffee”‑like output that needs curing or mixing with soil before planting, and factor in cost and energy use.
What Is the Best Electric Composter for Kitchen?
You’ll love the EcoChef 3.2 L model; it runs dry‑and bio‑compost cycles, keeps odors down with carbon filtration, stays under 45 dB, and offers one‑touch smart controls with a child lock.
Do Countertop Compost Machines Really Work?
Yes, they reduce waste volume and dry it into usable “soil amendments,” but you’ll still need a curing period or additional composting to achieve fully mature, nutrient‑rich compost for planting.
What Not to Put in an Electric Composter?
Don’t put large bones, shells, pet waste, meat, dairy, oily scraps, bioplastics, or whole cooked meals in your electric composter; these can clog, smell, or damage the unit and won’t compost properly.
In Summary
By picking the right size, using dual‑mode settings wisely, and keeping odor and noise in check, you’ll turn kitchen scraps into nutrient‑rich compost without disturbing apartment life. Smart controls and regular maintenance keep the machine efficient, while proper drying or biological cycles boost quality for indoor plants. Calculate your energy savings, compare top models, and you’ll enjoy a low‑cost, eco‑friendly solution that fits perfectly into any small living space.

Leave a Reply