
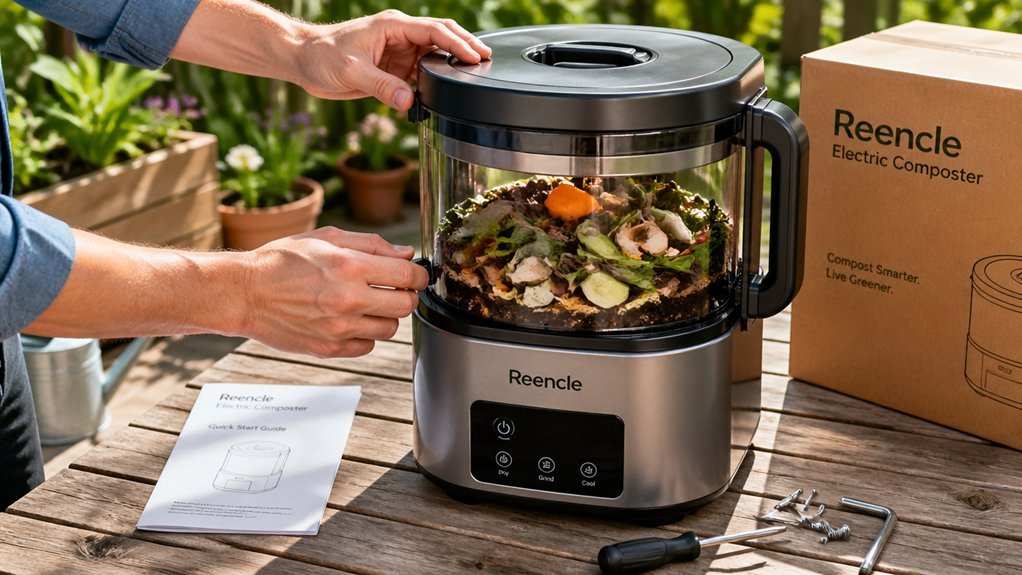
First, pull out the back‑compartment carbon cartridge and snap out a fresh one, then open the top chamber and place the microbial pack. Pour exactly 600 mL of water, snap the lid shut for a tight seal, and let the pack soak 5–10 minutes. Start the 20‑hour activation timer; during this time the temperature and moisture stay stable and you’ll notice a faint earthy scent. After activation, load up to three pounds of chopped, oil‑free food waste, seal the lid, and the system will begin composting. Keep the silicone gasket and carbon filter in good shape for odor control, and you’ll soon discover how to harvest and maintain your composter.
Remove and Refresh the Activated Carbon in Your Niasa Composter
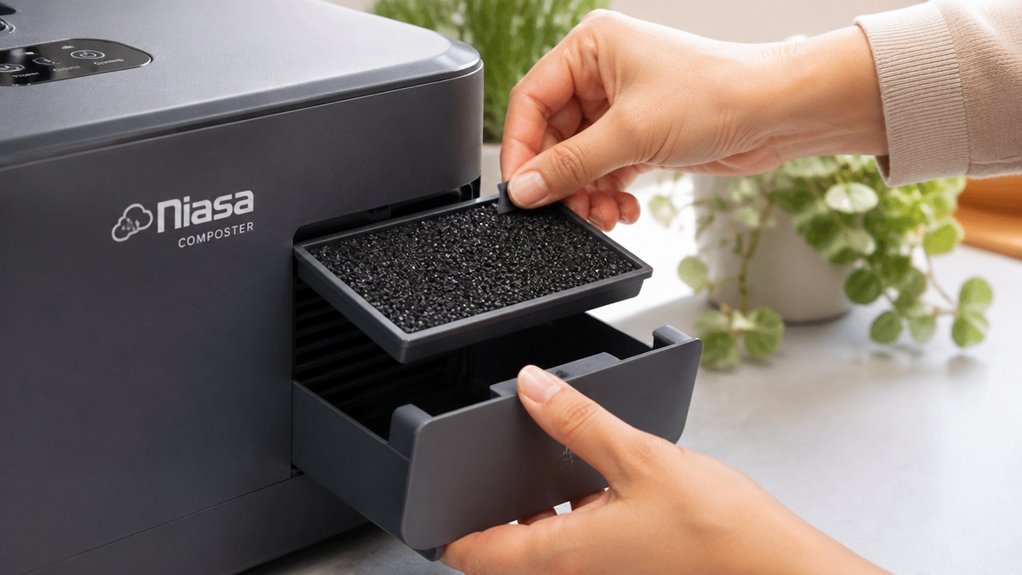
Ever wondered how to keep your Niasa composter smelling fresh? Start by locating the back compartment, which houses the activated carbon. Pull the compartment out, snap the carbon cartridge free, and set it aside. If the carbon looks saturated, replace it with a fresh cartridge; otherwise, give it a quick rinse and let it dry completely—this is the rejuvenating step that restores its odor‑absorbing power. Once the carbon is ready, slide it back into the compartment, press the unit firmly into place, and reattach the cover. Press the deodorizer button to activate the built‑in system, which works with the refreshed carbon to keep smells at bay during operation. This simple routine ensures your compost stays clean and odor‑free. Regular maintenance with a fresh charcoal filter helps sustain odor control over time filter replacement.
Add the Microbial Pack to the Niasa Top Chamber
When you open the top chamber, place the microbial pack inside before adding any water; this kick‑starts decomposition by introducing the beneficial microorganisms that will soak in once you pour the 600 mL of water, seal the lid, and let the pack activate for 5–10 minutes.
After the pack sits in the top chamber, make sure it rests on the tray without obstruction. Close the lid gently to keep the pack sealed, then wait the recommended activation time. The microbes need a short soak, so avoid moving the composter during this 5–10‑minute window.
Once the activation time passes, you’ll notice a faint earthy scent, indicating the pack is primed. Remember, the full microbial activation requires about 20 hours before the first compost cycle begins.
Pour 600 mL of Water and Seal the Lid Properly
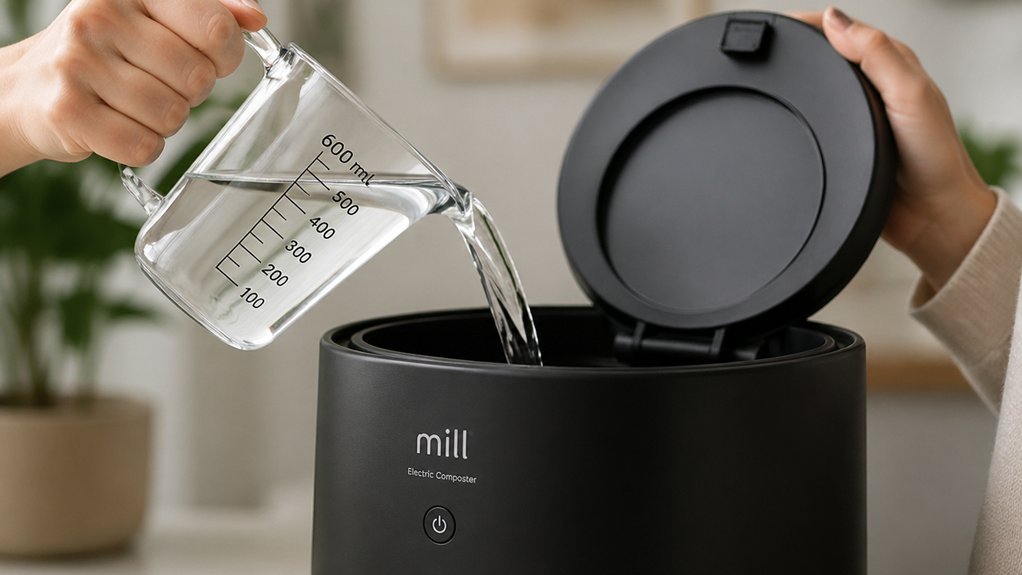
You’ll pour exactly 600 mL of water into the chamber, then snap the lid shut to create a tight seal. This assure the microbes stay moist and the odor stays contained. Side-lock lids provide an additional moisture-retention feature by using silicone gaskets to seal multiple containers securely.
Seal Lid Tightly
Need you pour exactly 600 mL (about 2 ½ cups) of water into the top compartment, then snap the lid shut to create a tight seal that prevents leaks and keeps the moisture inside for the microorganisms. When you press the lid down, hear the click that signals a proper seal; this locks in humidity and protects the compost’s microbial community. A secure lid also stops air drafts that could dry out the activated carbon in the back compartment. Give the microbes 5–10 minutes to soak, then start the 20‑hour activation timer.
| Step | What you see |
|---|---|
| 1 | Water pouring |
| 2 | Lid aligning |
| 3 | Click of seal |
| 4 | Moisture trapped |
| 5 | Microorganisms thriving |
Measure Exactly 600 mL
How much water does the starter need? You need exactly 600 ml for the water activation step. Grab the included measuring cup, pour the 600 ml into the top compartment, and then seal the lid securely. This precise amount kick‑starts the microbial starter during the initial setup, so avoid guessing or adding extra. After you close the lid, wait 5–10 minutes for the microbes to soak in, then let the unit rest for 20 hours before the first compost cycle. A tight seal prevents leaks and ensures the water stays where it belongs, giving the microorganisms a stable environment to thrive. Vacuum-packed leaves prep can also help ensure consistent moisture and texture during activation packaging preservation. Follow these steps and your electric composting will be ready for efficient, odor‑free operation.
Wait 5–10 Minutes for the Microbes to Soak In
Give the microbes a few minutes to soak, and they’ll start absorbing the water and waking up. In that 5‑10‑minute window the pack becomes fully hydrated, which jump‑starts the decomposition process. Don’t run the unit or add waste until the soak is complete. To ensure consistent odor control, rely on the unit’s built‑in filtration system and avoid overfilling during startup. Odor control ensures the kitchen stays fresh while the microbes activate.
Microbe Activation Time
After you place the microbial pack on top of the bin, give it 5–10 minutes to soak so the microbes can fully hydrate and start colonizing the interior. This microbial activation step is crucial; the soaking time lets the organisms awaken and begin the hydration period before any waste hits the chamber. During this window, keep the lid closed and avoid adding food scraps. You’ll notice a faint, earthy scent as the microbes settle, indicating they’re ready for action. Skipping or shortening this phase can delay colonization and reduce compost efficiency, so respect the timing and let the pack do its work. Ensure the pack sits flat on the bin lid. Keep the compartment sealed during soaking. Avoid introducing waste until the hydration period ends. Observe a subtle, fresh odor as a sign of activation. Follow the 5‑10 minute window precisely for optimal results. Odor control and the presence of a carbon-filter system can help maintain a fresh environment during and after activation.
Water Absorption Process
Ready to activate your composter’s microbes? Add the 600 mL of water, seal the lid, and start the soaking phase. During the 5–10 minute water absorption window, the microbes hydrate, sw swell, and begin the biochemical reactions that will drive the composting cycle. No extra steps are needed—just let the unit sit while the liquid permeates the pack. This brief pause ensures the microorganisms are fully awakened and ready to break down organic waste once you power the system. As the water spreads, it creates the moist environment microbes need, setting the stage for efficient decomposition. After the timer expires, you can open the lid and start loading food scraps, confident the microbes are primed for action. EM1+
Initial Soaking Benefits
The 5‑10‑minute soak lets the microbial pack fully hydrate, creating a moist environment that jumpactivates the bacteria before any food scraps are added. During this brief period you add 600 mL of water, close the lid, and let the microbes permeate the system. This soaking step jump‑starts the activation phase, so the composting process begins faster once you seal the unit. You’ll notice a noticeable rise in microbial activity, which reduces the 20‑hour lag before the first batch of waste can be processed. Keeping the lid shut preserves moisture, ensuring the microbes stay fully engaged and ready for efficient decomposition. This approach aligns with apartment‑friendly BSF kit practices that emphasize controlled moisture and odor management to sustain steady microbial performance crawl‑out system and efficient waste processing.
Activate the System – 20‑Hour Initial Microbe Activation
Wondering how to kick‑start your composting system? After you place the microbial pack on the top compartment, pour 600 mL (about 2 ½ cups) of water into the unit. Close the lid and let the water soaking work for 5–10 minutes so the microbes fully hydrate. Then begin the 20‑hour initial activation period. Keep the composter sealed, avoid adding any food waste, and let the microbes gradually awaken and colonize the substrate. During this window, temperature and moisture stay stable, fostering a robust microbial activation. After the full 20 hours, you’ll notice a faint earthy scent and a slight rise in internal temperature—signs that the system is ready for its first waste batch.
Load Your First Food Waste Batch (Up to 3 lbs)
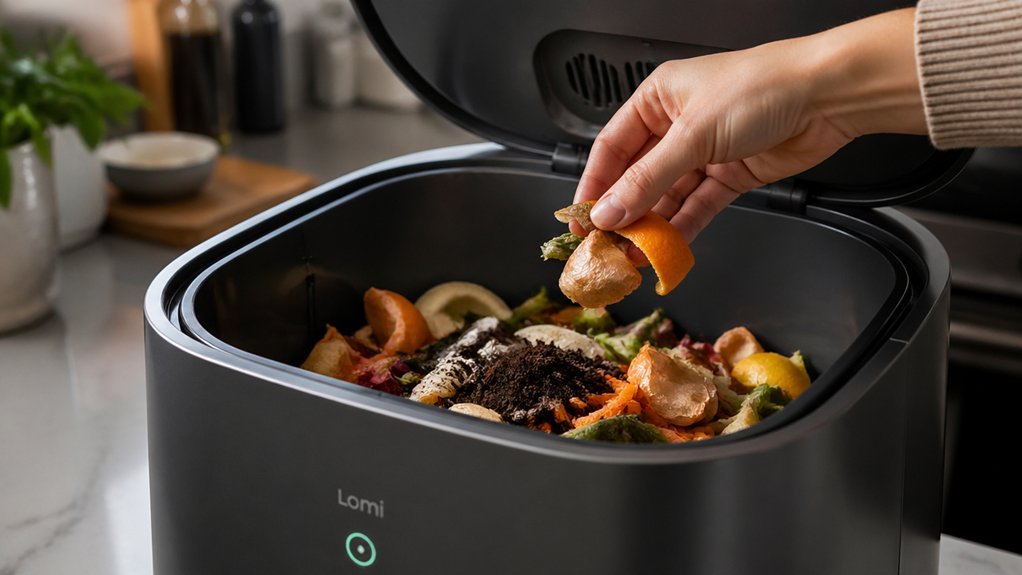
After the 20‑hour activation, place up to three pounds of eligible food waste into the top compartment, then give it 5–10 minutes to let the microbes soak in before sealing the lid. This brief pause jump microbial activity, jump‑starting the composting process. You can add a mix of chopped vegetables, fruit peels, cooked noodles, eggs, or small pieces of fish and chicken. Avoid prohibited items like bones, oil, or metal. Once sealed, the unit will begin breaking down the food waste in roughly four hours and will produce usable compost in about 48 hours. Remember not to harvest all material at once; let the cycle continue for optimal results.
- Use only approved food waste types
- Chop items into bite‑size pieces
- Keep total weight under three pounds
- Seal promptly after the soak period
- Don’t add prohibited materials
Control Odor With the Silicone Seal and Activated Carbon
Once your food waste is sealed, the silicone gasket and the activated‑carbon filter work together to keep odors in check. The silicone seal creates an airtight barrier, preventing smells from escaping the chamber. Meanwhile, the activated carbon in the back compartment absorbs volatile compounds as they form, delivering reliable odor control even with continuous waste input.
To keep the system effective, inspect the carbon filter every few weeks and replace or refresh it when it looks dark or saturated. A well‑sealed lid combined with a fresh activated carbon layer will trap most odors, letting you operate the composter in kitchens or apartments without nuisance smells. Regular maintenance ensures the seal and filter stay in sync for peak performance.
Harvest Compost From Your Niasa Composter – When & How Much
When should you start harvesting compost from your Niasa unit, and how much should you take? You can begin a compost harvest once the unit has been running at least 48 hours since the last food addition. Wait another 48 hours before you scoop out any material; this protects microbial activity and keeps the remaining substrate active.
- Harvest only the top, crumbly layer, leaving at least 2 inches of material in the bin.
- Aim for a thin top‑dressing layer, no thicker than ¼ inch, on houseplants or garden beds.
- Spread the compost evenly around plant bases for gradual soil integration.
- Avoid disturbing the lower, still‑active zone to maintain ongoing decomposition.
- Use a small scoop or spatula to control the amount you remove, preserving enough feedstock for future cycles.
Replace Carbon and Refill Water – Ongoing Maintenance
You’ll swap out the back‑compartment carbon by removing the cover, dropping in fresh activated carbon, and snapping the cover back on. Then top up the 600 mL water reservoir as needed to keep the microbes thriving. After a quick 5‑10‑minute soak, you’ll notice reduced odors and steady composting performance.
Replace Carbon Efficiently
How often should you refresh the activated carbon in the back compartment? You’ll want to swap it out every 4–6 weeks, or sooner if you notice a dip in odor control. During each maintenance session, pull the back panel, discard the spent carbon, and drop in fresh activated carbon. Seal the compartment tightly to restore the deodorizing seal, then resume composting. Consistent replacement keeps the microbes happy and the kitchen smelling fresh.
- Check the carbon’s color and texture before removal.
- Use a clean, dry scoop to avoid contaminating new carbon.
- Align the fresh carbon evenly for peak adsorption.
- Snap the back panel back into place securely.
- Log the date of each change for easy tracking.
Refill Water Correctly
A proper refill starts with swapping the back‑compartment carbon, then pouring exactly 600 mL (2 ½ cups) of water into the top chamber and sealing the lid. After you close the lid, give the microbes 5–10 minutes to soak. This brief pause lets the activated carbon begin odor management, keeping smells under control while the compost heats up.
| Step | Action | Reason |
|---|---|---|
| 1 | Replace carbon | Restores filtration |
| 2 | Add 600 mL water | Supplies microbes |
| 3 | Seal & wait 5‑10 min | Enables odor management |
You’ll notice a cleaner scent and smoother operation when you follow this routine each time you refill water. Consistency prevents buildup and keeps your composter humming efficiently.
Maintain Ongoing Performance
When the back‑compartment carbon starts losing its bite, replace it and then add the prescribed 600 mL of water, sealing the lid and letting the system soak for 5–10 minutes before you resume use. This quick maintenance step restores odor control, rehydrates the microbial community, and keeps the compost cycle humming.
- Pull out the old activated carbon cartridge and discard it safely.
- Insert a fresh cartridge, ensuring a snug fit to prevent leaks.
- Pour exactly 600 mL of water into the refill port, no more, no less.
- Close the lid tightly and wait the 5‑10‑minute soak for microorganisms to re‑activate.
- Resume regular composting, checking the carbon every 2‑3 weeks for optimal performance.
Troubleshoot: No Compost, Bad Smell, or Stuck Lid
Got stuck with no compost, a nasty smell, or a lid that won’t budge? First, confirm you added the microbial pack on top, waited 5–10 minutes, and gave the unit its 20‑hour activation. If the compost still won’t form, you may be overloading—keep inputs under 3 lb per day and exclude bones, shells, oils, and avocado pits.
| Symptom | Check | Fix |
|---|---|---|
| No compost | Microbial pack, activation time | Add pack, wait, avoid overload |
| Bad odor | Silicone seal, carbon filter | Refresh carbon, run deodorizer button, pause waste |
| Lid issues | Pressure, level, grinding block | Level unit, reseat lid, remove oversized pieces |
If odor persists after fresh carbon and reseated lid, run the deodorizer, balance interior moisture, and give the system a short rest before adding new waste.
Frequently Asked Questions
What Three Items Should Not Be Placed in a Compost Pile?
You shouldn’t put bones, shells, or husks in the pile; avoid avocado pits, cooking oil, and cigarette butts; and keep medicines, glass, metal, and non‑organic plastics out of your compost.
What Not to Put in an Electric Composter?
You shouldn’t put bones, shells, husks, avocado pits, cooking oil, cigarette butts, paper tape, medicines, glass, metal, plastics, non‑food items, or any synthetic material into your electric composter.
What Are Common Composting Mistakes?
You often overload the unit, add prohibited items like shells or metal, harvest too early, feed all waste at once, or exceed the 3‑pound daily limit, which all stall decomposition.
How to Set up a Composter?
You replace the back‑compartment carbon filter, add the microbial pack, pour 600 mL water, close the lid, wait 5‑10 minutes, then let it activate for 20 hours before adding up to 3 lbs of food waste daily.
In Summary
Now you’re all set—your Niasa composter will turn kitchen scraps into rich, odor‑free compost in no time. Keep the carbon fresh, water the microbes, and seal tightly, and you’ll see steady progress. Regular maintenance and quick troubleshooting will keep the system humming, so you can enjoy a greener kitchen and healthier garden with minimal effort.


Leave a Reply