
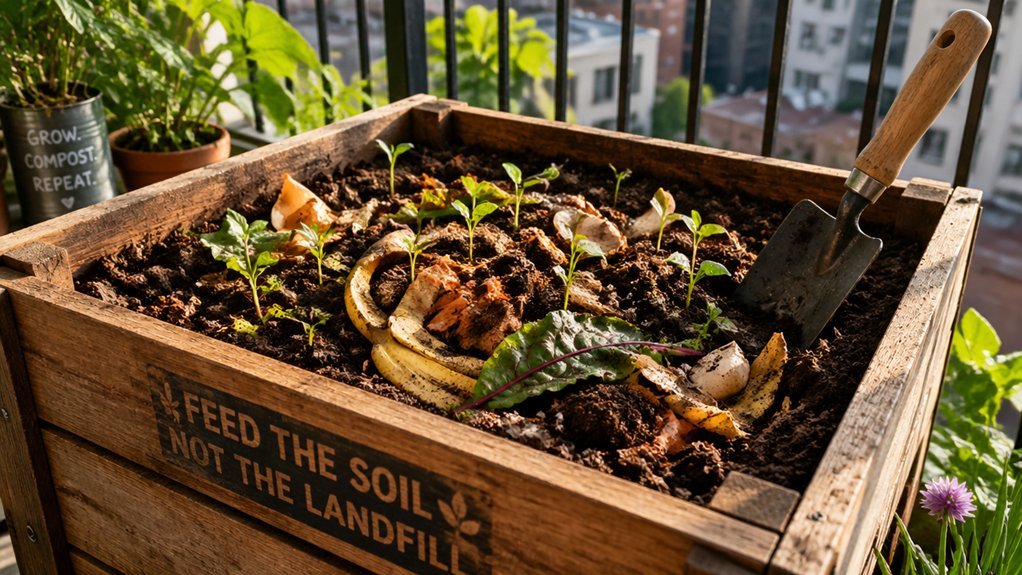
Pick a compact, airtight window‑box bin with a carbon‑filter lid that fits your balcony, and keep it sealed to block odors and pests. Aim for a 5:1 browns‑to‑greens ratio, chopping scraps small and layering browns around the edges for a lasagna effect. Test moisture with a squeeze—feel a damp sponge, not soggy. Turn the pile weekly to add oxygen, and toss in shredded paper or activators to speed breakdown. When the compost smells earthy, looks dark brown, and crumbles easily, it’s ready to mix into your soil, and the rest of the tips will guide you further.
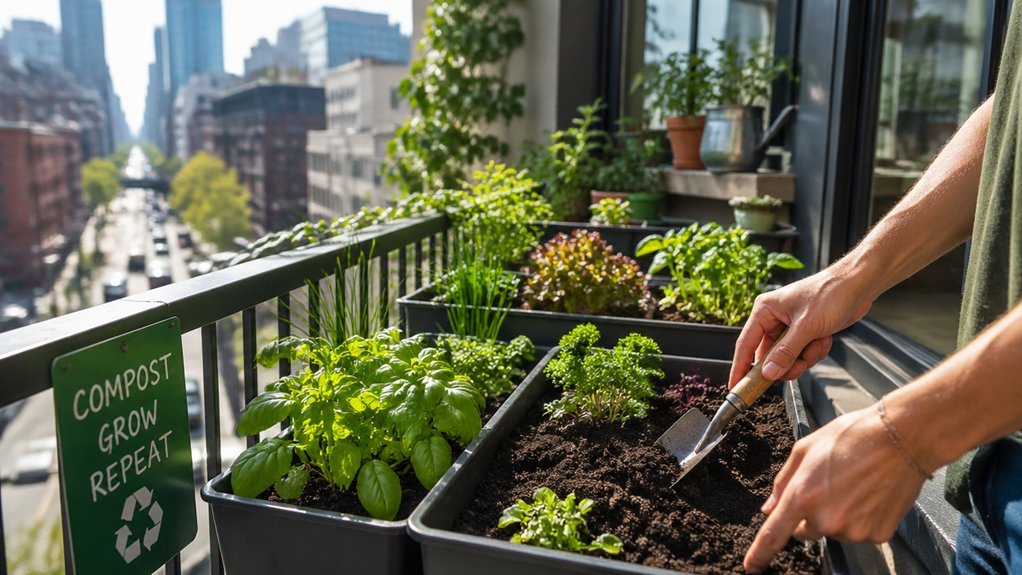
Select the Right Window‑Box Compost Bin for Urban Living
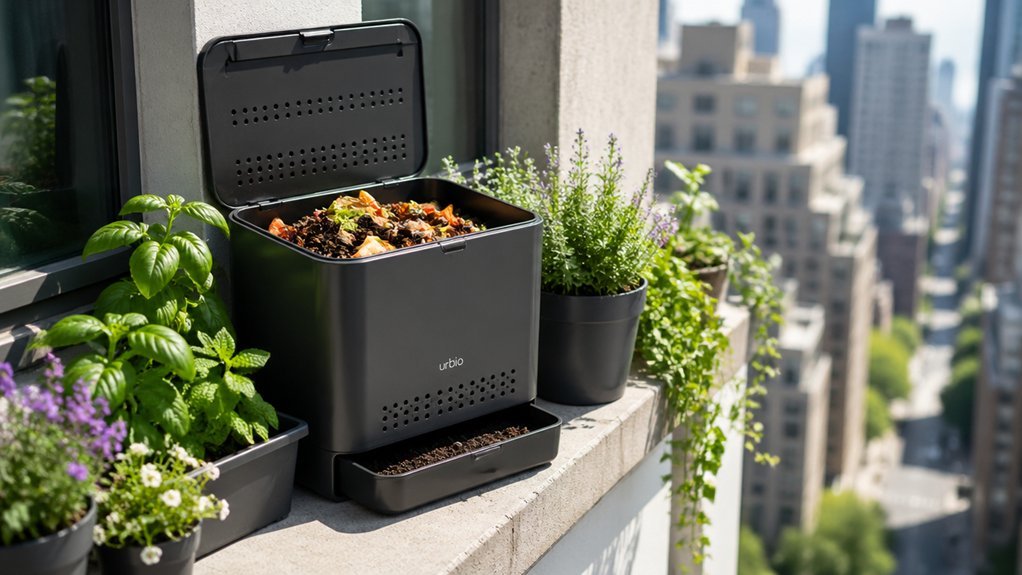
Looking for a compact, odor‑controlled compost bin that fits your city balcony? You’ll want a window-box compost bin that blends into urban living while keeping smells sealed. Choose a model with a tight seal and a carbon‑filter lid; that combo tackles odor and supports pests prevention. Aerobic designs are key—don’t pick a sealed tumbler—because they guarantee air flow for faster breakdown. Look for bins that slide under or beside a window box, so they stay discreet and match your balcony aesthetic. Easy weekly feeding and simple turning keep the mix balanced without hassle. When you pick a bin that meets these criteria, you’ll enjoy clean, efficient composting right on your balcony. Pest prevention is another important consideration, as a well-sealed lid reduces attractants and helps keep critters at bay.
Choose a Compact Window‑Box System That Fits Your Balcony
A compact window-box system lets you turn a modest balcony into a thriving compost hub without sacrificing space or style. You’ll want a lightweight, weather-resistant window box that blends with your décor while delivering urban sustainability. Tight seals or a carbon‑filter odor control keep smells in check, and built‑in airflow/ventilation prevents anaerobic buildup. Easy layering of browns and greens makes balcony composting a breeze, and weekly maintenance stays simple. Choose a slim, modular design that fits your railing or wall space, and look for sealed lids with replaceable carbon filters to maintain odor control odor control features.
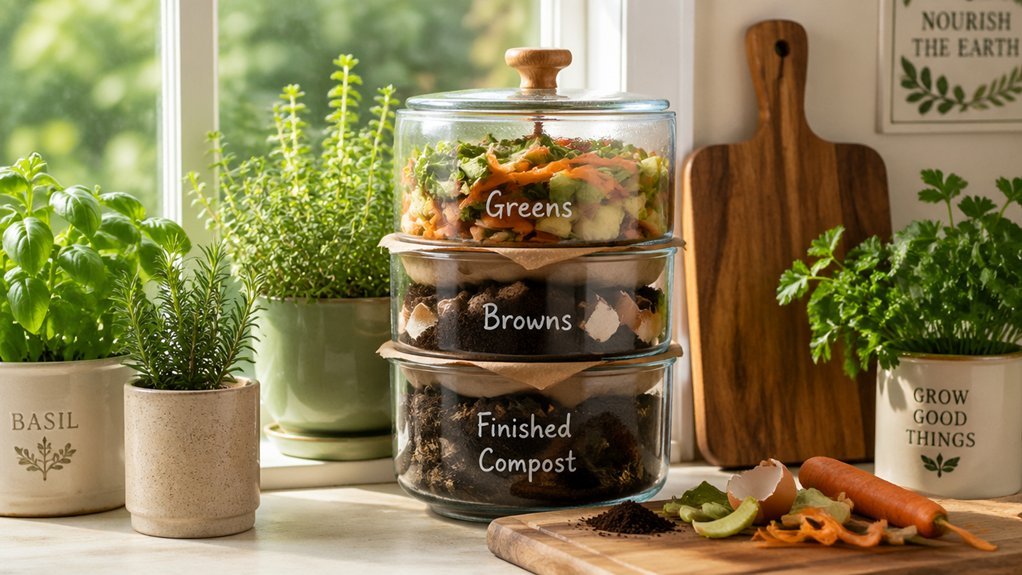
Create the Ideal Greens‑to‑Browns Ratio for Window‑Box Composting
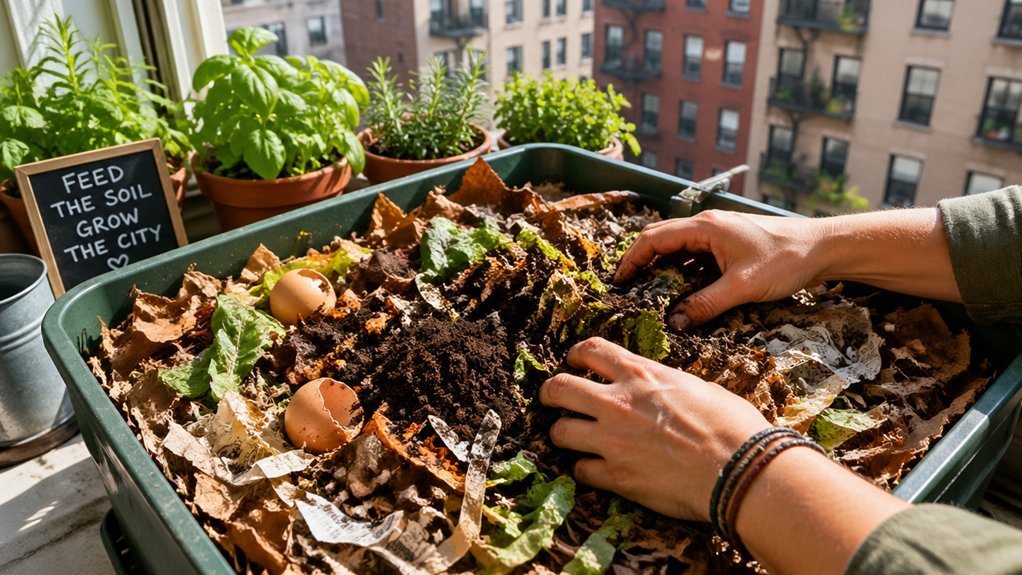
Wondering how to keep your balcony compost fresh and odor‑free? Aim for roughly five parts browns to one part greens. That 5:1 greens‑browns ratio gives window‑box composting the aeration and moisture balance it needs. Chop veggies, coffee grounds, and green waste into small bits, then mix with shredded paper, leaves, or straw. If the pile feels soggy, toss in more browns; if it’s dry, add a splash of water and a handful of greens.
Follow this guide, monitor with a wrung‑out sponge, and watch your balcony compost thrive. Odor Control and careful material choice help maintain a clean, pleasant balcony environment while you compost.
Keep Moisture in Check: How Wet Is Too Wet?
You can check moisture by squeezing a handful of compost; it should feel like a wrung‑out sponge, not a dripping mess.
If it’s soggy, add more brown material and give the pile a good turn to restore balance.
Watching for foul smells or compacted spots will also tell you when you’ve crossed the line into over‑saturation.
A quick test after turning can help confirm the mix is balanced and ready for use in a window box or container garden moisture balance.
Moisture Test Method
Ever wonder if your compost is too soggy? You can tell by feeling the moisture with a simple squeeze test. Grab a handful of the mix, give it a gentle press, and watch the drips. If a few drops fall, the moisture level is spot‑on; if a pool forms, you’ve entered compacted conditions that need balancing.
- Squeeze test – press a handful; a few drips mean good moisture.
- Add browns – when it’s too wet, stir in shredded paper or dry leaves.
- Add greens – if it’s dry, mist water or toss fresh kitchen scraps.
- Adjust daily – repeat the test each morning to keep the balance steady.
In compact city setups, a well‑ventilated, compact design like a worm bin can help maintain steady moisture levels more easily, since airflow aids evaporation and aerobic activity. Moisture balance
Avoid Over‑Saturation Signs
How do you know when your window‑box compost has crossed the line from moist to soggy? Keep an eye on moisture by feeling for a wrung‑out sponge texture; if it drips, you’re over‑saturated. Perform a squeeze test: a handful should release only a few drops. When you spot signs of wetness—pungent smells, compacted layers, or soggy browns—add dry browns and improve aeration. Schedule dry‑out sessions outdoors to reset the balance. Below is a quick reference:
| Symptom | Action | Result |
|---|---|---|
| Water droplets on squeeze | Add browns | Absorb excess moisture |
| Foul odor | Increase aeration | Boost aerobic microbes |
| Compacting | Loosen with a fork | Prevent anaerobic pockets |
| Soggy browns | Replace with dry material | Restore texture |
| Persistent wetness | Dry‑out session | Re‑establish optimal moisture |
Turn Your Window‑Box Compost Regularly for Faster Decomposition
Why let your window‑box sit stagnant when a quick turn can speed up decomposition? Regular turning brings oxygen, fuels aerobic microbes, and keeps the pile from becoming compacted and smelly. In small spaces you can’t rely on heat alone, so each mix after adding scraps maintains aeration and moisture balance, giving you faster decomposition without extra effort.
- Add scraps, then stir – Immediately after tossing in kitchen waste, use a small hand fork to lift and flip the material.
- Check texture – Aim for a loose, crumbly feel; if it’s dense, turn again to restore airflow.
- Watch moisture – If it looks dry, mist lightly; if soggy, turn more often to dry out spots.
- Set a routine – Turn after every feed, not just when you notice a smell, to keep the process steady and efficient. real-time indicators
Control Pests and Odors With a Soil Cap and Biofilter Layer
What if you could keep your window‑box compost smelling fresh and pest‑free with just two simple layers? A thin soil cap creates a dry barrier that soaks up excess moisture, cutting odors at the source. On top of that, a biofilter layer of browns—shredded paper, leaves, or cardboard—feeds aerobic microbes that further suppress smells and deter pests. By spreading browns around the perimeter and topping the pile, you mimic a lasagna effect that blocks insects from reaching food scraps. Keep the mix damp like a wrung‑out sponge and give it an occasional stir to maintain aeration. OK compost HOME certification guidance can help ensure your materials meet home composting standards while you manage odor and pest concerns.
Boost Window‑Box Compost Speed With Activators & Shredded Paper
Ever wondered how to make your window‑box compost break down in weeks instead of months? Adding activators and shredded paper can turbo‑charge the process while keeping the mix balanced and odor‑free. Here’s how to supercharge your window box composting:
- Sprinkle a commercial activator over the top layer; it jump‑starts microbial activity and accelerates breakdown of greens and browns.
- Mix in shredded paper (or newspaper) as a carbon‑rich brown; it prevents matting and balances the greens‑to‑browns ratio.
- Create a small air pocket at the bottom with twigs or branches to boost aeration in the tight box.
- Moisture moisture the the feels like a wrung‑out sponge; add water sparingly to keep microbes happy without sogginess.
Follow these steps and watch your compost mature in weeks.
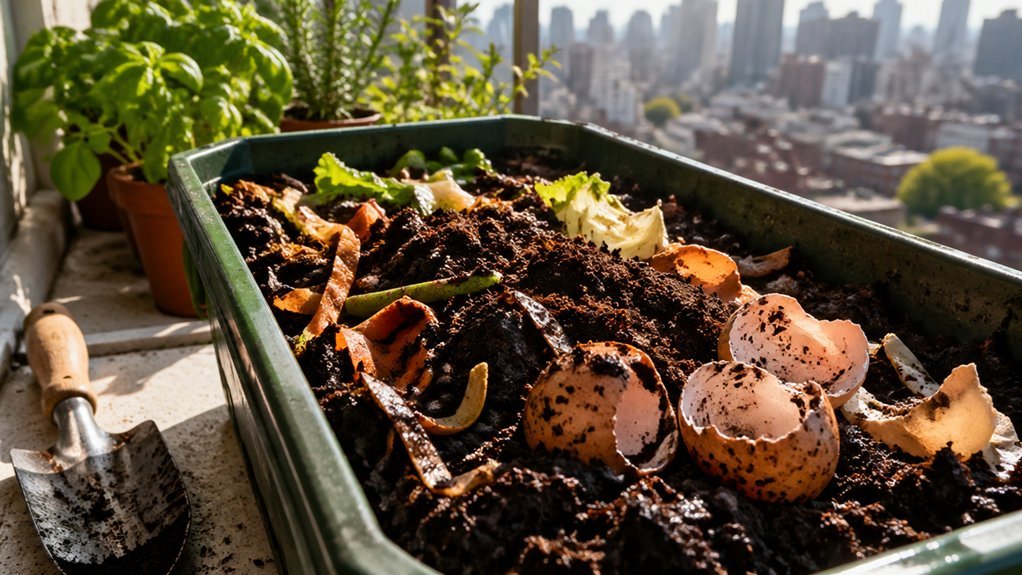
Harvest Ready Compost: Signs It’s Mature and How to Use It
You’ll know your compost is ready when it smells earthy, looks dark brown, and feels crumbly to the touch. If you can’t spot any bits of kitchen scraps, sticks, or twigs, it’s reached that mature stage. Now you can scoop it into your window box, mix it into the soil, and give your plants a nutrient boost.
Dark Earthy Aroma
Ever wondered how to tell when your window‑box compost is truly ready? The dark, earthy aroma is your cue that the composting process has finished, and the finished compost now smells like rich soil, not sour or sharp. This mellowing scent tells you the material is safe to add to your window boxes, turning them into nutrient‑rich soil that boosts plant health.
- Sniff the compost; a deep, pleasant earth smell means decomposition is complete.
- Check for uniform dark brown color and no visible food bits.
- Feel a crumbly texture that breaks apart easily—no hard clumps.
- Mix the finished compost into your window‑box soil to improve moisture retention and nutrient content.
Dark, Crumbly Texture
How can you tell when your window‑box compost is truly ready? You’ll notice a dark soil color and a crumbly texture that feels like garden loam. The compost texture should be uniform, free of recognizable scraps, and give off an earthy aroma. If it’s too wet or slimy, the moisture balance is off; a proper crumbly texture means it’s dry enough to hold shape but still damp to the touch. At this stage, you have finished compost ready for a mellowing period. Let it cure for a few days, then mix it into potting soil or top‑dress your containers. This boosts nutrients, improves drainage, and keeps your city garden thriving.
No Visible Fragments
When the crumbly texture turns uniform and the dark color deepens, the compost is ready for harvest. You’ll notice no visible fragments—no bits of kitchen scraps, twigs, or pebbles—just a smooth, earthy mass. This signals that the browns and greens have fully broken down and the mushrooming period has ended. Before you spread it, give the compost testing a quick sniff and feel; it should smell mellow and feel like finished compost. Then mix it into your window box soil to boost structure, moisture retention, and nutrients.
- Remove any lingering sticks or twigs.
- Verify uniform color and crumbly feel.
- Conduct a simple scent check for mellowness.
- Blend finished compost into the box’s soil.
Troubleshoot Common Issues: Smell, Wetness, and Slow Progress
Why does your window‑box compost stink, stay soggy, or crawl forward? A sour odor means moisture imbalance and anaerobic activity; add roughly‑browns to soak up excess water and aim for a wrung‑out sponge feel. If it’s wet, improve aeration by turning the composting pile and layering browns and greens properly to prevent compaction. For sluggish breakdown, boost turning frequency to increase airflow and adjust the carbon‑to‑nitrogen ratio—add more greens if decomposition lags.
Keep food scraps covered with browns, shred waste, and monitor moisture daily.
A balanced mix of browns and greens, regular turning, and proper aeration keep your window‑box healthy, odor‑free, and progressing at the right speed.
Scale Up or Switch Methods When Your Window‑Box Is Full
Ever hit the point where your window‑box is brimming with compost? You’re ready to scale up or switch methods, and you can keep city living composting fast and tidy.
- Add a second compost bin – place it beside the first, preserving airflow and preventing crowding.
- Transition to a tumbler or aerobic bin – turn it daily for aeration; the motion speeds decomposition in tight spaces.
- Extend browns around the perimeter – add fresh greens to maintain the greens to browns balance as volume grows.
- Boost odor control – keep lids tight, sprinkle extra browns to soak moisture, and use the squeeze test to monitor dampness.
Frequently Asked Questions
What Three Items Should Not Be Placed in a Compost Pile?
You shouldn’t put meat, dairy, or oily foods in your compost pile; they attract pests, create odors, and slow down decomposition, especially in small urban window‑box systems.
Do Coffee Grounds Improve Compost?
Yes, coffee grounds boost your compost. They add nitrogen, moisture, and texture, speeding microbial activity. Mix them with browns and other greens, keep the balance right, and avoid using them alone.
Can Parchment Paper Go in City Compost?
You can’t usually toss parchment paper into city compost because its silicone coating slows breakdown; check your local program’s rules, strip any coating, or recycle it instead.
How to Compost in an Urban Area?
You start by picking a compact bin—countertop, under‑sink, or electric—then layer greens and browns, keep it moist, turn it weekly, and use a sealed lid or carbon filter to block odors.
In Summary
By picking the right bin, balancing greens and browns, and keeping moisture just right, you’ll turn your balcony into a thriving compost hub. Regular turning and a few activators speed things up, while watching for smell or sogginess helps you troubleshoot early. When the compost matures, harvest it and feed your plants. Keep scaling or switching methods as needed, and enjoy a continuous cycle of fresh, city‑friendly fertilizer.
Leave a Reply