

Seal the bin with a tight‑fitting, silicone‑gasket lid and store it in a cool, dark spot—under the sink works great. Keep meat, dairy, oil, and sauces out, and freeze any strong‑smelling scraps before you add them. After each load, sprinkle a thin layer of dry browns like shredded paper or sawdust to soak up moisture and block odors. If you still notice a smell, check the lid seal, moisture level, and browns‑to‑greens ratio; the next steps will show you how to fine‑tune everything.
Stop Kitchen Compost Smells With a Tight‑Fitting Lid
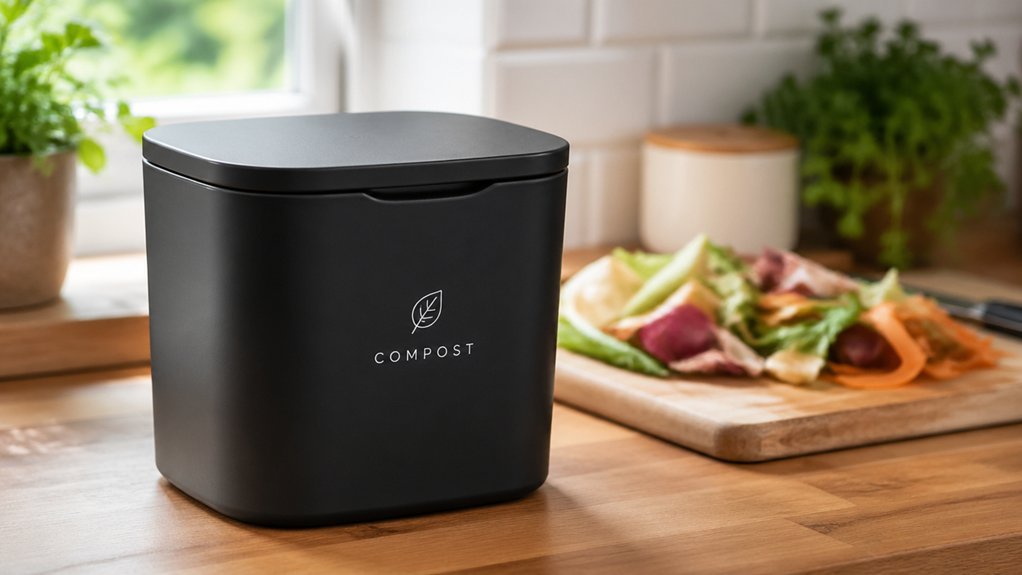
Ever wondered why your kitchen compost smells despite good storage? You’ll find the answer in the lid. A tight‑fitting lid seals the compost bin, blocking 99 % of exposed scraps that generate odors. Even if your bin boasts charcoal filters, the real odor‑control hero is a sturdy lid that stays shut under normal use, keeping fruit flies and pests out. In apartments like NYC, the best bins use latches that lock securely, so decomposing fruit never reaches the air. When the lid clicks into place, you stop kitchen compost smells at the source, letting you enjoy a cleaner kitchen without extra gadgets. Remember, a reliable lid works hand‑in‑hand with cool, dark storage for maximum freshness. A quality lid also helps prevent warping or residue buildup over time lid integrity and is easier to clean after use.
Store the Bin in a Cool, Dark Spot (Under the Sink Is Ideal)
A tight‑fitting lid keeps the bin sealed, but where you store that sealed bin matters just as much. Placing the compost container in a cool, dark spot slows odor development by lowering the temperature and limiting light‑driven microbial activity. Under the kitchen sink often offers the perfect storage solution: it’s away from the stove, radiator, and sunny windows, so heat exposure stays minimal. The cooler environment retards decomposition, giving you more time before smells become noticeable. OK compost HOME certification can guide you to bags that perform well in home composting settings.
Keep Meat, Dairy, Oil, and Sauces Out of the Kitchen Bin
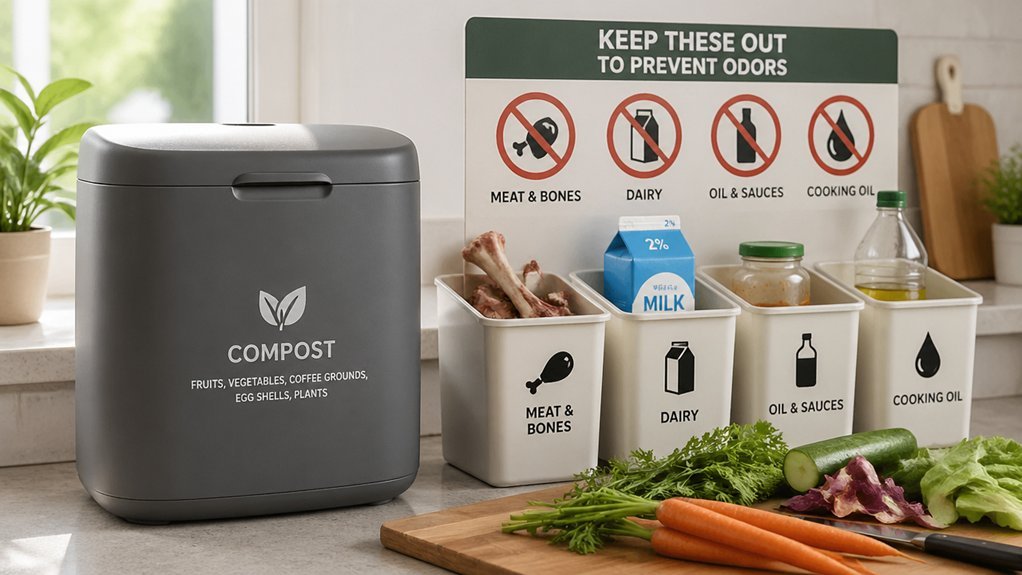
You’ll notice that meat, dairy, oil and sauces generate the strongest smells, so keep them out of your kitchen bin.
Stick to plant‑based scraps only, and the odor problem drops dramatically.
If you must toss a piece of meat, freeze it first to curb the stink before you take it out.
In addition, choosing compostable gloves with proper certifications can help ensure safer handling and reduce exposure to contaminants during food preparation and cleanup, particularly when sorting scraps for compost. Compostability Standards
Avoid High‑Odor Items
Why keep meat, dairy, oil, and sauces out of your kitchen compost bin? Those high‑odor items release pungent gases that overwhelm indoor spaces and ruin odor control. Stick to plant‑based scraps; they decompose cleanly and keep indoor composting pleasant. If you must toss a piece of meat or a greasy sauce, freeze it first. Cold storage halts microbial activity, so the smell stays locked until you drop the bin in an outdoor compost system. Use a tight‑fitting container and empty it every 4–7 days, or sooner when you cook often. This routine prevents odor buildup, simplifies management, and lets you enjoy a fresh kitchen without battling nasty smells. Dual chamber design can help you manage ongoing composting more efficiently by allowing you to add new scraps while processing older material.
Plant‑Based Only
Meat, dairy, oil and sauces are the biggest culprits behind kitchen compost odors, so stick to plant-based scraps only. You’ll notice that plant-based waste smells far less, making indoor composting manageable. By keeping animal products out, you avoid the complex odor-management steps that dairy and meat demand, and you simplify moisture control. Fresh veggie peels, fruit cores, coffee grounds, and herb stems break down quickly, so they won’t sit soggy and stinky. Balance your greens with browns, and you’ll keep the bin dry enough to deter mold and foul scents. If you have leftover meat or oily sauces, divert them to a municipal program or outdoor compost pile. This plant‑only habit keeps your kitchen fresh and your compost odor‑free odor control
Freeze Odorous Scraps Before Adding Them to the Bin
Ever wondered how to keep kitchen compost smells at bay? You can freeze odorous scraps before they hit the bin, giving you instant odor control and easy scraps storage. Toss meat, dairy, or fish into a freezer‑safe container or reusable bag—never a leaky plastic or old Tupperware. Seal it tight, then pop it into the freezer. The cold halts decomposition, so the smells stay locked in until pickup day. When it’s time to drop off, transfer the frozen bundle straight to your outdoor bin or local compost drop‑off, keeping it frozen until it reaches the bin. This trick works great if you empty the bin often or struggle with indoor odors, and it fits perfectly with San Diego’s organics recycling program. Using a compact indoor composter with odor‑reducing features, such as a tight‑sealing lid or coconut coir odor control, can further help maintain a pleasant kitchen environment odor control features.
Add a Thin Layer of Dry Browns on Top of Every Load
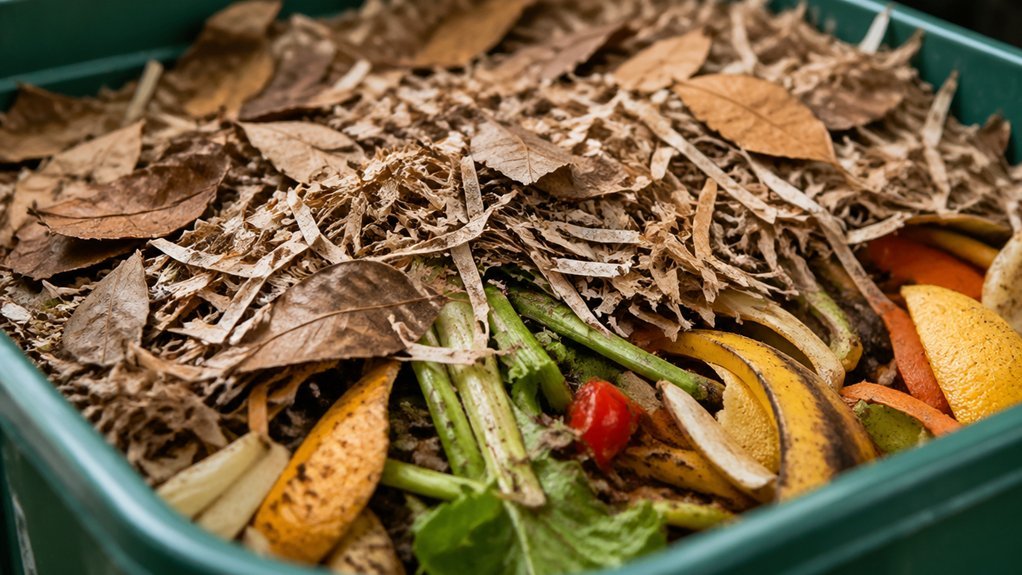
How can you keep your indoor compost bin fresh without sacrificing convenience? Add a thin layer of dry browns on top of every load. Spread shredded paper, cardboard, dry leaves, or sawdust over your scraps before you close the lid. Those dry carbon‑rich browns act like a sponge, pulling excess liquid away from the food waste and reducing the soggy environment that fuels smells. Convino’s odor-control approach with natural enzymes can further help by reducing odors at the source, especially in indoor systems. Nutrient balance considerations suggest pairing browns with compost starters that maintain microbial activity across temperature ranges to keep decomposition steady year-round.
Use a 100 % Compostable, Breathable Liner to Contain Liquids
Looking for a quick way to keep your kitchen compost bin from leaking and smelling? Grab a 100 % compostable, breathable liner and line the bin before you add scraps. The compostable liner holds liquids, while the breathable liner lets air flow, preventing vapor lock and slime that cause odors. Because it’s leak‑resistant and tear‑strong, you won’t have to worry about soggy messes spilling onto countertops. It also works with programs like EcoToss, so you stay compliant with local organics recycling. As you toss food waste, the liner captures drips, and the breathable design releases excess moisture, cutting down on smells between emptyings. This simple step makes cleanup easier and keeps your kitchen fresher.
How Often Should You Empty Your Kitchen Compost Bin?
Even if you’re diligent about using a breathable liner, the compost bin will still develop odors unless you empty it regularly; aim for a weekly dump, and if you cook heavily or generate a lot of waste, pull the trash out every 4–5 days to keep moisture and smell at bay. Consistent compost bin maintenance keeps decomposition slow and odor control effective. A reliable emptying cadence also prevents soggy browns from turning sour. Here’s a quick guide to fine‑tune your routine:
Empty weekly (or every 4‑5 days for heavy use) to keep compost dry, odor‑free, and efficiently decomposing.
- Check the bin’s moisture level each night.
- Add a thin layer of dry newspaper after each addition.
- Schedule a reminder for every 7 days, or 4–5 days for high‑volume kitchens.
- Keep the bin sealed and away from stovetop heat.
- If you notice a faint smell, increase the emptying frequency immediately.
Rinse the Bin Outside With Soap and Water After Each Emptying
Keeping your compost bin fresh starts with a quick rinse outside after each emptying. You grab a hose, a splash of gentle soap, and give the bin a thorough outdoor cleaning. The water washes away food residue that would otherwise cling and ferment, while the soap breaks down oils that trap smells. As you scrub, you’re actually performing bin rinsing that tackles odor control at the source, preventing slime from forming inside. After the rinse, tilt the bin to drain completely, then let it air‑dry or pat it dry with a clean towel. A dry interior stops moisture‑loving microbes, and when you add a dry brown layer on top, you further limit lingering odors. This simple habit keeps your kitchen air fresh and your compost system efficient.
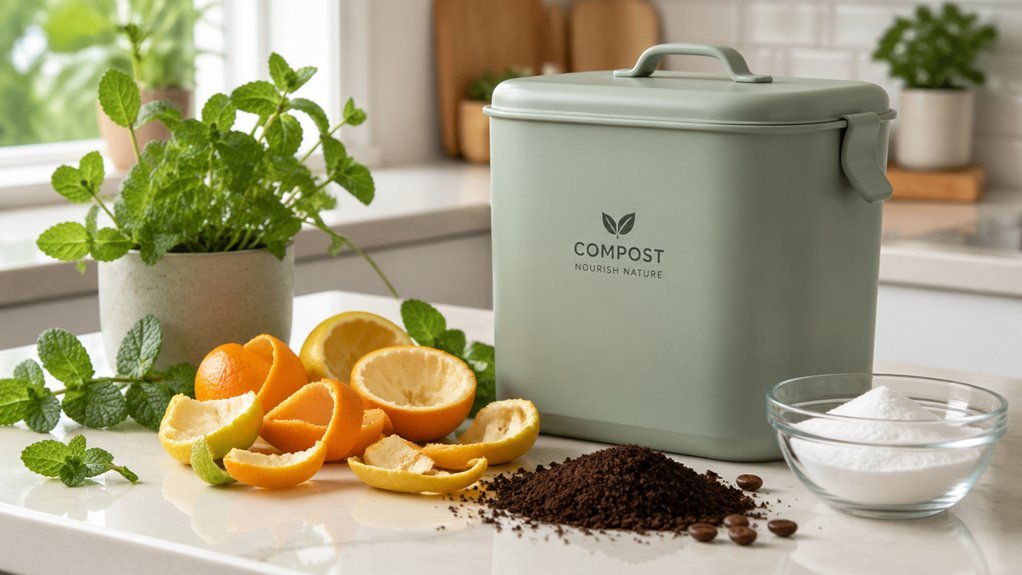
Sprinkle Baking Soda or Natural Deodorizers Only as a Symptom Mask
Baking soda may seem like a quick fix, but it only masks the odor instead of solving the underlying problems. You can sprinkle it after each emptying, but remember it does nothing for moisture management or microbial balance. Use it sparingly, and pair it with genuine odor control steps—otherwise you’ll just be covering up a deeper issue.
Baking soda merely masks odors; it doesn’t address moisture or microbial imbalances.
- Sprinkle a thin layer of baking soda only when the bin is dry.
- Avoid bagging the soda; it can trap moisture and worsen anaerobic conditions.
- Choose natural deodorizers that don’t retain water, like dried citrus peels.
- Rotate deodorizers weekly to prevent buildup of damp residues.
- Monitor the bin’s smell after each application; if it returns quickly, focus on aeration and moisture control instead.
Troubleshoot Persistent Smells: Check Moisture, Browns, and Lid Seal
If you’ve been masking odors with baking soda, it’s time to address the root causes.
First, gauge the moisture level inside your bin; excess dampness creates anaerobic pockets that smell sour. Pat the contents with a dry paper towel—if they feel wet, add more dry material.
Next, check your browns‑to‑greens ratio. Aim for a 2:1 or 3:1 balance, using shredded paper, dry leaves, or cardboard to soak up liquid and improve aeration. Sprinkle a thin brown layer on top of each load; this not only absorbs residual moisture but also blocks odors from escaping.
Finally, inspect the lid seal. Ensure the lid snaps shut tightly without gaps; a proper seal keeps air out, discourages fruit flies, and maintains an aerobic environment.
If the smell persists, repeat these steps, empty the bin more often, and give it a quick soap‑and‑water wash.
Seal the Bin to Keep Fruit Flies Out
Make sure the lid fits snugly and any gaps are sealed tightly, otherwise fruit flies will find their way in. If you spot flies, it usually means the seal isn’t complete or scraps are exposed, so double‑check that the lid closes fully and the contents stay contained. A tight‑fit lid combined with regular emptying will keep the bin pest‑free and odor‑controlled.
Tight‑Fit Lid
What’s the simplest way to keep fruit flies out of your kitchen compost? Use a tight‑fit lid that seals completely, leaving no gaps for odors or pests. When the lid locks shut, the bin stays odor‑free 99 % of the time and fruit flies can’t sniff exposed fruit. In NYC homes, the sturdiest bins rely on lid reliability, not fancy charcoal inserts. If you still see flies, check other scraps or the seal’s integrity. A proper seal is the cornerstone of indoor compost hygiene.
- Choose a lid with a silicone gasket for airtight closure.
- Ensure the lid snaps or locks firmly every time you close it.
- Test the seal by pressing the lid; it should resist lifting.
- Keep the lid clean of residue that could compromise the fit.
- Replace worn or warped lids promptly to maintain a perfect seal.
Seal All Openings
Because fruit flies locate food by scent, the single most effective defense is sealing every opening of your compost bin. You’ll want a truly sealed lid that snaps shut with no gaps, because even a tiny crack lets odor‑laden moisture escape and invites flies. Inspect the rim, hinges, and any vent holes; tape or silicone can block stubborn leaks. Pair the airtight seal with moisture management—layer dry brown material on top, sprinkle newspaper, and empty the indoor bin regularly. If you notice a fly, pause, check for exposed scraps or a half‑closed lid, and reseal immediately. A well‑sealed, moisture‑controlled indoor bin keeps the scent contained, cuts fruit‑fly breeding, and makes your kitchen compost odor‑free.
Pick a Simple Indoor Compost Method That Fits Your Apartment
Looking for an indoor compost solution that won’t overwhelm your apartment? Choose a method that prioritizes moisture control and odor reduction, like the Organics Collector (OC). It uses a fan and filter to keep smells and pests at bay while managing moisture rather than just containing waste. Keep meat, dairy, oils, and sauces out, and favor plant‑based scraps. Empty the bin weekly (or every 4–5 days if you compost a lot) and rinse it with soap and water. Layer dry browns—shredded paper, cardboard, or leaves—on top to absorb excess moisture and block odors. If smells linger, add more browns, cut moisture, or freeze odorous scraps until you can toss them outside.
- Use the Organics Collector for active airflow and filtration
- Stick to plant‑based kitchen waste only
- Empty and clean the bin at least once a week
- Top each load with a thick layer of dry browns
- Freeze strong‑smelling scraps before transferring to an outdoor bin
Frequently Asked Questions
How to Make Kitchen Compost Not Smell?
You’ll keep it odor‑free by sealing the bin, topping scraps with dry browns, avoiding meat/dairy, emptying it every few days, turning the pile for airflow, and rinsing the container regularly.
How to Fix Compost That Smells Bad?
You fix the smell by adding dry browns, turning the pile often, keeping a 2:1 brown‑to‑green ratio, avoiding wet foods, and ensuring good ventilation or moving the bin to a cooler spot.
How Do Amish Compost?
You’ll follow a simple, low‑tech routine: layer brown straw and greens, keep it moist but not soggy, turn it weekly, and let nature’s microbes do the work without chemicals.
Does the Smell of Compost Go Away?
Yes, the smell will fade once you balance browns and greens, keep it moist but not soggy, turn it regularly for air, and avoid animal scraps—these steps restore an earthy scent.
In Summary
By keeping your compost bin sealed, cool, and dark, and by adding dry browns and a quick freeze for smelly scraps, you’ll stop odors before they start. A tight‑fitting lid and a little baking soda keep fruit flies and stinks at bay, while regular checks on moisture and browns catch any lingering issues. Pick the indoor method that suits your space, and enjoy a fresh, odor‑free kitchen.

Leave a Reply