
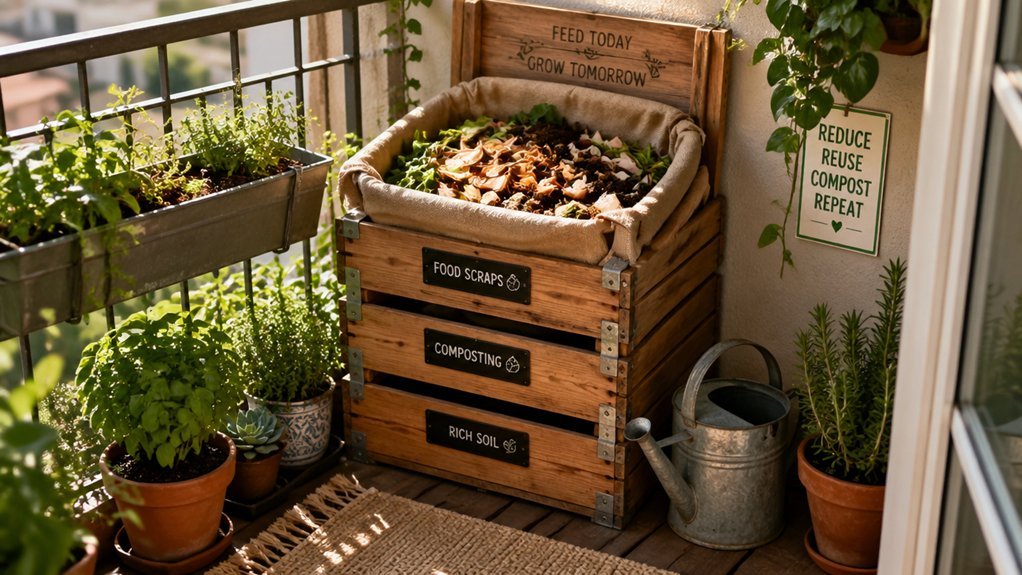
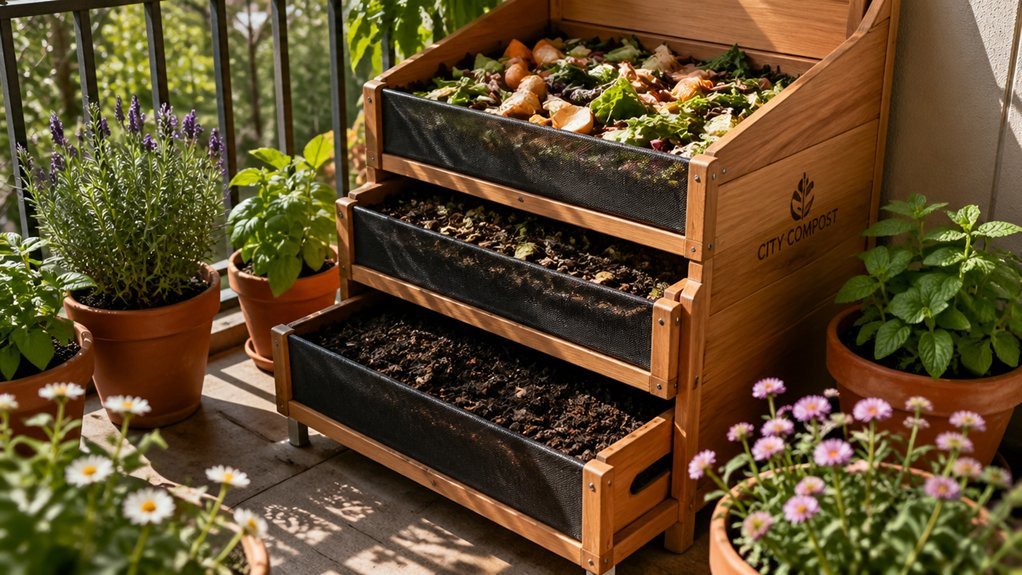
Pick a compact, weather‑resistant bin that fits your balcony, preferably a small stationary model or tumbler with ventilation, drainage, and a snug lid. Locate it in a sunny‑morning spot with partial shade, near the kitchen and a water source, and protect it from wind with a corner or railing. Keep the mix moist like a wrung‑out sponge using coir or a damp sponge, turn it weekly with a spoon or trowel, and monitor temperature and moisture. When the top turns deep brown and smells earthy, you’ll have ready‑to‑use compost, and the next steps will show you how to harvest, store, and troubleshoot any issues.
Choose Your Compact, Weather‑Resistant Balcony Compost Bin

Choosing a compact, weather-resistant balcony compost bin is the first step to hassle-free urban gardening. You’ll want a small stationary bin or tumbler that fits your balcony space and lets you turn and monitor it easily. Prioritize ventilation, durable material, and a secure lid to keep odors under control and pests out while you break down organic waste. Look for drainage holes and an aeration design so layers stay dry and aerobic, preventing soggy, smelly conditions. Additionally, select a liner or interior surface that can handle moisture without leaking, and choose a model with clear accessibility for frequent turning and monitoring ventilation design.
Find the Best Balcony Spot for Your Compost
Pick a spot that gets a few hours of morning sun but stays shaded in the hottest part of the day, so the compost stays warm without drying out. Position it away from strong breezes or use a wind‑break to keep the material from blowing away and to maintain steady moisture. Make sure it’s within easy reach of your kitchen door and a water source, so you can add waste and turn the pile without hassle. Sustainable coir bedding materials can help maintain consistent moisture and aeration for worm-friendly composting low EC and neutral pH.
Sunlight Exposure Optimization
Where should you place your balcony compost to keep it busy and break?
Choose a spot that catches at least six hours of sunlight exposure each day. South‑facing balconies usually deliver the most consistent light, but an east‑ or west‑facing area can work if you position the bin where the sun hits directly. Rotate the container every few days so each side receives equal light and avoids hot spots. Light‑colored or reflective containers amplify sunlight exposure, keeping microbes active.
If your balcony is shaded, focus on moisture, aeration, and regular turning to sustain temperature and decomposition. By mastering sunlight exposure, you’ll speed up breakdown and keep your compost thriving. Bokashi Bran Premium Accelerator
Balcony Wind Protection
Looking for a spot that shields your compost from gusts while still allowing airflow? Choose a corner where a railing or a low wall blocks the strongest breezes, yet leaves enough space for cross‑ventilation. Position a compact, weather‑resistant bin on a stable tray or a small deck that includes drainage, so runoff doesn’t pool. Use a lightweight cover or lid for rain, but keep one side open to maintain the airflow essential for balcony wind protection. Arrange the brown‑green layers inside, turning occasionally to boost aeration. By placing the container away from high‑traffic walkways, you reduce disturbances and keep the area tidy. This setup balances moisture, oxygen, and wind, letting your balcony compost thrive without soggy, anaerobic pockets. Organic certification remains a helpful factor to consider when choosing compost inputs, ensuring you’re using materials that align with sustainable gardening practices.
Easy Access Placement
Ever wondered which balcony nook will keep your compost easy to reach while staying fresh? Choose a spot with good ventilation and partial shade, letting airflow prevent odor buildup while protecting the compost bin from harsh sun.
Position it near your kitchen waste chute so you can toss scraps in without extra trips, cutting handling time dramatically.
Keep the bin at a comfortable height—no need to stretch or stoop—so turning and maintenance feel effortless.
Avoid high‑traffic zones; a quieter corner reduces disturbances and keeps smells away from roommates or neighbors.
Finally, select a stable, weather‑resistant container that fits within your balcony’s weight limit and space constraints, ensuring a secure, long‑lasting setup. Filter replacement and odor-control features from premium kits can help maintain freshness in enclosed spaces.
Cover the Bin to Block Rain and Pests
Usually you’ll want a snug lid or cover on your balcony compost bin to keep rain out and pests at bay. A well‑designed compost bin cover stops excess water from soaking the pile, which prevents anaerobic smells and keeps the material from turning soggy. It also blocks rodents, ants, and flies from rummaging through your kitchen scraps, preserving a tidy, odor‑free balcony. Choose a tight‑fitting lid that sits flush with the rim, and check it after each watering or turn to make sure it hasn’t shifted.
- Use a hinged or snap‑on lid for quick access.
- Opt for a breathable fabric cover if you need airflow but still want rain protection.
- Secure the lid with clips or a magnetic seal to prevent wind‑blown spills. Odor control
Use a Damp Sponge or Coir for Compost Moisture Control
How can you keep your balcony compost moist without drowning it? Grab a damp sponge or a handful of coir and use it as your moisture gauge. Press the sponge; it should feel like a wrung‑out kitchen towel—wet but not dripping. If it’s dry, drizzle a little water until the sponge reaches that texture.
Coir, a renewable, soil‑less amendment, expands with moisture and spreads it evenly throughout the compact bin, cutting down on frequent watering. Slip a piece of damp coir into the mix to boost retention and aeration, then feel the pile daily.
When it feels dry, add water gradually rather than soaking it, preventing anaerobic spots. This simple routine anchors effective compost moisture management on your balcony. Moisture control helps maintain a steady pace of decomposition and supports odor management.
Turn Your Balcony Compost Weekly to Add Air
You’ll want to give your balcony compost a quick turn each week, using a small hand fork or spoon to lift and flip the material without spilling.
While you’re at it, check that the mix feels like a wrung‑out sponge—add a splash of water if it’s dry, or a handful of dry browns if it’s soggy.
This simple routine keeps air flowing, balances moisture, and speeds up the breakdown into rich, garden‑ready compost.
Weekly Air Turnover Tips
Ever wondered why your balcony compost smells fresh instead of sour? You’re probably turning it weekly, which keeps aerobic microbes thriving and odors at bay. A quick shuffle every seven days flushes out stale air, breaks up compacted spots, and prevents the anaerobic pockets that cause slime and stink.
After each turn, give the moisture a once‑check—your pile should feel like a wrung‑out sponge, not bone‑dry or soggy. Consistent aeration speeds breakdown, nudging the mix toward a crumbly, soil‑like finish you’ll love.
- Use a pitchfork or sturdy camping spoon to fluff and mix the material.
- Turn the pile once a week, aiming for an even, airy texture.
- Inspect moisture after turning, adjusting only if the pile feels too dry or too wet.
Moisture Balance Monitoring
Wondering why some balcony piles stay fresh while others turn sour? You keep moisture balance by checking the compost each week as you turn it. When you lift the layer, feel it—if it’s dry like a sponge, sprinkle a little water until it feels just damp. If it’s soggy, add more dry leaves or shredded paper to soak up excess. Consistent moisture supports the microbes that break down waste quickly and prevents the foul, anaerobic smells. Track the texture after every turn; a wrung‑out‑sponge consistency means you’re on target. Adjust the mix by layering moist kitchen greens with dry straw or cardboard to keep the whole pile evenly hydrated. This routine guarantees a healthy, odor‑free balcony compost.
Simple Turning Techniques
Balcony compost stays fresh when you give it a quick weekly turn, letting oxygen rush in and microbes keep working. A simple turning technique keeps the pile airy, speeds decomposition, and stops compaction. Grab a sturdy spoon or small trowel, lift the top layer, and flip it over, mixing greens and browns together. After each turn, feel the texture; it should be like a wrung‑out sponge—moist but not soggy. If it’s dry, spray a little water; if it’s wet, add more dry leaves. Check the uniform, crumbly, soil‑like texture and earthy scent to confirm healthy composting progress.
- Use a camping spoon or trowel to mix materials.
- Aim for sponge‑but‑not‑soggy consistency after each turn.
- Look for dark, crumbly texture and earthy smell as a sign of readiness.
Check Temperature and Moisture in Your Balcony Compost
Curious how to keep your balcony compost thriving? Check the compost temperature each time you turn the pile; a warm‑to‑hot feel on the outside signals active decomposition. Use a simple kitchen thermometer, insert it into the core, and note the reading. If it’s too hot, shade the bin in scorching weather to slow drying and keep moisture steady. Aim for a sponge‑like dampness—squeeze a handful of material; a few drops should drip out, never a pool. When the mix feels dry, spritz water lightly; when it’s soggy, add dry browns like shredded paper. Turn the heap weekly to aerate, balance moisture, and let the temperature gradually drop as the compost matures. This routine prevents sour, anaerobic odors and keeps your balcony compost healthy.
Harvest Dark, Crumbly Compost for Your Balcony Garden
After you’ve mastered temperature and moisture checks, the next step is harvesting the dark, crumbly compost that fuels your balcony garden. When the top layer of your compost pile turns deep brown and smells earthy, it’s ready.
Harvest the dark, crumbly compost when the top turns deep brown and smells earthy.
Gently scoop the finished material into a clean container, leaving the still‑active bits in the lower crate to continue breaking down. Use a small garden fork or hand trowel to avoid disturbing the lower layers, and rinse the harvested compost lightly if you’ve added a lot of salty kitchen scraps.
The result is a nutrient‑rich amendment you can mix into potting soil for herbs, lettuce, or flowers.
- Scoop only the dark, crumbly portion.
- Keep unfinished material in the bottom crate for further decomposition.
- Store harvested compost in a breathable container to retain moisture.
Troubleshoot Common Balcony Compost Problems
Why do your compost’s odors suddenly turn sour or its texture become soggy? You’re probably over‑watering or stacking too many wet kitchen scraps without enough dry material.
First, check the moisture level: the mix should feel like a wrung‑out sponge, not dripping. If it’s soggy, add shredded newspaper, dry leaves, or straw to absorb excess liquid and restore balance.
Next, aerate: fluff the pile every week and turn it every two weeks to introduce oxygen and prevent anaerobic smells.
Keep meat and bones out; they decompose slowly and can foul the bin.
Finally, use a two‑week check‑in routine and follow guides like Daily Dump or Home Composting Made Easy to spot issues early and adjust your composting routine.
Store Harvested Compost for Future Plantings
Once you’ve cleared the sour smells and soggy texture, it’s time to think about how to keep the finished compost ready for your next planting cycle. Store harvested compost in a clean, airtight container to preserve its nutrient profile and prevent re‑wetting. Keep the container in a cool, shaded spot on your balcony or inside a pantry, and label it with the collection date so you can rotate stock. Before using, give it a quick fluff to restore airflow and check moisture—if it feels too dry, mist lightly; if too wet, spread it out for a few hours.
- Use a stackable bin with a lid for easy stacking and space saving.
- Add a thin layer of dry leaves or straw on top to absorb excess moisture.
- Include a small humidity gauge to monitor conditions and adjust as needed.
Frequently Asked Questions
What Three Items Should Not Be Placed in a Compost Pile?
You shouldn’t put meat, bones, or dairy in your compost; avoid greasy or oily foods; and keep plastics, metals, or synthetic materials out, because they slow decay, attract pests, and contaminate the pile.
Can You Have a Compost Bin on a Balcony?
Yes, you can keep a compost bin on your balcony; just choose a compact, breathable container, drill drainage holes, balance greens and browns, aerate regularly, and monitor moisture to avoid odors.
Do Potato Peelings in Compost Attract Rats?
Yes, they can attract rats if you leave them exposed, but you’ll avoid that by burying the peels under a thick brown layer, keeping the bin sealed, turning regularly, and maintaining proper moisture.
What Is the Lazy Compost Method?
You set up two stacked crates and two trays on your balcony, layer dried material and compost starter, then add daily food scraps, alternating moist and dry layers, turning it every two weeks.
In Summary
Now you’ve got a compact, weather‑resistant bin in the perfect spot, protected from rain and pests, with moisture balanced by a damp sponge or coir. Turning it weekly adds air, while temperature checks keep things on track. When the compost turns dark and crumbly, harvest it and store it for future plantings. With these simple steps, your balcony garden will thrive on fresh, homemade compost.


Leave a Reply